Loading ...
Loading ...
Loading ...
Model 358-350880 (Craftsman 2.3 PS/VL)
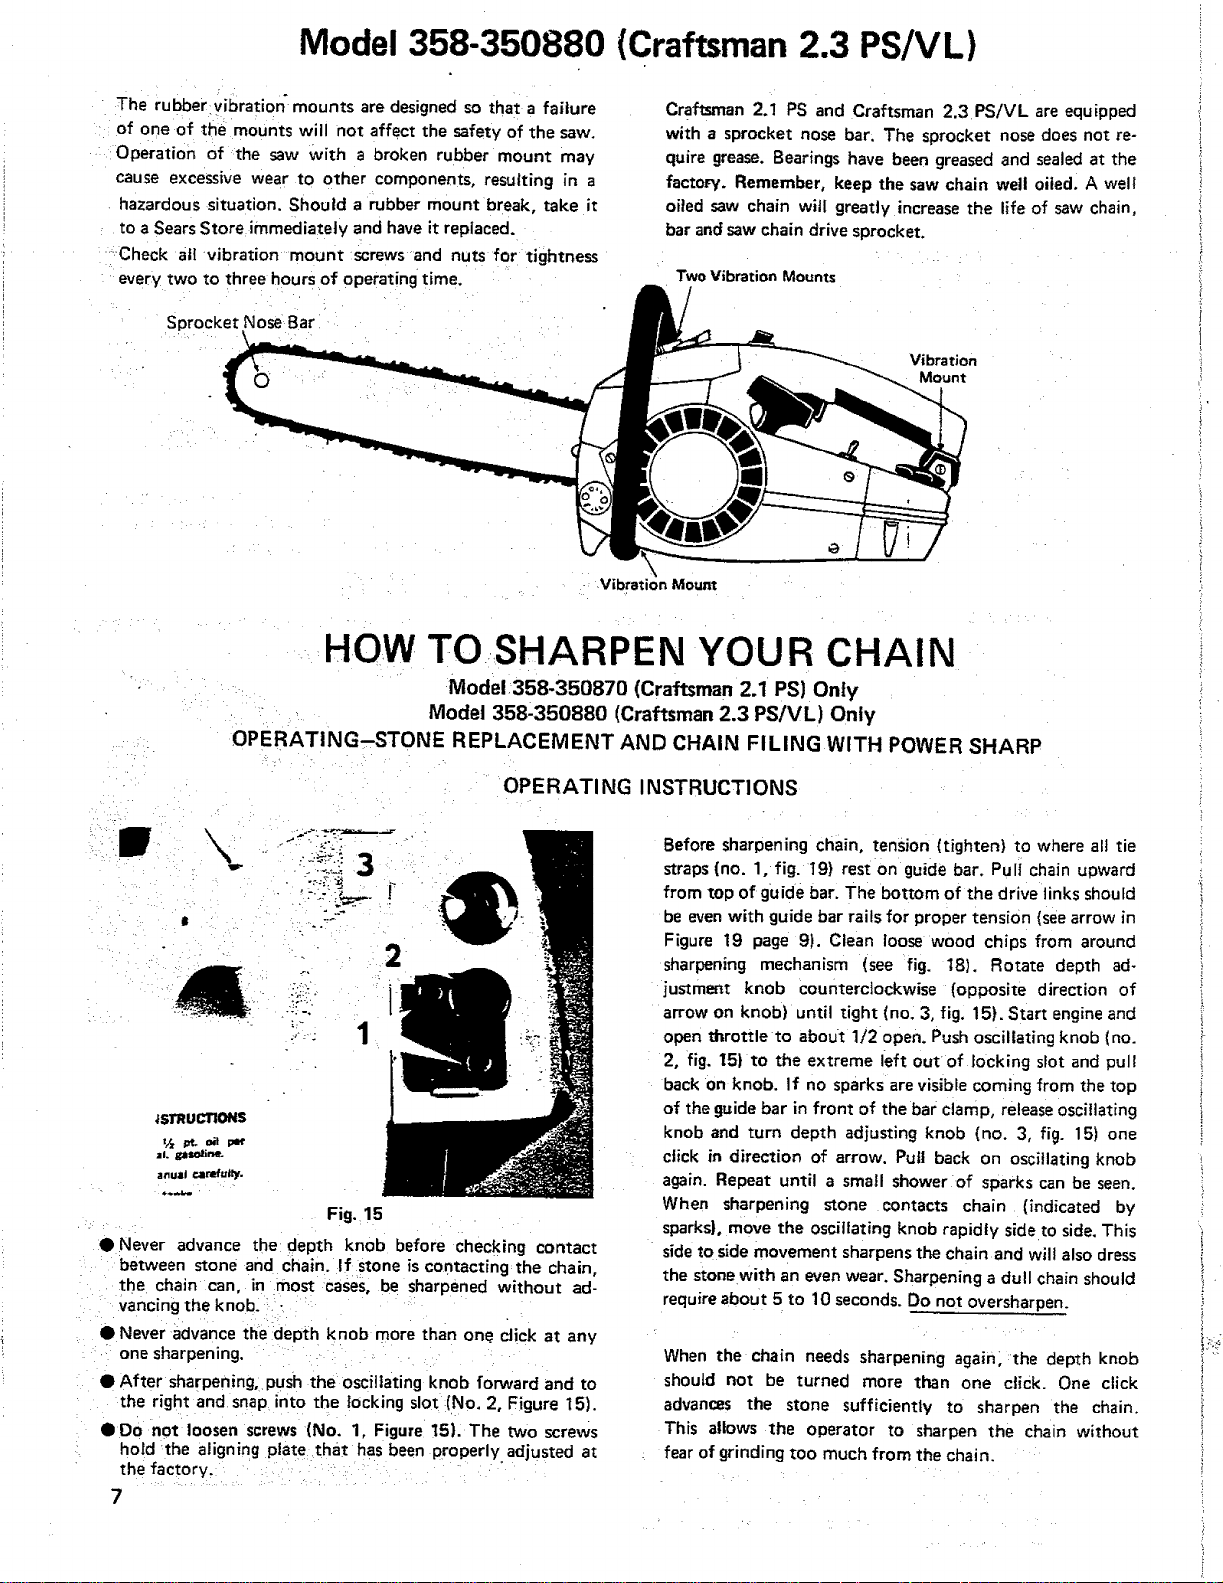
The rubber,vibration" mounts are designed so that a failure
of one of the mounts will not affect the safety of the saw.
Operation of the saw With a broken rubber mount may
cause excessive wear to other components, resulting in a
hazardous situation. Should a rubber mount break, take it
to a Sears Store immediately and have it replaced.
Check a|l vibration mount screws and nuts for tightness
every two to three hours of operating time.
Craftsman 2.1 PS and Craftsman 2.3 PS/VL are equipped
with a sprocket nose bar. The sprocket nose does not re-
quire grease. Bearings have been greased and sealed at the
factor/, Remember, keep the saw chain well oited. A well
oiled saw chain witl greatly increase the life of saw chain,
bar and saw chain drive sprocket.
Two Vibration Mounts
Sprocket Nose Bar
Vibration
Mount
Vibration Mount
O
HOW TO SHARPEN YOUR CHAIN
Model 358-350870 (Craftsman 2.1 PS) Only
Model 358-350880 (Craftsman 2.3 PS!VL) Only
OPERATING-STONE REPLACEMENT AND CHAIN FILING WITH POWER SHARP
OP ERATI NG INSTRUCT! ONS
_SI"RUCI30NS
½ ;o_.._ per
aL _lt, oline.
anua! camfu_l,/.
Fig. 15
• Never advance the depth knob before checking contact
: between stone and Chain. If stone is contacting:the chain,
the chain can. inmost cases, be sharpened without ad-
Vancing the knob.- : _::
• Never advance the depth knob more than one. click at any
• one sharpening. : ,
• After sharpening, push the oscillating knob forward and to
the right and snap into the locking slot :(No. 2, Figure 15).
• Do not loosen screws (No. 1, Figure 15). The two screws
hoJdthe aligning plate that has been properly adjusted at
the factory,_ _ :, _ i i i "
7
Before sharpening chain, tension (tighten) to where alt tie
straps (no. 1, fig. 19) rest on guide bar. Pull chain upward
. .
from top of guide bar. The bottom of the drive links should
be evenwith guide bar rails for proper tension (seearrow in
Figure 19 page 9). Clean loose wood chips from around
sharpening mechanism (see fig. lB). Rotate depth ad-
justment knob counterclockwise (opposite direction of
arrow on knob) until tight (no. 3, fig. 15). Start engineand
open throttle to about 1/2 open. Pushoscillating knob (no.
2, fig. 15) to the extreme left outof locking slot and pull
back on knob. If no sparks are visible coming from the top
of the guide bar in front of the bar clamp, release oscillating
knob and turn depth adjusting knob (no. 3, fi_]. 15) one
click in direction of arrow. Pull back on osci!lating knob
again. Repeat until a small shower of sparks can be seen.
When sharpening stone contacts chain (indicated by
sparks), move the oscillating knob rapidly side to side. This
sideto side movement sharpensthe chain and will also dress
the stone with an even wear. Sharpening a dull chain should
require about 5 to 10 seconds.Do not oversharpen.
When the chain needs sharpening again_ the depth knob
should not be turned more than one click. One click
advances the stone sufficiently to sharpen the chain.
This allows the operator to sharpen the chain without
fear of grinding too much from the chain.
Loading ...
Loading ...
Loading ...