Loading ...
Loading ...
Loading ...
9
Installation
Professional Vent Hoods
NOTE: A decorative duct cover is available
for wall mount installations. The duct cover
conceals the duct run from the top of the
hood to the ceiling. Choose the 6" or 12"
cover based upon installation height of the
vent hood.
We recommend that the vent hood and
decorative duct cover be on site before final
framing and wall finishing in order to accu-
rately locate the ductwork and electrical
service.
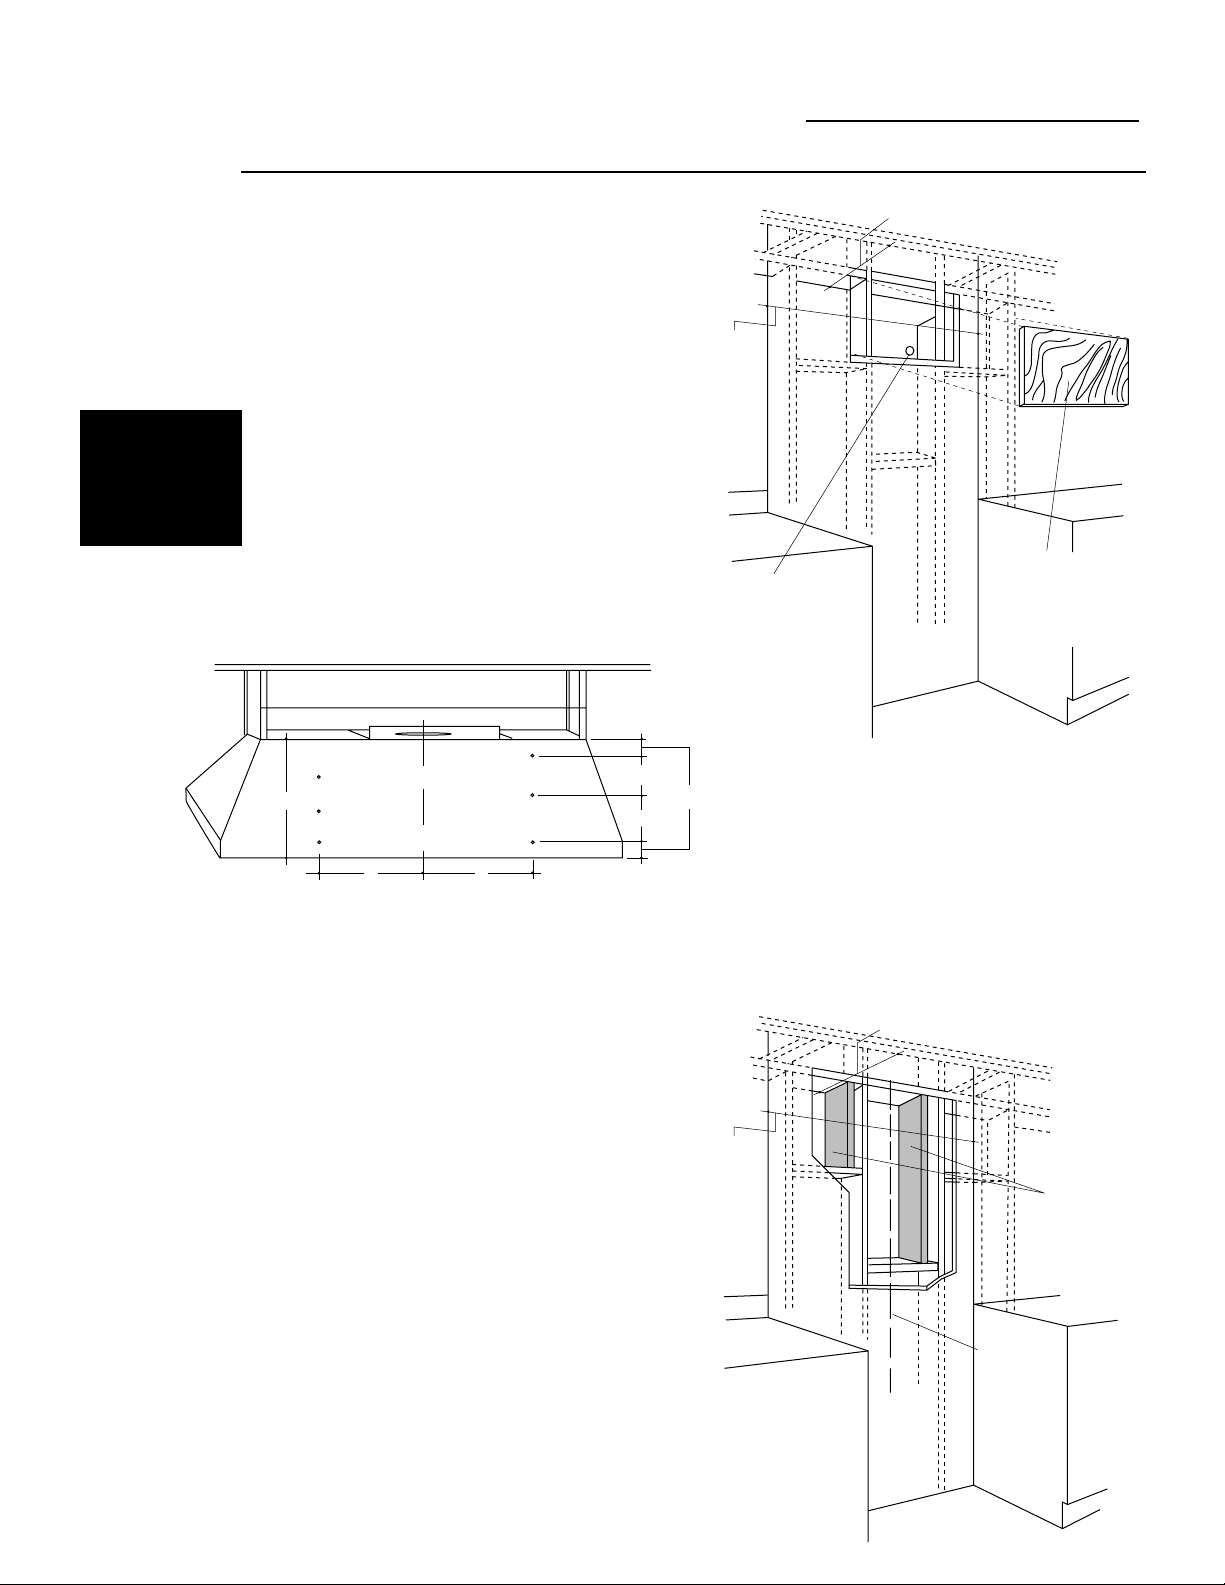
• Determine the location for installation.
• Mark the centerline of the installation.
3A
Step
Construct
Wall Mount
Framing
WALL MOUNT
INSTALLATION
(SKIP THESE
STEPS IF SOFFIT
IS USED.)
“C” – Hood Centerline
13" for 48" wide models
9" for 36" wide models
8-15/16" for 30" wide models
Rear View of Vent Hood (48" Model Shown)
Hood Centerline
C C
C
L
6" or 12"
Duct
Cover
Ceiling Drywall
18"
6-1/2"
2-1/2"
6-1/2"
Cut a sheet of plywood, 48" wide (or 36" wide)
and 18" high. If drywall is installed, cut away
enough to expose 2 vertical studs, 1 on each
side of the cutout. Secure the plywood to the
studs.
OR
If drywall is installed, cut away enough to
expose 2 vertical studs.
•Install additional aligning wall studs as
illustrated.
No Additional
Wall Studs needed
Plywood Sheet
(Wall Hole Cut
Out x Drywall
Thickness)
Hood
Width
7" Min. (30" and 36" Models)
10" Min. (48" Models)
Additional
Wall Studs
Installed
Centerline of
Installation
Space
7" Min. (30" and 36" Models)
10" Min. (48" Models)
Hood
Width
Loading ...
Loading ...
Loading ...