Loading ...
Loading ...
Loading ...
8
Installation
Professional Vent Hoods
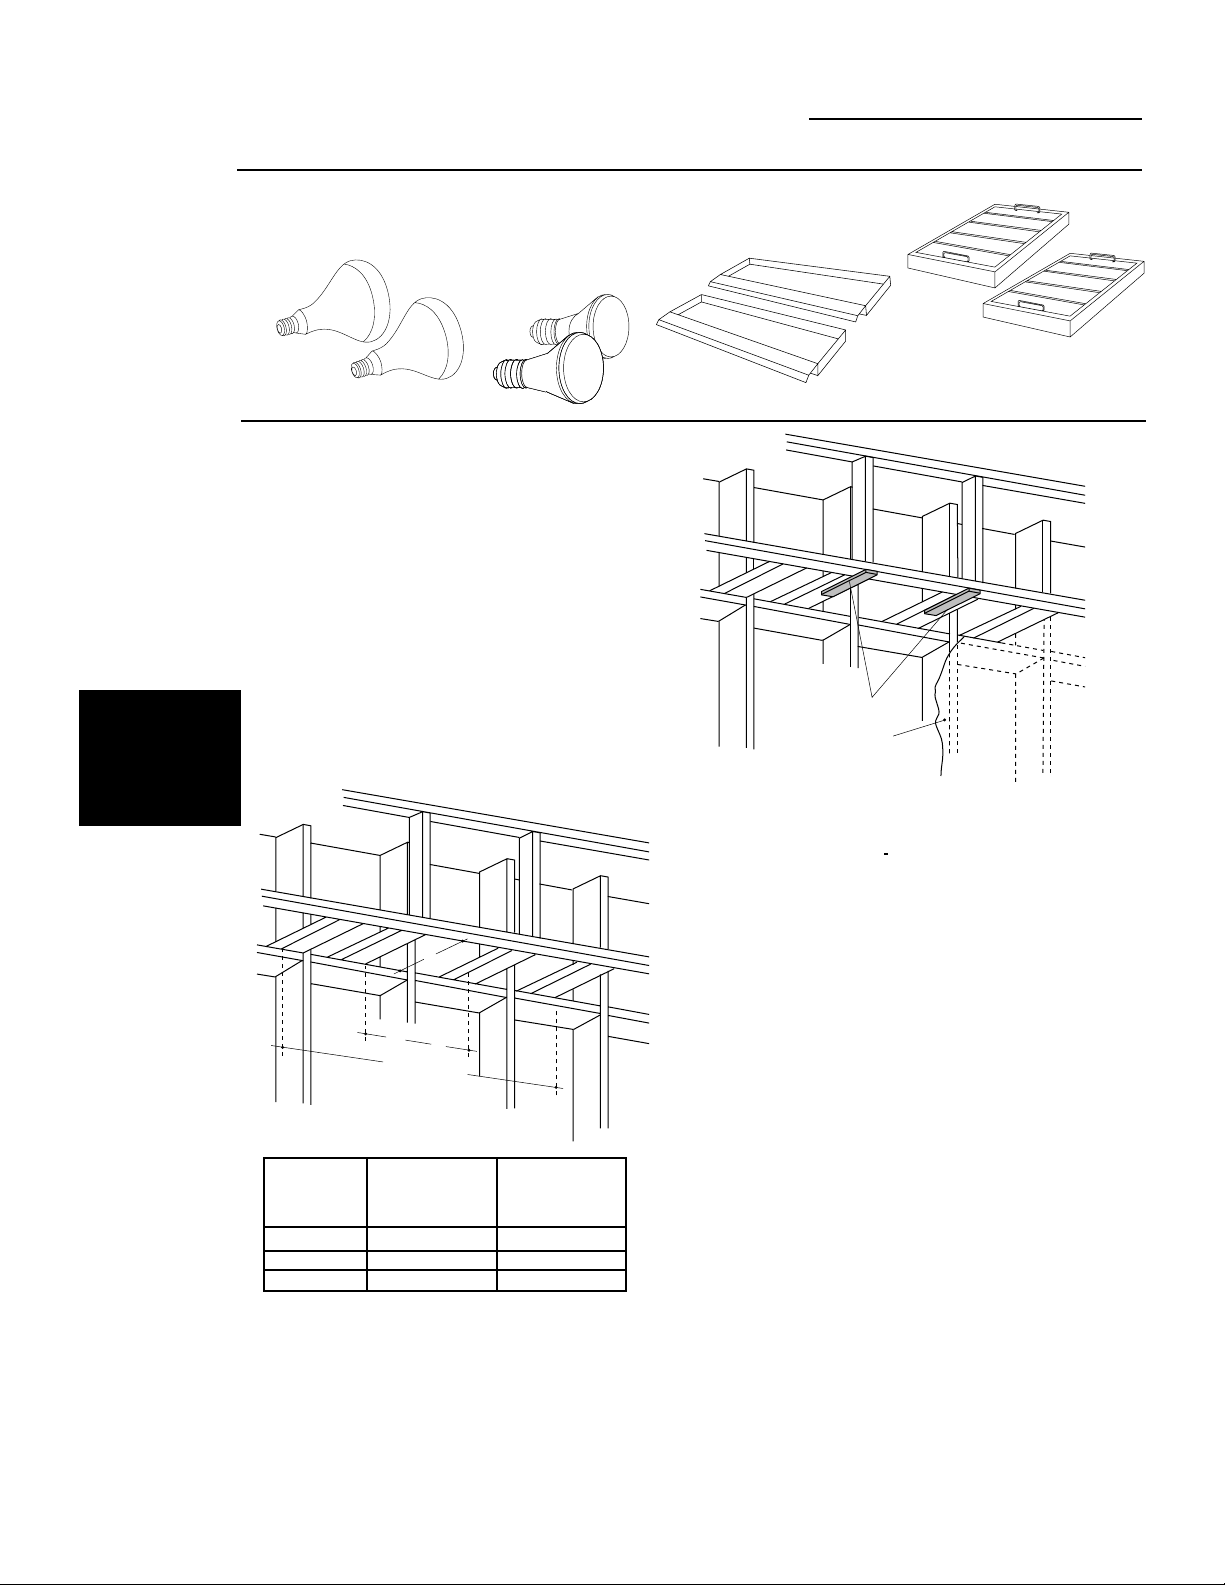
Locate the hardware accessory box packed
with range hood and check contents.
2
Check
Installation
Hardware
Step
We recommend that the vent hood
and/or duct cover be on site before
final framing and wall finishing to
more accurately locate the ductwork
and electrical service.
NOTE: If the top of the installation
location does not meet the soffit, use
a 6" or 12" duct cover accessory to
conceal the duct run.
•The soffit should be constructed
with 2x4’s.
• Determine the installation location.
Construct
Soffit
Framing
3
Step
INSTALLATION
UNDER A SOFFIT
(SKIP THIS STEP
IF SOFFIT IS NOT
USED.)
•Cut 2 wood shims, 2" x 10" X
(drywall thickness). Secure to the
bottom of the horizontal studs,
flush with the front, as illustrated.
NOTE: If drywall is present, cutaway
enough to expose studs.
Heat Lamp(s)
(on some models)
Halogen
Bulbs
Grease
Tray(s)
Filter(s)
“A” “A”
Hood Width
B
“A” “B”
Centerline to Opening Depth
Stud Inner Edge for Ductwork
48" Models 11-1/4" 10" Min.
36" Models 8-3/4" 7" Min.
30" Models 10-11/16" 7" Min.
•Refer to step 4 for mounting screw
locations.
•Mark the centerline of the installation.
•Add additional 2 x 4 studs at the loca-
tions illustrated.
•For 48" models, allow 10" deep mini-
mum opening below the soffit to accom-
modate ductwork. For 30" and 36"
models, allow 7" deep minimum opening.
Shims
Finished Drywall
Loading ...
Loading ...
Loading ...