Loading ...
Loading ...
Loading ...
10
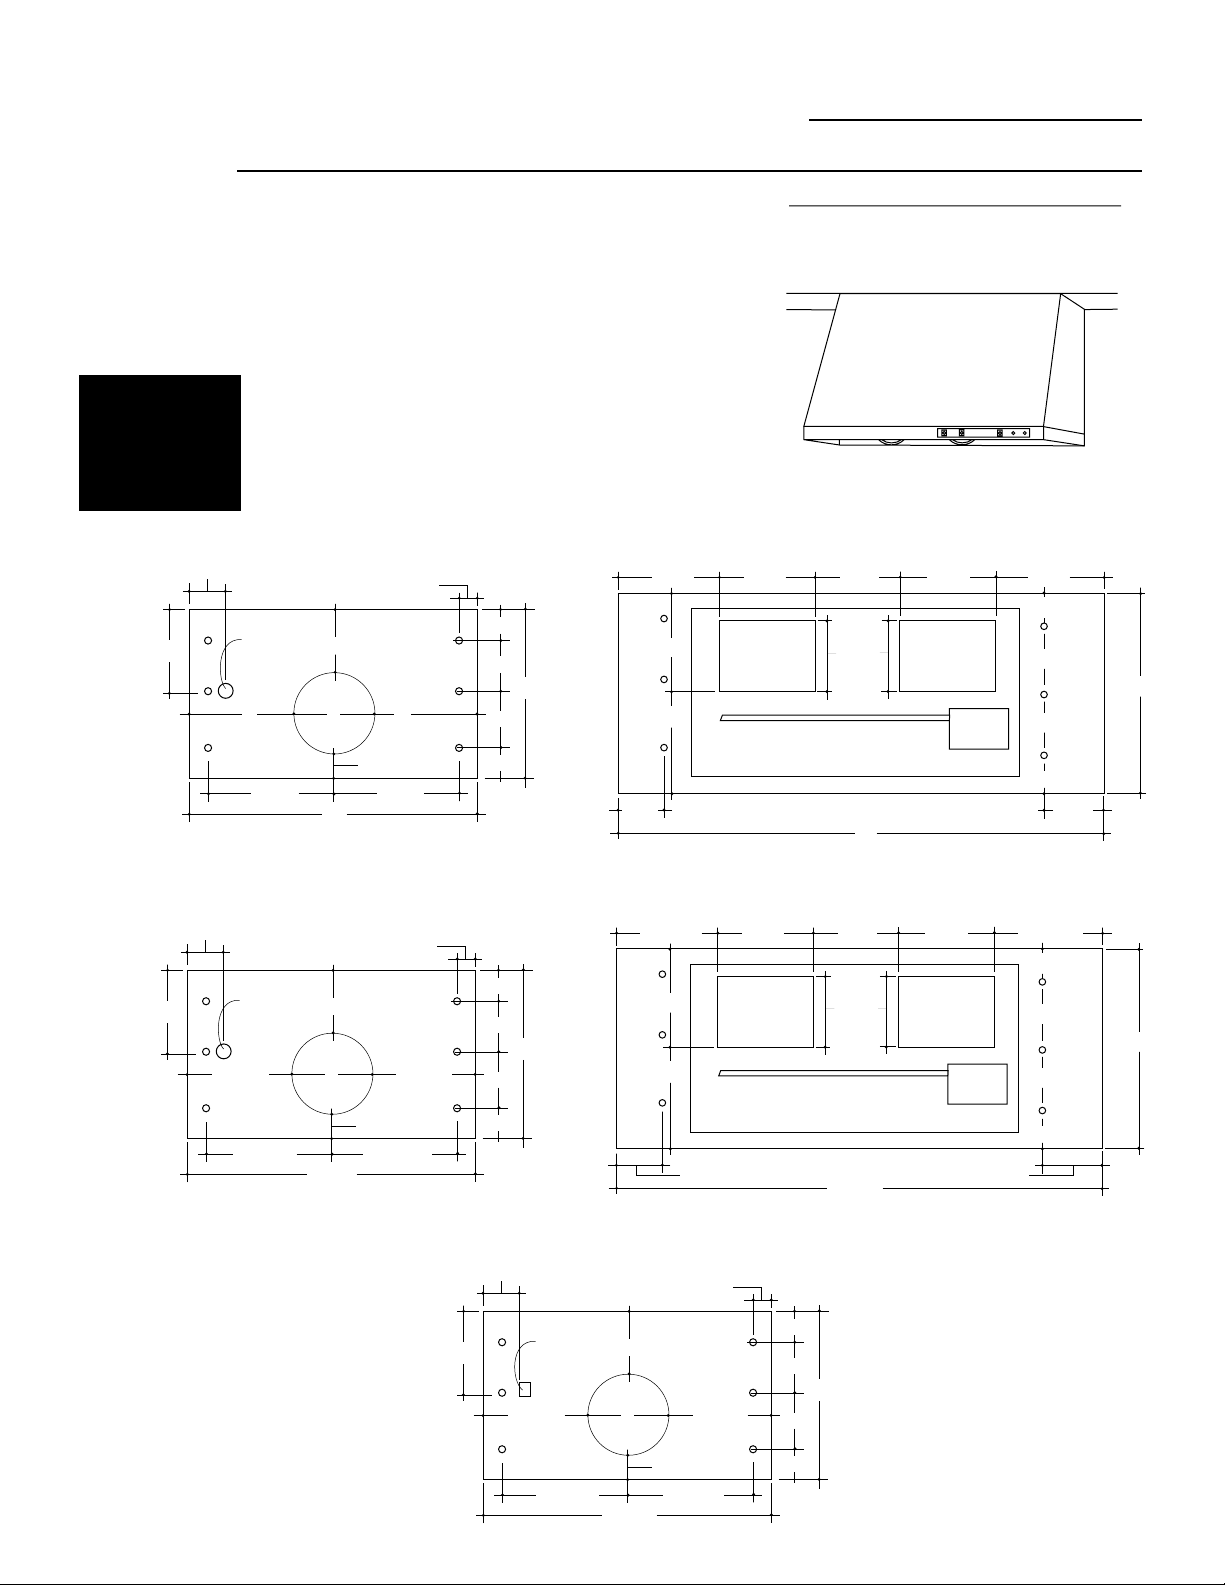
Installation
Professional Vent Hoods
•Drill 3/16" pilot holes through the shims and
into the soffit studs.
•Hold the hood against the soffit and secure
with 6 lag screws with washers.
•For additional support and to minimize
vibration during operation, we recommend
that the hood be secured to the back wall.
•Drive lag screws through the rear panel of
the hood and into the wall studs.
4
Step
Install Hood
Below Soffit
INSTALLATION
UNDER A SOFFIT
(SKIP THIS STEP
IF SOFFIT IS NOT
USED.)
SOFFIT INSTALLATION
ZV681YSS, ZV680YSS
4-1/2"
6-1/4"
5-3/4"
4-1/2"
6-1/8"8-1/4"
6-1/4"
6-1/8"
8-1/4"
3-1/2"
3-1/2"
2-1/4"
2-3/4"
35"
4-1/2"
12"
Junction
Box
48" Hood Top View - Front Side
Back Side
ZV671WSS, ZV670WSS
ZV881WSS, ZV880WSS
ZV891YSS, ZV890YSS
ZV371YSS, ZV370YSS
8-1/2"
5-1/2"
14-7/16"
12"
Junction
Box
36" Hood Top View - Front Side
7"
35-7/8"
Back Side
14-7/16"
4-1/4"
3/4"
3"
3"
2-7/8"
3-1/8"
5-1/2"
12-7/16" 12-7/16"
10-15/16"
5-1/8"
5-7/8"
4-1/2"
6-1/8"14-11/16"
6-1/4"
6-1/8"
14-11/16"
3-1/2"
3-1/2"
2-1/4"
2-3/4"
47-7/8"
12"
Junction
Box
48" Hood Top View - Front Side
Back Side
10-15/16"
5-1/2"
5-1/2"
11-7/16"
12"
Junction
Box
30" Hood Top View - Front Side
7"
29-7/8"
Back Side
11-7/16"
4-1/4"
3/4"
3"
3"
2-7/8"
3-1/8"
2-1/2"
12-7/16" 12-7/16"
4"
6-1/4"
8"
12"
Junction
Box
36" Hood Top View - Front Side
7"
23"
Back Side
8"
4-1/4"
3/4"
3"
3"
2-7/8"
3-1/8"
1"
10-1/2" 10-1/2"
Loading ...
Loading ...
Loading ...