Loading ...
Loading ...
Loading ...
MOTOR SAFETY FILTERCLEANING
I IIIIIIIIIIIIIIII IIII IIIIIII
,_ WARNING
Electrical Shock Hazard
Unplug power cord from electrical outlet.
Do not operate the vacuum cleaner
without the motor safety filter, Be sure
the filter is dry and properly installed to
prevent motor failure and/or electrical
shock.
1
Remove the dust bag as outlined in the
DUST BAG REPLACEMENT section (page 16).
If the filter, located in the bottom of the dust
cover cavity, is dirty, remove it by pulling
forward out from under the ribs,
Wash the foam filter in warm soapy water,
rinse and dry thoroughly by squeezing the
filter in your hand and letting it air dry.
DO NOT wash in the dishwasher.
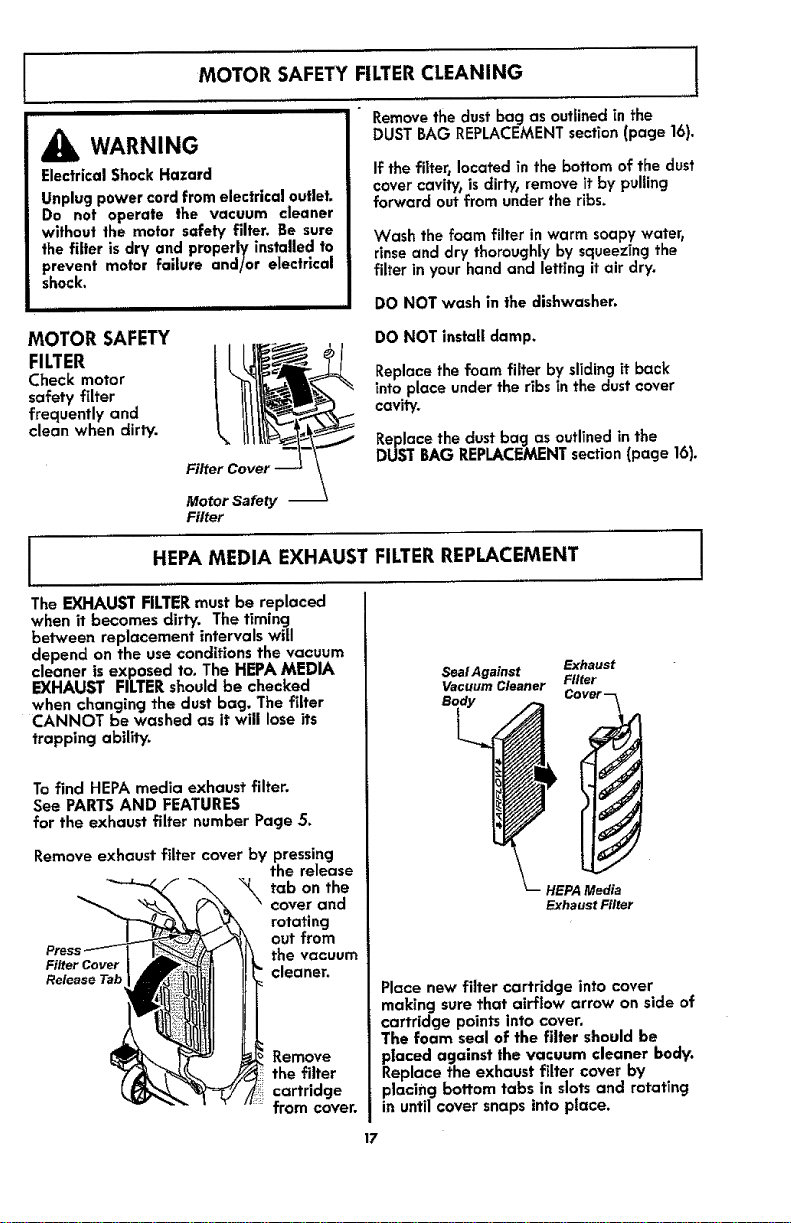
MOTOR SAFETY
FILTER
Check motor
safety fffter
frequently and
clean when dirty.
DO NOT install damp,
Replace the foam filter by sliding it back
into place under the ribs in the dust cover
cavity.
Replace the dust bag as outlined in the
DUST BAG REPLACEMENT section (page 16).
Motor Safety
Filter
HEPA MEDIA EXHAUST FILTERREPLACEMENT
The EXHAUST FILTER must be replaced
when it becomes dirty. The timing
between replacement intervals will
depend on the use conditions the vacuum
cleaner is exposed to. The HEPA MEDIA
EXHAUST FILTER should be checked
when changing the dust bag. The filter
CANNOT be washed as it will lose its
trapping ability.
To find HEPA media exhaust filter.
See PARTS AND FEATURES
for the exhaust filter number Page 5,
Remove exhaust filter cover by pressing
the release
_'_\ tab on the
cover and
rotafi ng
out from
cleaner.
Remove
the filter
cartridge
from cover.
SealAgainst
VacuumCleaner
Exhaust
Filter
Cover "-_t
HEPAMedia
ExhaustFilter
Place new filter cartridge into cover
making sure that airflow arrow on side of
cartridge points into cover.
The foam seal of the filter should be
placed against the vacuum cleaner body.
Replace the exhaust filter cover by
placing bottom tabs in slots and rotating
in until cover snaps into place.
17
Loading ...
Loading ...
Loading ...