Loading ...
Loading ...
Loading ...
17 ENGLISH
and
all
lampsash
once for each
sequence
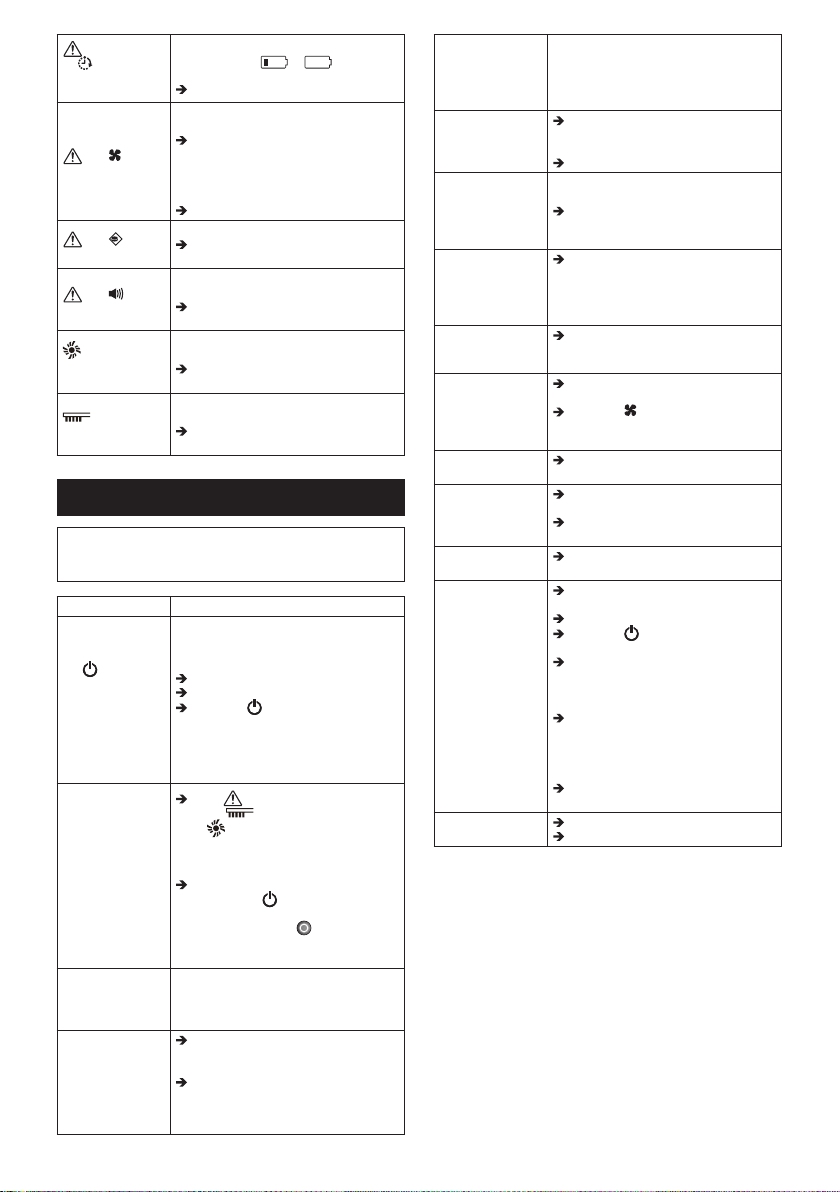
• The remaining battery charge was
not enough (
or ) to start
cleaning.
Fully charge the battery cartridges.
and lamps
light up
• Threads and hairs are tangled in the
drive wheels.
Remove them from the drive wheels
(Fig. M-2).
• The Robotic Cleaner passed through
aconnedareawhereitstopsurface
was pushed down.
This is not a malfunction.
and lamps
light up
• A sensor error has occurred.
Turn the Robotic Cleaner OFF and
then ON.
and lamps
light up
• An error has occurred in the Robotic
Cleaner.
Turn the Robotic Cleaner OFF and
then ON.
lampashes
once for each
sequence
• Threads and hairs are tangled in the
side brushes and main brush.
Remove them from the brushes (Figs.
A, N-3).
lamp
lights up
• The dust box is full of dust and dirt or
thelterisclogged.
Empty the dust box (Fig. K-2) and
cleanthelter(Fig.K-5).
TROUBLESHOOTING
NOTE: If the problem persists after the remedial
action is taken, consult your nearest Makita Service
Center.
Symptom Cause/Remedy
The lamps do
not light up
when you press
the
button.
The Robotic
Cleaner does not
operate when you
press the button
on the Robotic
Cleaner or the
remote control.
Install the battery cartridges correctly.
Fully charge the battery cartridges.
Press the button to turn the
Robotic Cleaner ON.
The Robotic
Cleaner does not
operate.
If the Troubleshooting
lamp,
Filter maintenance lamp,
or
Brush maintenance lamp lights
uporashes,see“RESTORINGTHE
ROBOTIC CLEANER” to resolve the
problem.
Ifthepilotlampashesslowly,press
and hold the
POWER button on
the Robotic Cleaner until all indicators
go off, or press the
POWER OFF
button on the remote control to clear
the timer.
The Robotic
Cleaner starts
operation
automatically.
• The auto-on timer has been activated.
The Robotic
Cleaner stops
operation during
cleaning.
Turn the Robotic Cleaner OFF, and
then remove any cords, strings, etc.
from the drive wheels.
If the Robotic Cleaner has gotten
stuck on a barrier or other obstacle,
move the Robotic Cleaner to a
different location.
The cruising speed
is not constant.
• If an obstacle is detected, the Robotic
Cleaner will slow down as it takes time
to calculate a traveling direction. This
is not a malfunction of the Robotic
Cleaner.
The Robotic
Cleaner does not
travel straight
forward.
Turn the Robotic Cleaner OFF, and
thenremoveanyforeignobjects
tangled in the drive wheels.
Clean the ultrasonic sensors.
The Robotic
Cleaner is hitting
obstacles more
frequently than
before.
Clean the ultrasonic sensors.
The Robotic
Cleaner falls down
stairs or to a lower
oor.
Clean the cliff sensors.
• The Robotic Cleaner may not avoid
differences in level of 5.5 cm or
less. This is not a malfunction of the
Robotic Cleaner.
The operating
sound is louder
than usual.
Empty the dust box and clean the
lter,thesidebrushes,andthemain
brush.
The suction power
is not strong
enough to capture
dust and dirt.
Empty the dust box and clean the
lter.
Press the Vacuum button on the
Robotic Cleaner or on the remote
control to turn ON the vacuum fan.
The side brushes
fall off.
Install the side brushes correctly
(Fig. A).
The side brushes
do not rotate
or rotate with
difculty.
Clean the side brushes and the main
brush.
Install the main brush and the plate
correctly (Fig. N).
The exhaust air
smells.
Empty the dust box and clean the
lter.
The remote control
does not work.
Install the remote control batteries
correctly (Fig. E).
Replace the batteries with new ones.
Press the POWER button on the
Robotic Cleaner to turn it ON.
Move closer to the Robotic Cleaner
or remove obstacles between the
Robotic Cleaner and the remote
control.
Stop using the Robotic Cleaner near
or move it away from equipment that
uses radio frequencies in the 2.4 GHz
band (kitchen microwaves, Bluetooth
devices, Wi-Fi devices, etc.).
Turn the Robotic Cleaner OFF and
then ON.
The auto-on timer
does not work.
Use fully charged battery cartridges.
Reactivate the auto-on timer.
Loading ...
Loading ...
Loading ...