Loading ...
Loading ...
Loading ...
English
6
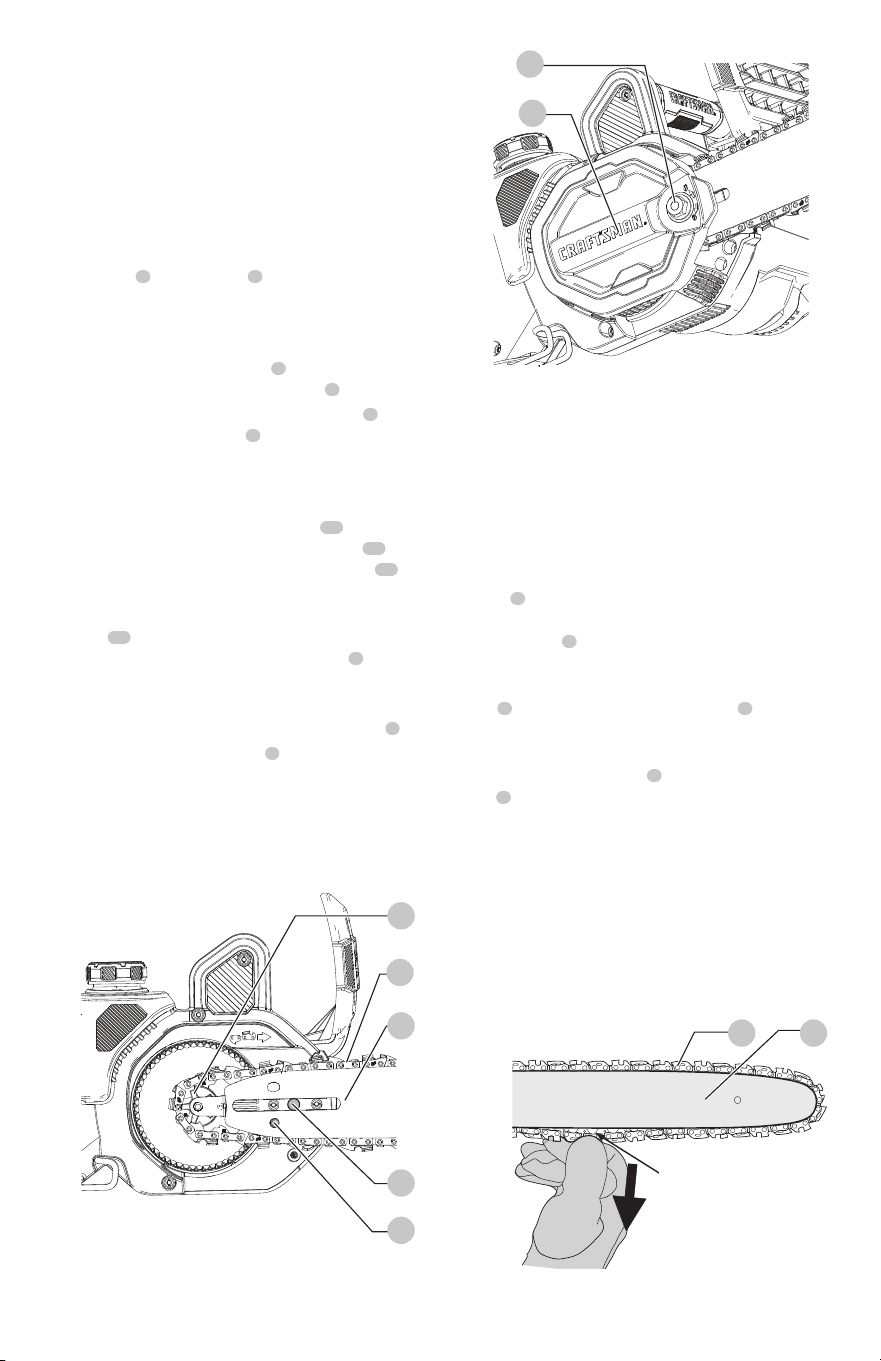
Installing the Guide Bar and Saw Chain
(Fig.A–C)
CAUTION: Sharp chain. Always wear protective
gloves when handling the chain. The chain is sharp
and can cut you when it is notrunning.
WARNING: Sharp moving chain. To prevent
accidental operation, ensure the tool is unplugged
before performing the following operations. Failure to
do this could result in serious personalinjury.
If the saw chain
5
and guide bar
4
are packed separately in
the carton, the chain has to be attached to the bar, and both
must be attached to the body of thetool.
1. Place the saw on a flat, firmsurface.
2. Rotate the bar adjust locking nut
7
counterclockwise as
shown in Fig.A to remove sprocket cover
6
.
3. Wearing protective gloves, grasp the saw chain
5
and
wrap it around the guide bar
4
, ensuring the teeth are
facing the correctdirection.
4. Ensure the chain is properly set in the slot around the
entire guidebar.
5. Place the saw chain around the sprocket
16
while
lining up the slot in the guide bar with the bolt
17
in
the base of the tool and the chain tensioning pin
18
as
shown in Fig.B.
nOTE: You may need to adjust the position of the chain
tension pin
18
for it to properly engage the slot in the
guide bar by rotating the chain tensioning screw
8
.
6. Rotate the screw in the front of the housing clockwise to
increase the chaintension.
7. While holding the bar still, replace the sprocket cover
6
.
8. Rotate the bar adjust locking nut
7
clockwise until snug,
then loosen nut one full turn, so the saw chain
can be
properlytensioned.
9. Follow instructions for Adjusting Chain Tension in the
next section.
Adjusting Chain Tension (Fig.A, D, E)
CAUTION: Sharp chain. Always wear protective
gloves when handling the chain. The chain is sharp
and can cut you when it is notrunning.
WARNING: Sharp moving chain. To prevent
accidental operation, ensure the tool is unplugged
before performing the following operations. Failure to
do this could result in serious personalinjury.
1. With the saw on a flat, firm surface, check the saw
chain
5
tension. The tension is correct when the chain
snaps back after being pulled 1/8" (3mm) away from
the guide bar
4
with light force from the index finger
and thumb as shown in Fig. D.
2. To adjust saw chain tension, loosen bar adjust locking
nut
7
, rotate the chain tensioning screw
8
clockwise to
increase tension.
3. Tighten the bar adjust locking nut until snug after
making sure the saw chain
5
is snug around the guide
bar
4
. There should be no “sag” between the guide bar
and the chain on the underside as shown in Fig.E.
4. Once chain tension is correct, securely tighten bar adjust
lockingnut.
5. Do not over-tension the chain as this will lead to excessive
wear and will reduce the life of the bar andchain.
6. When the chain is new, check the tension frequently
(after unplugging tool) during the first 2 hours of use as
a new chain stretchesslightly.
7
6
Fig.B
5
4
16
17
18
Fig.C
Fig.D
5 4
1/8" (3 mm)
Loading ...
Loading ...
Loading ...