Loading ...
Loading ...
Loading ...

page 7
Speed Control Wheel (Fig. 1)
It is important to remember two things about electronic speed control:
1. The electronic speed control operates only when the trigger switch (C) is fully depressed.
2. The effect of electronic speed control is much easier to observe at lower speed settings
(2600 RPM and below), than at high speeds. As the tool approaches 3200 RPM, the effect is
considerably less dramatic.
Spindle Lock Button (Fig. 1)
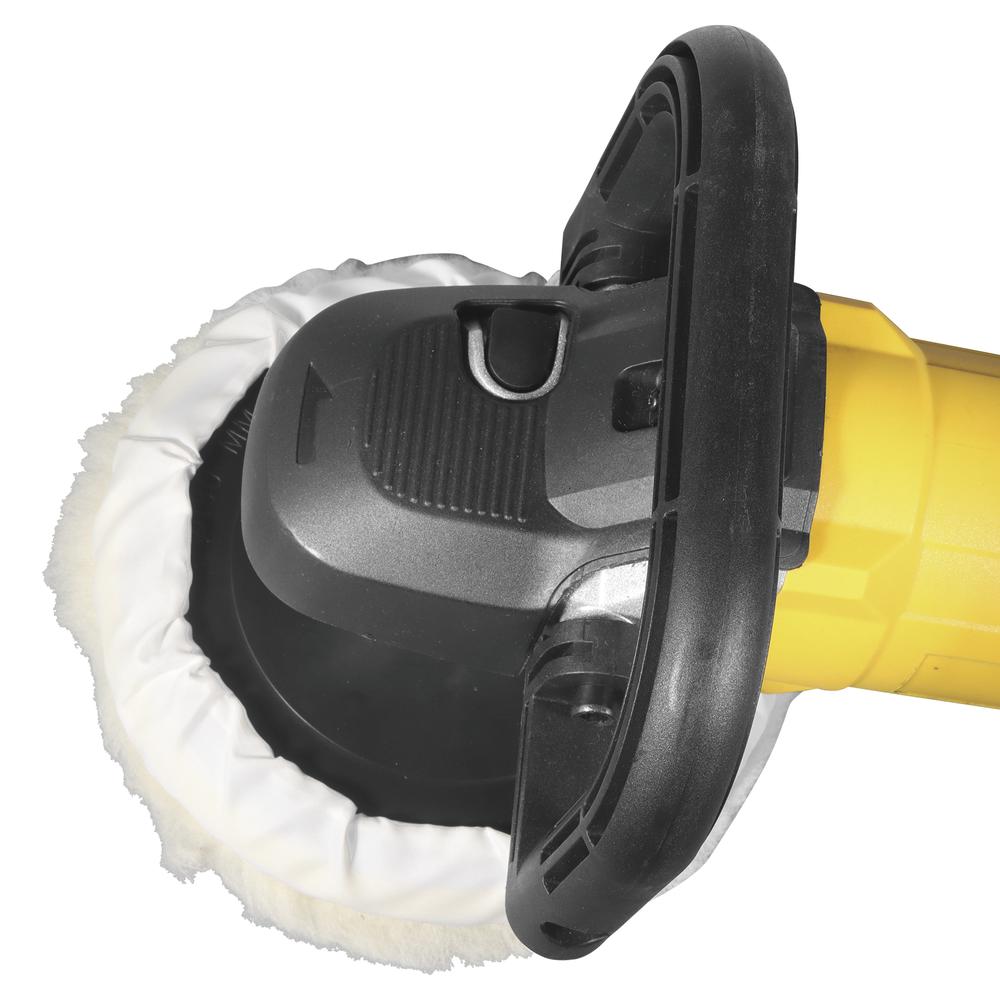
Wool Ingestion Shields (Fig. 1, 2)
Trigger Switch (Fig. 1)
Auxiliary Handle (Fig. 1)
An auxiliary handle (F) is provided with your tool and can be installed on either side of the gear
case. This handle should be used at all times to maintain complete control of the tool.
There is a bale handle (H) which can be used in place of the auxiliary handle. You can use the inner hexagon
wrench (B) to install or release the bale handle(H).
WARNING: To reduce the risk of serious personal injury, turn tool off and disconnect
tool from power source before making any adjustments or removing/installing
attachments or accessories. Before reconnecting the tool, depress and release the
trigger switch to ensure that the tool is off.
In order to prevent the spindle of the tool from rotating while installing or removing accessories, a
spindle lock button (E) has been provided in the gear head of the machine. To lock the spindle,
depress and hold the lock button. NEVER DEPRESS THE SPINDLE LOCK BUTTON WITH
THE TOOL RUNNING OR COASTING.
The wool ingestion shields (K) are designed to
reduce the amount of wool, dust, and debris that
gets ingested by the motor during normal use. The
goal of the ingestion shields is to improve
durability as compared to a unit without the ingestion
shields.
Each ingestion shield can be easily removed for
cleaning by removing the mounting screw (L),
followed by sliding the shield back towards the
trigger end of the tool and then lifting it off.
FIG. 2
K
L
The tool operation can be locked on for continuous use by depressing the trigger switch (C) fully
and depressing the lock button (G) shown in Figure 1. Hold down the lock button while simultan-
eously releasing the trigger switch (C) . The tool will continue to run. To turn the tool off from a
locked-on position, fully depress and release the trigger switch (C) once. Do not unplug the tool
with the switch in the locked-on condition. Make sure the tool is not locked on when plugging in.
The wool ingestion shields can be cleaned with soap and water and a soft bristle brush in the
event they get clogged with polish and debris. Clean the shields as soon as you start to see
buildup on the outside.
The tool speed can be changed by turning the speed control wheel to any one of six speeds.
Speed at 1:600/min
Speed at 2:1,100/min
Speed at 3:1,600/min
Speed at 4:2,100/min
Speed at 5:2,600/min
Speed at 6:3,200/min
WARNING:The high speed settings are intended for sanding. If used for polishing an excessive
amount of surface material may be removed.
Loading ...
Loading ...
Loading ...