Loading ...
Loading ...
Loading ...
www.foodsaver.com 1-877-777-8042
9
SEALED END
SEALED END
OPEN END
SEALED END
OPEN END
SEALED END
SEALED END
4 inches
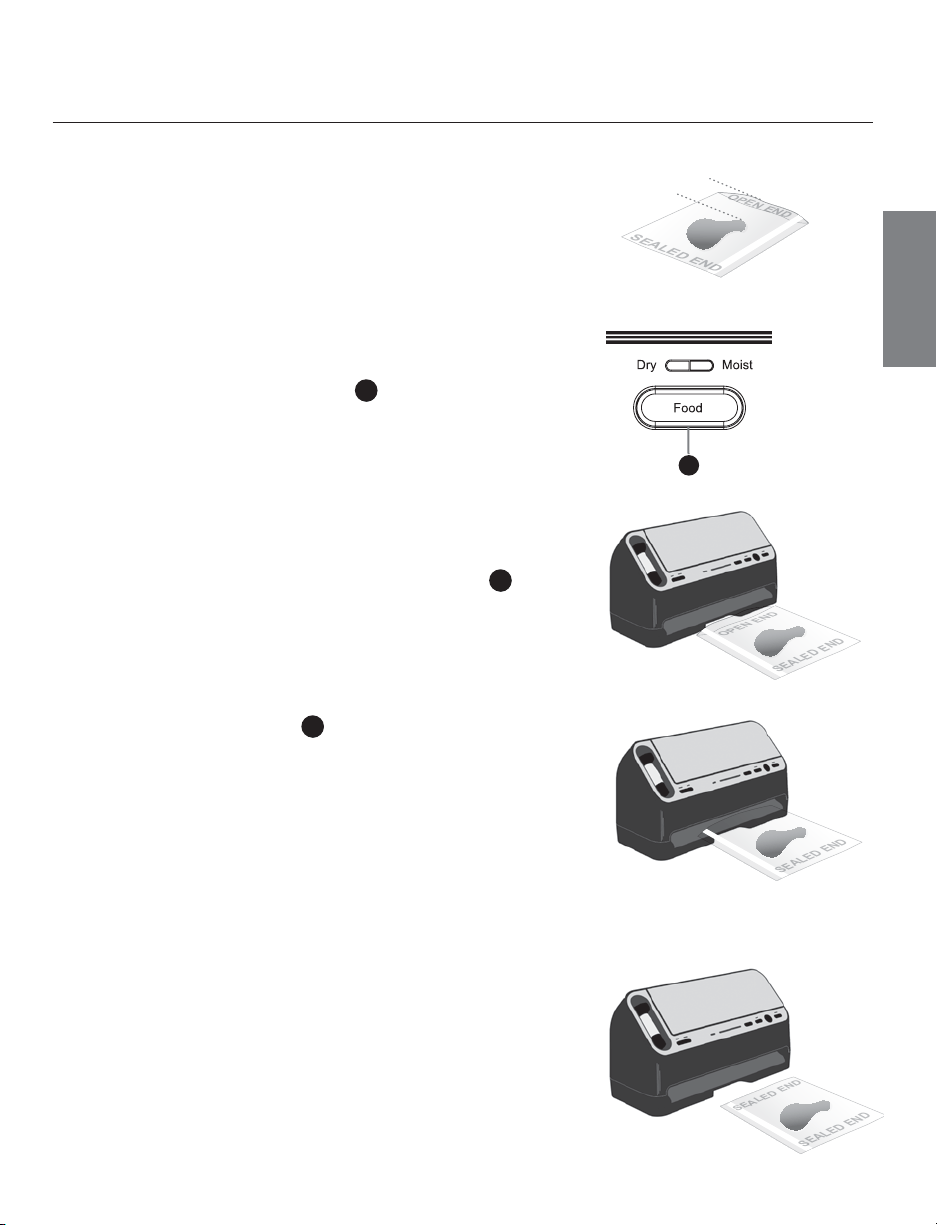
1. Begin with a FoodSaver
®
Vacuum Sealing System Bag
(or create a bag as described in the “How to Make a Bag
from a Roll” section on page 8).
2. Place item(s) in bag, allowing at least 4 inches (10.16cm)
of space between bag contents and top of bag (Fig. 1).
The extra space is required to allow the bag to seal tightly
around contents.
3. OPTIONAL: If you wish to customize the vacuum sealing
process you may select Food Setting
7
(Fig. 2).
Default setting is Dry Food. See page 7 for more information.
4. Your new FoodSaver
®
System Automatically Vacuums
and Seals. To Vacuum: DO NOT PRESS THE SEAL BUTTON.
Using two hands, slowly insert open end of bag, curl down,
into Vacuum Channel (E) (Fig. 3/4).
5. Continue to hold bag until vacuum pump starts.
You may now release bag. The Vacuum Progress lights
4
will illuminate.
NOTE: To prevent crushing delicate items, you may
press Seal Button (F) at any time to begin automatic
sealing process.
6. When red Seal Indicator Light
5
turns off, remove
bag (Fig. 5). Refrigerate or freeze if needed.
NOTE: Wait at least 20 seconds between seals to
allow appliance to properly cool.
NOTE: Appliance should be used in vertical orientation
and not laid on its back.
NOTE: Appliance will time out after a couple of minutes
if vacuum cannot be reached.
Go to www.foodsaver.com for additional hints,
tips, instructional videos and information about
how to purchase FoodSaver
®
parts and accessories.
Fig. 1
Fig. 5
Fig. 2
Fig. 4
7
HOW TO
Insert Bag
Curl Downward
AUTOMATICALLY
SEALS!
Do Not Press Button!
OPEN END
SEALED END
SEALED END
SEALED END
SEALED END
OPEN END
SEALED END
SEALED END
SEALED END
SEALED END
OPEN END
SEALED END
SEALED END
SEALED END
SEALED END
Fig. 3
How to Vacuum Seal with FoodSaver
®
Vacuum Sealing Bags
Loading ...
Loading ...
Loading ...