Loading ...
Loading ...
Loading ...
12
Deterioration risk: The water tank must be lled
before the appliance is switched on or connected
to a power supply.
7 Set-Up and Use
7.1 Commissioning
Figure 10:
At the time of commissioning, complete all relevant
sections of the Benchmark Checklist located on the
inside back pages of this document.
The following commissioning procedures only detail the
required steps to be taken for the potable water loop.
1) Before making any mains connections to the
out to ensure all debris has been removed so as
not to damage the strainer within the
combination valve.
valve and check all connections and joints to
3) Before turning on the mains supply to the
water heater a hot water tap should be opened,
where the water heater is located.
4) Check the pre-charge in the expansion vessel
and ensure it is at least 3 bar. Note actual
pressure on label on expansion vessel.
until water runs from the open hot water tap.
been removed.
6) Close the hot water tap.
7) Check all joints for leaks, even those not
having been altered especially when replacing a
vented water heater.
8) Open temperature and pressure relief valve
to ensure proper discharge and check after
closing that valve is not dripping.
9) Open expansion relief valve to ensure proper
discharge and check after closing that valve is
not dripping.
10) Check all shower outlets, toilet cisterns and
(especially when replacing a vented unit).
Open all water outlets to purge air from
pipework and ensure proper operation.
11) Instruct user in the operation of the unit and
hand over this manual advising the owner of
annual service requirements.
12) Complete the technical data label on the
water heater with legible and permanent
writing.
Set-Up and Use
This function enables the appliance to operate in
auto-production mode, which means that it will use the
energy produced by the PV function to supply the heat
pump as well as the electrical back-up, in order to heat
the water in the tank.
The connection is made between the PV Inverter and
connectors 1 and 2 on the electronics board.
- Remove the appliance lid.
- Remove the black cover from the electronic board.
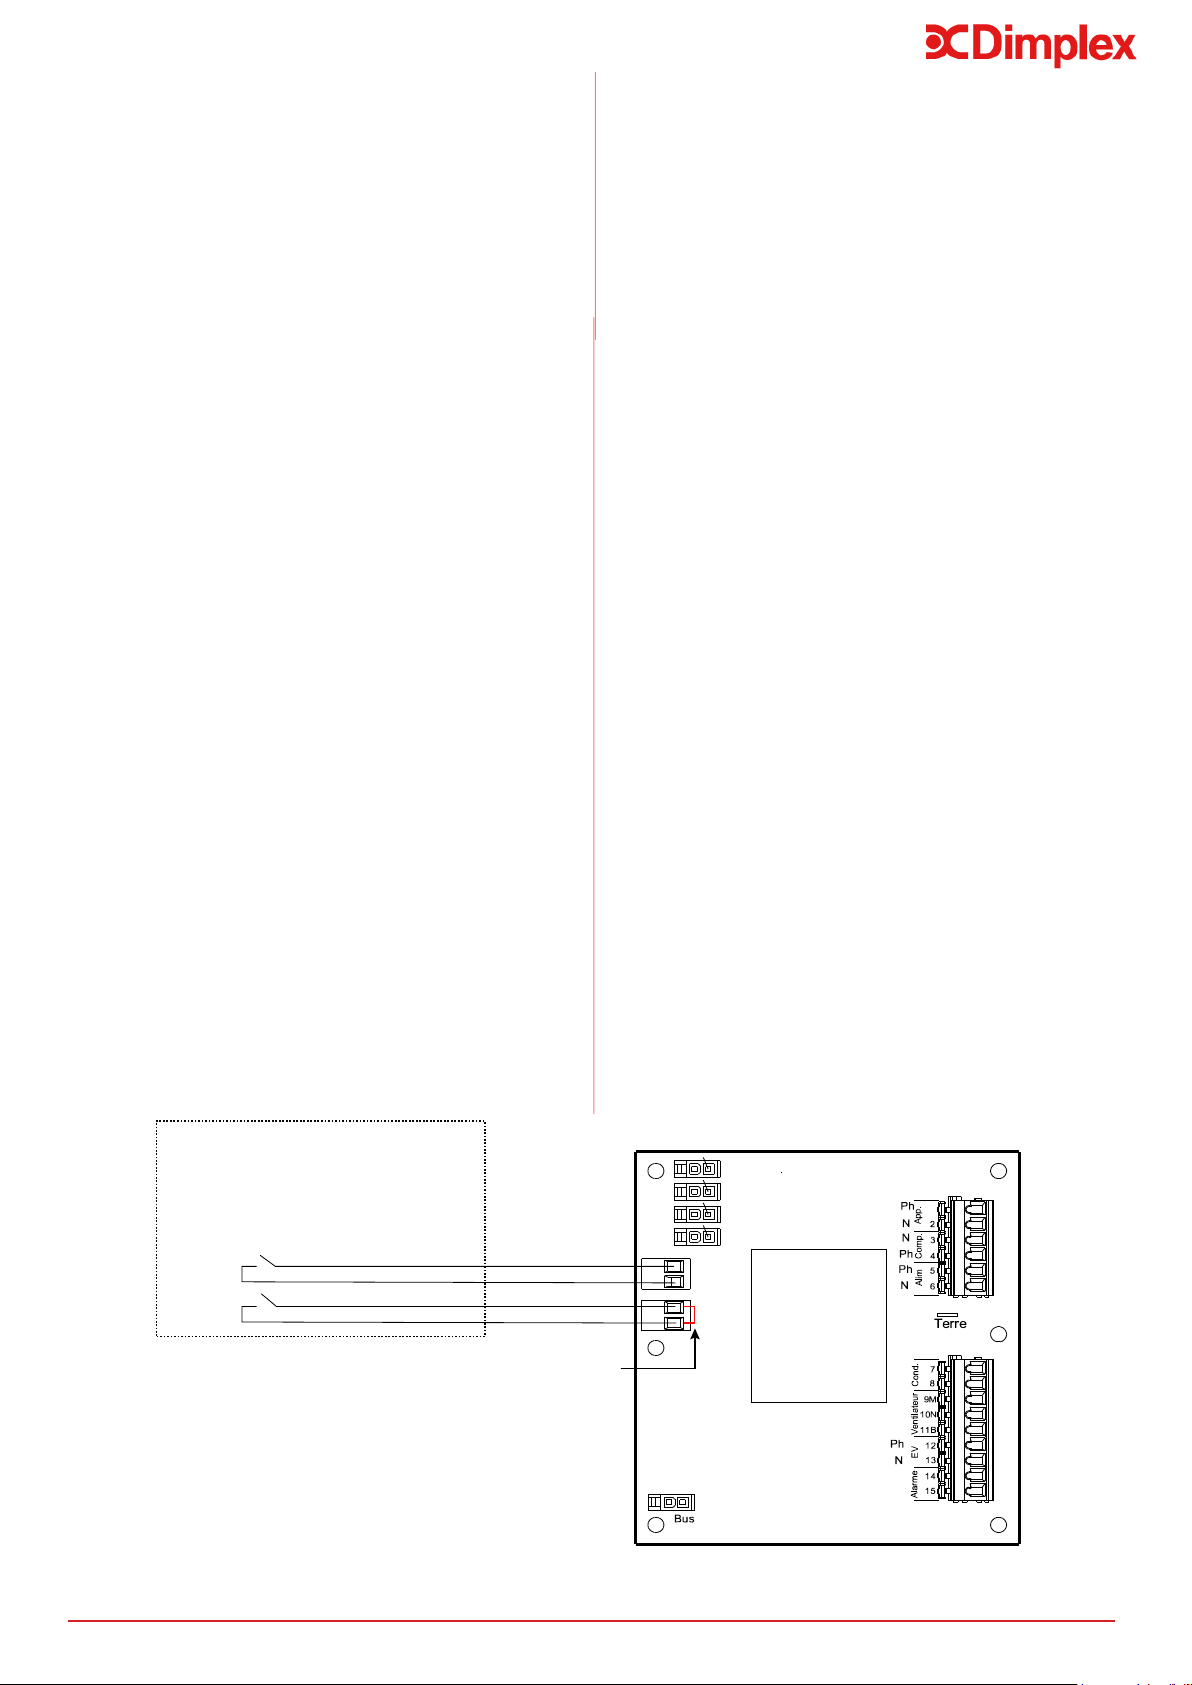
6.9.1.2 Connecting the PV Function
- Connect the PV function cable to connector 1 on the
electronic board.
- If the PV function regulator has two control contacts,
connect them to Entrée 1 and 2 on the electronic
board (see Figure 9).
- Terminal 1: a low level of electrical energy is
produced by the PV function.
- Terminal 2: a high level of electrical energy is
produced by the PV function.
2
1
PV max
PV éco
Voltage-free Contacts to PV Inverter
Tair
Tdégiv
Teau
HP
Caution: Connectors 1 and 2 are for
VOLTAGE FREE CONTACTS only. They
must NEVER be connected to 230V.
Red Jumper to
be removed
Loading ...
Loading ...
Loading ...