Loading ...
Loading ...
Loading ...
Installation Requirements
(con’t)
Cleaning Before Use
Wipe the inside of the freezer with a solution of mild detergent and water. Then rinse
with warm water using a damp sponge or cloth. Wash the baskets and shelves in warm,
soapy water and dry completely before replacing in the freezer. The external parts of
the freezer can be cleaned with wax polish.
Before Switching On!
LET YOUR REFRIGERATOR STAND UPRGIHT FOR APPROXIMATELY FOUR HOURS
BEFORE CONNECTING TO POWER.
The coolant fluid needs time to settle. If the appliance is switched off at any time, wait
30 minutes before switching back on to allow the coolant fluid to settle.
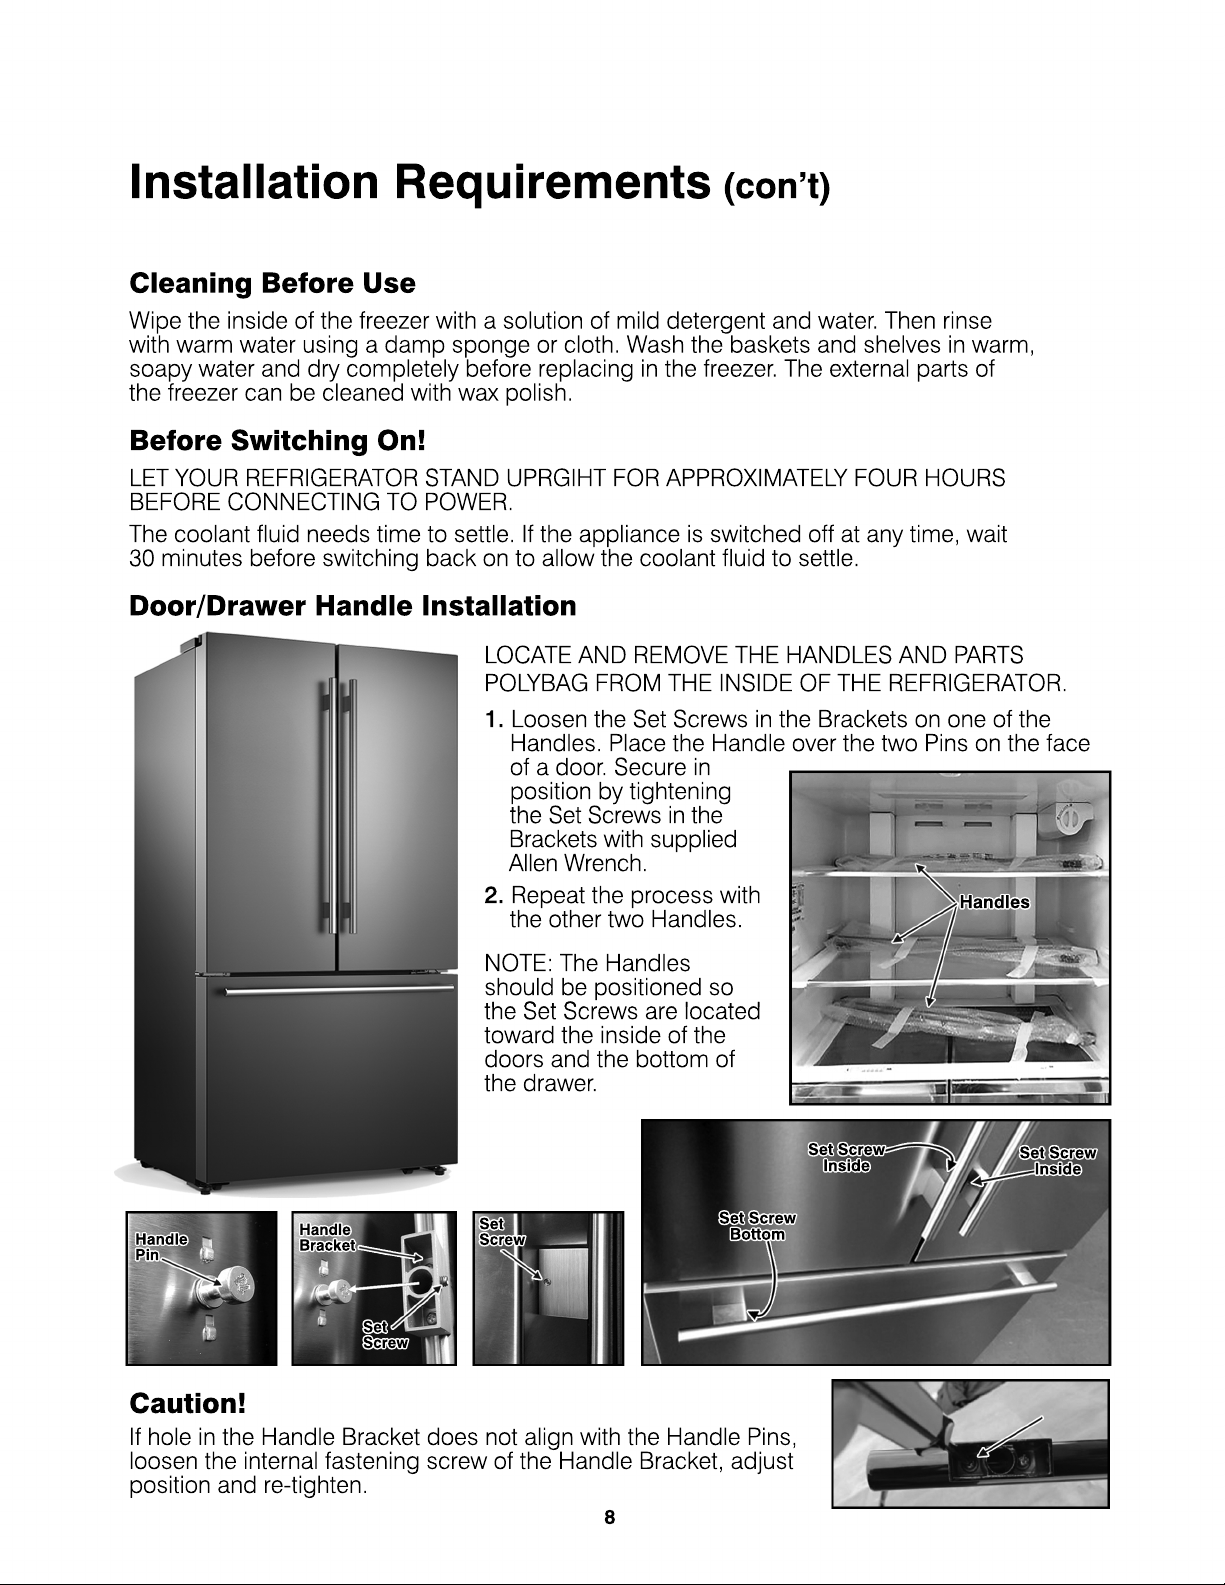
Door/Drawer Handle Installation
Set Screw
Inside
Set Screw
Bottom
Set Screw
Inside
Set
Screw
Set
Screw
Handle
Bracket
Handle
Pin
Handles
LOCATE AND REMOVE THE HANDLES AND PARTS
POLYBAG FROM THE INSIDE OF THE REFRIGERATOR.
1. Loosen the Set Screws in the Brackets on one of the
Handles. Place the Handle over the two Pins on the face
of a door. Secure in
position by tightening
the the Set Screws in the
Brackets with supplied
Allen Wrench.
2. Repeat the process with
the other two Handles.
NOTE: The Handles
should be positioned so
the Set Screws are locatedthe Set Screws are located
toward the inside of the
doors and the bottom of
the drawer.
Caution!
If hole in the Handle Bracket does not align with the Handle Pins,
loosen the internal fastening screw of the Handle Bracket, adjust
position and re-tighten.
8
Loading ...
Loading ...
Loading ...