Loading ...
Loading ...
Loading ...
23
Assembly Instructions
Tools required (not provided): Phillips screwdriver, stud finder, tape measure, pencil, power drill and 1/8” drill bit.
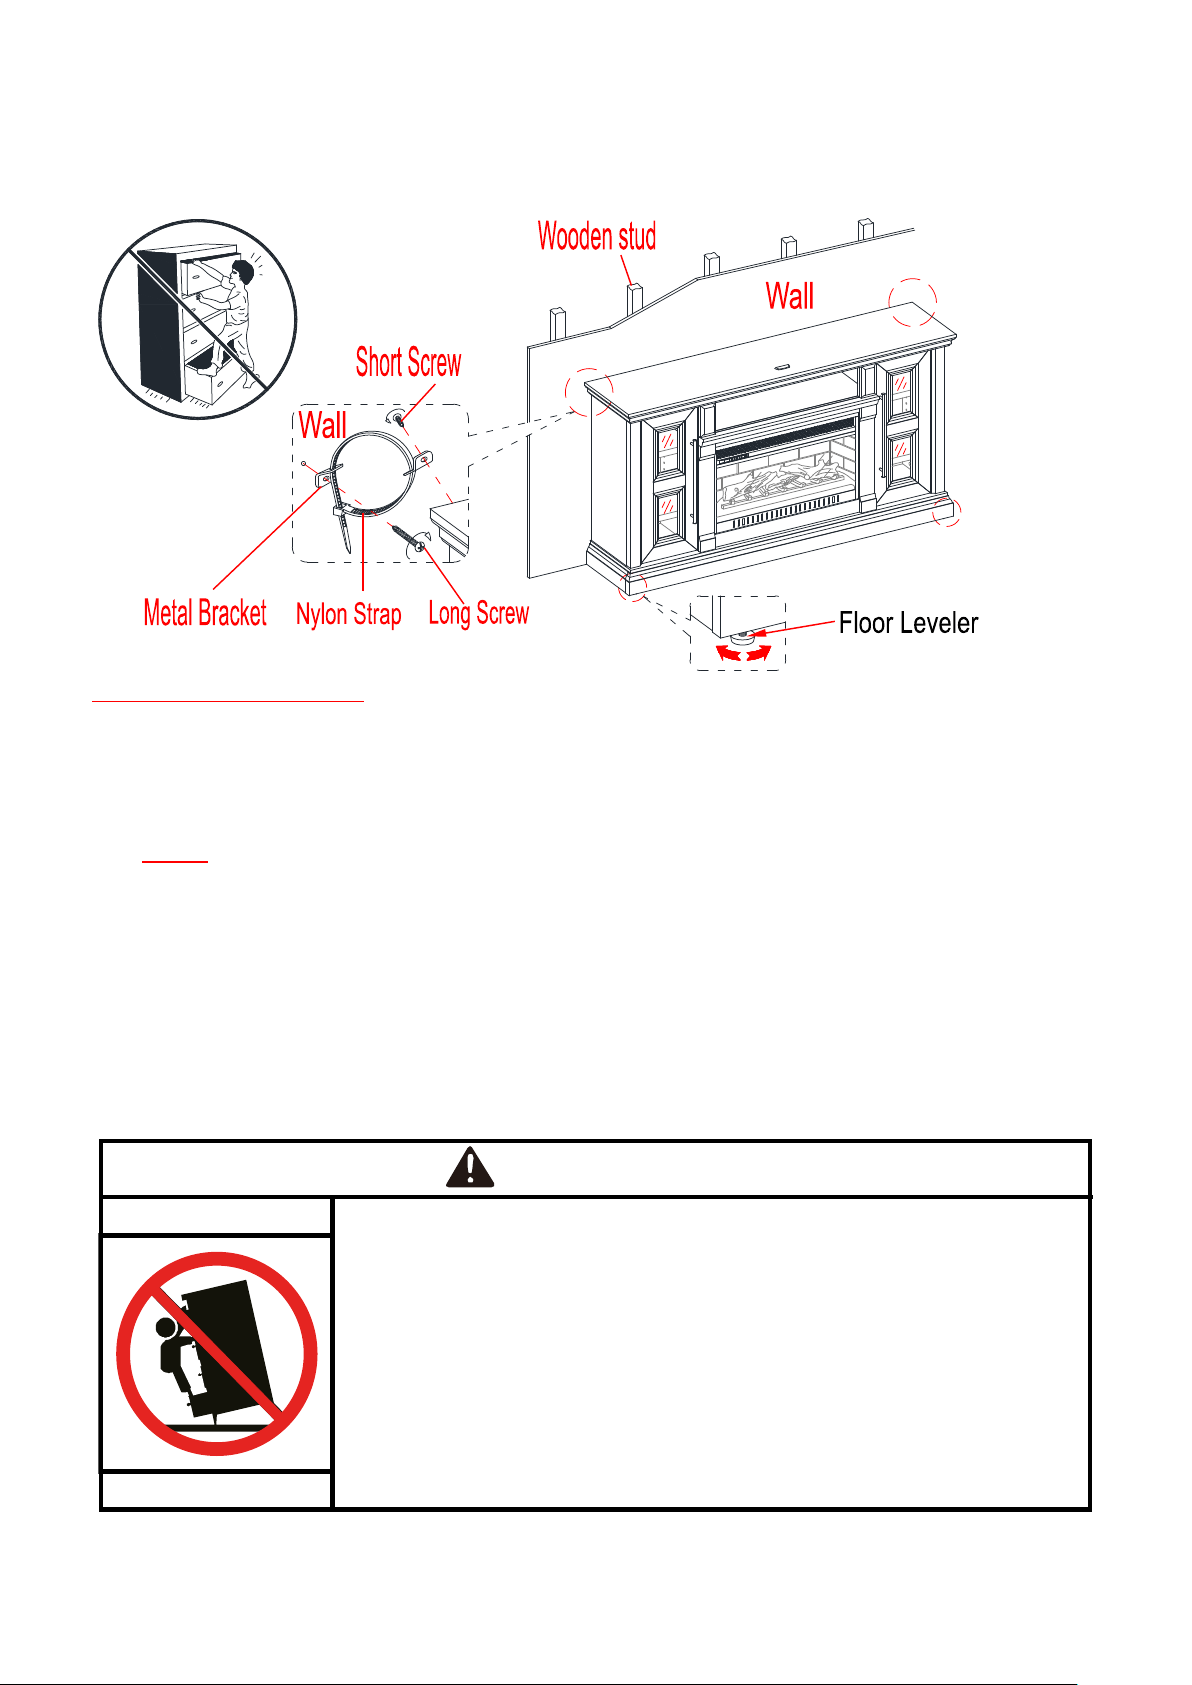
50. Ask for assistance to position the assemble fireplace console at the desired location against a wall. If
necessary, adjust the pre-attached Floor Levelers at the bottom of the Front Skirting (R) to level the unit.
Now, follow the instructions printed on the plastic bag containing the Tipping Restraint Hardware to
attach the tip-over restraints to the unit and the wall.
NOTE: The tipping restraint hardware included is for wooden stud wall construction. It must be
attached to a wall stud. Depending upon your wall construction, different anchor hardware maybe
required. Please contact your local hardware store for assistance. Young children can be seriously
injured by tipping furniture. You must install the tipping restraint hardware with the unit to prevent the
unit from tipping, causing any accidents or damage. The tipping restraints are intended only as a
deterrent, they are not a substitute for proper adult supervision. The tipping restraints are not
earthquake restraints. If you wish to add the extra security of earthquake restraints, they must be
purchased and installed separately.
51. Connect the fireplace to the power transformer. Follow the operating manual for the electric fireplace
insert to control your fireplace.
Children have died from furniture tip-over.
To reduce the risk of furniture tip-over:
ALWAYS install tip-over restraint provided.
FOR use with televisions weighing 135 lbs / 61.2 kg or less. Use with heavier
televisions may result in instability causing tip-over resulting in death or
serious injury.
NEVER allow children to stand, climb or hang on drawers, doors, or shelves.
NEVER open more than one drawer at a time.
Place heaviest items in the lowest drawers.
Use of tip-over restraints may only reduce, but not eliminate, the risk of
tip-over.
WARNING
Loading ...
Loading ...