Loading ...
2
1. Please read the Assembly Instructions prior to assembling this product.
2. Remove all hardware from the box and sort by size.
3. Check to see that all hardware and parts are present BEFORE assembling.
4. Ask a friend to assist you with the assembly of this furniture.
5. To avoid damage, assemble the product on a sturdy, level and protective surface.
6. Please wait until all steps are completed before fully tightening bolts.
7. Make sure all screws and bolts are tightly fastened before the unit is used.
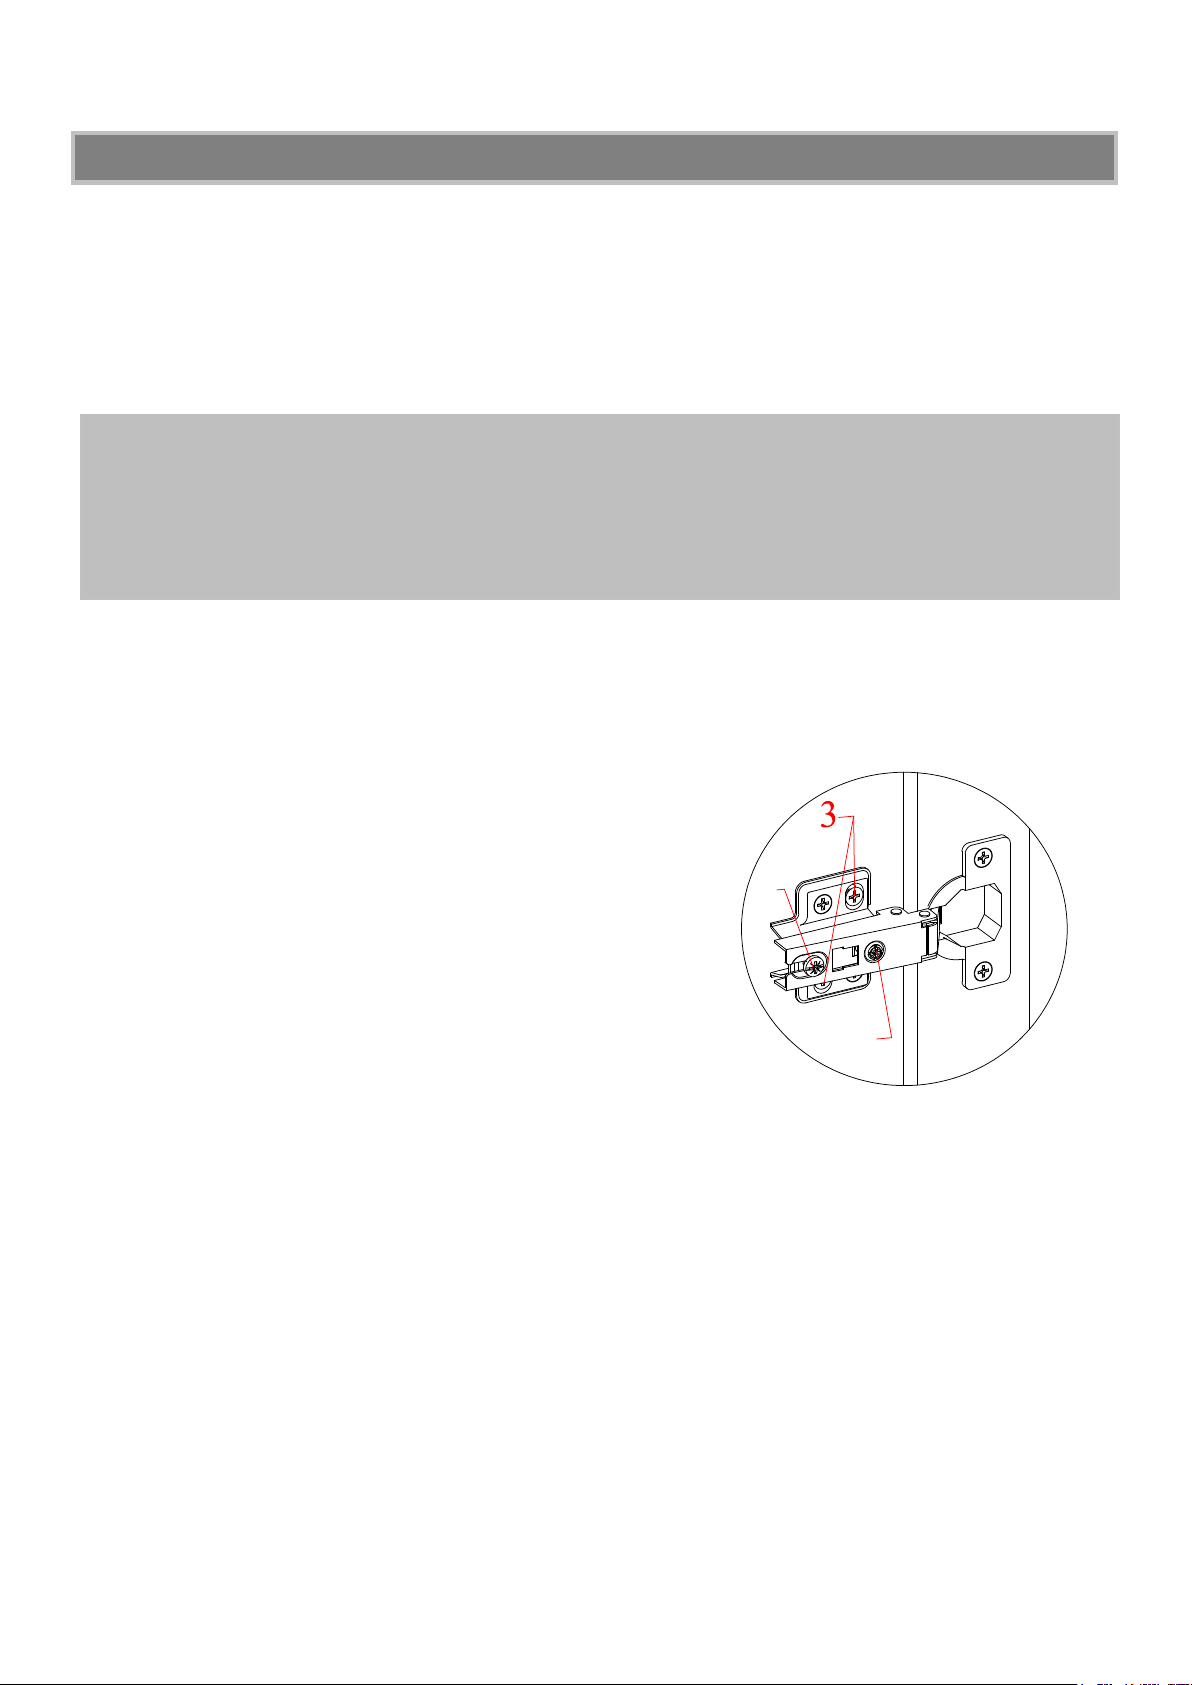
How to adjust the European adjustable hinges on doors
Shipping may cause doors to go out of alignment. If you find that the doors need to be adjusted slightly,
turn the appropriate screw as illustrated.
1. TO ADJUST DOOR FORWARD OR BACKWARD.
2. TO ADJUST DOOR TO RIGHT OR TO LEFT.
3. TO ADJUST DOOR UP OR DOWN.
SPECIAL NOTE
Please read the instruction sheets completely before assembly. Examine all packaging material
before discarding carton. Remove any remaining staples from the carton before discarding.
Remove all parts from carton and separate into groups as indicated on part list. Please ensure
all parts are included prior to assembly. Use of power tools to complete assembly is not
recommended.
This product is sold with two sets of Tipping Restraint Hardware Kit. You must
install the Tipping Restraint
Hardware between the wall and the console to prevent any accidents or damages. W
hen properly installed,
this restraint can provide protection against the unexpected tipping of the unit due to small tremors, bumps o
r
climbing. The restraint is only a deterrent and is not a substitute for proper adult supervision. Use of tip-over
restraints may only reduce, but not eliminate, the risk of tip-over.
G E N E R A L I N F O R M A T I O N , T I P S A N D T R I C K S
1
2
Loading ...
Loading ...
Loading ...