Loading ...
Loading ...
Loading ...
Page 14 INSTALLATION MANUAL ECO-55 / ECO-55 CT / ECO-55 ST
ENGLISH
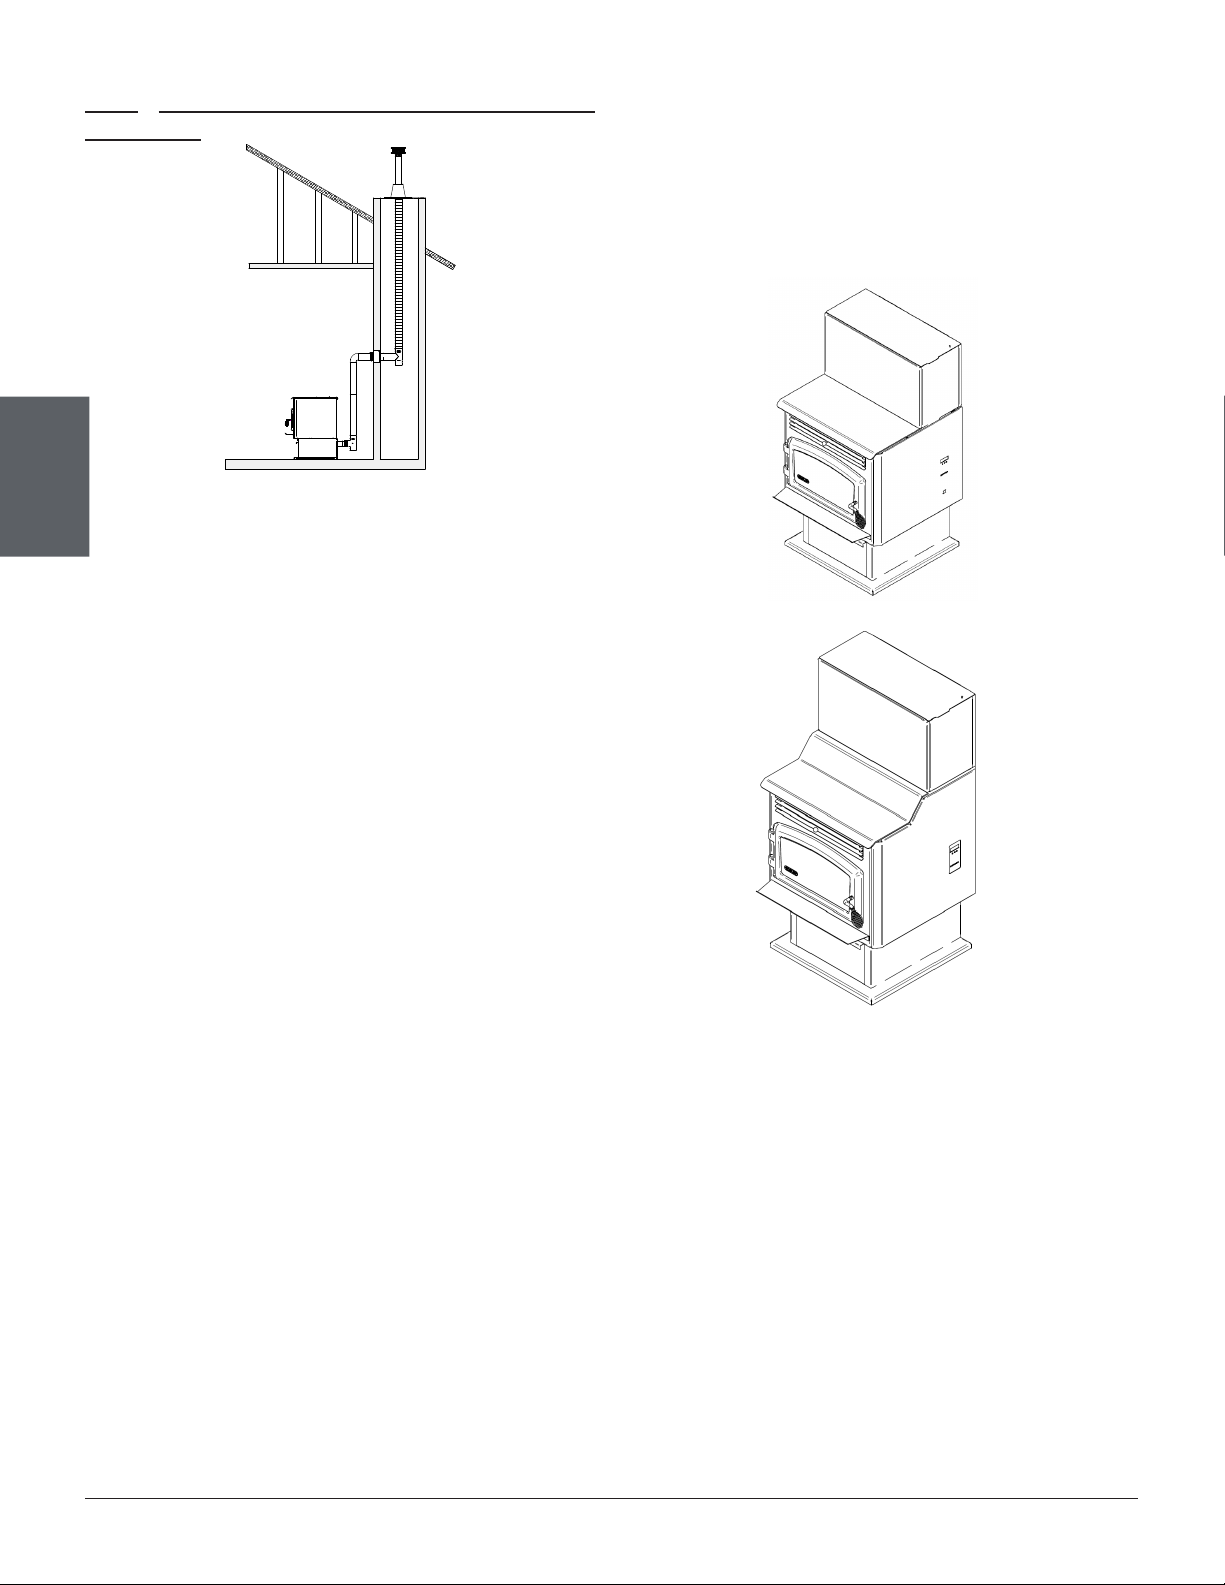
4.6.5 THROUGH AN EXISTING MASONRY
CHIMNEY
1. Position stove following clearances following vent
manufacturer’s instructions.
2. Mark the center of the hole where the vent pipe
will go through the masonry chimney.
3. It is necessary to make a hole in the masonry
with a one-inch diameter greater than the diame-
ter of the vent pipe used.
4. Install the cleanout tee at the bottom of the ver-
tical vent system and lower it down the chimney
until the center branch of the tee is aligned with
the hole in the masonry.
5. Connect the horizontal vent pipe to the cleanout
tee by pushing it through the hole in the masonry.
6. If desired, once the horizontal pipe is in place,
the space between the pipe and masonry may be
lled with high-temperature grout.
7. Install a vented ashing at the top of the mason-
ry chimney. Stainless steel plate and screws are
recommended. Cut a hole for the vent pipe. If
needed, cut a second hole for the air intake pipe.
Seal all joints with high temperature waterproof
silicone sealant to prevent water leakage.
8. Install and seal ashing with high temperature
waterproof silicone sealant.
9. Seal and install vertical roof vent. If required, seal
and install a storm collar.
10. If desired, install a trim collar and use an addi-
tional horizontal vent pipe length, if required, to
connect the stove to the chimney.
5. INSTALLING THE OPTIONAL
HOPPER EXTENSION
To increase the hopper capacity, it is possible to
install a hopper extension, sold separatly. Consult
your dealer or website for details.
Loading ...
Loading ...
Loading ...