Loading ...
Loading ...
Loading ...
Page 13
INSTALLATION MANUAL ECO-55 / ECO-55 CT / ECO-55 ST
ENGLISH
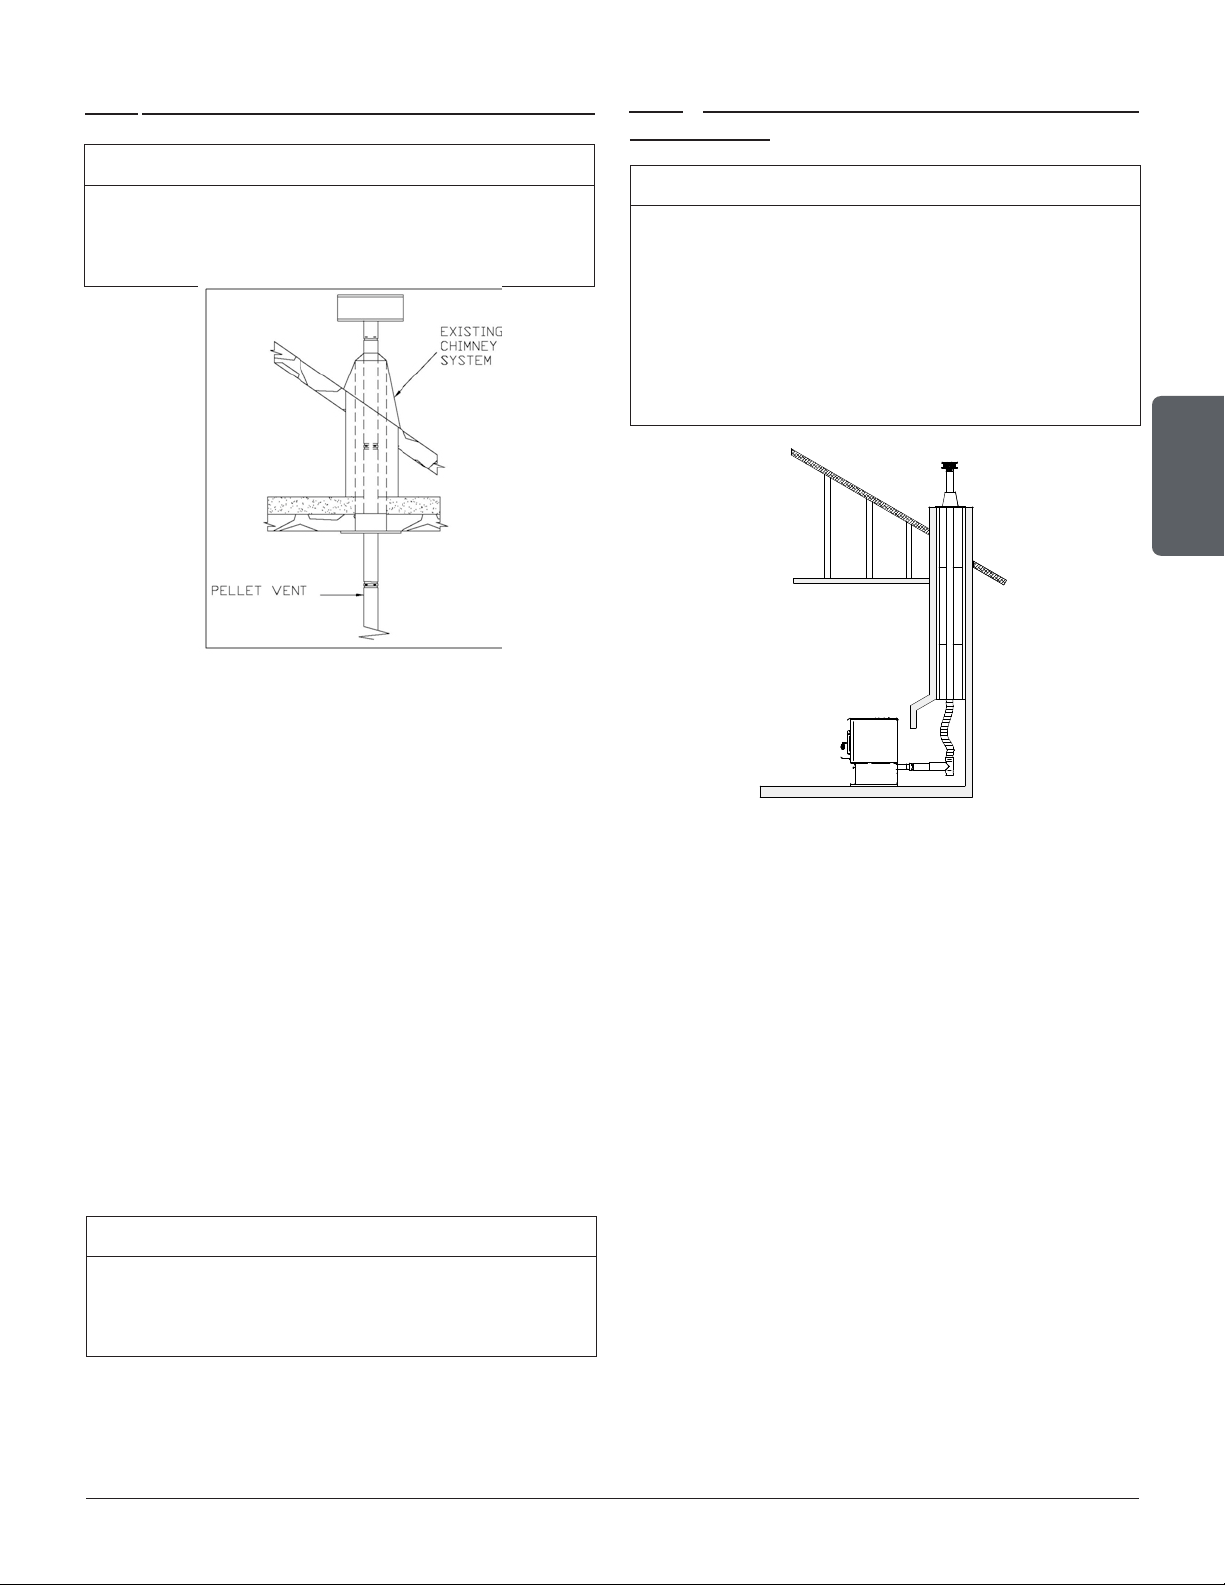
4.6.3 THROUGH A FACTORY BUILT CHIMNEY
1. Position stove following clearances given and fol-
lowing vent manufacturer’s instructions.
2. Install a stove adapter or a stove adapter tee onto
the appliance ue collar. If necessary, use a ho-
rizontal additional length between the ue outlet
and the tee.
3. Use a proper chimney adaptor for your installa-
tion.
4. Run the number of sections of vent necessary to
go through the chimney adaptor into the chimney.
5. Connect the vent to a stainless steel 4" liner ac-
cording to the vent manufacturer’s instruction.
6. Install roof ashing and rain cap as per
manufacturer’s instructions. If necessary, install
and seal a storm collar.
NOTICE
Before installation, the chimney must be cleaned
and inspected by a qualied chimney sweep or
installer.
NOTICE
In the USA., the use of a stainless steel liner is
mandatory. In Canada, it is not mandatory but is
strongly recommended.
4.6.4 THROUGH AN EXISTING MASONRY
FIREPLACE
NOTICE
The structural condition of the masonry chimney
must rst be inspected by a qualied chimney
sweep or installer. You will need a pipe length
equal to the chimney height from the hearth. If
outside combustion air is to be used, you will need
a pipe length superior from 12 to 18 inches (30 to
46 cm) of the chimney height to ensure a proper
stove behaviour.
1. Position stove, following clearances and fol-
lowing vent manufacturer’s instructions.
2. Build and Install a blocking plate inside the chim-
ney to seal the replace damper. Stainless steel
plate and screws are recommended. Cut a hole
for the exhaust pipe. If needed, cut a second hole
for the air intake pipe
3. Attach a section of pipe and clean out tee to the
ue outlet, making sure the clean out tee is cen-
tered in the chimney ue area.
4. Install a vented ashing at the top of the replace
chimney. Stainless steel plate and screws are
recommended. Cut a hole for the vent pipe. If
needed, cut a second hole for the air intake pipe.
Seal all joints with high temperature waterproof
silicone sealant to prevent water leakage.
5. Seal and install vertical roof vent. If required, seal
and install a storm collar.
Loading ...
Loading ...
Loading ...