
Loading ...
Loading ...
Loading ...
23
WIRELESS KEYPAD PROGRAMMING
Single Door Operation:
1. Ensure number pad back lighting is o .
2. Enter PIN number.
3. Press the UP/DOWN key.
4. Opener will operate.
Multi-Door Operation:
1. Ensure number pad back lighting is o .
2. Enter PIN number.
3. Press the UP/DOWN key.
4. Press number key corresponding with desired door (1, 2,
or 3).
5. Desired opener will operate.
STEP 3) OPERATING THE KEYPAD WITH THE OPENER(S)
NOTE: Keypad will remain active for 15 seconds after a successful
entry is made. During this 15 seconds ANY key will operate the
opener.
Changing an Existing PIN:
1. Enter current PIN
2. Press PROGRAM key once.
3. Enter new PIN.
4. Press PROGRAM key once.
• Original PIN will no longer operate keypad or opener.
ADDITIONAL (OPTIONAL) PROGRAMMING:
Setting a Temporary PIN:
A temporary PIN allows temporary access to the garage by,
normally unauthorized, personnel such as repairmen or
neighbor.
1. Enter current PIN.
2. Press PROGRAM key 3 times.
3. Enter a temporary PIN (3 to 8 digits)
4. Press PROGRAM key once.
• The Temporary PIN will operate garage door opener
until the original PIN is used. Use of the original PIN will
delete temporary PIN.
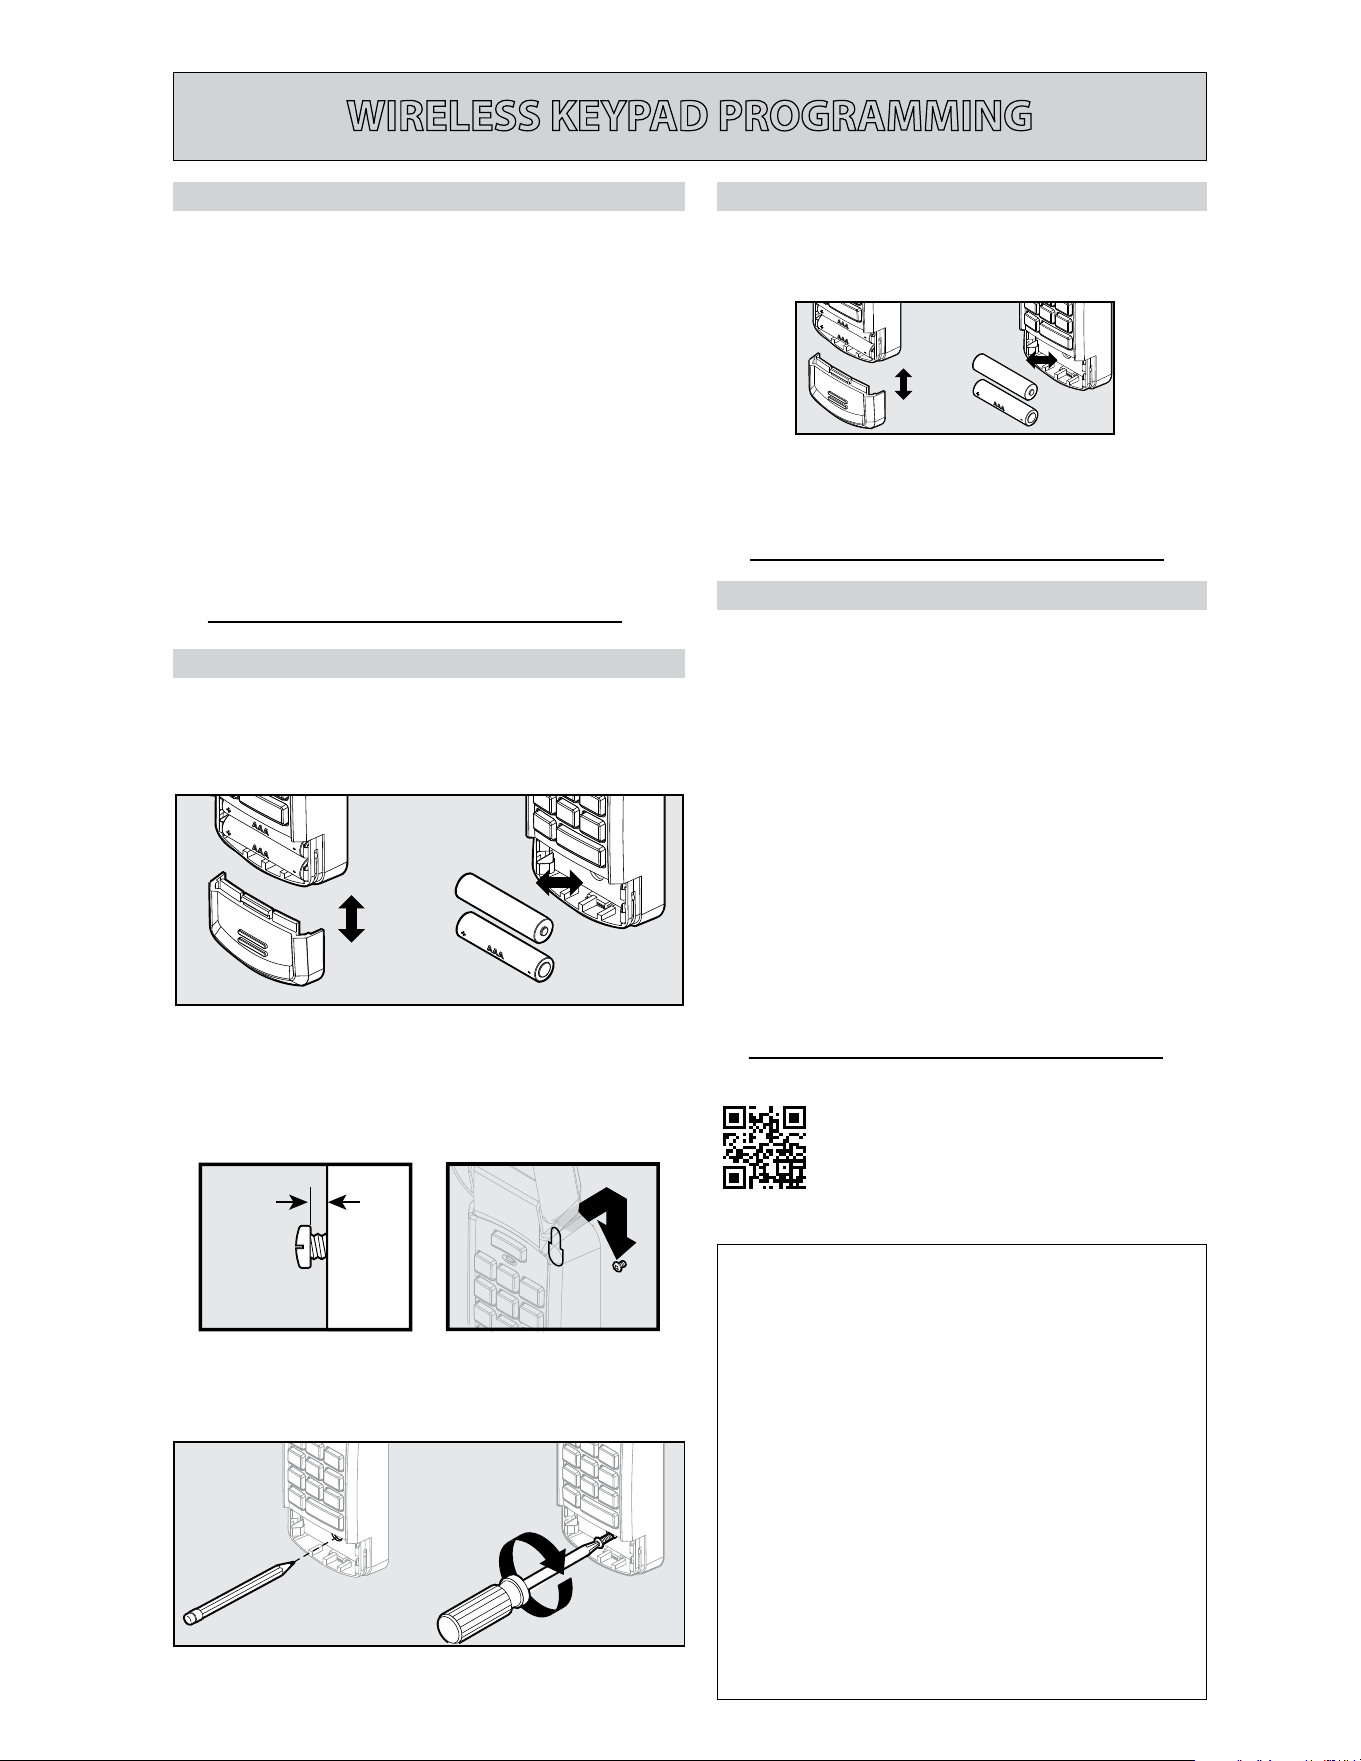
If the keypad back-lighting fails to operate, Batteries may
require replacement.
• Programming will not be lost during battery change.
1. Remove battery cover and batteries.
2. Replace batteries with same type alkaline (AAA) and
check for proper direction of (+) and (-) terminals.
Rechargeable batteries are NOT recommended.
REPLACING BATTERIES
Keypad MUST be mounted within sight of the garage door(s)
at least 5 feet above oor and clear of any moving door parts.
• Programming will not be lost during battery change.
1. Remove battery cover and batteries.
2. Drill a 3/32” pilot hole for the top mounting screw.
3. Install included screw into pilot hole, leaving 1/8” gap
between the screw head and wall.
4. Hook the slotted mount on back of keypad over the screw.
Wall
1/8"
Screw
head gap
5. Mark and drill a 3/32” pilot hole for the bottom screw and
secure keypad to the wall. (Do not over-tighten).
6. Reinstall batteries.
STEP 4) MOUNTING THE KEYPAD
Scan this code with a QR code reader
app on a smart device to view a video
of these instructions.
or visit www.GenieCompany.com
FCC Part 15.21 Statement:
Changes or modi cations not expressly approved by the
party responsible for compliance could void the user’s
authority to operate the equipment.
FCC / IC Statement:
This device complies with FCC Part 15 and Industry Canada
licence-exempt RSS standard(s). Operation is subject to
the following two conditions: (1) this device may not cause
harmful interference, and (2) this device must accept any
interference received, including interference that may
cause undesired operation of the device.
Le présent appareil est conforme aux CNR d’Industrie
Canada applicables aux appareils radio exempts de
licence. L’exploitation est autorisée aux deux conditions
suivantes : (1) l’appareil ne doit pas produire de
brouillage, et (2) l’utilisateur de l’appareil doit accepter
tout brouillage radioélectrique subi, même si le brouillage
est susceptible d’en compromettre le fonctionnement.
Loading ...
Loading ...
Loading ...