Loading ...
Loading ...
Loading ...
.
Fig. 3
Operation
IMPORTANT - OBJECTS OR CLOTHING MUST NOT BE
PLACED ON THIS HEATER.
Before using the heater ensure that all warnings and
instructions have been carefully read.
To activate the heater, after installation or assembly, simply
plug it in.
Note: The element has been coated with a protective film
which will burn off during the first few minutes of use, this
may cause a small amount of fuming. This is quite normal –
the fumes are non-toxic and will quickly disappear.
We recommend that you open a window to ventilate the
room when using the heater for the first time.
CONTROL KNOB (SWITCH)
All models are fitted with a rotary control knob and
an electronic timer/thermostat control unit, see Fig
4. The heat output along with the turbo fan (selected
models) are controlled via the control knob. The
electronic control unit offers a programmable automatic
seven day time and temperature operation mode
or a manual mode for room temperature control.
F
COPY
BLK
OFF
ON
P
DLY
AUTO
ADVANCE
MANUAL
ON
M
T
W
T
S
S
OFF
ML*TSTie7
Control Knob
Electronic timer
with thermostat
ML2TSFTie7
Control Knob
ML3TSFTie7
Control Knob
Fig. 4
Depending on the model the options available on the control
knob may vary, see Fig.4. The following table explains the
operation of each knob position.
Mode Operation
Off
Low heat
High heat
High heat with turbo fan
ELECTRONIC CONTROL (TIMER)
The product is equipped with an electronic control unit,
consisting of a display, a heat indicating LED and five
keys. The unit has two principle operating modes, AUTO
and MANUAL, to offer flexibility to the user. AUTO mode
will operate a user programmed time and temperature
profile. MANUAL mode is a continuous operating mode
that will allow the user to set and maintain a constant room
temperature.
Save entry
Set program
Select operating mode
Value down/up
Week day
Program no. (1 - 4)
Manual Mode
Automatic mode
Advance
Copy
Setting time mode
Key lock
Manual ON mode
Manual OFF mode
F
COPY
P
AUTO
ADVANCE
MANUAL
ON
M
T
W
T
S
S
OFF
Fig.5
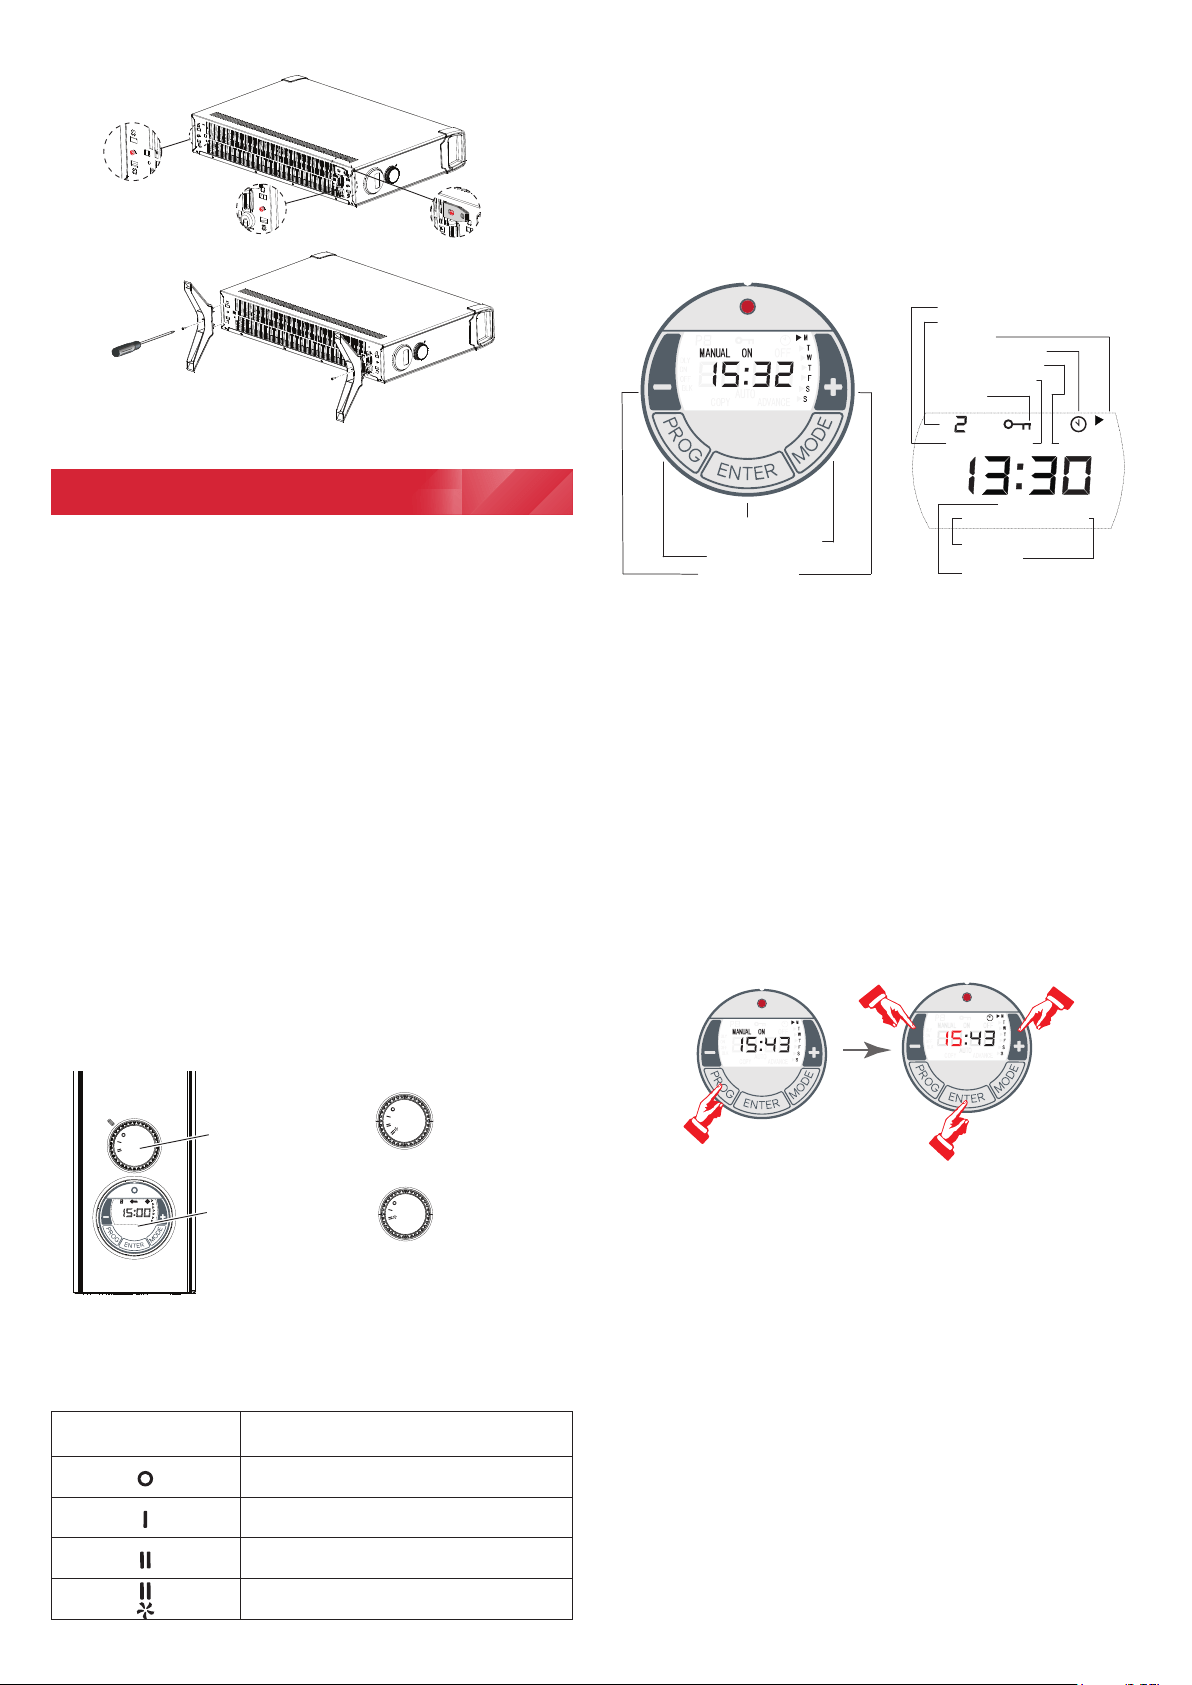
Setting time and weekday
To set the time and day complete the following steps:
• Press and hold the PROG key for three seconds.
The clock symbol appears on screen with the hours
display flashing.
• Use the + / - keys to set the hours and press the
ENTER key. to confirm selection, The minutes display
will begin flashing.
• Use the + / - keys to set the minutes. Press the
ENTER key to conform selection, the week day will
begin flashing.
• Use the + / - keys to set the day and confirm
selection using the ENTER key.
• The CLOCK symbol disappears. Setting is complete.
Fig. 6
OPERATING MODES
To select or toggle through the operating modes press the
MODE key, see Fig.7. The available operating modes are a
follows:
Auto/timer operation
The heater will control the room temperature in accordance
with the user determined time and temperature schedule.
Up to four heating programs can be set for each day. The
required On/Off time along with the room temperature can
be specified for each heating program.
When this mode has been activated AUTO is visible on the
on the display.
Loading ...
Loading ...
Loading ...