Loading ...
Loading ...
Loading ...
LuxProducts.com | 17
INSTALLATION WITH
P-BRIDGE4.
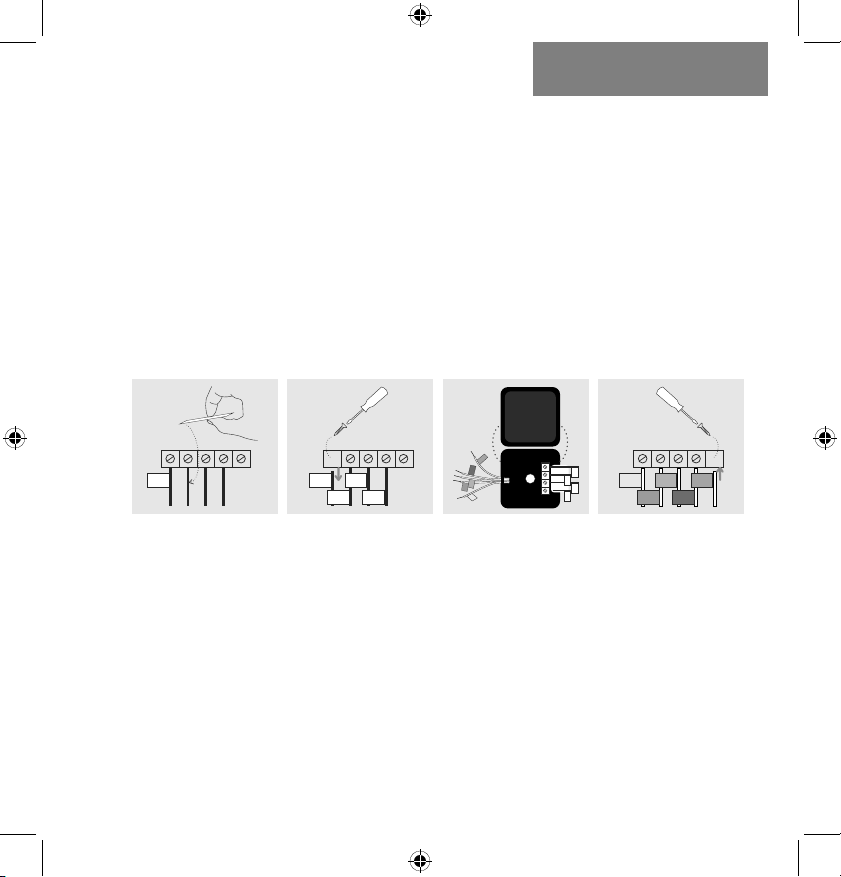
Step 4.9: i) Matching the letters, label the wires connected to
your furnace with the included wire labels for the
Power Bridge.
Take a picture of the wiring at your control board.
ii) Disconnect these wires from the control board.
iii)Open the Power Bridge and insert each of your
old wires into the corresponding numbered
terminals in the Power Bridge.
iv) Finally, insert the Power Bridge wires (with the
colored labels) into the corresponding terminals
on your furnace control board.
i) ii) iii) iv)
Y G W R C
1(Y)
Y G W R C
1(Y)
4(G)
2(W)
3(R)
Y G W R C
1(Y)
4(G)
2(W)
3(R)
C
4(G)
Y G W R C
1(Y)
Y G W R C
1(Y)
4(G)
2(W)
3(R)
Y G W R C
1(Y)
4(G)
2(W)
3(R)
C
4(G)
1(Y)
4(G)
1(Y)
4(G)
2(W)
3(R)
C
3(R)
2(W)
Y G W R C
1(Y)
Y G W R C
1(Y)
4(G)
2(W)
3(R)
Y G W R C
1(Y)
4(G)
2(W)
3(R)
C
4(G)
Furnace Furnace Furnace
Step 4.10: Secure the LUX Power Bridge to your furnace. If
you had to remove a panel or door to access your control
panel, replace it now.
Step 4.11: Return power to your heating and cooling
system. If your system, including your thermostat, does not
power up please call LUX Technical Support.
After CS1 powers up, you are ready to configure it for your
heating and cooling system.
Loading ...
Loading ...
Loading ...