MiniBrew Quickstart Guide
(MiniBrew Smart Keg & parts are packed and delivered in a seperate box)
(Ingredients are packed in brew packs which you can order in the MiniBrew app).
MiniBrew Smart Beer Machine
Safety Instructions
Product Overview
Getting Started
Cleaning & Maintenance
MiniBrew Bierbrauanlage
Sicherheitshinweise
Produkt Übersicht
Erste Schritte
Reinigung & Instandhaltung
4
6
8
11
11
12
14
16
19
19
5
4
3
2
1
1
2
3
4
5
English
Deutsch
3

MiniBrew
1
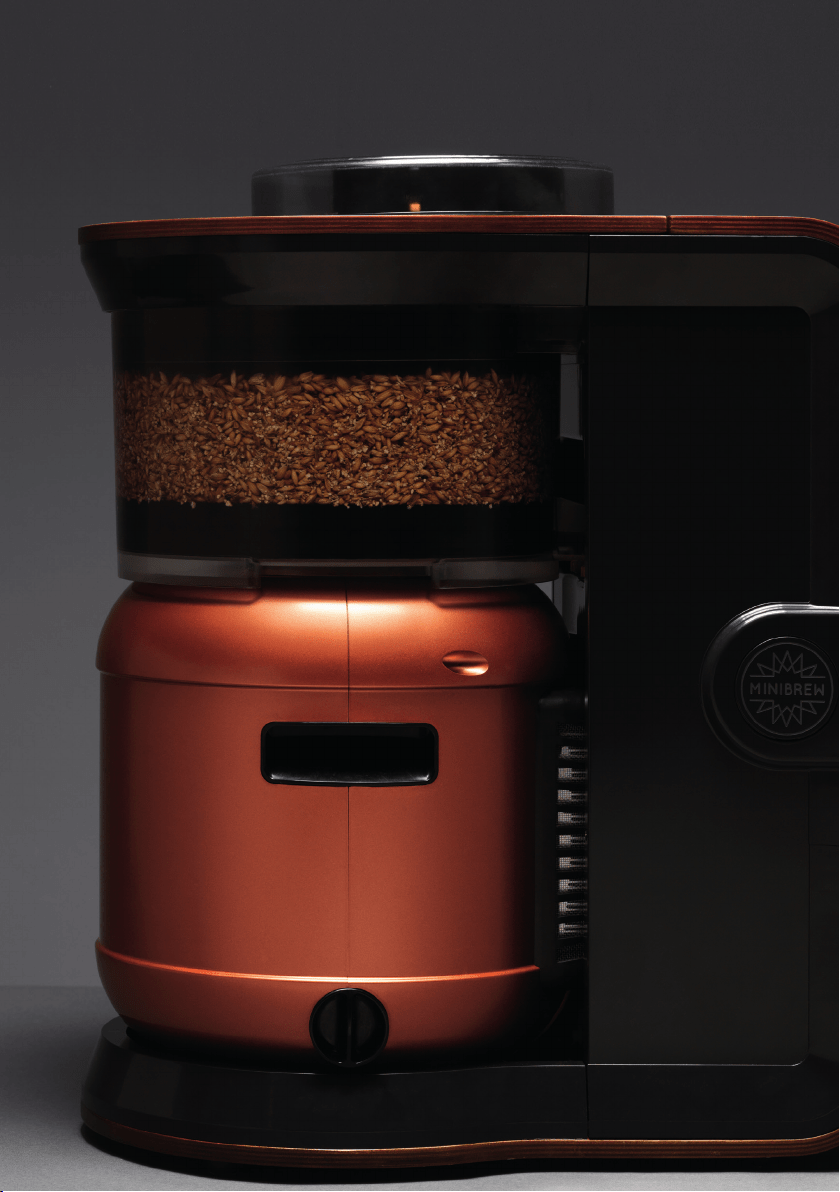
MiniBrew is an automated beer brewing machine
for making your favorite beer styles in batches of 5
liters with natural ingredients.
4
(Ingredients are packed in brew packs which you can order in the MiniBrew app).

Safety Instructions
2
Please read these instructions before operating the appliance, and retain for future use.
6
• This appliance is intended solely for
household use.
• Before cleaning, allow the
appliance to cool down.
• Attention! Avoid touching hot
surfaces. The heating element will
remain hot after use.
• Before plugging into a socket,
check whether the voltage in your
home corresponds with the voltage
printed on the bottom of the
appliance.
• If the main power cord is damaged
it, must be replaced by the
manufacturer, its service agent, or
a similar qualified person to avoid a
hazard.
• Never unplug it from the socket by
pulling the cable. Always ensure
that your hands are dry before
removing the plug.
• When positioning the appliance,
ensure the supply cord is not
trapped or damaged.
• Do not position multiple portable
socket-outlets or portable
power supplies at the rear of the
appliance.
• Avoid spillage on the electrical
plug.
• This appliance may be used by
people over the age of 18. It should
not be used by people with reduced
physical, sensory, or mental
capabilities, or by those who
lack experience, unless they are
properly supervised or instructed
via software for the safe usage
of the appliance and the hazards
associated with its use.
• Children should not play with the
appliance.
• Unplug the appliance as soon as
you have finished using it.
• For your own safety, only use
the original parts from the
manufacturer.
• The warranty/safety is not
guaranteed after using 3rd party
parts.
• Never use the appliance if it is
not working properly, or if it has
been damaged. Potential injury
may occur from misuse. Any
intervention (other than normal
maintenance activities performed
by the user) must be carried out by
an approved service centre.
• It is absolutely necessary to keep
the appliance clean at all times

7
because it comes into direct contact
with liquid.
• If the appliance is used for other
purposes than intended, or if it is
not handled in accordance with
the Quickstart Guide and user
manual in the app, MiniBrew is not
liable for any damage which may
occurred by use of the machine.
• This product contains batteries.
In the context of the sale of
rechargeable and disposable
batteries, or in the context of the
delivery of equipment containing
rechargeable or disposable
batteries, we are obliged to draw
your attention to the Battery
Ordinance, which states that
batteries may not be disposed of as
ordinary household waste.
• As the end user, you are obliged
to return used batteries. You can
return batteries free of charge after
use to a retail outlet, municipal
collection points, or shops. You can
also return batteries to the seller by
post.
• For correct operation of the
appliance, the min. value is 15 PSI
when connecting the water inlet to
the tap. The max. value is 85 PSI
when connecting the water outlet
to the sink.
• Only hoses and connectors supplied
with the appliance should be used.
Don’t re-use old hoses when a new
one is supplied.
• The frequency band is 2400-2483.5
MHz and 13.56 MHz. The maximum
RF Output Power is 15.3 dBm.
• Avoid water spillage on the
electrical plug.
• If the Smart Keg appliance is left
empty for long periods, switch
off, defrost, clean, dry, and leave
the Keg lid open to prevent mold
developing within the appliance.
• Do not store explosive substances,
such as aerosol cans with a flam-
mable propellant in this appliance.
• DO NOT rotate the carrousel when
placed on the machine. It will se-
verely damage the turning gear.
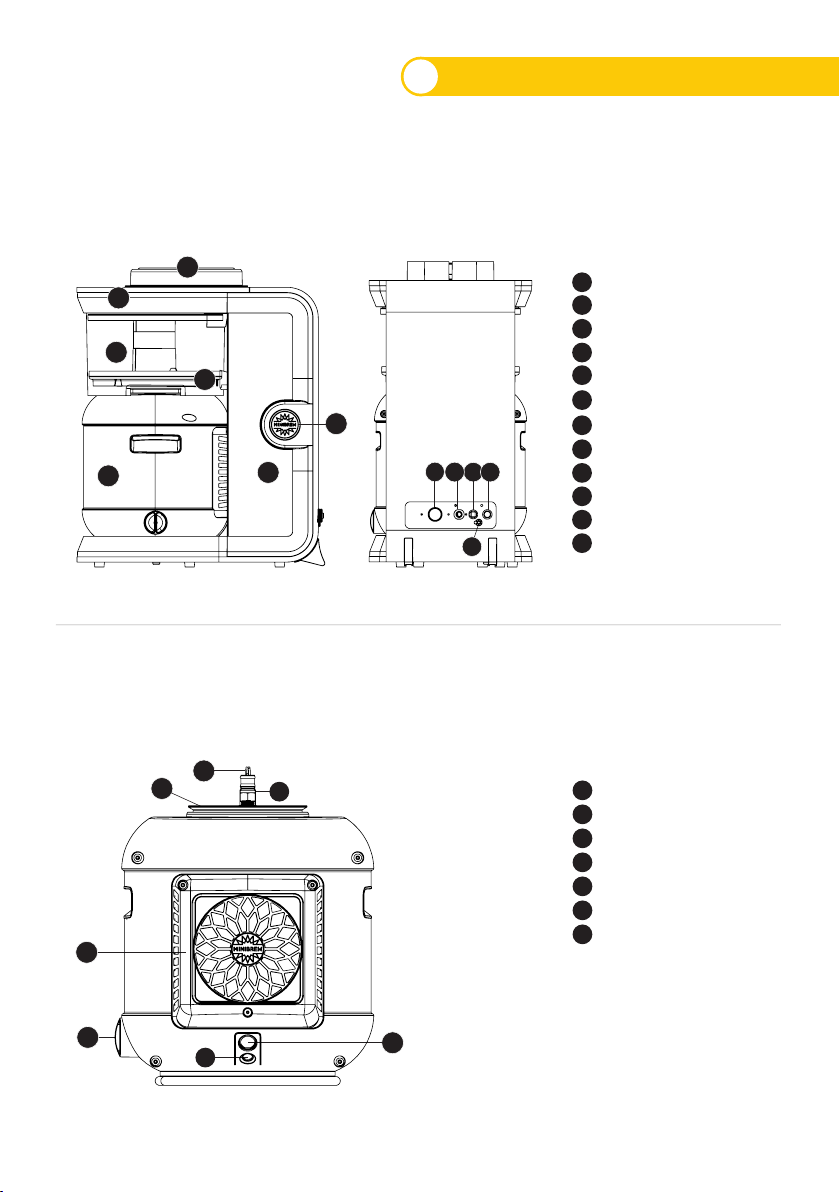
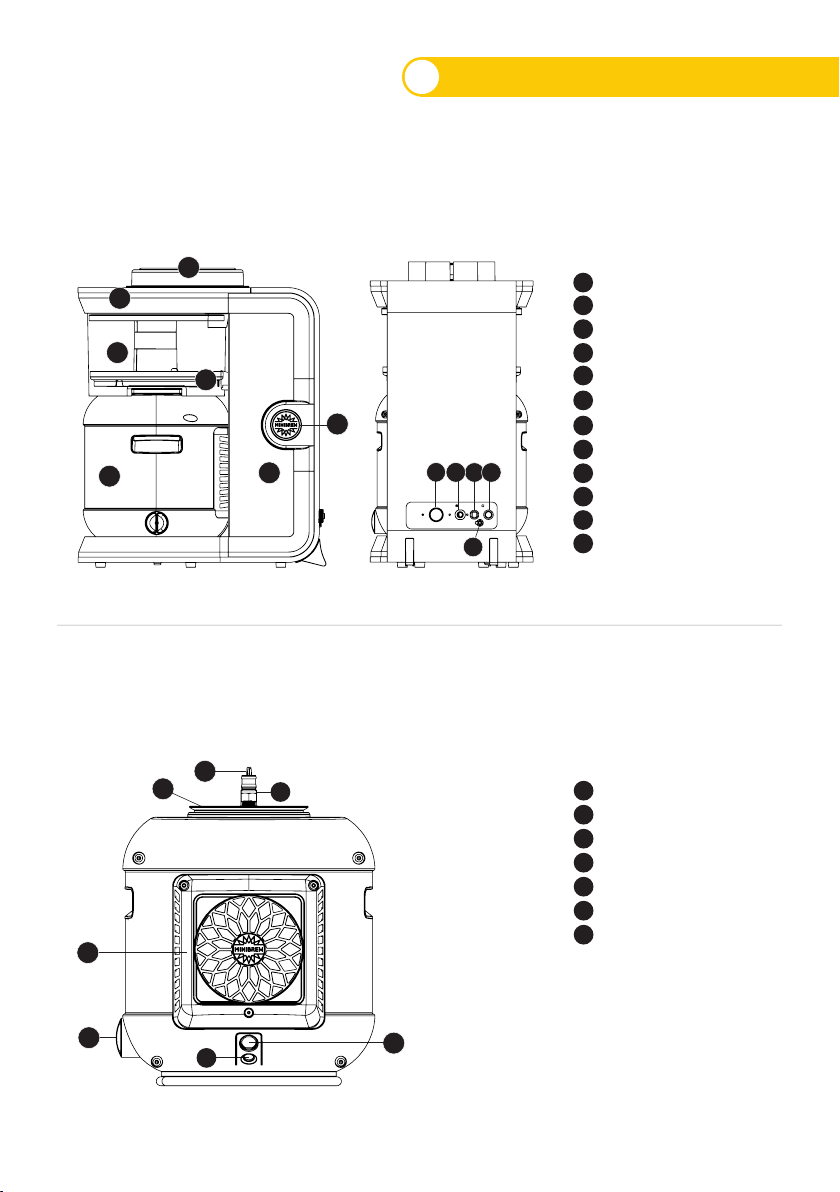
Product Overview
MiniBrew Smart Beer Machine
3
AA
CC
DD
EE
FF
F
G
H
E
D
C
B
A
GG
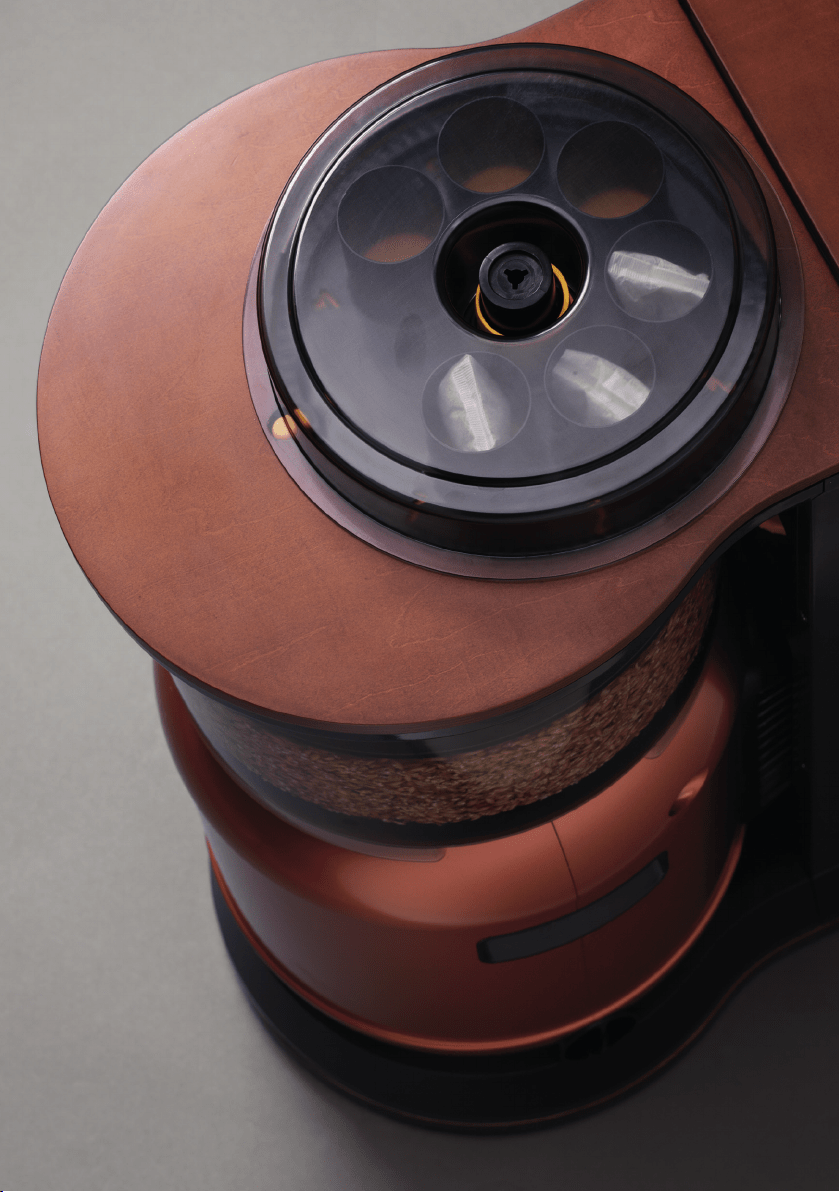
Hop Cover + Hop Carousel
Top Cover
Mash Tun
Top & Bottom Mash Filter
Base station
Status Indicator
Smart Keg
Water Inlet Channel
Water Outlet Channel
Power Cable
Connect Button
Environment Sensor
This product overview shows a complete overview of the MiniBrew appliance and its parts. This overview
explains the position and functionalities of parts in a complete machine.
JJ
KK
LL
BB
HH
II
I
J
K
L
MiniBrew Smart Keg
AA
CC
DD
FF
FF
GG
EE
DD
CC
BB
AA
GG
BB
Keg Valve (open/close)
Keg Posts
Pressure Relief Valve
Keg Lid and Tube
Keg Cooler
WiFi Connect Button
Power Adapter Socket
This product overview shows a complete summary of the MiniBrew Smart Keg and its parts. The Smart Keg works with
the MiniBrew Base Station and its parts
EE
8
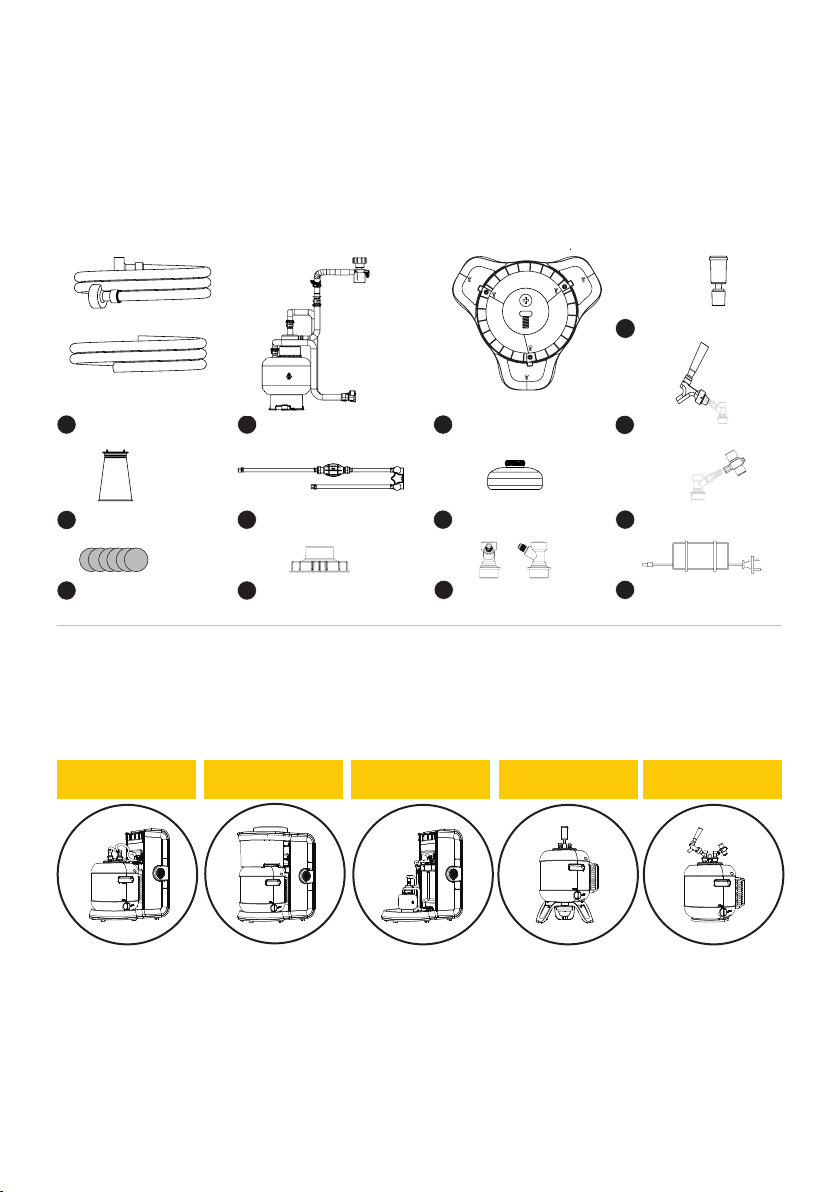
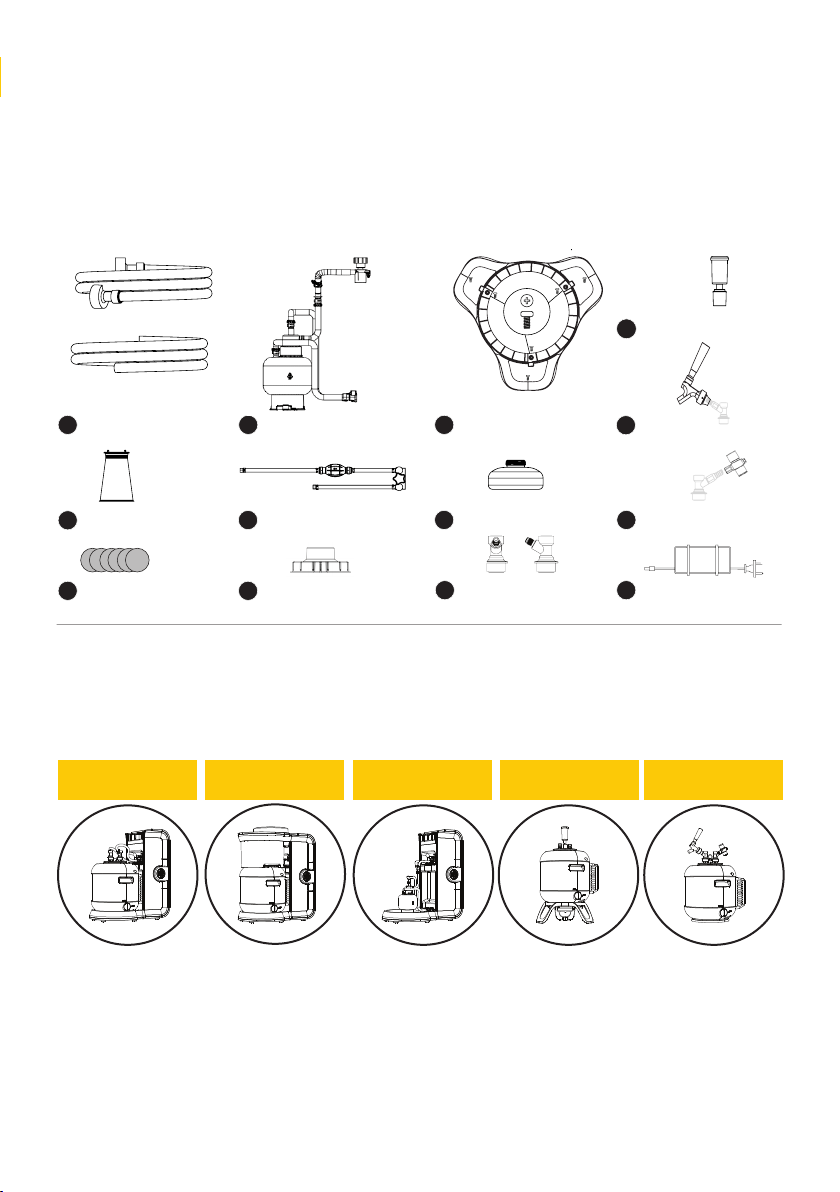
MiniBrew Parts
Remove all parts from the box that you need for brewing. Check all parts for defects before using. The box contains the
following parts:
1
2
3
4 8
6
5
9
10
6x
Water Inlet Tube + Connectors
and Water Outlet Tube.
Keg Rinse Set Contains a Pump
Priming component
6x Hop Disks
Hop Brewing Filter
Mash Tun Filling Cap
Clean in Place Set contains a
Filter + tubes with Connectors
Trub Container
2x Ball Lock Connectors
Airlock + Sleeve
11
12
13
14
Beer Tap
CO
2
Pressure Regulator
Power Adapter + Cord (12Volt)
Assembly setups in the entire proces
In FIVE simple steps, you can build up the Smart Beer Machine to be ready for Rinising, Brewing, Cleaning, Fermentation,
or Tapping. All the parts are present in this box.
A quick rinse before
you start brewing.
Base station, Smart
Keg and Part 1, 5 and
10 required.
A full setup to make
your own beer.
Base station, Smart
Keg and Part 1,2 and 3
required.
Easy way to clean your
device after each brew.
Base station, Smart
Keg and Part 1 and 4
required.
Full setup to control
your fermentation.
Smart Keg and
Part 8, 9, 11 and 14
required.
Enjoy your fresh made
beer. Cheers.
Smart Keg and
Part 10, 12, 13 and 14
required.
9
Keg stand (needs assambly)
3 Parts + 6 Screws
#1 Rinsing #2 Brewing #3 Cleaning #4 Fermenting #5 Tapping
(Ingredients are packed in brew packs which you can order in the MiniBrew app).
Follow 10 simple steps
to set up your first brew
1. Unpack the box by removing one Clean In Place Set
(includes a Container) + one Keg Rinse Set and place
them aside. These parts will be used later in the brewing
process.
2. Take all components from the box and remove
the stickers, protective foil or plastic from the
appliance.
3. Unpack the Mash Tun by unclipping the Mash Tun
Lid. Remove all protective stickers and foil from parts
inside the Mash Tun. Put the Brewing Filter and Filling
Cap aside. These parts will be used later in the brewing
process.
4. Make sure all protective stickers and foil from the Hop
Cover is removed, so the Hop Carousel can turn.
5. Keep the material (plastic bags and cardboard) out of
reach of children.
6. Check the appliance after unpacking for any damage
caused during transport.
7. Place the MiniBrew Base on a level and stable surface
within two meters’ distance of water supply and drain
• Please follow the Clean In Place (CIP) instruction in the MiniBrew app or on our website (Support Center)
• Dilute the sanitizer solution properly as strong sanitizer solution can cause damage to the outside of your Smart Keg
• The ideal conditions for the Smart Keg to operate include an ambient temperature of between 5°C and 22 °C.
• Never immerse the Base Station and Smart Keg in water as the frame and various parts are not waterproof.
• The mash Tun requires a hand wash. Do not put the Mash Tun in the dishwasher
• Do not use dishwasher tablets containing glass cleaners or rinse aids.
• Cleaning and other user maintenance should not be performed by children without supervision.
• When storing the machine, keep in upright position and use the Filling Cap to close the Keg Receiver.
station as a water connection is required.
8. Connect the MiniBrew Base power cord to a power
outlet socket (220-240 Volt 50/60Hz).
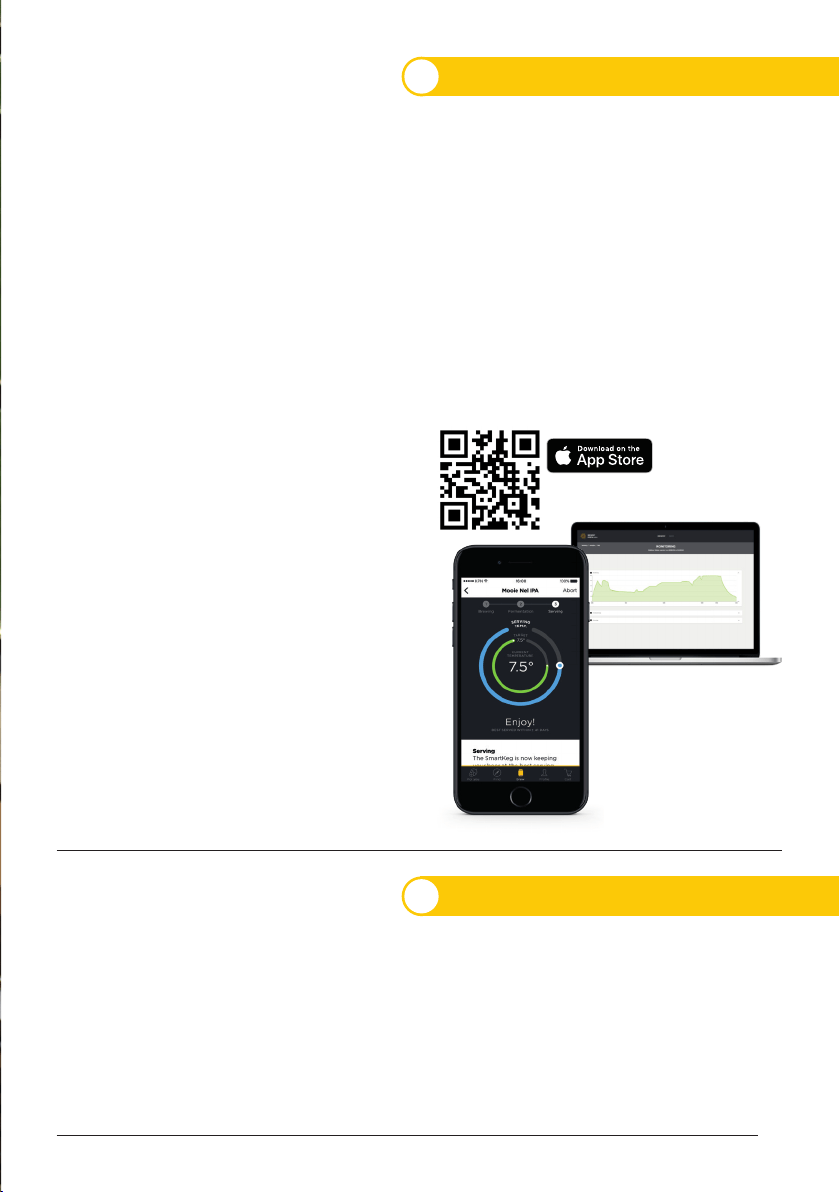
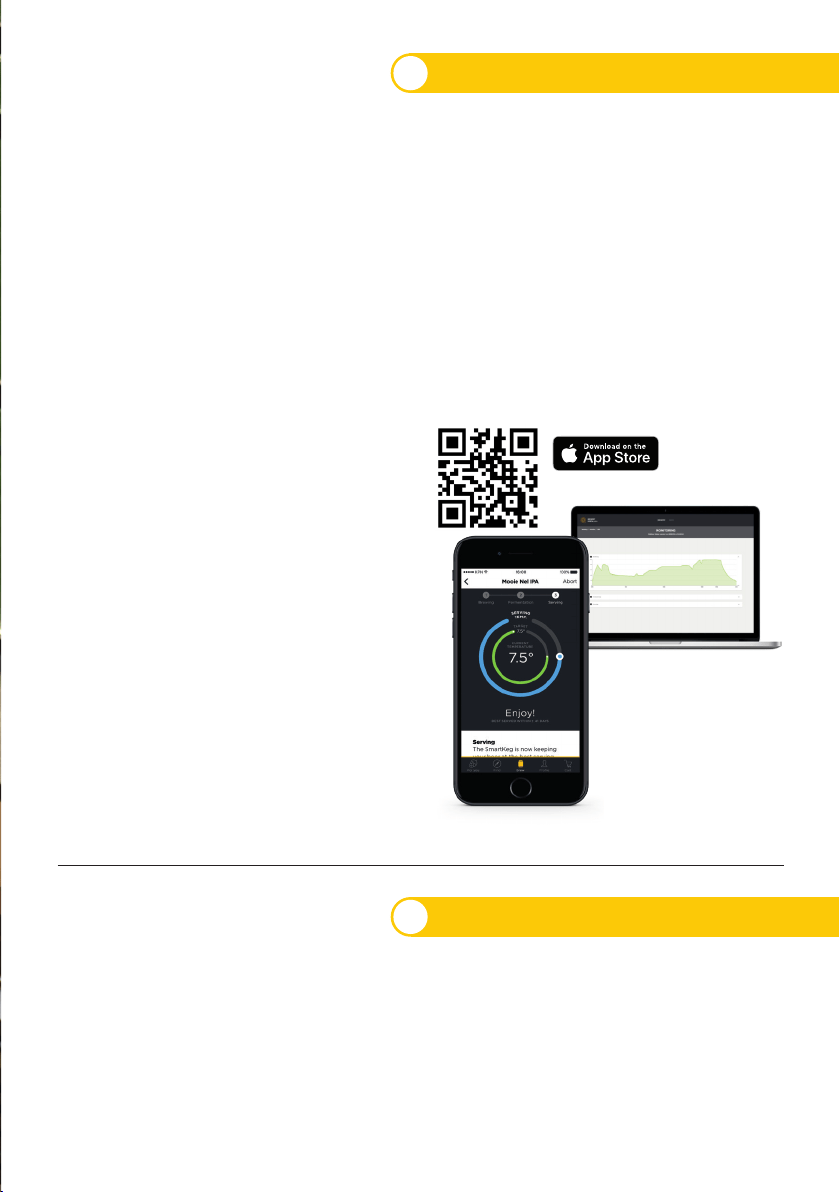
9. Scan the QR code to download the free MiniBrew app.
10. The app or the Brewery Portal will guide you through
assembly and starting a brew session as well as through
connecting your Base Station to your WiFi* network.
*The MiniBrew doesn’t support 5GHz networks.
Cleaning & Maintenance
Getting Started
4
5
11

MiniBrew Bierbrauanlage
1
MiniBrew ist eine automatisierte Bierbrauanlage,
um 5L von deinen Lieblings-Biersorten mit natürlichen
Zutaten zu brauen.
12
Die Zutaten sind in optionalen Braupaketen (Brew Packs) verfügbar und können über die MiniBrew App
bestellt werden).

Sicherheitshinweise
2
Lesen Sie diese Gebrauchsanweisung sorgfältig durch, bevor Sie den Apparat (MiniBrew
Basisstation) in Betrieb nehmen und heben Sie diese für den späteren Gebrauch auf.
14
• Dieser Apparat ist nur dazu bestimmt
im Haushalt verwendet zu werden.
• Lassen Sie den Apparat vor der
Reinigung vollständig abkühlen.
• Achtung! Vermeiden Sie
unbedingt, heiße Oberflächen zu
berühren.
• Die Spannung der Stromquelle
muss mit den Angaben auf dem
Typenschild, auf der Rückseite des
Apparates, übereinstimmen.
• Wenn das Netzkabel dieses
Apparates beschädigt wurde, muss
es durch den Hersteller, seinen
Kundendienst oder eine ähnlich
qualifizierte Person ersetzt werden,
um Gefahren zu vermeiden.
• Bitte ziehen Sie den Netzstecker
niemals am Kabel aus der Steckdose.
• Vergewissern Sie sich, den
Netzstecker immer mit trockenen und
niemals mit nassen Händen aus der
Steckdose zu ziehen.
• Der Apparat darf nicht von Personen
unter 18 Jahren benutzt werden. Er
sollte nicht von Menschen benutzt
werden mit eingeschränkter
physischer, sensorischer oder
mentalen Fähigkeiten.
• Kinder sollten nicht mit dem Gerät
spielen.
• Wenn der Apparat nicht benutzt
oder gereinigt wird, schalten Sie
den Apparat aus und ziehen Sie den
Stecker aus der Steckdose.
• Verwenden Sie zu Ihrer eigenen
Sicherheit nur die Originalteile-
und Zubehörteile des Herstellers,
die ausschließlich für den Apparat
geeignet sind.
• Die Garantie / Sicherheit ist nicht
mehr gewährleistet, nachdem
Teile von Drittanbietern verwendet
wurden.
• Verwenden Sie den Apparat
niemals, wenn er nicht richtig
funktioniert oder wenn er
beschädigt wurde. Es besteht
ein Gefahrenpotential wenn das
Gerät anders benutzt wird, als hier
beschrieben. Jeglicher Eingriff außer
der Verwendung des Apparates
und der normalen Wartung durch
den Kunden, muss von einem
zugelassenen Servicecenter
durchgeführt werden.
• Es ist unbedingt notwendig, den
Apparat stets sauber zu halten,
da er in direkten Kontakt mit
Flüssigkeit kommt.

HF-Ausgangsleistung beträgt 15,3
dBm.
• Vermeiden Sie unbedingt den
Kontakt von Wasser mit elektrischen
Kabeln und Anschlüssen.
• Lagern Sie keine explosiven
Gegenstände wie Spraydosen it
entzündlichen Treibmitteln in diesem
Gerät.
• Drehen Sie das Karussell NICHT,
wenn Sie es auf die Maschine stellen.
Das Drehgetriebe wird dadurch
schwer beschädigt.
15
• Wenn der Apparat für andere
als für die vorgesehenen Zwecke
verwendet wird oder er nicht
gemäß der Kurzanleitung und dem
Benutzerhandbuch in der App
gehandhabt wird, liegt die volle
Verantwortung für eventuelle Folgen
und Schäden beim Kunden.
• Dieser Apparat enthält Batterien.
Der Apparat darf am Ende seiner
Lebensdauer nicht im Hausmüll
entsorgt werden, sondern muss
an einer zentralen Stelle für das
Recycling von elektrischen und
elektronischen Haushaltsgeräten
angeboten werden.
• Wenn die Batterien mit den
chemischen Symbolen Hg, Cd
oder Pb gekennzeichnet sind, liegt
der Quecksilber-, Cadmium- oder
Blei-Gehalt des der Batterien über
den in der EG-Richtlinie 2006/66
festgelegten Referenzwerten.
• Damit das Gerät korrektfunktioniert
muss derWasserdruck
amWassereingangsanschluss (H)
zwischen 15 und 85 psi liegen.
• Bitte verwenden Sie nur Schläuche
und Adapter welche mitgeliefert
worden sind. Benutzen Sie keine
alten gebrauchten Schläuche
wenn Sie neue in der Verpackung
vorfinden.
• Das Frequenzband ist 2400-2483,5
MHz und 13,56 MHz. Die maximale
Produkt Übersicht
MiniBrew Bierbrauanlage
3
AA
CC
DD
EE
FF
F
G
H
E
D
C
B
A
GG
Hopfen-Karussell-Abdeckung
Obere Abdeckung
Maischebehälter
Obere & untere Filterplatten
Basisstation
Statuslicht
MiniBrew Keg
Wasseranschluss Eingang
Wasseranschluss Stroman-
schlusskabel
Verbindungstaste
Umgebungssensor
Diese Produktübersicht zeigt ein komplettes MiniBrew Gerät mit dem mitgelieferten Standardzubehör. Die Übersicht
zeigt die Position und Funktion der einzelnen Teile des Gerätes.
JJ
KK
LL
BB
HH
II
I
J
K
L
MiniBrew Fass (Smart Keg)
AA
CC
DD
FF
FF
GG
EE
DD
CC
BB
AA
GG
BB
Keg Ventil (offen/geschlossen)
NC Ventil
Überdruckventil
Kegdeckel + Schlauch
Keg Kühler
WiFi Verbindungstaste
Stromanschlusskabel Eingang
Diese Produktübersicht zeigt einen kompletten MiniBrew Keg mit dem mitgelieferten Standardzubehör. Der MiniBrew
Keg funktioniert nur mit der MiniBrew Basisstation (E*).
EE
16
MiniBrew Einzelteile
Entfernen Sie alle MiniBrew Einzelteile , die zum Brauen benötigt werden, aus der Box. Überprüfen Sie vor der
Verwendung alle Teile auf Mängel. Die Box enthält die folgenden Einzelteile.
1
2
3
4 8
6
5
9
10
6x
Wasserzulaufschlauch (Hoch-
druck) + Wasserablaufschlauch
Keg Spülsystem
6 gelbe Hopfenscheiben
Hopfen Filter
Maischebehälter
Fülldeckel
Reinigungssystem mit Filter +
Schläuchen mit Kupplungen
Hefe Behälter
2 NC Ventilkupplungen
Gärspund
11
12
13
14
Zapfhahn
CO
2
regulator
Stromadapter + Kabel (12Volt)
Konfiguration der einzelnen Prozessschritte
In fünf einfachen Schritten können Sie die Brauanlage so konfigurieren das sie bereit ist ist zum
Spülen, Brauen, Reinigen, Gären und Zapfen. Alle Teile sind in dieser Box vorhanden.
Eine schnelle Spülung,
bevor Sie mit dem
Brauen beginnen.
Bierbrauanlage,
Keg und Einzelteile 1,
5 und 10 benötigt.
Ein komplettes Setup,
um Ihr eigenes Bier zu
machen.
Bierbrauanlage,
Keg und Einzelteile 1,
2 und 3 benötigt.
Einfache Möglichkeit,
Ihr Gerät nach jedem
brauen zu reinigen.
Bierbrauanlage,
Keg und Einzelteile 1
und 4 benötigt.
Vollständiges Setup
zur Kontrolle Ihrer
Gärung.
Keg und Einzelteile 8,
9, 11 und 14
benötigt.
Genießen Sie Ihr
frisch hergestelltes
Bier. Prost!
Keg und Einzelteile 10,
12, 13 & 14 benötigt.
17
Fass Ständer(muss
zusammenge-baut werden) 3
Ständerteile + 6 Schrauben
#1 Spülen #2 Brauen #3 Reinigung #4 Gären #5 Zapfen

(Die Zutaten sind in optionalen Braupaketen (Brew Packs) verfügbar und können über die MiniBrew app
bestellt werden).
Folgen Sie 10 einfachen Schritten um
mit dem Brauen beginnen zu
können
1. Nehmen Sie die Basisstation sowie die 2
Reinigungssyteme aus der Verpackung. Diese werden
später im Brau-Prozess benötigt
2. Entnehmen Sie das gesamte Zubehör aus der Box und
entfernen Sie die Sticker und Schutzfolien von dem Gerät.
3. Entnehmen Sie den Maischebehälter indem Sie die
Clips auf der Seite des Deckels entriegeln. Entfernen Sie
alle Sticker und Schutzfolien innerhalb des
Maischebehälters. Legen Sie den Hopfenfilter und den
Fülldeckel zur Seite, diese Teile werden später im
Brauprozess benötigt.
4. Stellen Sie sicher, dass alle Schutzfolien und Sticker
der Hopfenkarusselabdeckung entfernt sind, damit sich
das Hopfenkarussell drehen kann.
5. Stellen Sie sicher, dass das Verpackungsmaterial
(Plastiktüten und Kartonagen) außer Reichweite von
Kindern sind.
6. Prüfen Sie die Basisstation nach dem Auspacken auf
Transportschäden.
7. Stellen Sie die Basisstation auf eine ebene und stabile
Oberfläche iin einem Abstand von 2 Metern zum
raumseitigen Wasseranschluss/ablauf.
• Bitte befolgen Sie das Reinigungsprogramm (CIP = Clean In Place) wie in der App oder auf unserer Webseite erläuter
• Verdünnen Sie das Desinfektionsmittel nach Anleitung, in konzentrierter Form kann er den Keg beschädigen
• Die idealen Betriebsbedingungen für den MiniBrew Keg sind Temperaturen zwischen 5°C und 22°C.
• Tauchen Sie die Basisstation niemals in Wasser, das Gehäuse und verschiedenen Teile sind nicht wasserdicht.
• Der Maischebottich erfordert eine Handwäsche, bitte nicht in die Spülmaschine legen.
• Benutzen Sie niemals Geschirrspül-Tabs mit Zusätzen von Glasreiniger oder Klarspüler.
• Die Reinigung und andere Instandhaltungs-Prozeduren sollen nicht von Kindern ohne entsprechende Aufsicht erfolgen.
• Bei der Lagerung der Basisstation ist eine aufrechte Position erforderlich.
8. Verbinden Sie das Netzkabel mit der Steckdose
(220- 240Volt 50/60Hz).
9. Scannen Sie den mitgelieferten QR Code, um die App
herunterzuladen.
10. Die App order Desktop wird Ihnen dabei helfen, mit
demBrauen zu beginnen und die Basistation zu Ihrem
WiFi* Netzwerk hinzuzufügen.
*MiniBrew unterstützt keine 5-GHz-Netzwerke.
Erste Schritte
Reinigung & Instandhaltung
4
5
19

Discover. Brew. Share.
WWW.MINIBREW.IO