Loading ...
Loading ...
Loading ...
11
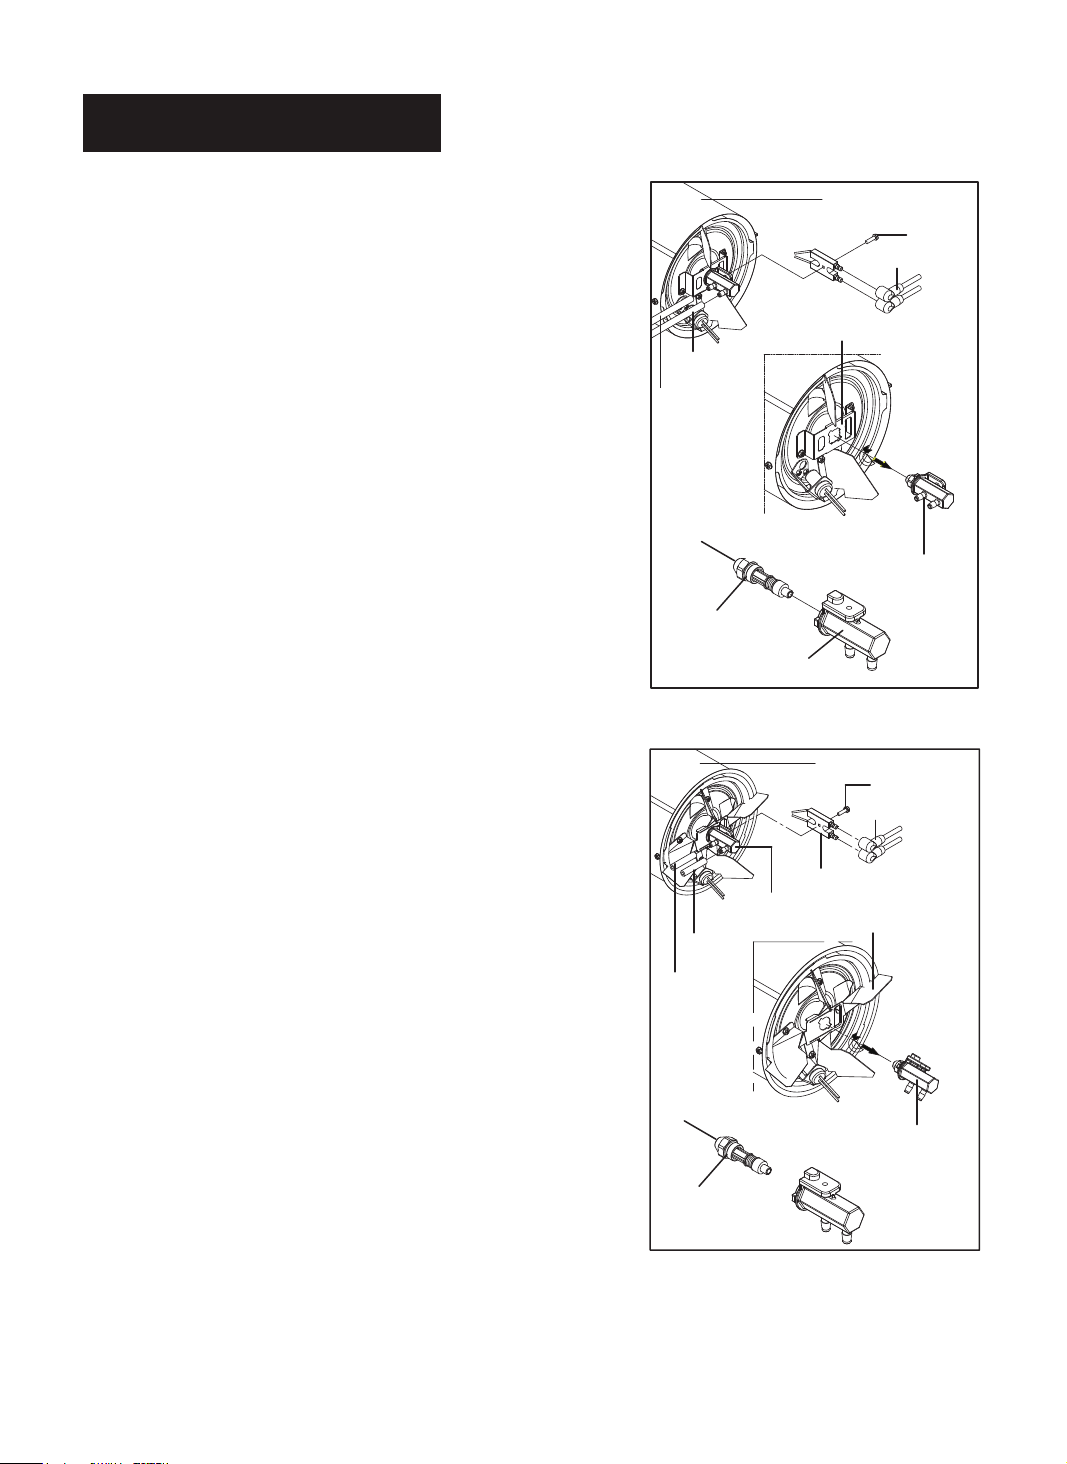
E.) NOZZLE
REMOVE DIRT IN NOZZLE AS NEEDED (SEE PAGE 16).
(For KFA50DGD/80DGD/135DGD/180DGD Models Only)
- Remove upper shell (See page 10).
- Remove fan blade (See page 10).
- Remove fuel and air line hoses from nozzle adaptor.
- Remove ignitor wire from spark plug.
- Remove spark plug from nozzle adaptor using medium
phillips screwdriver.
- Turn nozzle adaptor 1/9 turn(40°) to counter clock wise
and pull toward motor to remove. (See Figure 14)
- Place plastic hex-body into vise and lightlry tighten.
- Carefully remove nozzle from nozzle adaptor using 5/8”
socket wrench.
- Blow compressed air through face of nozzle.
(this will remove any dirt in nozzle)
- Reinstall nozzle into nozzle adaptor until nozzle seats.
Tighten 1/3 turn more using 5/8” socket wrench.
(40~45 inch-pounds)
- Reinstall nozzle adaptor to Bracket-Adaptor.
- Reinstall spark plug to nozzle adaptor.
- Attach ignitor wire to spark plug.
- Attach fuel and air line hoses to nozzle adaptor.
- Reinstall fan blade and upper shell.
(For KFA220DGD Model Only)
- Remove upper shell (See page 10).
- Remove fan (See page 10).
- Remove fuel and air line hoses from nozzle adaptor.
- Remove ignitor wire from spark plug.
- Remove spark plug from nozzle adaptor using medium
phillips screwdriver.
- Turn nozzle adaptor 1/8 turn (45°) to counter clock wise
and pull toward motor to remove. (See Figure 15)
- Place plastic hex-body into vise and lightly tighten.
- Carefully remove nozzle from nozzle adaptor using 5/8”
socket wrench.
- Blow compressed air through face of nozzle.
(this will remove any dirt in nozzle)
- Reinstall nozzle into nozzle adaptor until nozzle seats
Tighten 1/3 turn more using 5/8” socket wrench
(40~45 inch-pounds)
- Reinstall nozzle adaptor to burner bracket
- Reinstall spark plug to nozzle adaptor.
- Attach ignitor wire to spark plug.
- Attach fuel and air line hoses to nozzle adaptor.
- Reinstall fan blade and upper shell.
rmly (40-50 inch-pounds/4.5-5.6 N-m).
- Reinstall upper shell.
NEVER LEAVE THE HEATER
UNATTENDED WHILE BURNING!
Figure 15. Nozzle Replacement
Figure 14. Nozzle Replacement
Combustion Chamber
Nozzle
Nozzle Adaptor
Nozzle Face
Screw
Ignitor Wire
Fuel Line
Air Line
Bracket-Adaptor
Nozzle Adaptor
Fuel Line
Air Line
Nozzle Adaptor
Combustion Chamber
Screw
Ignitor Wire
Spark Plug
Bracket-Burner
Nozzle Adaptor
Nozzle Face
Nozzle
Nozzle Adaptor
Loading ...
Loading ...
Loading ...