Loading ...
Loading ...
Loading ...
34 35
OPERATING YOUR BREVILLE SMART OVEN™ - PIZZAOPERATING YOUR BREVILLE SMART OVEN™ - BROIL
NOTE
When using metal foil to cover
accessories, pans, and dishes, it is
recommended that the wire rack be in
the middle or bottom location.
NOTE
It may be necessary to lightly grease
or line the enamel baking pan with
baking paper or foil to prevent food from
sticking.
NOTE
Caution should be exercised when using
pans and dishes constructed of materials
other than metal. If using ceramic or
glass pans or dishes it is important that
they are oven safe to prevent cracking.
NOTE
Caution should be exercised when using
lids in the oven, as pressure build up
in a covered pan or dish may cause hot
ingredients to expel or the dish to crack.
3. Close the oven door.
WARNING
Always ensure the oven door is
completely Closed when using the
BROIL function.
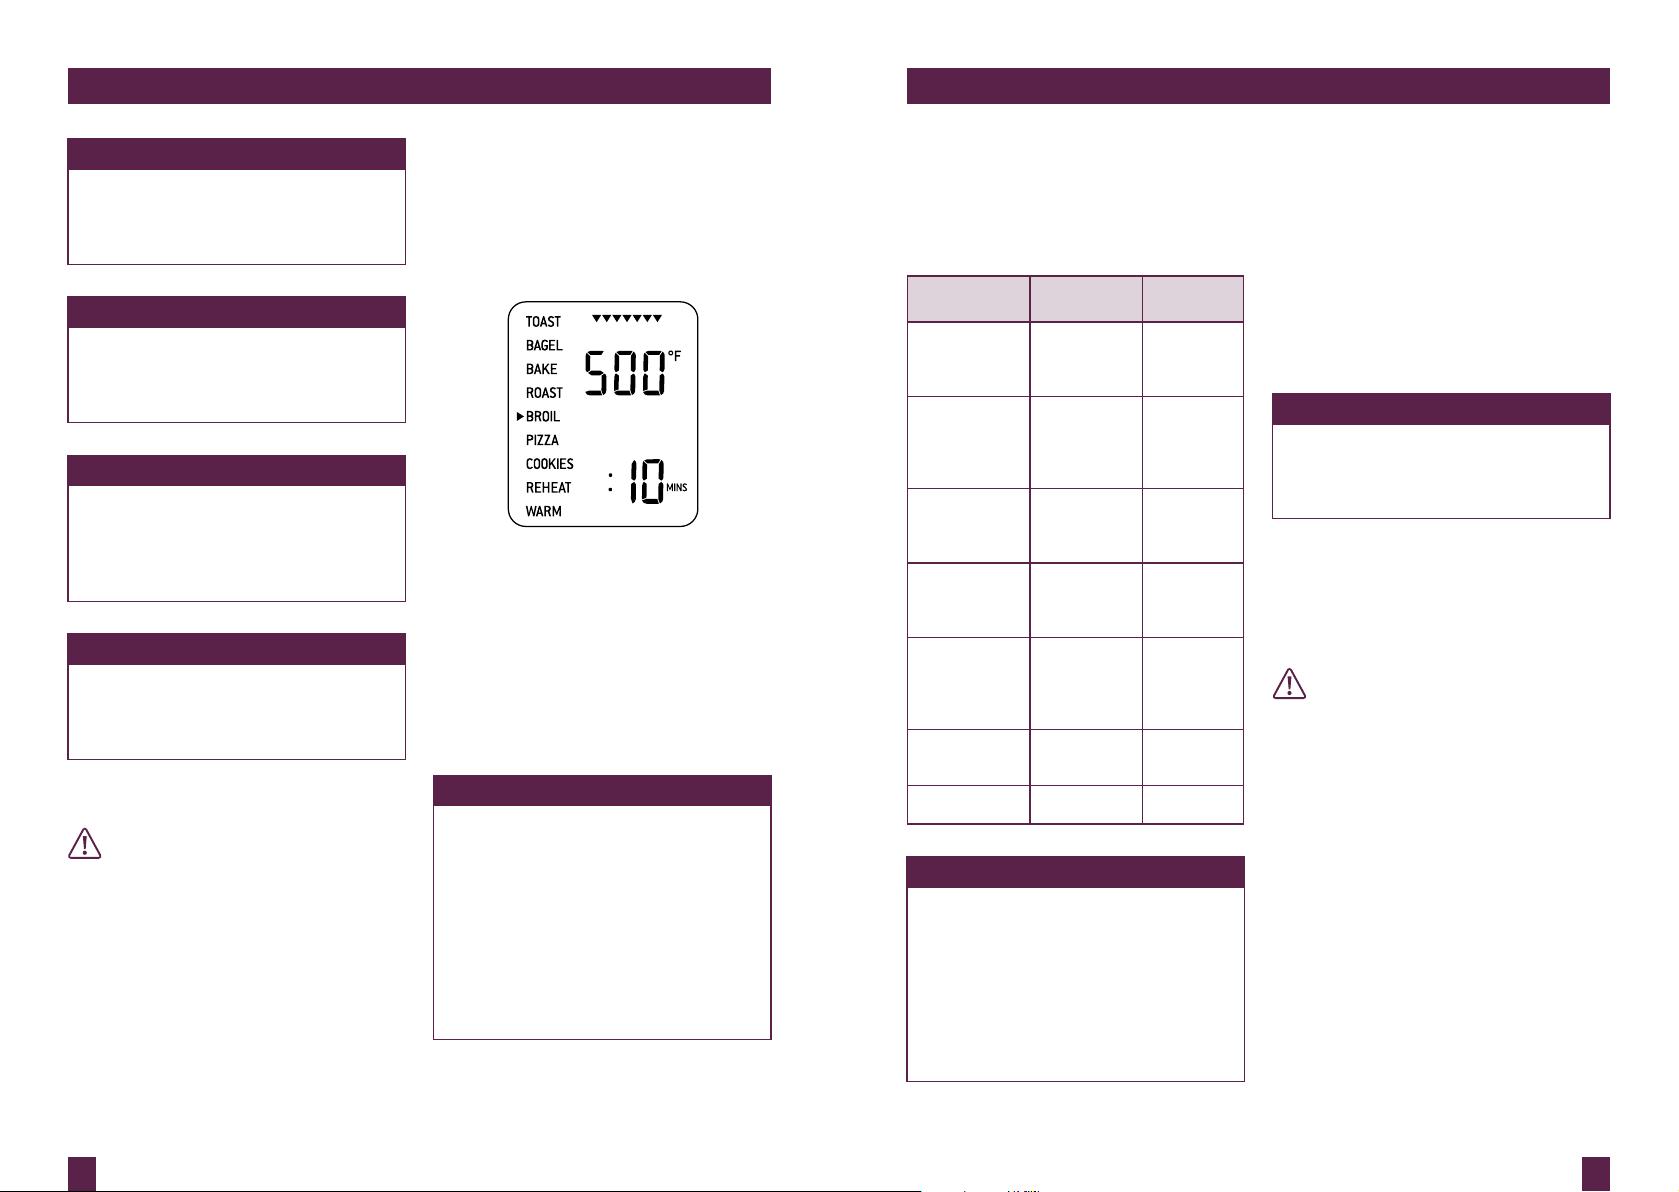
4. Turn the FUNCTION dial until the
indicator on the LCD screen reaches
the BROIL function. The top figure on
the LCD screen indicates the preset
temperature of ‘500°F’, while the bottom
figure on the LCD screen indicates the
preset time of ‘:10 MINS’.
5. The broiling temperature and time
can be adjusted before or during the
broiling cycle.
a) The broiling temperature is displayed as
the top figure on the LCD screen.
Turn the TEMPERATURE DIAL to
adjust broiling to one of three preset
temperatures: 500°F (HIGH), 400°F
(MEDIUM), 300°F (LOW).
NOTE
The three preset broiling temperatures
allow you to change the broiling
speed – how quickly the tops of your
food brown - depending on the food
to be broiled, quantity of food and
your personal taste. While we suggest
most foods should be broiled using
the preset 500°F, we recommend
experimenting with the broiling
temperature and time settings to
produce the desired results.
b) The broiling time is displayed as the
bottom figure on the LCD screen.
Turn the TIME dial to adjust the broiling
time in one minute increments up to a
maximum of 20 minutes.
TYPE/CUT WEIGHT /
THICKNESS
GRILLING
TIME
Beef
Sirloin
Hamburger
1” (2.5cm)
1” (2.5cm)
12-15 mins
10-15 mins
Pork
Chops
Ribs
Bacon
1” (2.5cm)
1 rack
3 rashers
15 mins
20 mins
10 mins
Lamb
Neck chops
Cutlets
4 pieces
8 pieces
15 mins
10-12 mins
Sausages
Thin
Thick
8 pieces
6 pieces
8 mins
12 mins
Chicken
Wings
Breast or
Thigh
1lb (500g)
0.5lbs (250g)
12-15 mins
20 mins
Fish 0.5lbs (250g)
1lb (500g)
8 mins
8-10 mins
Cheese Melt 3-5 mins
NOTE
Your customized BROIL temperature
and time settings will remain in the
memory of the oven until you change
them or unplug the oven from the
wall outlet. When the oven is plugged
back into the wall outlet, the BROIL
function will automatically return to
the preset temperature of ‘500°F’, and
preset time of ‘:10MINS’.
6. Press the START/CANCEL button
to activate this setting. The button
surround will illuminate red, the oven
alert will sound and the LCD screen will
illuminate orange.
7. The timer will be displayed and
begin to count down in one minute
increments. The temperature and time
can be adjusted during the broiling
cycle by turning the corresponding
TEMPERATURE and TIME dial.
NOTE
Depending on the food being broiled,
it may be necessary to turn food over
half way through the cooking time to
achieve even cooking and browning.
8. At the end of the broiling cycle, the
oven alert will sound three times.
The START/CANCEL button surround
will no longer illuminate red and LCD
screen will illuminate blue.
WARNING
The outer surface of the oven,
including the oven door, is hot during
and after operation. Always use
protective hot pads or insulated oven
mitts when inserting, removing or
handling items from the oven.
9. The broiling cycle can be stopped at any
time by pressing the START/CANCEL
button. This will cancel the cycle. The
button surround illumination will go out
and the LCD screen will illuminate blue.
Loading ...
Loading ...
Loading ...