Loading ...
Loading ...
Loading ...
30
|
INSTALLATION / USE & CARE
Rotisserie cooking
provides an even
delivery of heat to
your foods. It has no
equal. The constant
rotation not only cooks foods evenly, it also self bastes. As juices
rise to the surface of the food, they naturally ow around it
as it rotates. And, by moving the burner out from beneath the
food, you avoid scorching are-ups.
Your foods will be more evenly
cooked, more tender and juicier
when slow-roasted on a rotisserie.
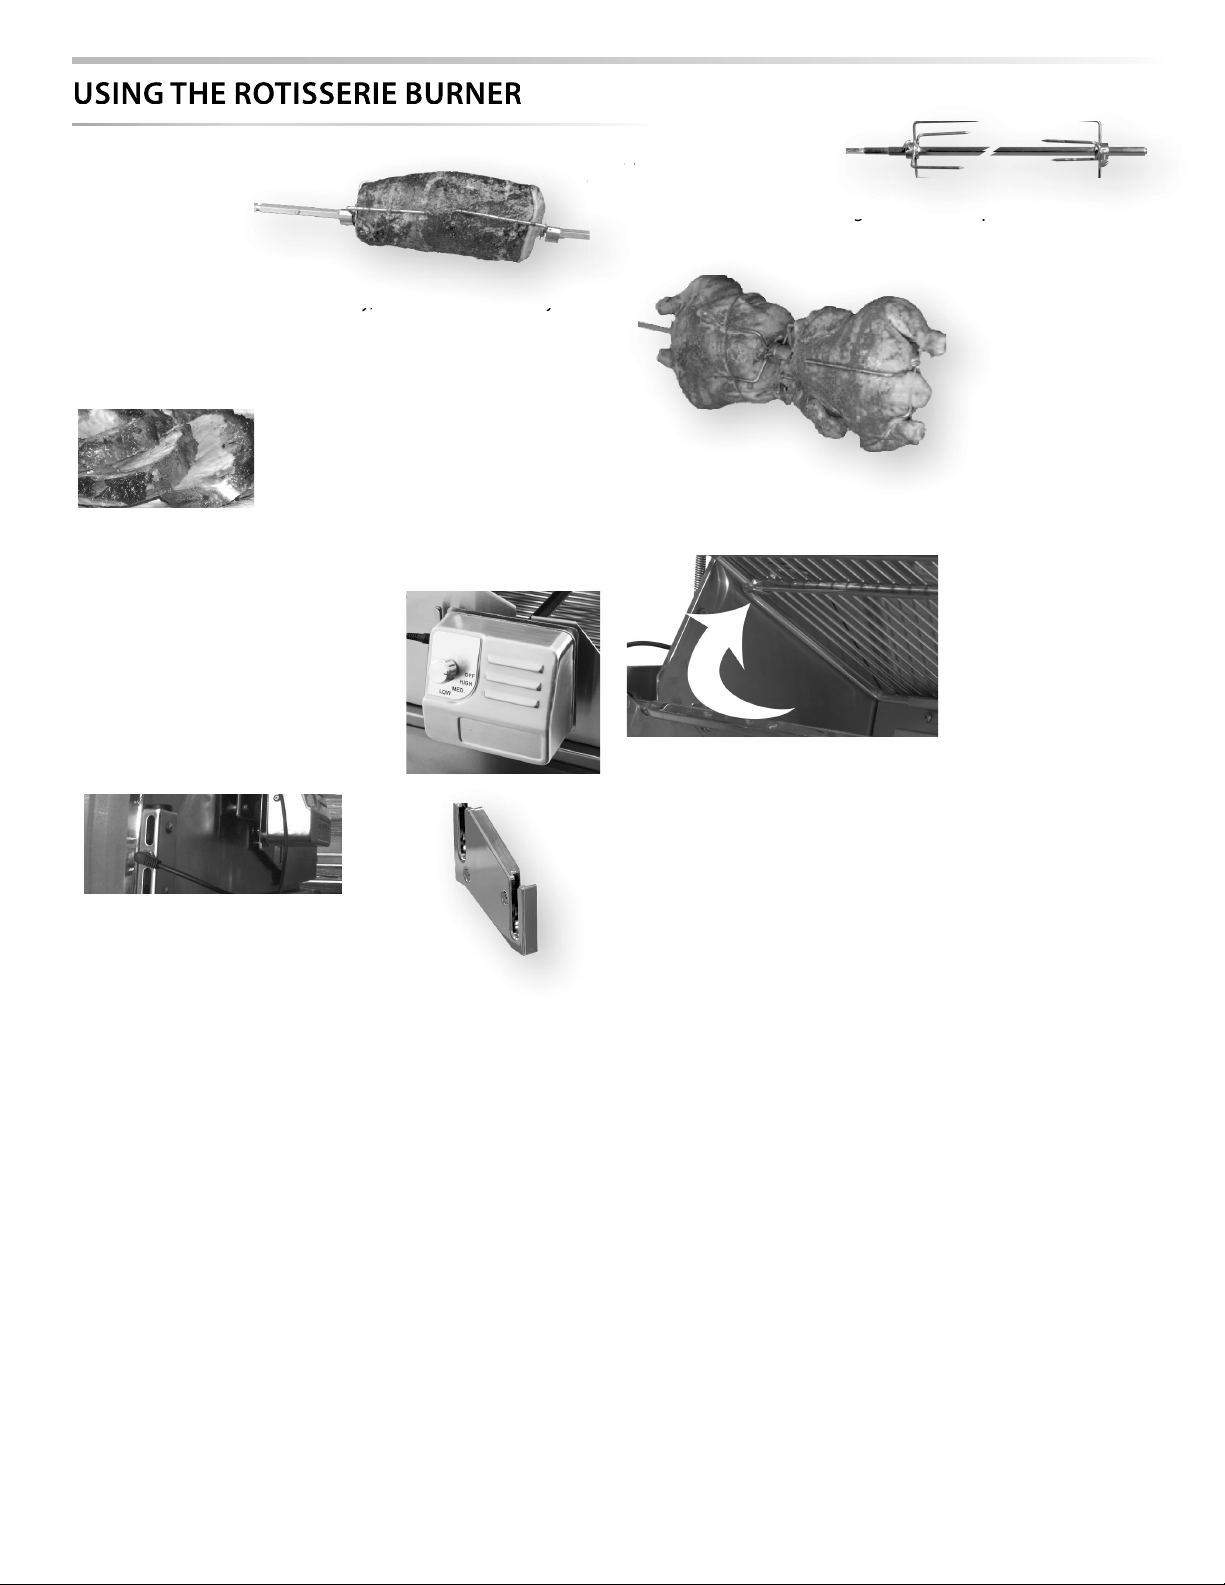
The rotisserie system consists of four
main parts, the motor, the skewer, the forks and the infrared
burner.
The Motor
Install the motor by sliding it into one
of the slots shown here. Use the top slot
for small foods or fast cooking and the
lower slot for large foods and slower
cooking.
Plug the motor power cord into the mo-
tor and into the built-in power outlet
on the rear left panel. Your grill must be
plugged into an AC power supply for
the rotisserie to work.
Place a basting pan in the grill to prevent food accumulations
on the briquettes and burners. But BE SURE YOU REMOVE IT
before using any of the other burners.
The location of the rotisserie burner makes it more susceptible
to strong wind conditions (more so than the main grill burners).
For this reason it features a safety valve that automatically closes
any time the rotisserie burner is not properly lit … like if it were
to extinguish in windy conditions. During windy conditions, it’s
best to keep the lid closed and to periodically check the burner.
When the rotisserie is not in use the rotisserie motor should be
stored in a cool dry location.
The Skewer & Forks
The rotisserie can handle large food items up to 50 lbs. You
should prepare any item and rst mount it on the skewer.
Swing the warming rack up and out of the way. It will rest in
place.
Then mount the skewer on the grill before lighting the rotis-
serie infrared burner. Lighting the burner rst could result in
burning your hands while trying to mount the skewer on the
grill.
It’s okay to remove the grill racks and even the briquette trays to
make room for large foods on the skewer.
To load the skewer, slide one of the forks onto the skewer. Push
the skewer through the center of the food, then slide the second
fork onto the skewer. Center the food to be cooked on the
skewer then push the forks rmly together. Tighten the thumb
screws (use pliers if necessary). You should wrap any loose, dan-
gling pieces of food (like wings) with butcher’s string (never use
nylon or plastic string).
With the food secured to the skewer slowly roll the skewer in
the palms of your hands to check for balance. It should rotate
smoothly. If you nd it has a heavy side, adjust where the skewer
pierces the meat. An unbalanced skewer will cause uneven rota-
tion and uneven cooking. It’s normal for the skewer to ex with
large foods.
o
o
ks foods evenl
y,
it also self bastes. As
j
uices
T
T
s
h
la
rg
e food items u
p
to 50 lbs. You
Swing the warming rack up and out o
f
the w
a
Rotisserie
Motor Mount
Loading ...
Loading ...
Loading ...