Loading ...
Loading ...
Loading ...
en Time-setting options
16
Removing the rotisserie spit
:Warning – Risk of burns!
Never touch the hot surfaces of the cooking
compartment or the heating elements. Children must be
kept at a safe distance from the appliance at all times.
Open the appliance door carefully. Hot steam may
escape.
:Warning – Risk of burns!
Never directly touch the rotisserie spit or other
accessories when they are hot. Always use a pot holder
or wear oven gloves to handle accessories when they
are hot.
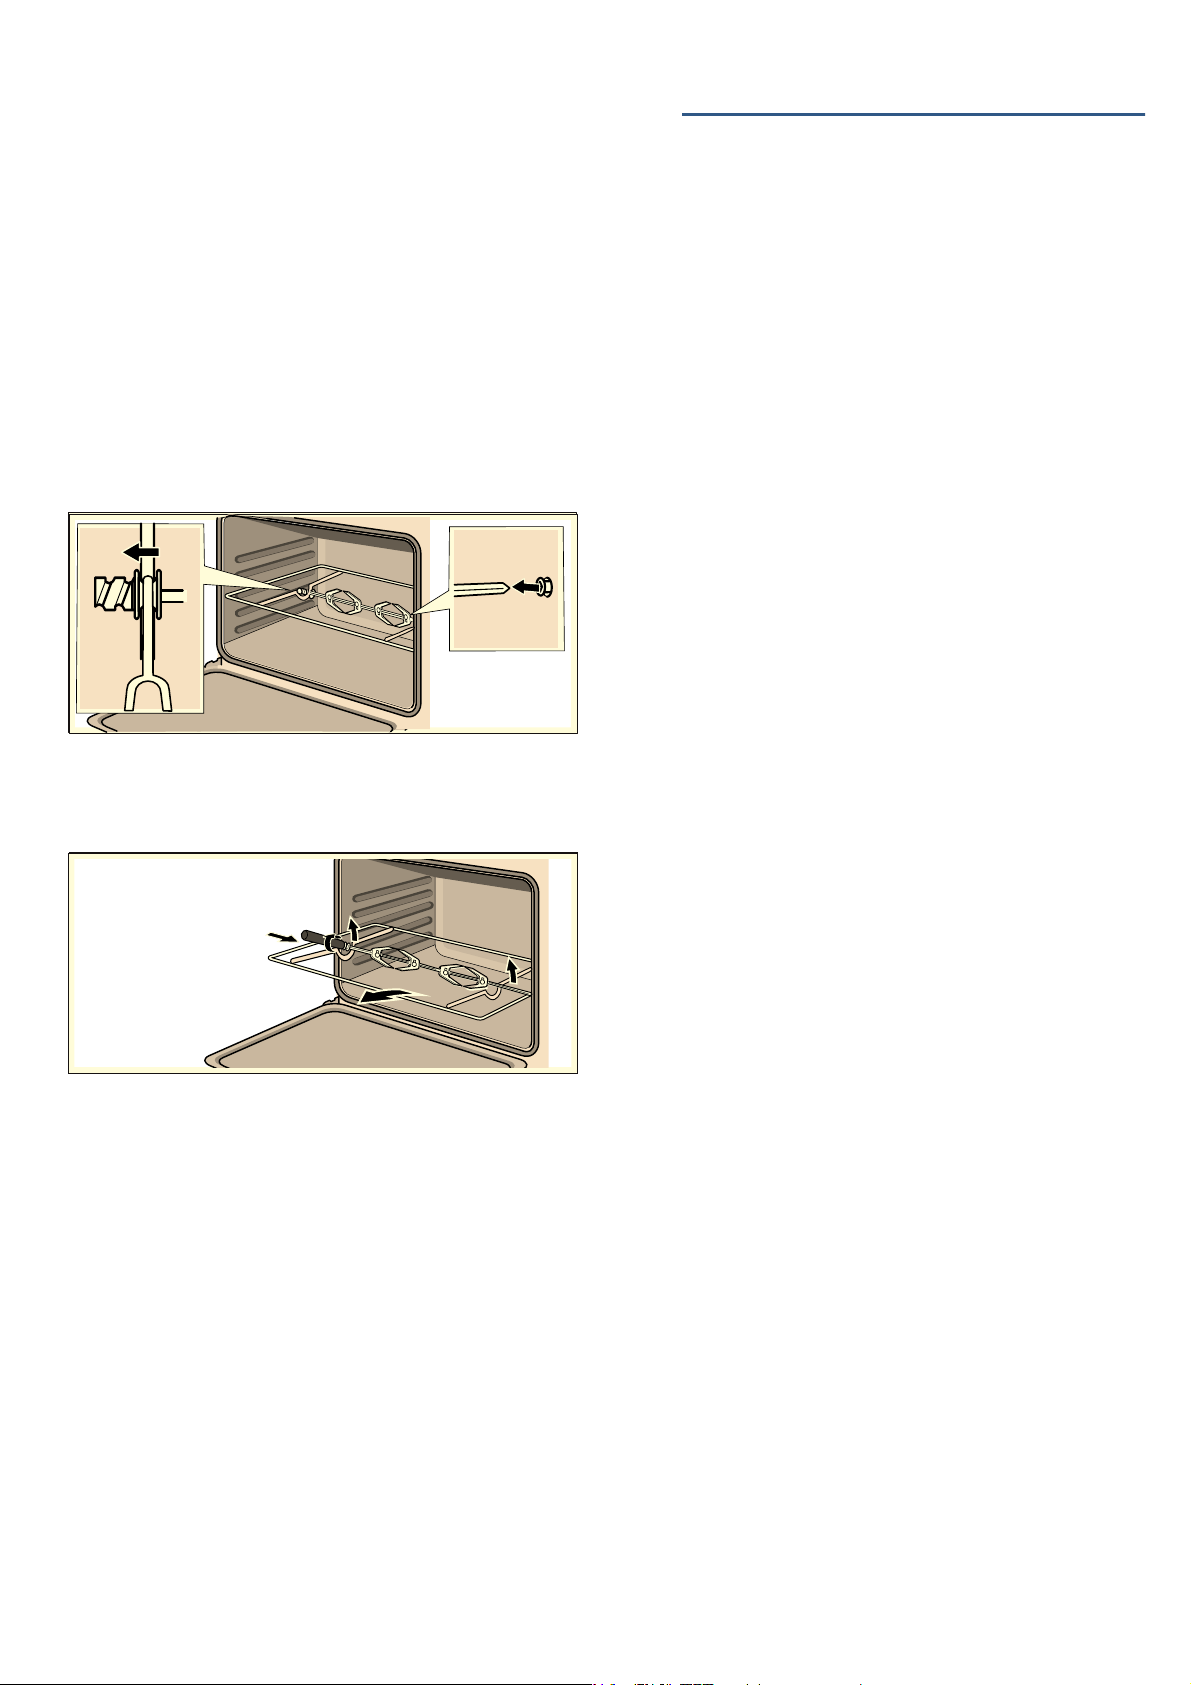
1. Open the appliance door carefully.
2. Pull the rotisserie spit rack with the metal frame to
the left and out of the motor adaptor.
3. Pull the rotisserie spit rack out of the oven as far as
possible.
4. Hold the rotisserie spit on the right-hand side with a
pot holder and screw the grill onto the rotisserie spit.
5. Carefully lift the rotisserie spit off the rotisserie spit
rack.
6. Remove the rotary spit rack and the baking tray from
the oven.
OTime-setting options
Ti me- set t i ng opt i ons
Setting the clock
Once the appliance has been connected to the mains
or after a power cut, the "A" symbol and "12:00" will
flash in the display. The current time must be set in
order for the oven to be switched on.
1. Press the "+" and "-" buttons at the same time or just
press the "Mode" button. The Û symbol will appear
in the display. Setting mode is active once the Ú
symbol starts flashing.
2. Use the "+" and "-" buttons to set the current time.
If the buttons are not pressed for a long time, the
symbols will stop flashing and the display will show the
set time.
Note: The function selector, the temperature selector
and the clock must be set before using the oven.
Otherwise the oven will not switch on.
Button lock
The digital timer has an automatic button lock. If the
timer is inactive for at least 10 seconds, the button lock
is activated automatically. The ó symbol will be shown
on the display while the button lock is active.To disable
the button lock, press and hold the "Mode" button for 2
seconds.
Setting the timer
The timer has no effect on how the oven works. The
timer can be set between 1 minute and 23 hours and
59 minutes.
1. Press and hold the "Mode" button for 2 seconds to
disable the button lock. The V symbol will flash in
the display.
2. Use the "+" and "-" buttons to set the required time. If
the buttons are not pressed for a long time, the
symbols will stop flashing and the display will show
the current time.
3. An audible signal will sound once the time has
elapsed. Press the "Mode" button to switch off the
timer.
Semi automatically programming the cooking time
A different cooking time can be set for each item of
food in the oven. The oven will switch off automatically
at the end of the cooking time. This means that you do
not have to stop what you are doing to switch off the
oven, and prevents the food from accidentally being
cooked for too long.
1. Use the function selector to set the type of heating.
2. Use the temperature selector to set the temperature.
3. Press and hold the "Mode" button for 2 seconds to
disable the button lock.
4. Press the "Mode" button repeatedly until "dur"
appears in the display. When "dur" appears,
indicator "A", "00:00" and the z symbol will flash in
the display.
5. Use the "+" and "-" buttons to set the cooking time.
6. Once this has been set, the current time, the "A"
symbol and the z symbol will light up permanently
in the display. The oven heats up.
Loading ...
Loading ...
Loading ...