Loading ...
Loading ...
Loading ...
Getting Started10
Getting Started
1
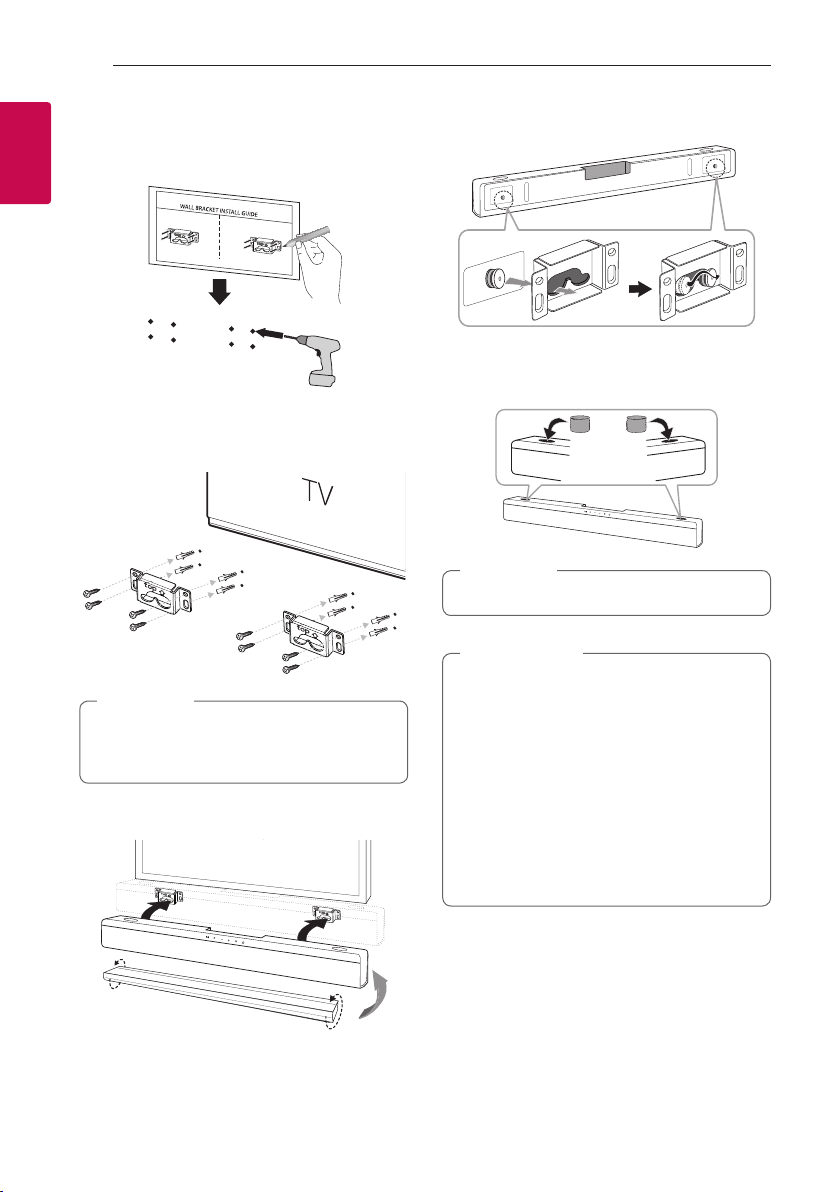
2. When you mount it on a wall (concrete), use the
wall plugs. You should drill some holes. A guide
sheet (Wall bracket install guide) is supplied to
drill. Use the sheet to check the point to drill.
3. Remove the Wall bracket install guide.
4. Fix the brackets with screws (A) as shown in the
illustration below.
Screws (A) and Wall Plugs are not supplied for
mounting the unit. We recommend the Hilti
(HUD-1 6 x 30) for the mounting.
,
Note
5. Connect the botton of the unit faced with the
brackets on the wall.
6. Fix the hooks of the unit on the brackets as
shown below.
7. If you want to protective inflow of foreign
substance, insert foreign substance-protective
sponge as shown below (optional).
To detach the unit, perform it in reverse order.
,
Note
y
Do not install this unit upside down. It can
damage the parts of this unit or be the cause
of personal injury.
y
Do not hang onto the installed unit and avoid
any impact to the unit.
y
Secure the unit rmly to the wall so that it
does not fall off. If the unit falls off, it may
result in an injury or damage to the product.
y
When the unit is installed on a wall, please
make sure that a child does not pull any of
connecting cables, as it may cause it to fall.
>
Caution
Loading ...
Loading ...
Loading ...