Loading ...
Loading ...
Loading ...
4
Electrical Requirements
It is important to make sure you have the proper electrical
connection:
A 120 V, 60 Hz, AC only 15 A electrical supply, properly grounded
in accordance with the National Electrical Code and local codes
and ordinances, is required.
It is recommended that a separate circuit, serving only your
warming drawer, be provided.
Grounding Instructions
This appliance shall be grounded while in use to protect the
operator from electrical shock. The appliance is equipped with
a 3-conductor cord and a 3-prong grounding-type plug to t the
proper grounding-type receptacle. Plug into a GFCI-protected
outdoor receptacle, where available.
WARMING DRAWER USE
Before using the warming drawer for the rst time, remove all
stickers placed on the front and door of the warming drawer
except the serial plate. Clean the surface with a damp cloth and
then wipe it dry.
Odors and smoke are normal when the warming drawer is used
the rst few times, or when it is heavily soiled.
Push the middle of the warming drawer panel to open or close the
warming drawer.
NOTE: The maximum load capacity of the warming drawer is
55lbs (25 kg).
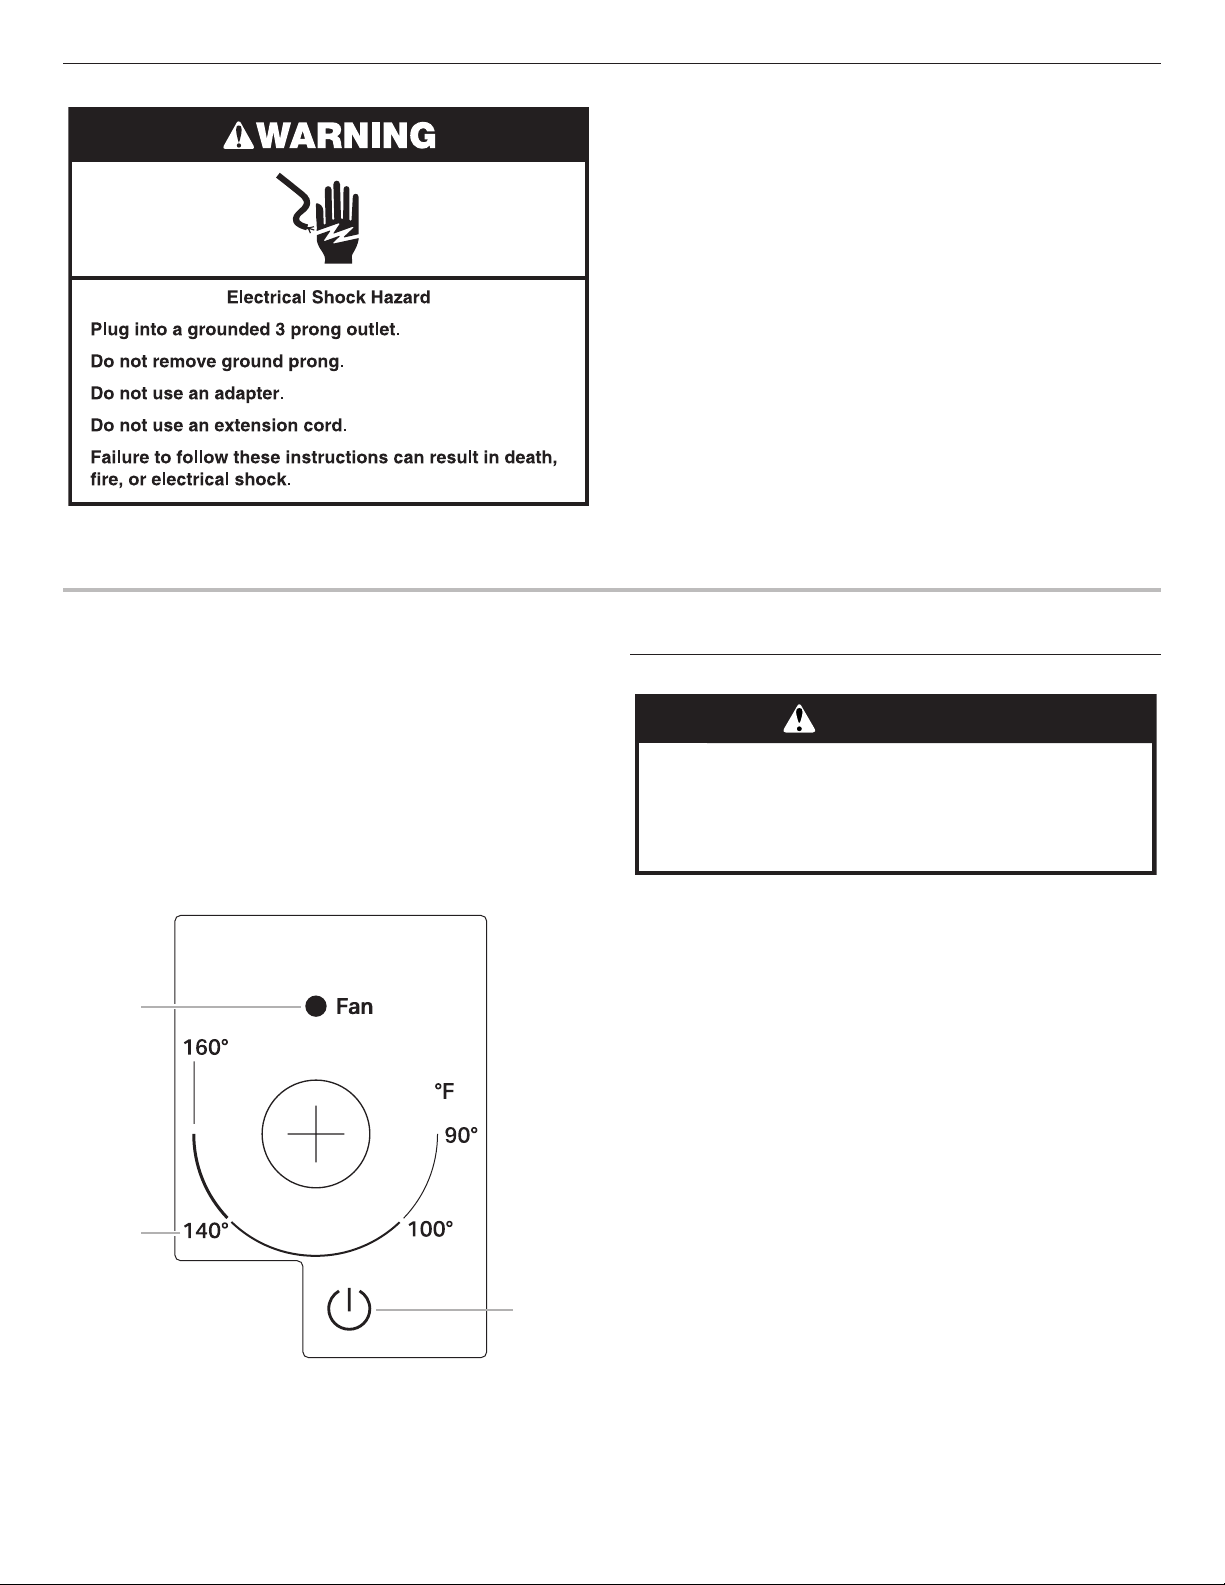
Control Panel
Control Knob
Push in and turn the control knob to the desired setting and then
press the red power on/off button. A red light will turn on and will
remain on throughout use.
Turn the control knob to the Fan position and press the red power
On/Off button when nished to turn the Warming Drawer off.
The temperature is controlled by rotating the control knob to the
desired setting. The temperature setting ranges from 90°F to
160°F on the warming drawer control to keep heated foods warm
at the selected temperatures.
A
B
C
A. Fan Setting
B. Temperature control zone
C. Power On/Off indicator
WARNING
Food Poisoning Hazard
Do not let food sit for more than one hour before or
after cooking.
Doing so can result in food poisoning or sickness.
Loading ...
Loading ...
Loading ...