Loading ...
Loading ...
Loading ...
12
Using Bridge Mode
You can combine (bridge) the left-hand front/rear cook zones into a tandem unit to accommodate a griddle or rectangular cookware.
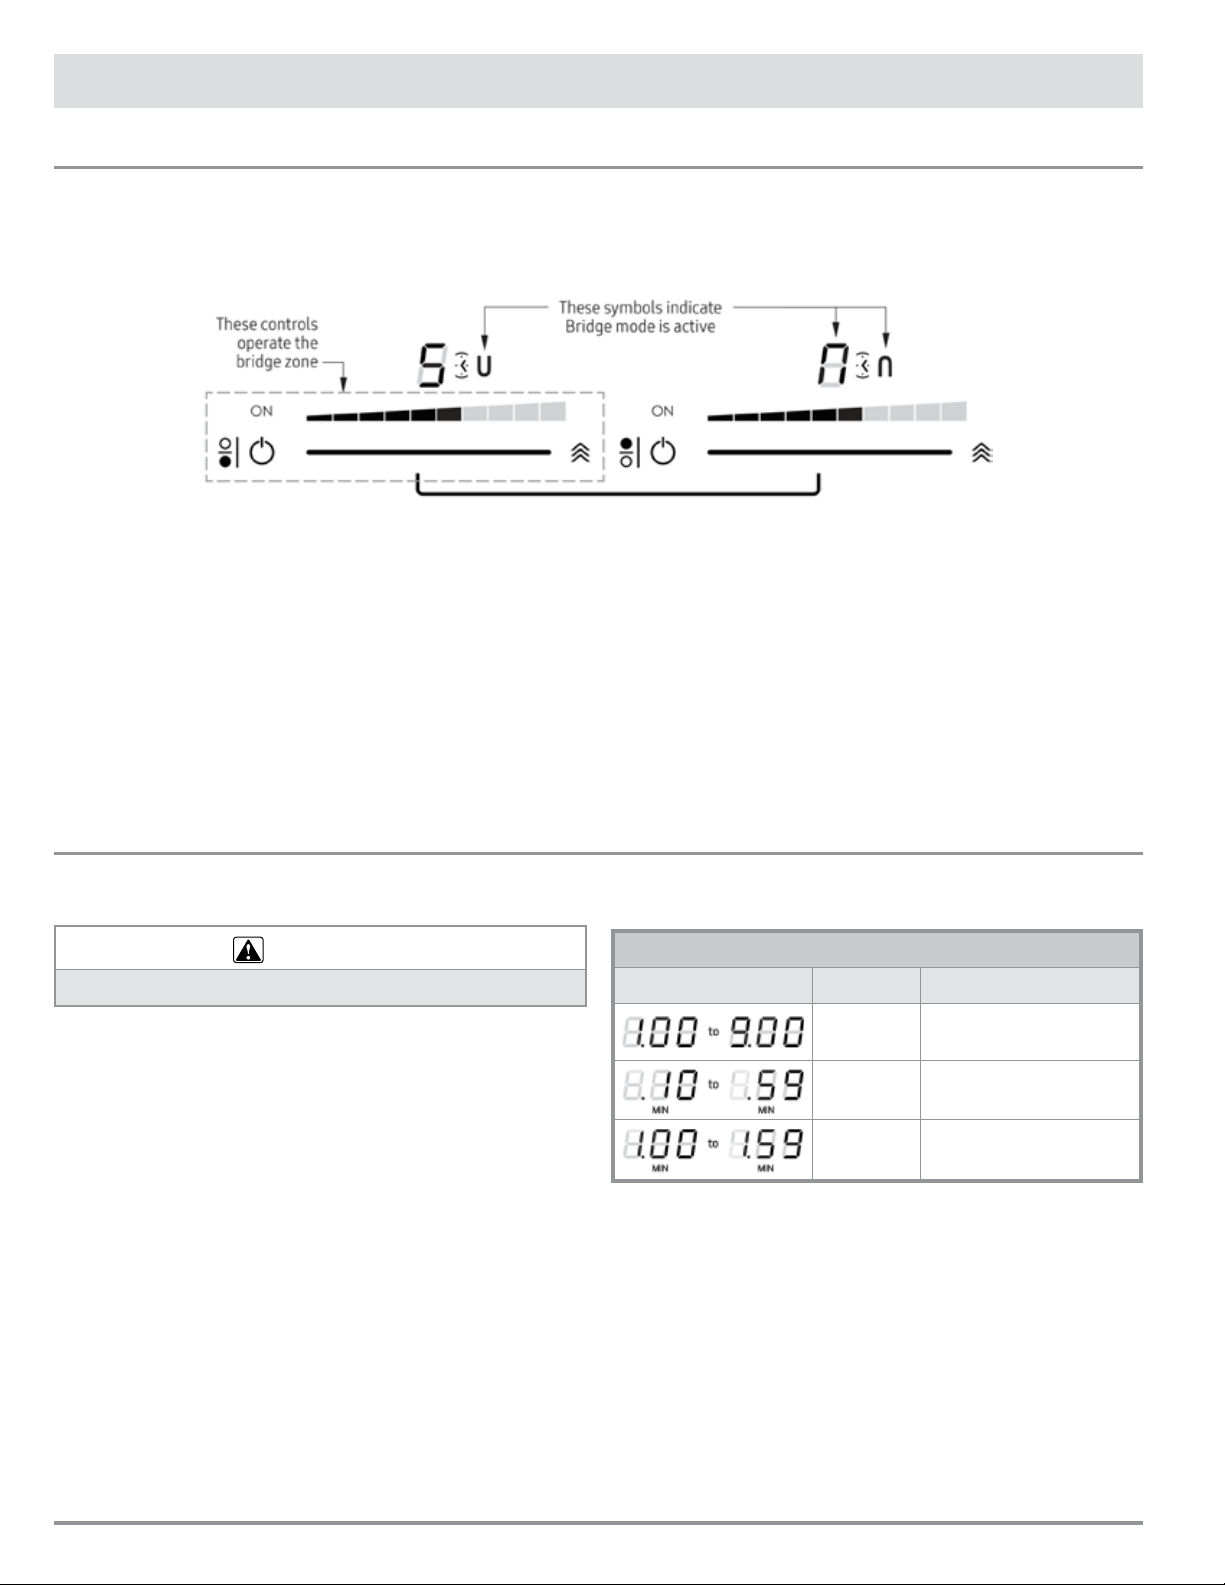
On the cooktop, a horizontal bracket indicates which control panels combine for bridge mode.
In bridge mode, the power level and timer for the two cook zones are shared, and the left-most cook-zone control panel becomes the
master control (i.e., the bridge power level is regulated/displayed on the left-most control panel).
The cooktop has seven alarm timers: one for each cook zone and
one independent alarm timer not associated with a cook zone.
WARNING
The alarm timer does not shut off cook-zone power.
• If timers are set for multiple cook zones, the main control panel
displays the timer that will go off first, and that zone’s timer
icon glows brightly. (The other timer indicators are dimmed.)
When a cook-zone timer goes off, its timer indicator goes out,
and the timer indicator for the next cook zone in line brightens.
• The up-arrow on the main control panel adds time; the
down-arrow subtracts time.
• Press the up/down arrows simultaneously to pause the timer
display; countdown resumes automatically in 5 seconds.
• When a cook zone reaches its set time, a double-beep alarm
sounds until you press the up or down arrow; or the alarm shuts
off automatically after 2 minutes.
About the Main Timer Display
This section explains the various types of readouts that appear on
the main control-panel timer display.
The “dot” (see the Image column) blinks to show time is counting
down. It divides minutes/seconds (Image column, top row) and
hours/minutes (Image column, bottom row).
1. (Having turned on the cooktop) Tap the left-front and
left-rear cook-zone power buttons.
2. Simultaneously tap-hold the left-front and left-rear slide bars.
The two cook zones enter bridge mode; bridge symbols
appear on the control panel; the left-front control becomes
the master bridge control. (See the above graphic.)
3. Set the bridge power level by sliding your finger along the
master bridge control (left-hand) slide bar.
• Pan detection is on the master control (left-front control).
• The timer icon appears on both cook zones.
• If no pan is detected on either zone within 10 minutes, bridge
mode de-activates.
• If only one zone detects a pot, bridge mode de-activates in 10
minutes. (The cook zone with the pot on it stays active at the
same power level; the empty zone shuts off.)
• You cannot use the Boost function while in Bridge mode.
For settings of 10 minutes and higher, seconds do not appear on
the timer display, and the MIN designator is lit.
Setting the Cooktop Timers
After the time is set, a 5-second delay precedes the countdown.
The “dot” in the timer display starts blinking as the countdown
starts and blinks until the display goes out as the alarm sounds.
Countdown continues even if the pan is removed. Tap the Pause
button to stop/resume timer countdown if needed.
Setting a Cook-Zone Timer
Once you have turned on the cooktop, activated a cook zone, set
its power level, and placed a pan of food on the cook zone, you
can set the food’s cook time.
Timer Display Readings
Image Time Description
1 min to
9 min
Press p 1 to 9 times; each
press adds 1 minute
10 min to
59 min
Press-hold
p to set longer
times
1 hr to
1 hr, 59 min
Press-hold
p to set time
(max. time: 1 hr, 59 min.)
Using the Cooktop
Using the Cooktop Timers
Loading ...
Loading ...
Loading ...