Loading ...
Loading ...
Loading ...
10
INSTALLATION
LOCATION
The air conditioner should be placed on a hard and level surface strong enough to support the unit. The unit has
casters and it should only be rolled on smooth, flat surfaces. Use caution when rolling on carpet surfaces. Do not
attempt to roll the unit over objects. Never place any obstacles around the air inlet or outlet and allow at least 20 inch
of clearance for efficient air-conditioning.
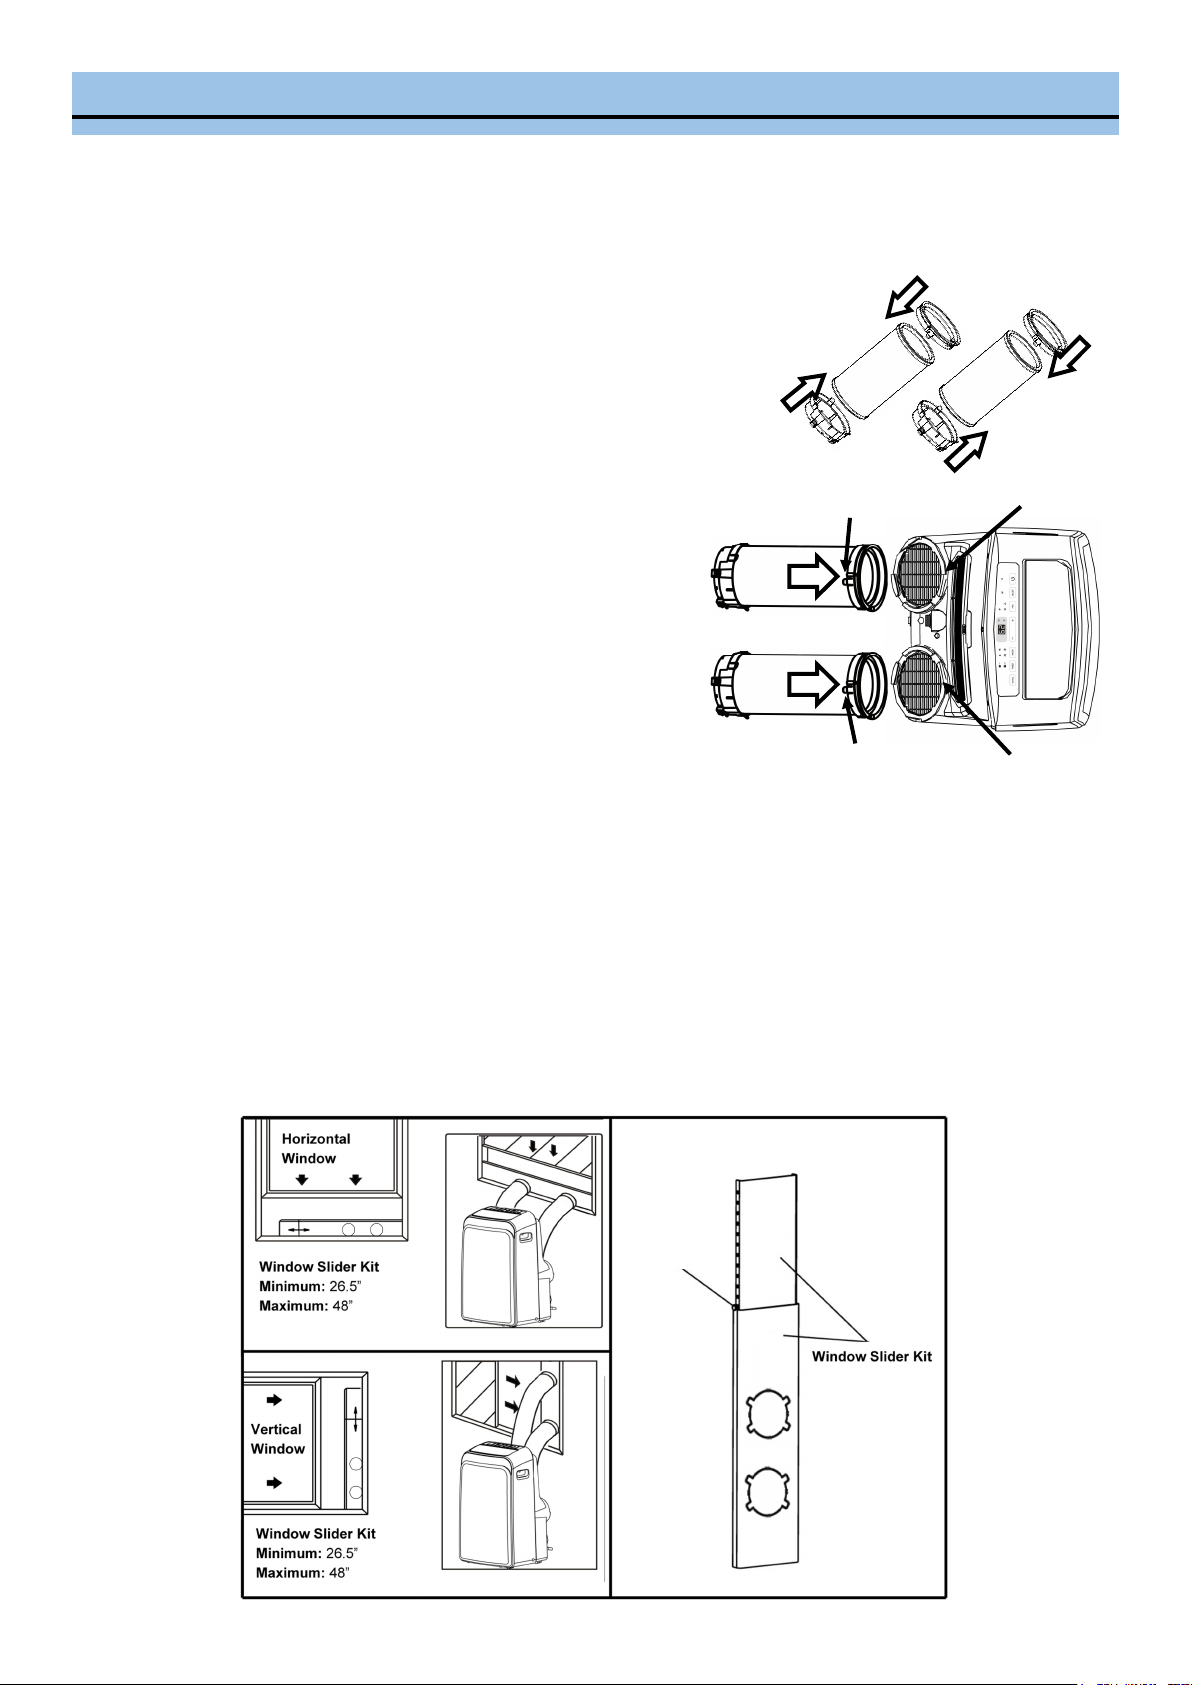
EXHAUST AND INTAKE HOSE INSTALLATION
When you use this air conditioner unit, hot air must be exhausted
out of the room to complete the air exchange of the condenser.
When the unit is operating in DRY or FAN only mode, installation
of the exhaust hose is optional.
1. Pull out about 6” of each end of the exhaust and intake hose.
2. Snap each of the hose connectors to the unit onto one end of
each hose and then snap each of the hose connectors to the
window onto the other ends. See Fig. 1
3. Line-up the hose connector hooks of each hose onto the back
of the unit and slide into the hole seats. See Fig. 2
4. Only extend the exhaust hose to the necessary length keeping
it as short and straight as possible.
WINDOW KIT INSTALLATION
The window kit has been designed to fit most standard vertical and horizontal windows. However, it may be
necessary to modify the installation procedures to accommodate your window. Please refer to Fig. 3a and Fig. 3b
for minimum and maximum window openings. If your window opening is less than the mentioned minimum length
of the window slider kit, the window slider kit can be cut to fit the window opening. Never cut into the exhaust/
intake hose cut-outs on the window slider kit.
If your window opening is larger than the maximum length of the window slider kit, additional material will be
needed to cover the open space such as, Plexiglas, PVC plastic, ply wood, etc. Alternately, an additional window
slider kit can be purchased to be used in combination with the included kit.
NOTE: When using the window slider kit on a window or sliding door, additional security measures may be
needed. The window slide bars can be fixed with the clear plastic bolt. Fig. 4.
Fig. 2
Hole Seat
Hole Seat
Fig.3a
Fig. 4
Fig.3b
Fig. 1
Hook
Hook
Clear plastic
plug
Loading ...
Loading ...
Loading ...