Loading ...
Loading ...
Loading ...
30 INSTALLATION
Gas Connection
Before commencing installation, check to ensure the type
of gas to which the appliance is intended to be connected
matches the gas type given on the appliance data plate.
Check the data plate (located behind the oven door) to
determine gas type. A gas type label is located on the
back panel near the gas inlet.
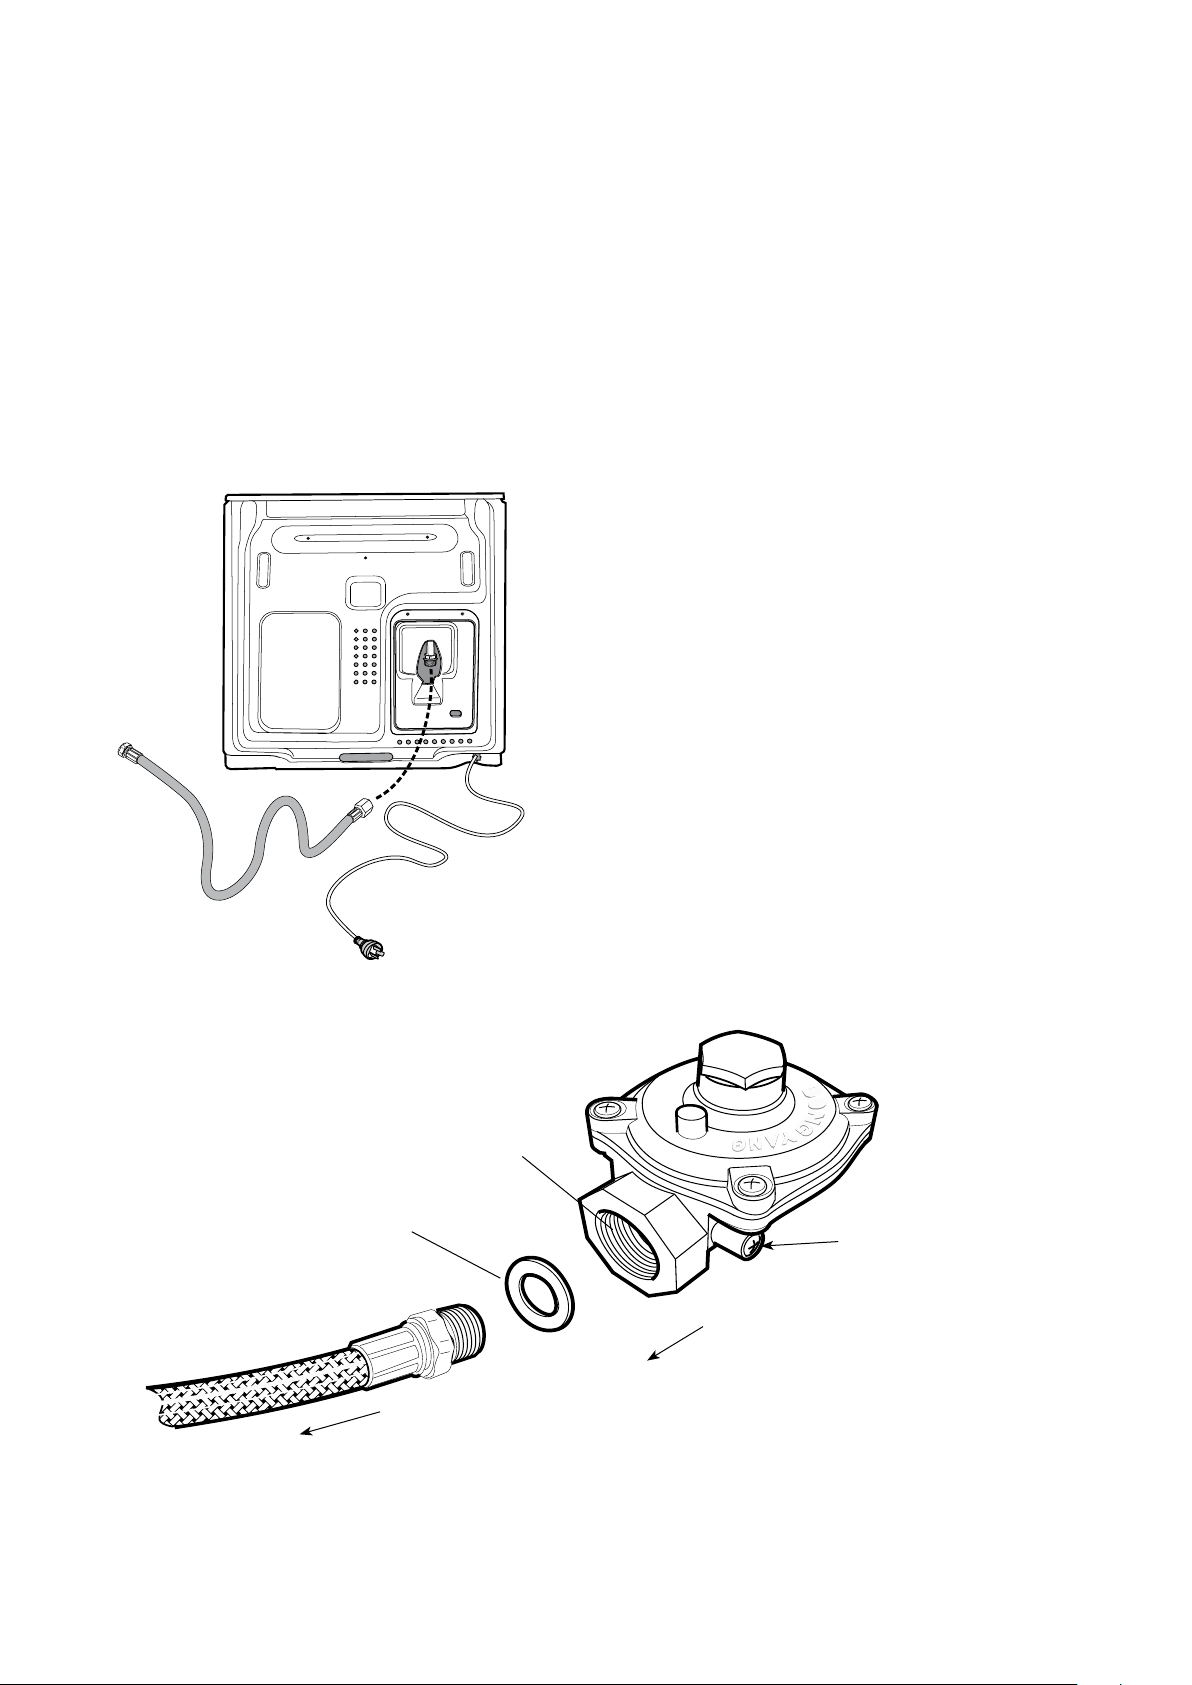
A 1700mm long flexible hose is supplied in the pack for
installation purposes.
Connecting flexible hose
• Place a spanner on the flats provided on the gas inlet
to brace the inlet against the action of wrenching
when connecting the hose to the appliance gas inlet.
Failure to do so may damage the appliance.
• An approved thread sealing tape or compound is
required for the connection between the hose and
the appliance gas inlet.
• Ensure there is no kink in the gas hose when the
appliance is in the installed position.
Appliances for operation on N.G. & S.N.G.
For N.G. and S.N.G appliances the supplied N.G. regulator
must be fitted. For L.P.G appliances (Propane or Universal
LP) the test point fitting supplied must be fitted.
NOTE: The inlet of the regulator or test point fitting should
be fitted to the consumer piping first. The arrow on the
regulator or test point fitting indicates the direction of gas
flow. Then connect the hose to the outlet of the regulator
or test point fitting using the swivel connection on the
hose and fibre washer supplied.
Ensure the regulator or test point fitting is in a position
that is accessible with the appliance installed and
which will allow the appliance to be withdrawn without
disconnecting the hose.
Check all joints and ensure that connections are sound.
GAS INSTALLATION INFORMATION
Gas flow
Pressure point test
to appliance
Internal flange
N.G. Regulator
Important: flat fibre washer
must be installed
Loading ...
Loading ...
Loading ...