Loading ...
Loading ...
Loading ...
11OPERATION
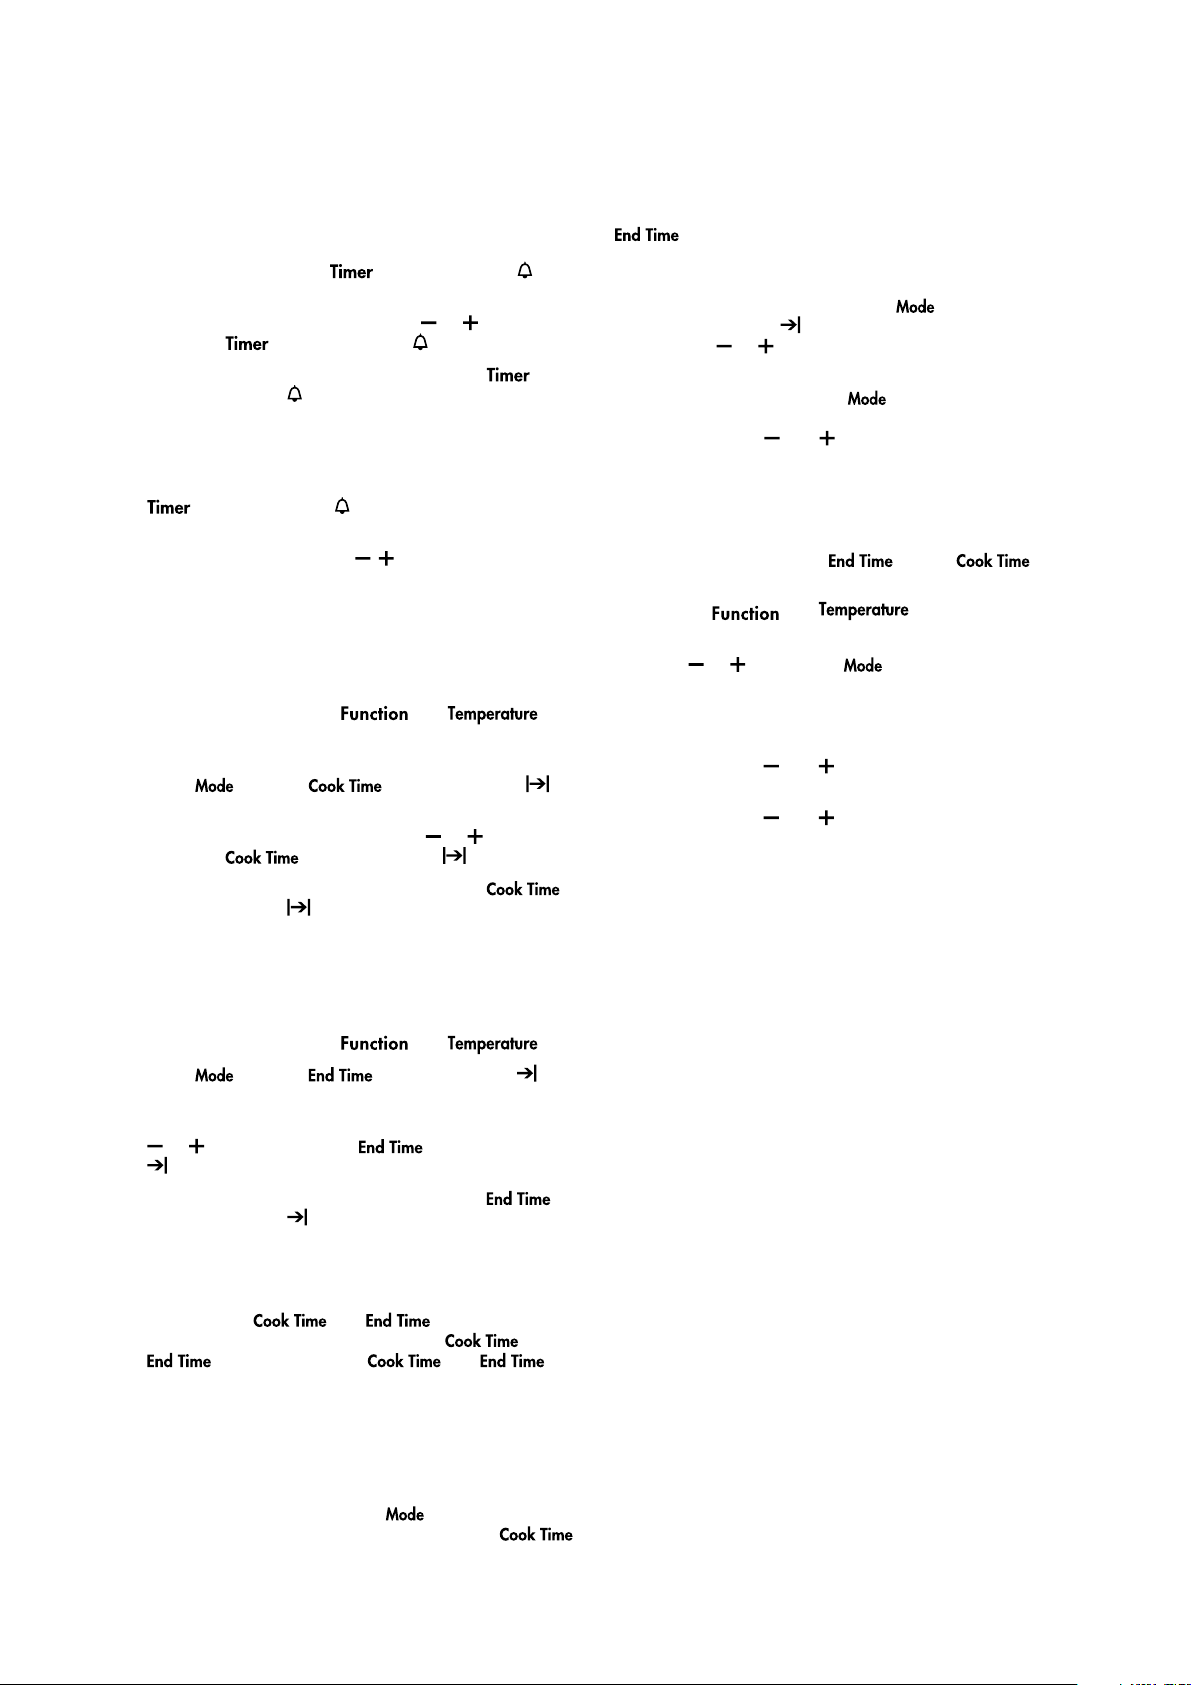
Setting the minute minder
1. Press “Mode“ until the indicator symbol
begins flashing.
2. Set the countdown time by using
or
symbols
while the
indicator symbol is flashing.
3. After 5 seconds from the last change, the
indicator symbol
will stop flashing, confirming the
timer has been set. The countdown time remaining
will appear on the display.
4. Once the set time has elapsed, a beeper will sound
for 1 minute. The time indication “0.00” and a flashing
indicator symbol will appear on the
display.
5. To stop the beeper, press
, symbols or “mode”.
NOTE: This feature has no effect on the oven operation.
With the minder operating, the time of day cannot be
displayed.
Setting the cooking duration
1. Select the desired oven and . The
oven indicator light will appear and the heating
source will switch on.
2. Press
until the indicator symbol
begins flashing.
3. Set the cooking duration by using
or symbols
while the indicator symbol is flashing.
4. After 5 seconds from the last change, the
indicator symbol will stop flashing, and the time
of day will be displayed.
NOTE: Do not forget to add pre-heating time if necessary.
Setting the cooking end time
1. Select the desired oven and ..
2. Press
until the indicator symbol
begins flashing.
3. Enter the time of day to finish cooking by pressing
or symbols while the indicator symbol
is flashing.
4. After 5 seconds from the last change, the
indicator symbol
will stop flashing and the current
time of day will be displayed.
Setting the delayed start cooking time
1. Program the and as described in
the relevant sections. Once both the
and
have been set, the and
indicators will stop flashing and the current time of
day will be displayed.
NOTE: Do not forget to add pre-heating time if necessary.
To check or cancel settings
1. To check your settings, press until the
indicator symbol flashes next to the mode (
, etc) that you want to display. After
5 seconds from the last change, the indicator will
stop flashing and the time of day will be displayed.
2. To cancel “delayed start”, press
until the
indicator symbol
flashes next to “End time”. Press
and hold
or
symbols together until the
current time of day is displayed.
3. To cancel a setting, press
until the indicator
symbol flashes next to the setting to be cancelled.
Press and hold
and
symbols together until the
setting is cleared.
On completion of cooking
When the set time has elapsed, the oven will turn off,
the timer will beep and the and/or
indicators will flash.
1. Turn the
and controls
to the off position.
2. Press
or symbols or to stop the clock
from beeping.
Switching the clock display ON and OFF
1. Press together and symbols for 3 seconds to
switch off the display.
2. Press together
and symbols for 3 seconds to
switch the clock display on again.
NOTE: If a timer mode is set, then it is not possible to
switch the display off.
Electronic burner control
Your gas oven is fitted with an electronic controller which
manages the operation of the burner and monitors the
flame. This controller includes features which ensure the
safe operation of your appliance and will prevent the build
up of unburnt gas should a fault occur.
It is normal for the flame to turn on and off during
cooking to maintain a stable temperature in the oven.
The thermostat indicator light indicates when the flame
is on or igniting (indicator on), or when the flame is off
(indicator off).
The burner flame can be seen by viewing through the
2 holes in the front of the burner cover.
Loading ...
Loading ...
Loading ...