Loading ...
Loading ...
Loading ...
6
7
Ready to Brew Your First Cup
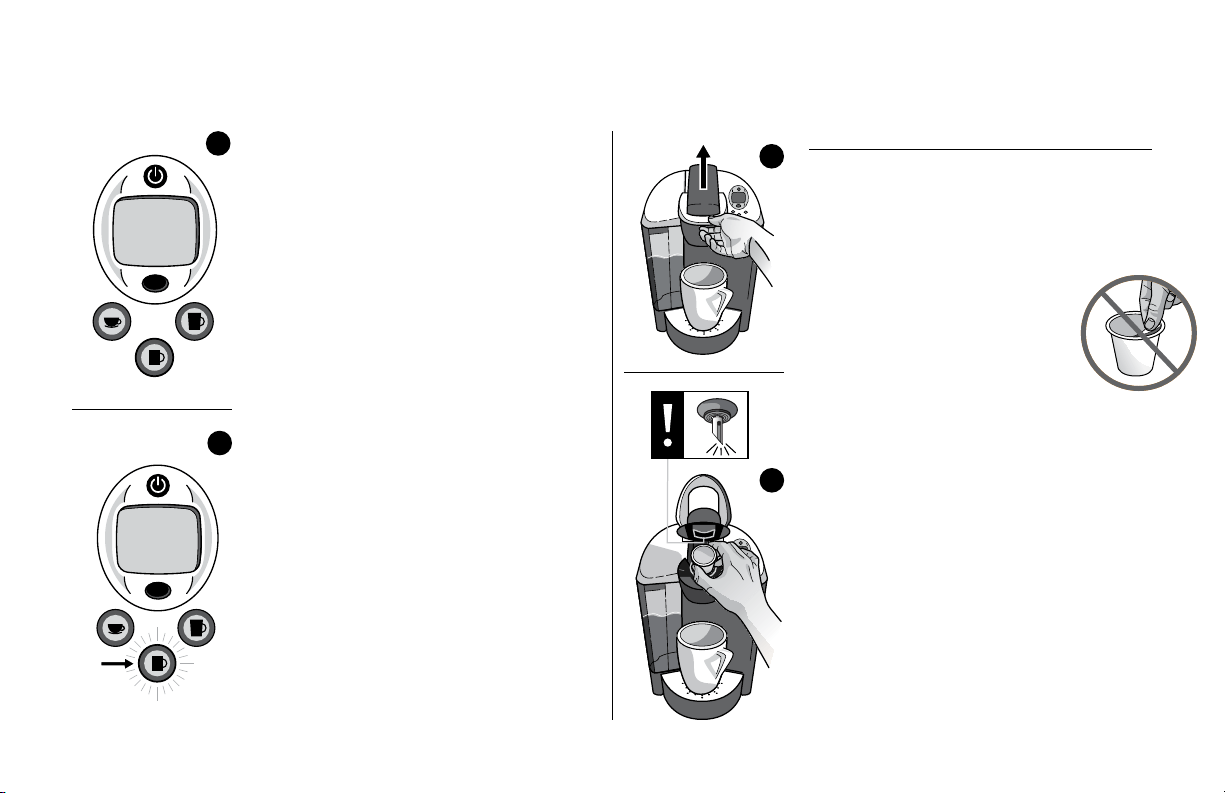
1. LCD Control Center will indicate
“READY TO BREW”.
2. Place a cup or mug on the Drip Tray Plate.
3. Lift the Handle and the K-Cup Holder
will open toward you (fig. 6).
4. Select a K-Cup
®
portion pack.
NOTE: Do not remove the foil lid or
puncture the K-Cup.
5.
Place a K-Cup portion pack in the
K-Cup Holder (fig. 7).
CAUTION: There are two sharp needles that
puncture the K-Cup, one above the K-Cup Holder
and the other in the bottom of the K-Cup Holder.
To avoid risk of injury, do not put your fingers in
the K-Cup Assembly Housing.
6.
Lower the Handle to close the Lid over the
K-Cup Holder. (When it is closed completely,
the LCD Control Center will indicate “READY
TO BREW” and the Small Cup, Small Mug and
Large Mug Buttons will flash up to 60 seconds.)
9. The Brewer will automatically fill the internal
tank with water and then the water will be heat-
ed. This will take about 4 minutes. During the
heating period, “NOT READY” (fig. 4) is displayed
on the LCD Control Center. Do not lift Brewer
Handle during this ‘heating period’. Once
the water is heated, “READY” will be displayed
and the Small Mug Button will flash (fig. 5).
NOTE: You may see small amounts of water
coming from the Vent and dripping into the
Water Reservoir during this and subsequent heat-
ing — this is normal.
10.
Press the Small Mug Button to start a
cleansing brew. Pour the hot water into
the sink.
11. The one-time set-up process is now
complete and you are ready to brew!
NOTE: The Brewer may take 15 seconds
between brews and then “READY TO BREW”
will be displayed.
NOT READY
Small
Mug
READY
TO BREW
fig.
4
fig.
5
fig.
6
fig.
7
Loading ...
Loading ...
Loading ...