Loading ...
Loading ...
Loading ...
7
Install Grill
The grill assembly consists of two grill grates, grill element and a
basin pan. It may be installed only on the left side of the cooktop.
When using the grill, follow the guidelines below.
■ Trim excess fat to reduce spattering. Slit the remaining fat on
the edges to avoid curling.
■ Allow space between food on the grill. Crowding food will
result in uneven cooking.
■ Use a metal spatula or tongs to turn food.
■ Steaks, chops and hamburgers should be turned only once
to avoid loss of juices.
■ For best results, use top grade meat. Thicker meat will grill
better than thinner cuts.
■ When basting meats or applying sauces to foods, remember
that excessive amounts accumulate inside your grill and do
not improve the food flavor.
■ Use only nonmetallic spatulas or utensils to avoid damaging
the nonstick grill grate finish.
■ Do not leave the grill unattended while cooking.
■ To avoid damage to the grill, do not use aluminum foil,
charcoal or wood chips.
■ To avoid damage to cookware, do not place cookware on the
grill when in use. Food should be cooked directly on the grill
grate.
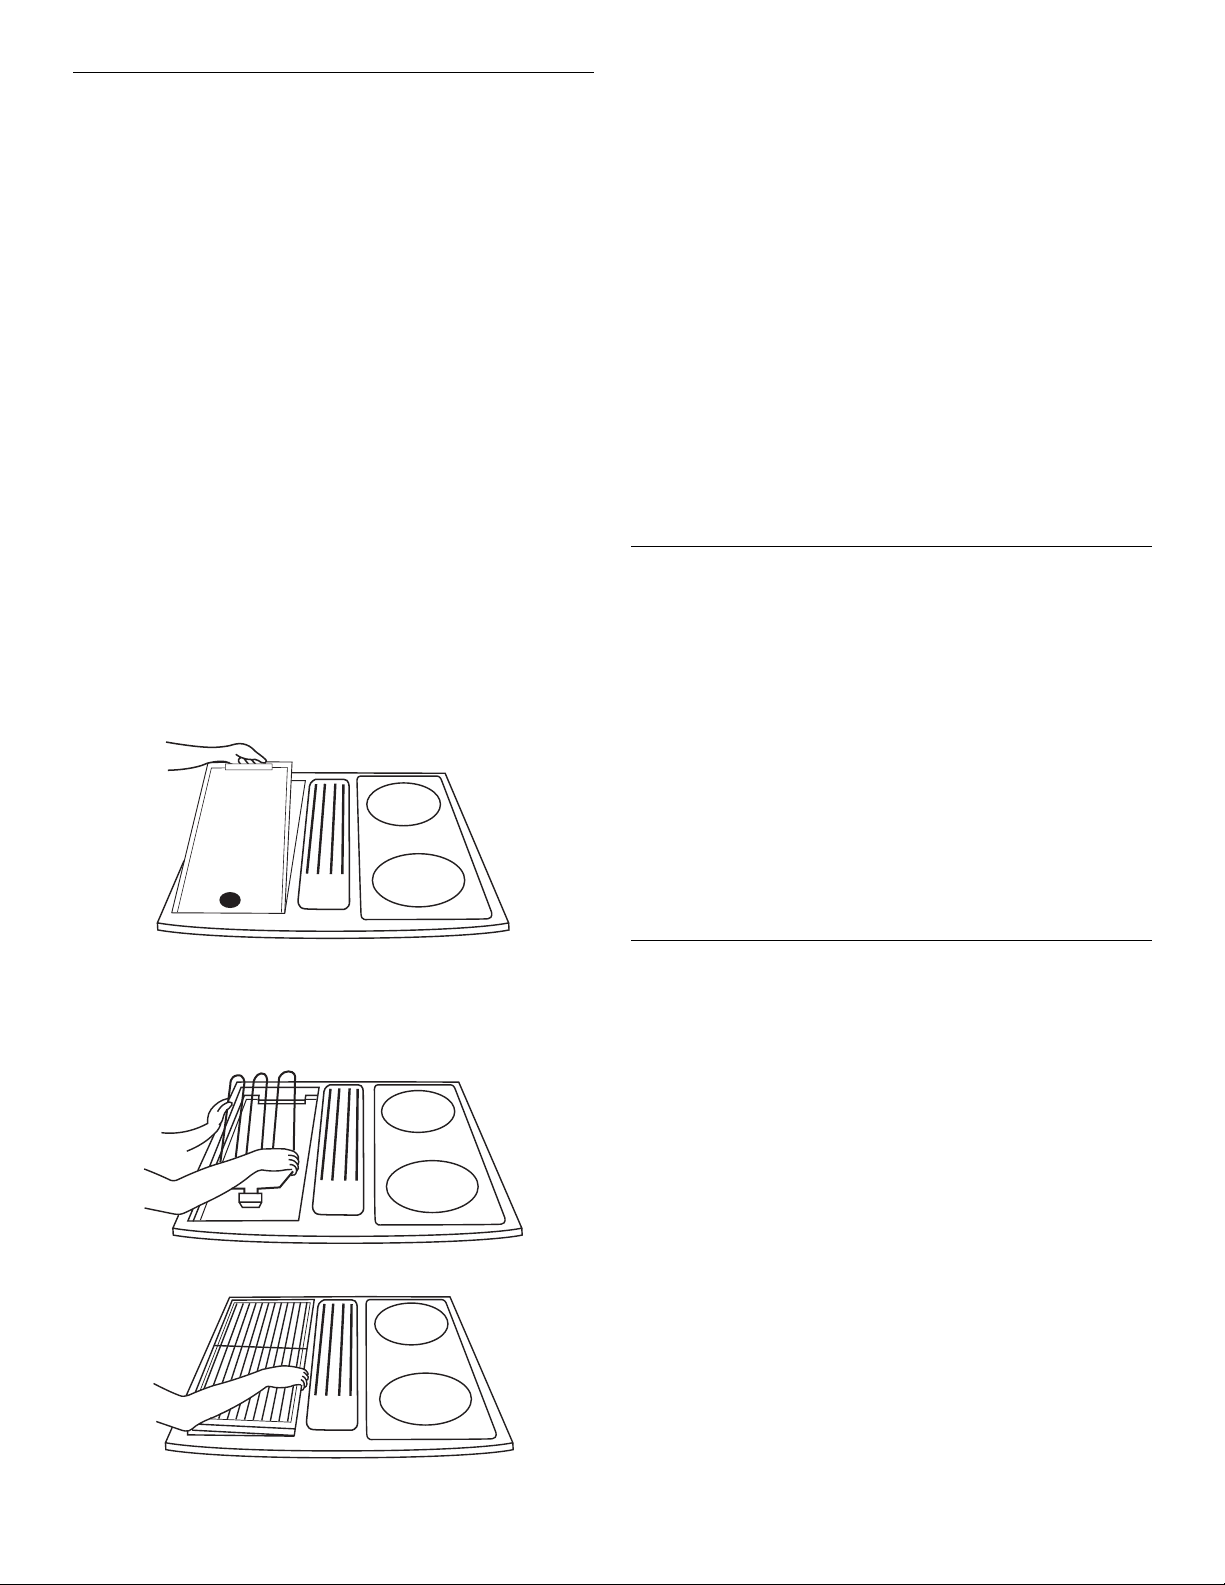
To Install Grill:
1. Be sure control knobs are in the “Off” position.
2. Place the basin pan into the empty basin.
3. Position the grill element with the terminal plug toward the
terminal receptacle. The terminal receptacle is located at the
front of the left side of the range. Slide the element toward the
receptacle until the terminal plug is completely engaged and
the supports rest on the sides of the basin.
4. Place the grill grates on top of the cooktop.
IMPORTANT: Before using the grill for the first time, heat the
grill burner to remove the shipping coating. Heat the grill
burner on High for 10 minutes and use the vent system to
remove any smoke.
To Remove Grill:
1. Be sure control knobs are in the “Off” position and grill
components are cool.
2. To remove grill element, pull away from receptacle until it is
unplugged.
IMPORTANT: Lifting the cartridge too high while still engaged
in the receptacle could damage the terminal plug.
To Use:
Before first use, wash grill grates in hot soapy water, rinse and
dry. Season the surface by wiping on a thin coating of cooking
oil. Remove excess oil by wiping with a paper towel. Repeat the
seasoning process when grill grates are cleaned in the
dishwasher or anytime a sugar-based marinade is used.
1. Preheat grill on High for 5 minutes. Preheating improves the
flavor and appearance of meats and quickly sears the meat to
help retain the juices.
2. Turn knob to desired cook setting. Place food on grill.
Downdraft Ventilation System
The built-in downdraft ventilation system removes cooking
vapors, odors and smoke from foods prepared on the cooktop.
IMPORTANT: For optimal performance, operate the downdraft
ventilation system with the filter properly installed.
To avoid the buildup of grease, the filter should be cleaned often.
The downdraft ventilation system will operate automatically when
the grill is in use.
For more information on proper filter placement and cleaning, see
“Downdraft Ventilation System” in the “General Cleaning”
section.
To Use:
The ventilation fan can be set to Low, High or Off.
Press VENT FAN once for Low, a second time for High, and a
third time to turn the fan Off.
Home Canning
When canning for long periods, alternate the use of surface
cooking areas, elements or surface burners between batches.
This allows time for the most recently used areas to cool.
■ Center the canner on the grate or largest surface cooking
area or element. On electric cooktops, canners should not
extend more than ½" (1.3 cm) beyond the surface cooking
area or element.
■ Do not place canner on 2 surface cooking areas, elements or
surface burners at the same time.
■ On ceramic glass models, use only flat-bottomed canners.
■ For more information, contact your local agricultural
department. Companies that manufacture home canning
products can also offer assistance.
Loading ...
Loading ...
Loading ...