Loading ...
Loading ...
Loading ...
1212
To Set for Broiling:
Broiling is direct heat cooking and will produce some
smoke. If smoke is excessive, place food further away
from the element. Always watch food carefully to prevent
burning.
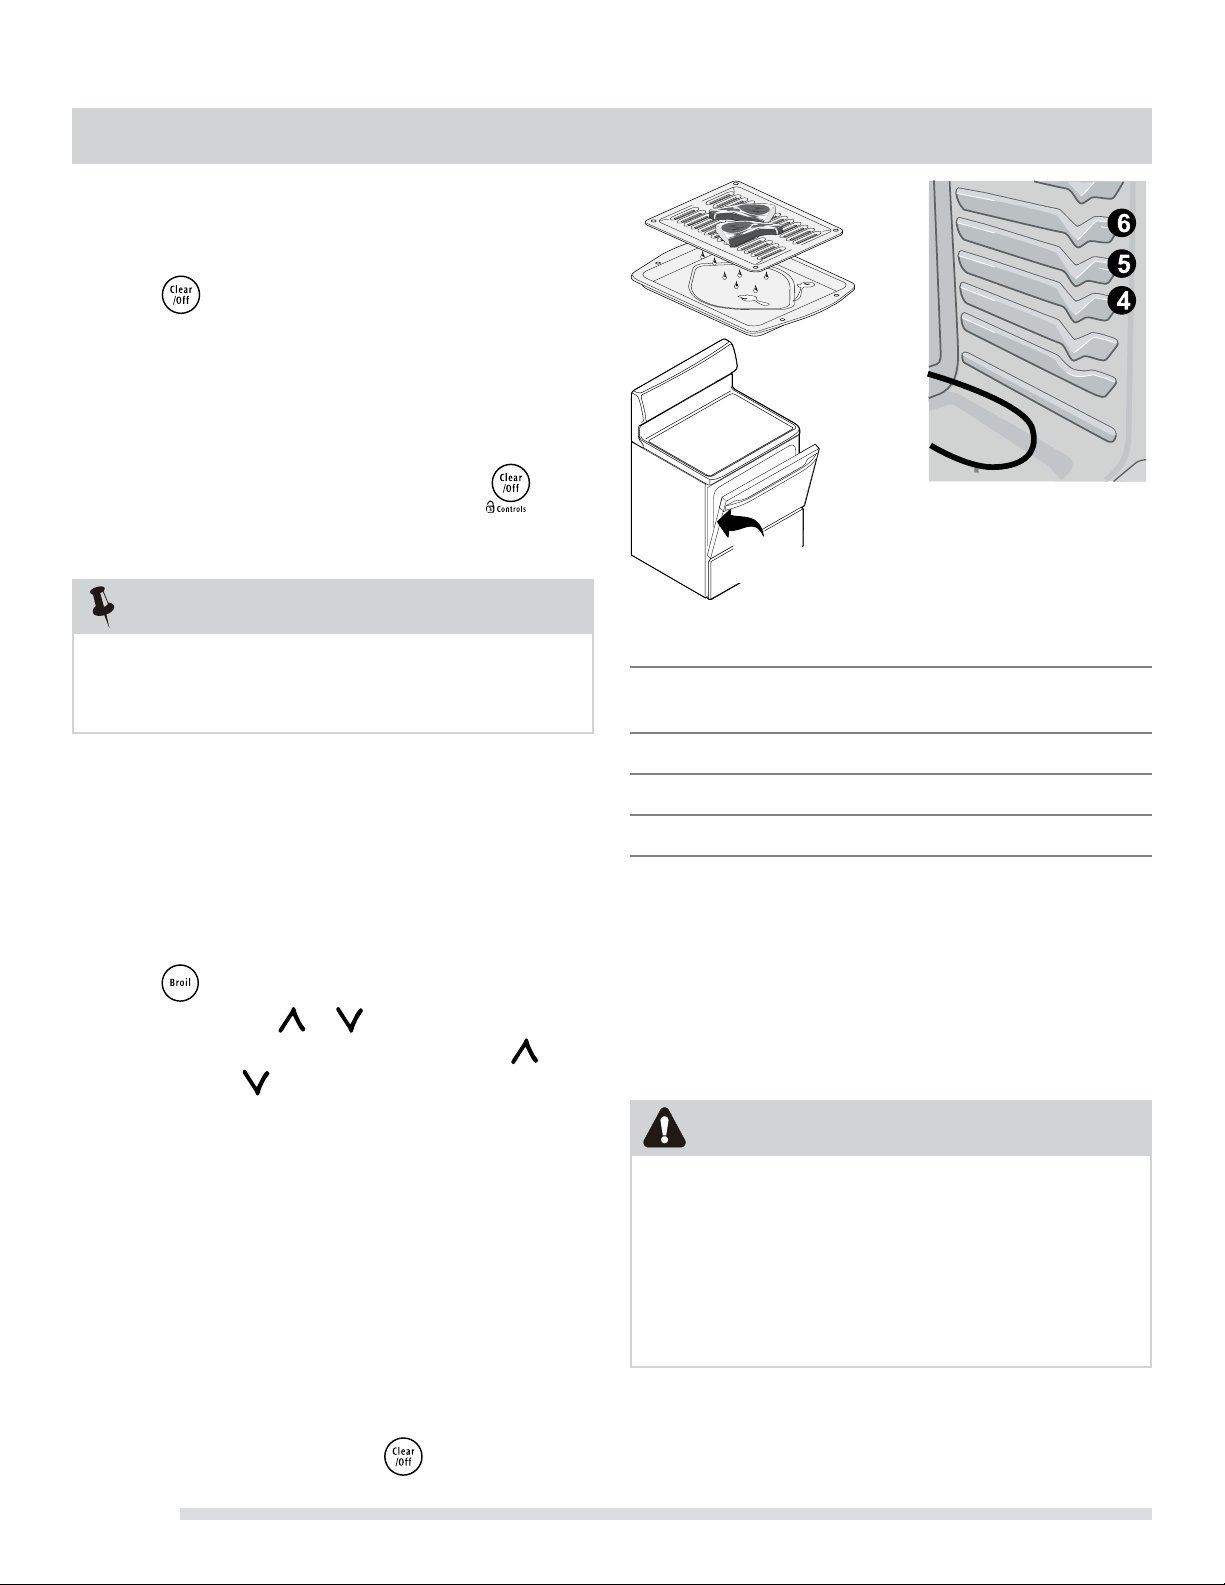
1. Arrange the oven rack while oven is still cool. Position
the rack as suggested in the BroilRackPosition
Table below.
2. Press . “——” will appear in display.
3. Press and hold the or until the desired broil
setting level appears in the display. Press the for
HI broil or the for LO broil. Most foods may be
broiled at the HI broil setting. Select the LO broil
setting to avoid excess browning or drying of foods
that should be cooked to the well-done stage.
4. For optimum browning, preheat broil element
for 3 - 4 minutes before adding food.
5. Place the insert on the broil pan (if equipped), then
place the food on the insert (if equipped; See Fig. 1).
6. Place the broiler pan and insert on the oven rack (if
equipped). Open the oven door to the broil stop
position when broiling (See Fig 2).
7. Broil on one side until food is browned. Turn and broil
food on 2nd side.
Note: Always pull the oven rack out to the stop
position before turning or removing the food.
8. When broiling is nished press .
Fig.1
(some models)
Fig. 3
Consuming raw or undercooked meats, poultry, seafood or
shelsh may increase your risk of food borne illness.
The broiler pan and the insert allows grease to drain and
be kept away from the high heat of the broiler. DO NOT
use the pan without the insert. DO NOT cover the insert
with foil; the exposed grease could ignite. DO NOT use
the broil pan without the insert or cover the insert with
aluminum foil. The exposed fat could ignite.
Fig. 2
Broil Stop
Position
BroilRackPositionTable(Refer to Fig. 3)
Rack
Position
Food category
6 Medium steaks & hamburgers
5 Fish, medium-well steaks & pork chops
4 Well-done foods such as chicken & lobster
ToSetControlforOvenLockout
The control can be programmed to lock the oven door and
lockout the oven control pads.
TosetControlforOvenLockoutfeature:
1. Press and hold for 3 seconds. “Loc” will appear
in display, the “Door Locked” indicator light will ash
and the motor driven door lock will begin to close
automatically. DO NOT open oven door while the
indicator light is ashing. Allow about 15 seconds for
the oven door to lock. Once the oven door is locked,
the current time of day will appear in the display.
2. To cancel the Oven Lockout feature, press and
hold for 3 seconds. The control will unlock the oven
door and resume normal operation.
If any control pad is pressed while in the Oven
Lockoutmode,“Loc”willappearinthedisplay
until the control pad is released.
NOTE
SETTING OVEN CONTROLS
CAUTION
To insure proper results when broiling use ONLY
Electrolux Home Products, Inc. approved Broil Pan &
Insert.
Should an oven re occur, close the oven door and
turn the oven OFF. If the re continues, use a re
extinguisher. DO NOT put water or our on the re.
Flour may be explosive.
Loading ...
Loading ...
Loading ...