Loading ...
Loading ...
Loading ...
GB
10-Installation
25
10.1 Preparation
▶ Take the appliance out of the packaging.
▶ Remove all packaging material including polystyrene base, keep them out of childrens
reach. While opening the package, water drops may be seen on plastic bag and port-
hole. This normal phenomenon results from water tests in the factory.
10.3 Dismantle the transportation bolts
The transportation bolts are designed for clamping
anti-vibration components inside the appliance during
transportation to prevent inner damage.
1. Remove the back cover (Fig. 10-3).
2. Remove all 4 bolts on the rear side and take out
plastic spacers (A) from inner side of the machine
(Fig. 10-4).
10-410-3
Note: Packaging disposal
Keep all packaging materials out of children´s reach and dispose them in an environmen-
tally friendly manner.
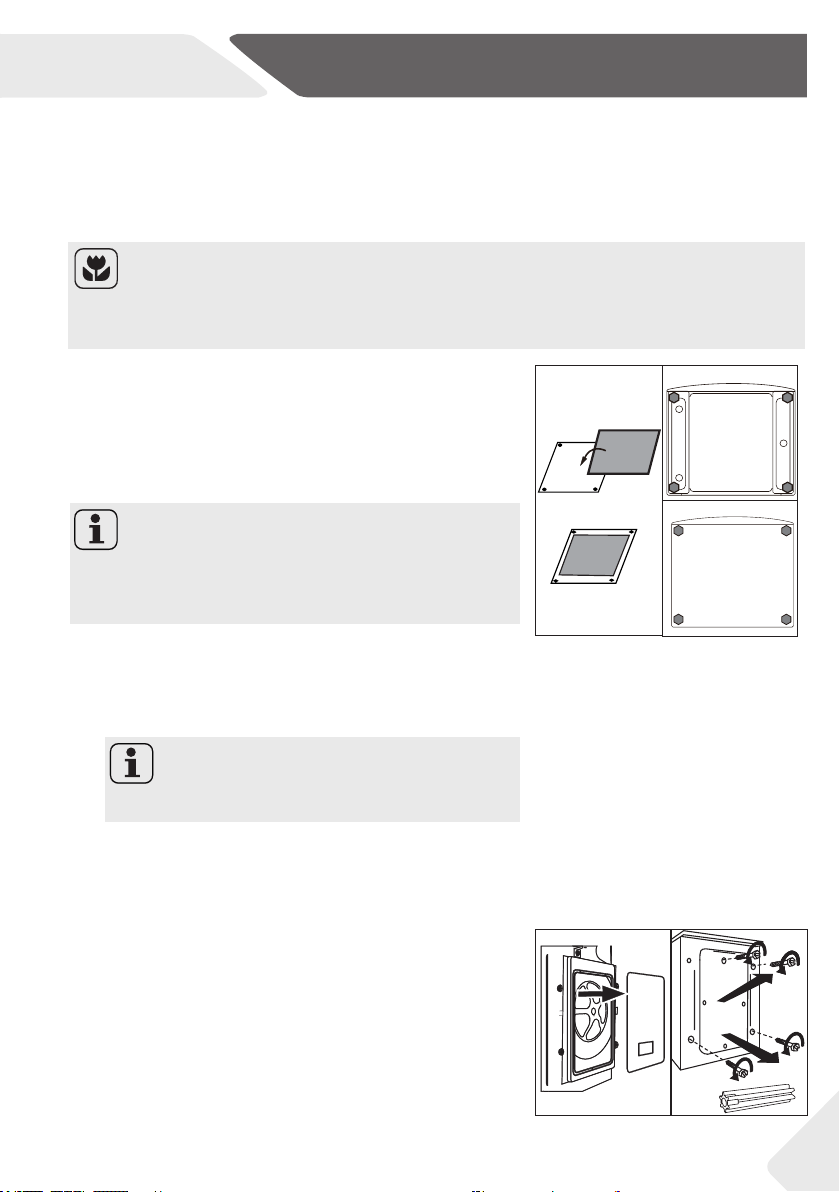
10.2. OPTIONAL: Adjusting the bottom cover
board
When opening the shrink package, you will nd a calci-
um-plastic board (A) (Fig. 10-1). The board is used for
reducing noise after covering the bottom of the cabi-
net.
2. Lay the washing machine down to its side, port-
hole pointing upwards, bottom side towards op-
erator and screw o the four bolts (Fig. 10-2).
3. Place the calcium-plastic board.
Screw the bolts through the four holes on the
board on to the tub rmly. Finally set the machine
upright again.
Only Model HW80-/HW100:
There is also a felt (B) in the package.
1. Past the felt on one side of the calcium-plastic
board (Fig. 10-1).
Only Model HW80-/HW100:
The felt is pointing inside the appliance.
10-1
A
B
1.
2.
3.
10-2
A
Loading ...
Loading ...
Loading ...