Operating Instructions
(Household)
Rechargeable Shaver
Model No.
ES‑RT97
English��������������������������������������������� 3
Français����������������������������������������� 25
Español������������������������������������������ 47
BC

2
3
English
Operating Instructions
(Household)
Rechargeable Shaver
Model No.
ES‑RT97
Thank you for purchasing this Panasonic product.
Before operating this unit, please read these instructions completely and save them for future use.
Safety precautions..................... 4
Intendeduse����������������������������������������9
Partsidentication����������������������������10
Chargingtheshaver��������������������������11
Usingtheshaver��������������������������������12
Cleaningtheshaver��������������������������15
Troubleshooting��������������������������������19
Batterylife������������������������������������������22
Removingthebuilt-inrechargeable
battery�������������������������������������������������22
Specications������������������������������������22
Contents

4
English
Safety precautions
To reduce the risk of injury, loss of life, electric shock, fire, and
damage to property, always observe the following safety precautions.
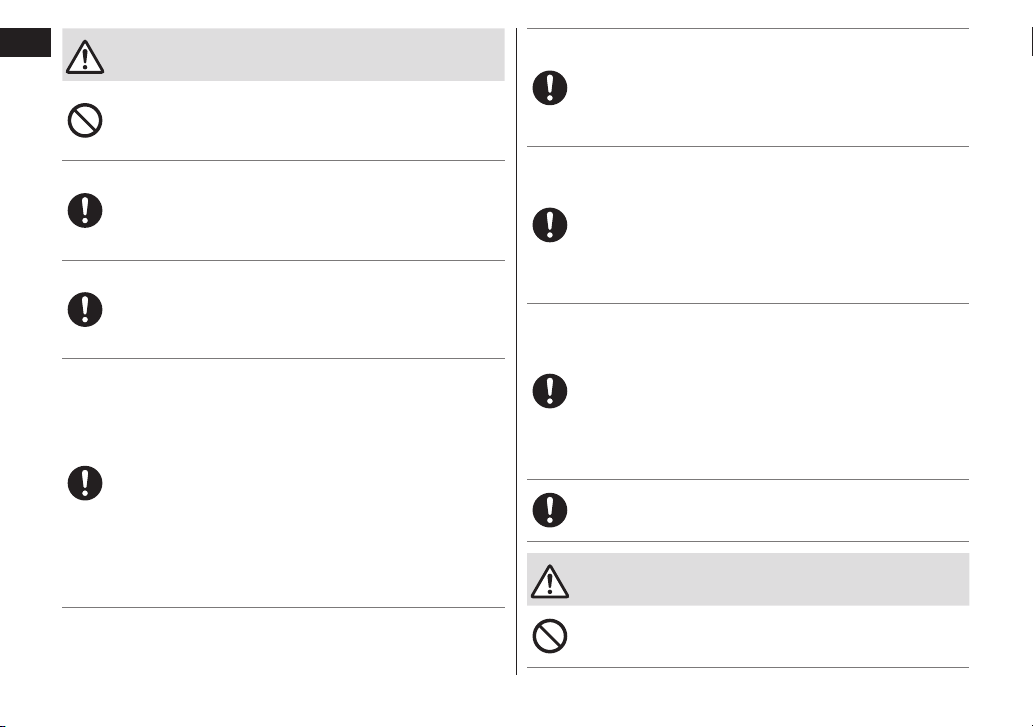
Explanation of symbols
The following symbols are used to classify and describe the level
of hazard, injury, and property damage caused when the
denotation is disregarded and improper use is performed.
DANGER
Denotes a potential
hazard that will result in
serious injury or death.
WARNING
Denotes a potential
hazard that could result
in serious injury or death.
CAUTION
Denotes a hazard that
could result in minor injury.
The following symbols are used to classify and describe the type
of instructions to be observed.
This symbol is used to alert users to a specific operating
procedure that must not be performed.
This symbol is used to alert users to a specific operating
procedure that must be followed in order to operate the
unit safely.
IMPORTANT SAFETY INSTRUCTIONS
When using an electrical appliance, basic
precautions should always be followed, including
the following:
Read all instructions before using this appliance.
DANGER
To reduce the risk of electric
shock:
1. Do not reach for an appliance that has fallen
into water. Unplug immediately.
2. Do not place or store appliance where it can fall
or be pulled into a tub or sink. Do not place in
or drop into water or other liquid.
3. Except when charging, always unplug this
appliance from the electrical outlet immediately
after using.
4. Unplug this appliance before cleaning.
WARNING
To reduce the risk of burns, fire,
electric shock, or injury to persons:
1.
Close supervision is necessary when this appliance
is used by, on, or near children or invalids.
2.
Use this appliance only for its intended use as
described in this manual. Do not use attachments
not recommended by the manufacturer.

5
English
3. Never operate this appliance when it has a
damaged cord or plug, when it is not working
properly, after it has been dropped or damaged,
or after it has been dropped into water. Return
the appliance to a service center for
examination and repair.
4. Keep the cord away from heated surfaces.
5.
Never drop or insert any object into any opening.
6. Do not use outdoors or operate where aerosol
(spray) products are being used or where
oxygen is being administered.
7. Do not use this appliance with damaged
shaving blades and/or foil, as it has the
potential to result in facial injury.
8. Always attach plug to appliance first, then to
outlet. To disconnect, turn all controls to “off”
then remove plug from outlet.
SAVE THESE INSTRUCTIONS
WARNING
This shaver has a built-in rechargeable battery. Do
not throw into fire, apply heat, or charge, use, or
leave in a high temperature environment.
-Doing so may cause overheating, ignition, or explosion.
Do not connect or disconnect the adaptor to a
household outlet with a wet hand.
-Doing so may cause electric shock or injury.
Never disassemble except when disposing of the product.
-Doing so may cause fire, electric shock, or injury.
Do not use anything other than the supplied AC
adaptor and the self-cleaning recharger. Also, do
not charge any other product with the supplied AC
adaptor and the self-cleaning recharger.
-Doing so may cause burn or fire due to a short circuit.
Do not modify or repair.
-Doing so may cause fire, electric shock, or injury.
Contact an authorized service center for repair (battery
change etc).
Do not store within reach of children or infants. Do
not let them use it.
-Putting the inner blades and/or the oil container in the
mouth or drinking the detergent may cause accidents and
injury.
Do not damage, modify, or forcibly bend, pull, or twist
the cord.
Also, do not place anything heavy on or pinch the cord.
-
Doing so may cause electric shock or fire due to a short circuit.
6
English
WARNING
Do not use in a way exceeding the rating of the
household outlet or the wiring.
-Exceeding the rating by connecting too many plugs to one
household outlet may cause fire due to overheating.
Always ensure the appliance is operated on an
electric power source matched to the rated voltage
indicated on the AC adaptor.
Fully insert the power plug.
-Failure to do so may cause fire or electric shock.
Regularly clean the power plug and the appliance
plug to prevent dust from accumulating.
-Failure to do so may cause fire due to insulation failure
caused by humidity.
Disconnect the adaptor and wipe with a dry cloth.
Immediately stop using and remove the adaptor if
there is an abnormality or malfunction.
-Using it in such conditions may cause fire, electric shock,
or injury.
<Abnormality or malfunction cases>
• The main unit, self-cleaning recharger, adaptor or
cord is deformed or abnormally hot.
• The main unit, self-cleaning recharger, adaptor or
cord has burning smell.
• There is abnormal sound during use or charging of
the main unit, self-cleaning recharger, adaptor or cord.
-Immediately request inspection or repair at an authorized
service center.
If detergent contacts skin, wash immediately and
thoroughly with soap.
If you experience skin irritation anywhere on the body,
stop using immediately and contact a physician.
-Failure to follow these instructions may result in physical
injury or injury to the skin.
If detergent or oil is consumed accidentally, do not
induce vomiting, drink a large amount of water and
contact a physician.
If detergent or oil comes into contact with eyes,
wash immediately and thoroughly with running
water and contact a physician.
-Failure to follow these instructions may result in physical
problems.
This appliance is not intended for use by persons
(including children) with reduced physical, sensory
or mental capabilities, or lack of experience and
knowledge, unless they have been given
supervision or instruction concerning use of the
appliance by a person responsible for their safety.
Children should be supervised to ensure that they
do not play with the appliance.
-Failure to do so may cause an accident or injury.
The supply cord cannot be replaced. If the cord is
damaged, the AC adaptor should be discarded.
-Failure to do so may cause an accident or injury.
CAUTION
Do not allow pins or trash to adhere to the power
plug or the appliance plug.
-
Doing so may cause electric shock or fire due to a short circuit.

7
English
CAUTION
Do not use excessive pressure to apply the system
outer foil to your lip or other part of your face. Do
not apply the system outer foil directly to blemishes
or injured skin.
-Doing so may cause injury to the skin.
Do not forcefully press the system outer foil. Also,
do not touch the system outer foil with fingers or
nails when in use.
-Doing so may cause injury to skin or reduce the life of the
system outer foil.
Do not touch the blade section (metallic section) of
the inner blade.
-Doing so may cause injury to your hands.
Do not use this product for hair on head or any
other part of the body.
-Doing so may cause injury to skin or reduce the life of the
system outer foil.
Do not share your shaver with your family or other
people.
-Doing so may result in infection or inflammation.
Do not remove the shaver from the self-cleaning
recharger while using the “AUTO” mode.
-Doing so may cause burn due to high temperatures
around the blades.
Do not wrap the cord around the adaptor when storing.
-Doing so may cause the wire in the cord to break with the
load, and may cause fire due to a short circuit.
Do not use detergent for any purpose other than
washing the shaver blades.
-
Using it with other products may cause discoloration or cracking.
Check the system outer foil for cracks or
deformations before use.
-Failure to do so may cause injury to the skin.
Be sure to place the protective cap on the shaver
when carrying around or storing.
-Failure to do so may cause injury to skin or reduce the life
of the system outer foil.
Disconnect the adaptor or the appliance plug by
holding onto the adaptor or the appliance plug
instead of the cord.
-Failure to do so may cause electric shock or injury.
Use caution when opening detergent as spout is sharp.
-Failure to do so may cause injury.
8
English
If the battery fluid leaks out, take the following
procedures. Do not touch the battery with your bare
hands.
-The battery fluid may cause blindness if it comes in
contact with your eyes.
Do not rub your eyes. Wash immediately with clean water
and consult a physician.
-
The battery fluid may cause inflammation or injury if it comes in
contact with the skin or clothes.
Wash it off thoroughly with clean water and consult a physician.
►Disposing of the rechargeable battery
DANGER
The rechargeable battery is exclusively for use with
this shaver. Do not use the battery with other products.
Do not charge the battery after it has been removed
from the product.
• Do not throw into fire or apply heat.
• Do not hit, disassemble, modify, or puncture with a nail.
• Do not let the positive and negative terminals of
the battery get in contact with each other through
metallic objects.
• Do not carry or store the battery together with
metallic jewelry such as necklaces and hairpins.
• Do not charge, use, or leave the battery where it
will be exposed to high temperatures, such as
under direct sunlight or near other sources of heat.
• Never peel off the tube.
-Doing so may cause overheating, ignition, or explosion.
WARNING
After removing the rechargeable battery, do not
keep it within reach of children and infants.
-The battery will harm the body if accidentally swallowed.
If this happens, consult a physician immediately.
9
English
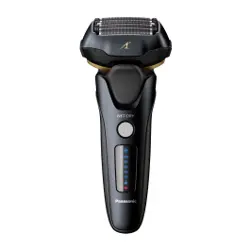
Intended use
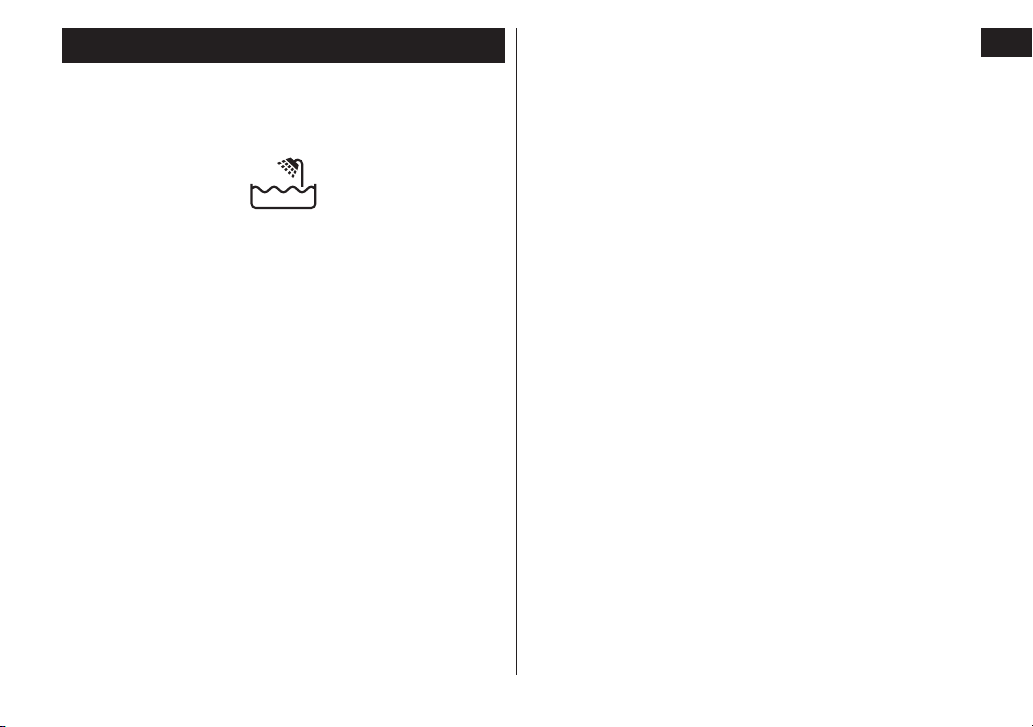
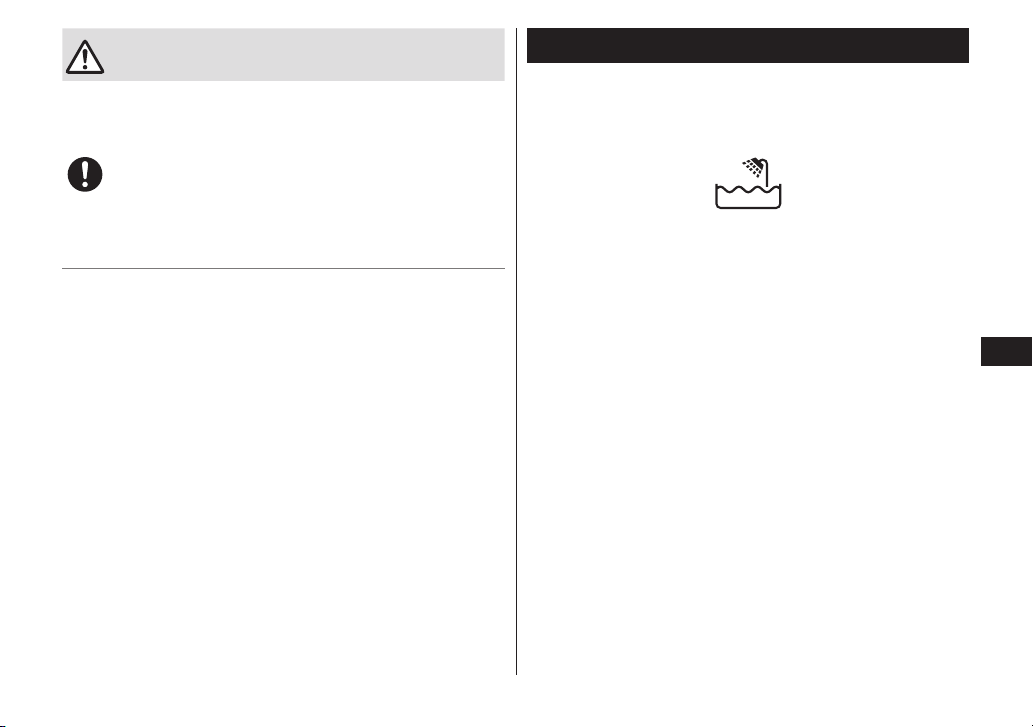
• This WET/DRY shaver can be used for wet shaving using
shaving lather or for dry shaving. You can use this watertight
shaver in the shower and clean with water. The following symbol
means suitable for use in a bath or shower.
►Notes
• Treat yourself to wet lather shaves for at least three weeks and
notice the difference. Your Panasonic WET/DRY shaver requires
a little time to get used to because your skin and beard need
about a month to adjust to any new shaving method.
• Keep both the inner blades inserted. If only one of the inner
blades is inserted, the shaver may be damaged.
• If you clean the shaver with water, do not use salt water or hot
water. Do not soak the shaver in water for a long period of time.
• Clean the housing only with a soft cloth slightly dampened with
tap water or soapy tap water. Do not use thinner, benzine,
alcohol or other chemicals.
• Store the shaver in a place with low humidity after use.
• Do not store the shaver or detergent where it will be exposed to
direct sunlight or other heat sources.
• The self‑cleaning recharger cleans the inner blades and the
system outer foil. Wash with water to remove beard trimmings in
other areas.
10
English
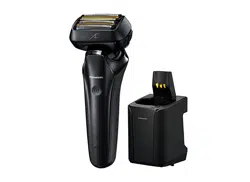
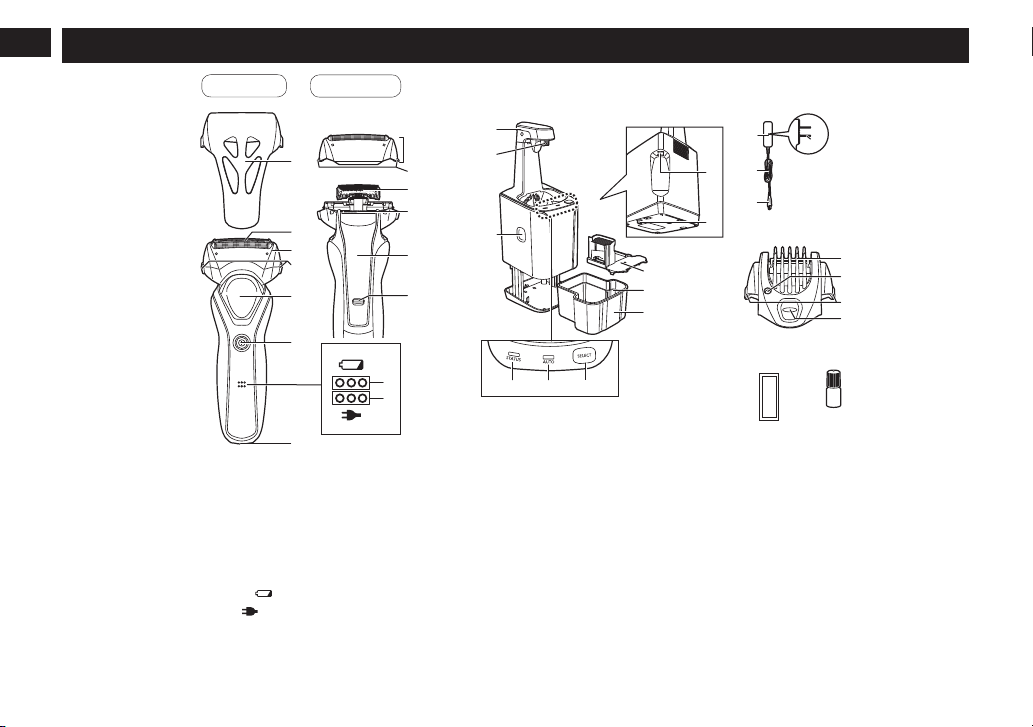
Parts identification
Front
Back
A Main body
1 Protective cap
2 System outer foil
3 Foil frame
4 Foil frame release buttons
5 Thumb rest
6 Power switch
7 Battery capacity lamp ( )
8 Charge status lamp ( )
9 Appliance socket
: Outer foil section
; System outer foil release
buttons
< Inner blades
= Trimmer
> Trimmer handle
? Lock release button
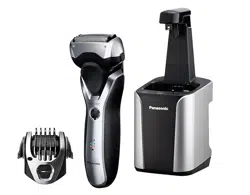
B Self-cleaning recharger
@ Arm
A Charging terminal
B Cleaning liquid unit
removal button
C
Self‑cleaning recharger socket
Lock release lever
E Cleaning liquid filter
Water maximum line
Cleaning liquid unit
H STATUS lamp
I AUTO lamp
J SELECT button
C AC adaptor (RE7-59)
K Adaptor
L Power plug
M Cord
N Appliance plug
D Comb attachment
Comb
Trimming height window
Comb attachment release
buttons
Trimming height switch
button
Accessories
E Special detergent
(Detergent)
F Oil
11
English
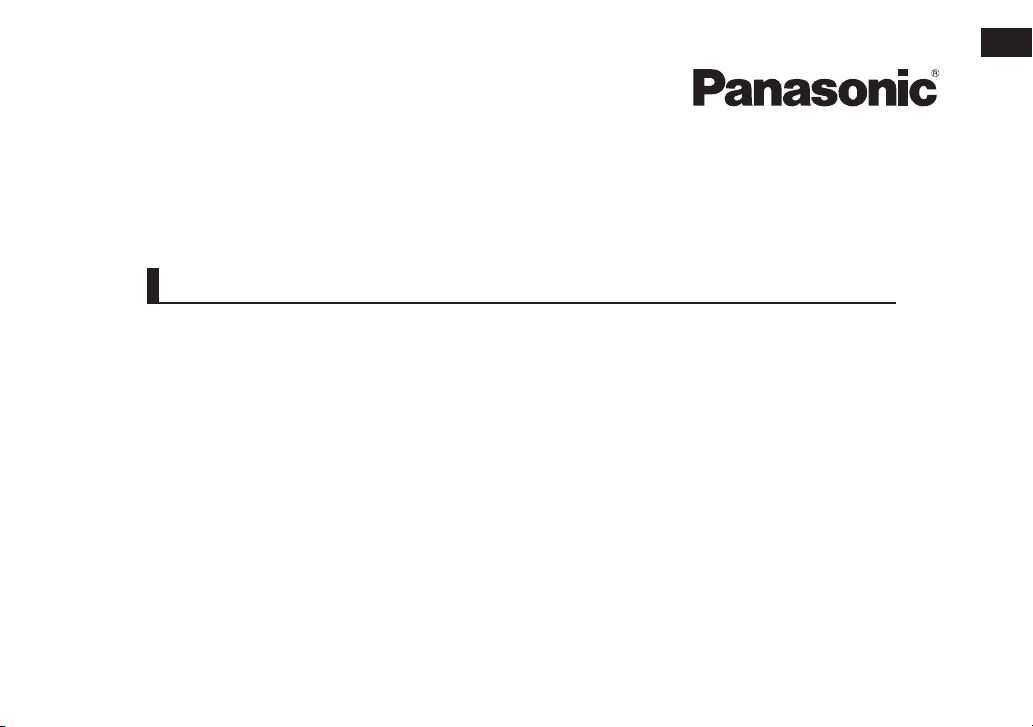
Charging the shaver
Charging using the self-cleaning recharger
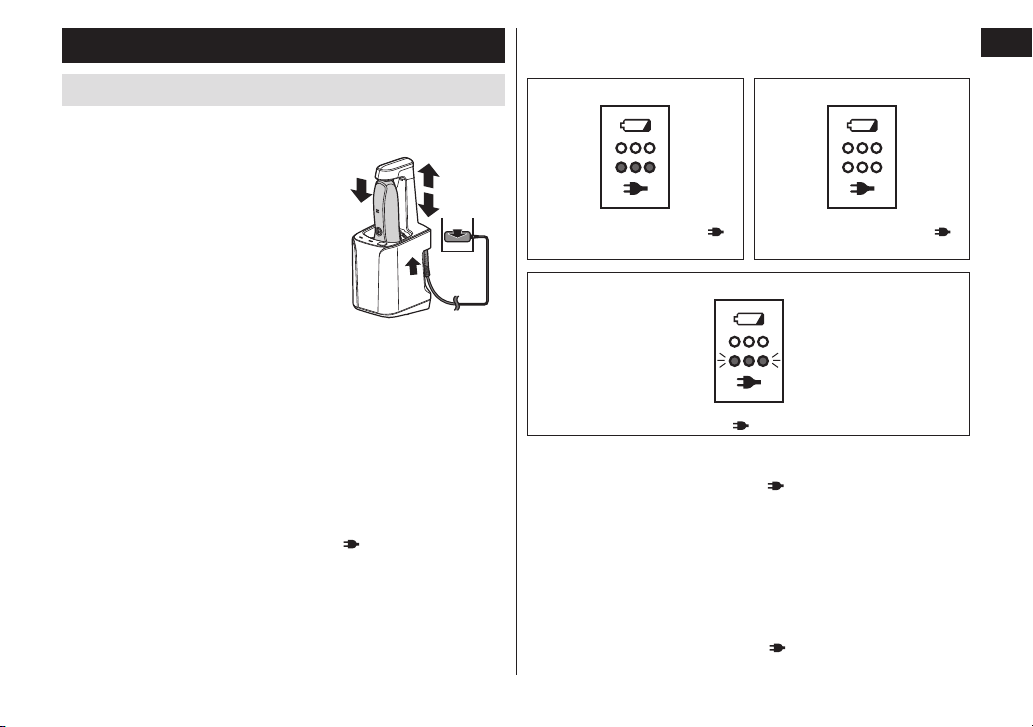
Thoroughly wipe off any drops of water on or around the self‑
cleaning recharger so that it is dry before charging the shaver.
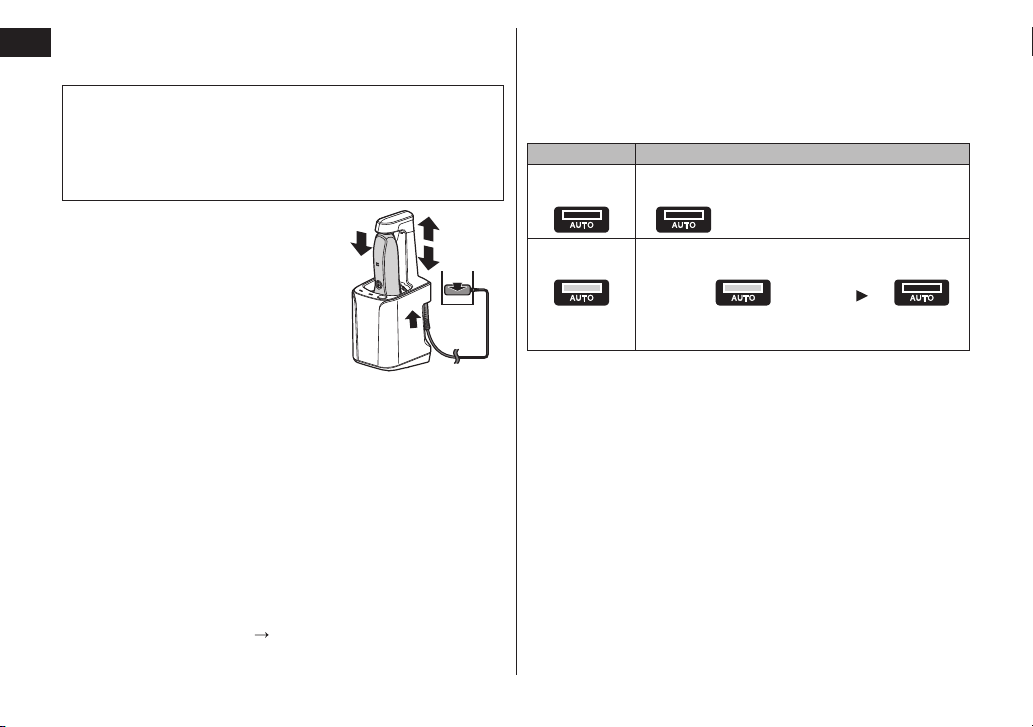
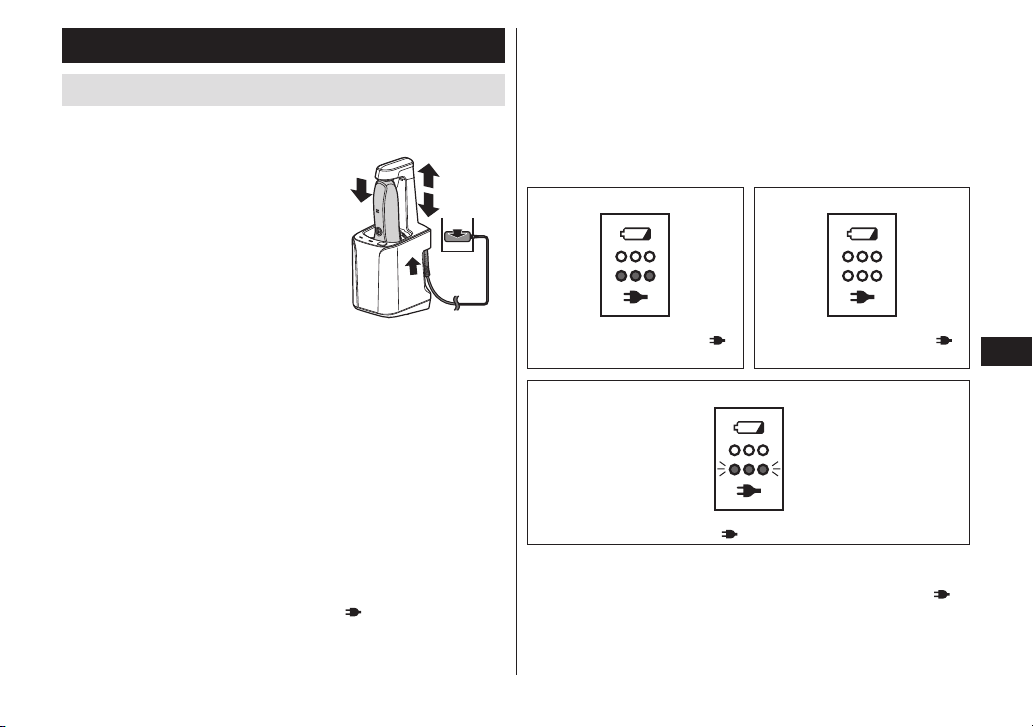
1
1
Insert the appliance plug into
the self-cleaning recharger.
2
2
Pull up the arm until it clicks.
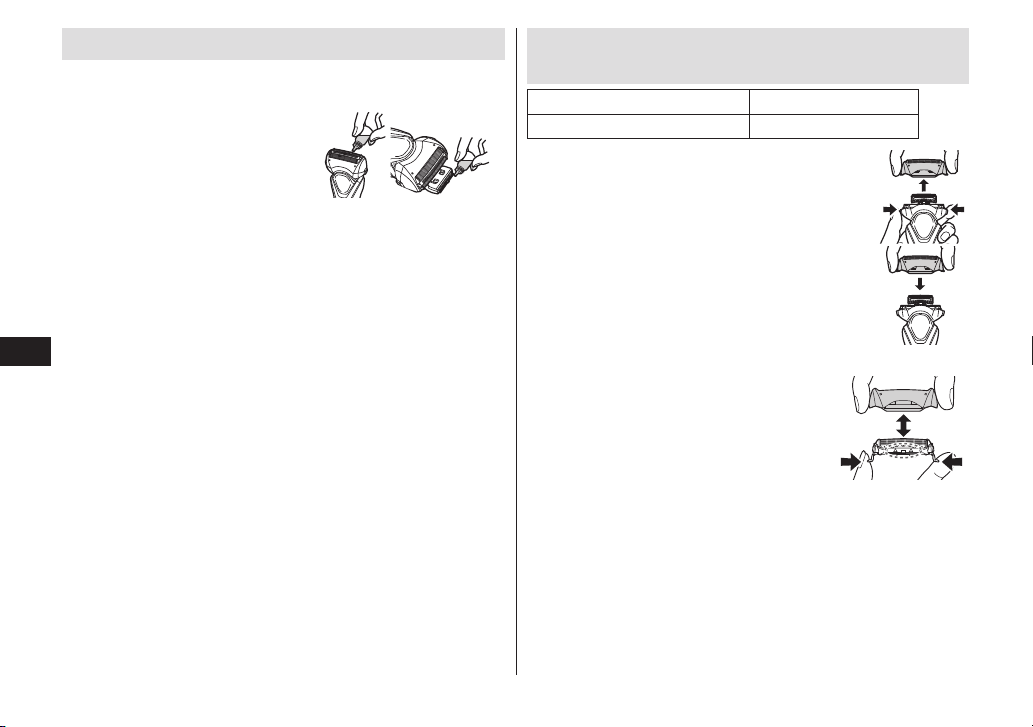
3
3
Remove the protective cap
or comb attachment and
then attach the shaver.
• Turn the shaver off before attaching.
• Check that the system outer foil is
not deformed or damaged when
you are attaching the shaver.
1
2
4
3
5
• Put shaver into the self‑cleaning recharger with the trimmer
handle retracted. If the trimmer handle is not retracted, it
might scratch the cleaning tray.
4
4
Push down the arm until it clicks.
5
5
Plug in the adaptor into a household outlet.
• The “Charge” mode starts when attaching the shaver.
• Check that the charge status lamp ( ) glows.
• Charging is completed after approx. 1 hour.
The charging time may differ with the charging capacity.
• Top‑up charging will not cause reductions in battery performance.
• The appliance can be charged even with the cleaning liquid
unit removed.
• If the shape of the plug does not fit the power outlet, use an
attachment plug adaptor of the proper configuration.
6
6
Disconnect the adaptor after charging is
completed.
While charging After charging is completed
The charge status lamp ( )
glows.
The charge status lamp ( )
turns off.
Abnormal charging
The charge status lamp ( ) blinks twice every second.
• After charging is completed, turning the power switch ON with
the shaver plugged in or connected to the self‑cleaning recharger
will cause the charge status lamp (
) to turn on, and then turn
off after 5 seconds.
This shows that the shaver is fully charged.
• Recommended ambient temperature for charging is 10 – 35 °C
(50 – 95 °F). It may take longer to charge or the battery may fail to
charge properly in extremely high or low temperatures.
Charge the shaver within the recommended ambient temperature range.
• When charging the shaver for the first time or when it has not
been in use for more than 6 months, the charging time may
change or the charge status lamp ( ) may not glow for a few
minutes. It will eventually glow if kept connected.
12
English
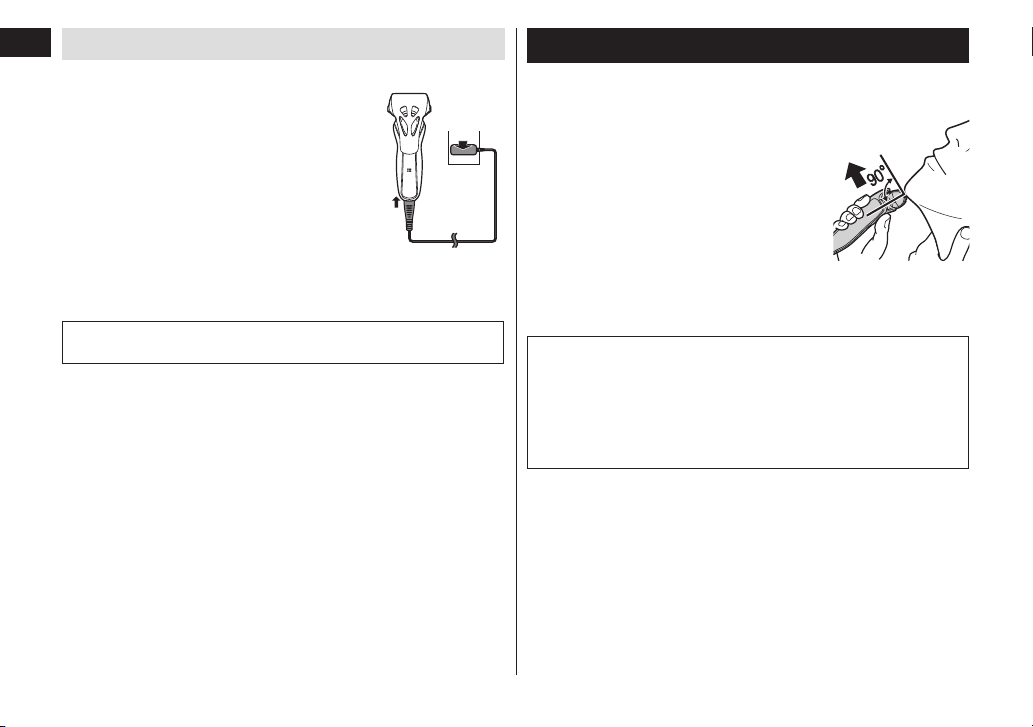
Charging without the self-cleaning recharger
You can also charge without the self‑cleaning recharger.
1
1
Insert the appliance plug into
the shaver.
• Turn the shaver off before inserting.
2
2
Plug in the adaptor into a
household outlet.
• Wipe off any water droplets on the
appliance socket.
1
2
3
3
Disconnect the adaptor after charging is completed.
• Charging the battery for more than 1 hour will not affect
battery performance.
Note
You cannot operate the shaver while charging.
Using the shaver
1
1
Press the power switch.
2
2
Hold the shaver as illustrated
and shave.
• Start shaving by applying gentle
pressure to your face. Stretch your
skin with your free hand and move the
shaver back and forth in the direction
of your beard. You may gently increase
the amount of pressure as your skin
becomes accustomed to this shaver.
Applying excessive pressure does not
provide a closer shave.
Notes
• Do not place your fingers on the power switch while using the
shaver. This may cause the shaver to turn off. Place your
fingers on the thumb rest while using the shaver.
• We recommend using the shaver in an ambient temperature
range of 5 – 35 °C (41 – 95 °F). If used outside this range, the
appliance may stop operating.
13
English
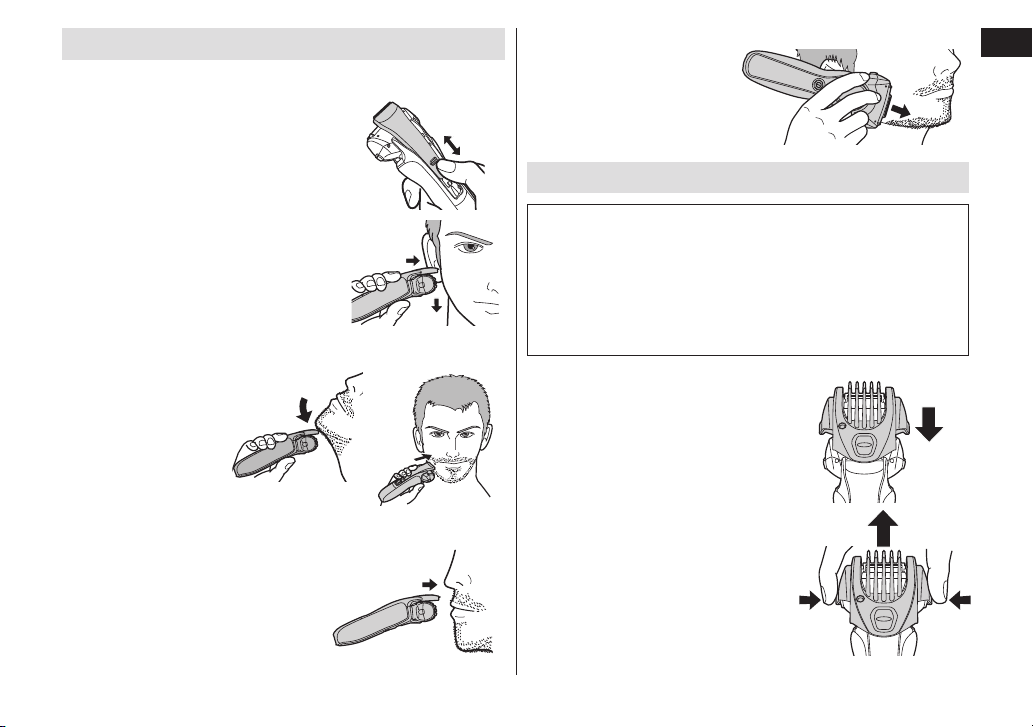
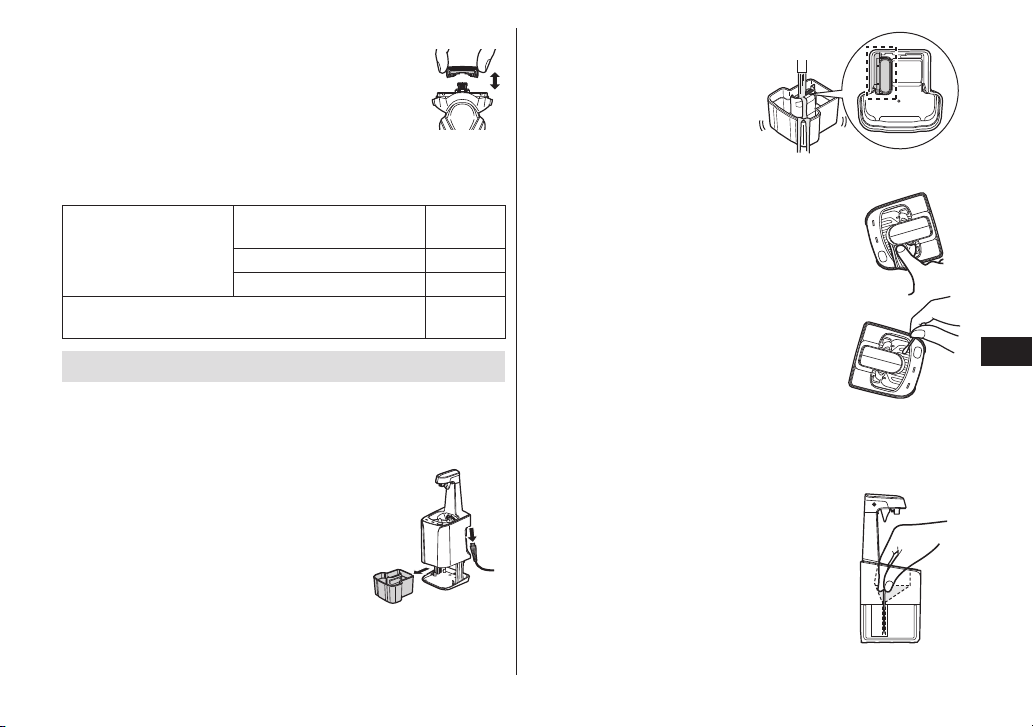
Using the trimmer
►Trimming sideburns
Slide the trimmer handle up. Turn the
shaver on and place at a right angle to
your skin and move downwards to trim
your sideburns.
• Press and hold the lock release button
and slide the trimmer handle down to
lower the trimmer.
►Pre-shave
The trimmer can be
used for a pre‑shave of
long beards.
►Above the lips
Turn the shaver on and place at a right
angle to your skin and trim around your
moustache.
►Trimming the edge of beard
Cut your beard gradually
with the power switch facing
opposite side of your skin,
taking care not to cut too
much.
Using the comb attachment
Note
Apply the oil to the trimmer before and after each use.
(See page 17.)
Failure to apply the oil may cause the following problems due to
rust, wear or burn out.
-The trimmer has become blunt.
-Shorter operating time.
-Louder sound.
Make sure that the shaver is turned off.
1
1
Mount the comb
attachment to the main
body until it clicks.
• Press and hold the comb
attachment release buttons to
remove.
14
English
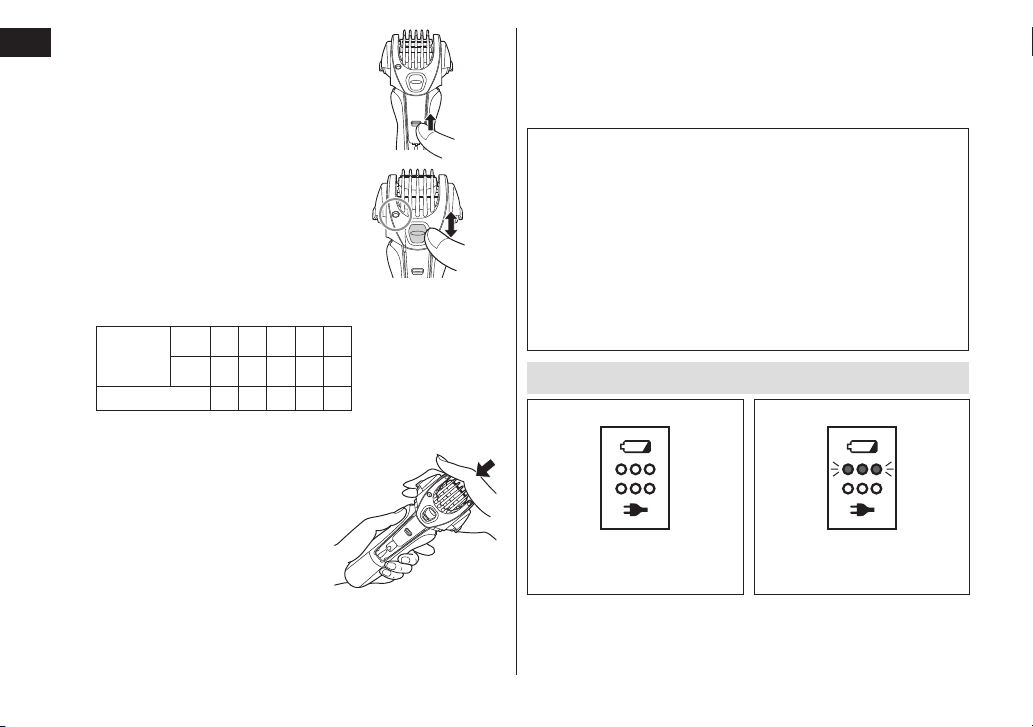
2
2
Slide the trimmer handle
up until it clicks.
3
3
While pressing and
holding the trimming
height switch button, move
the comb vertically to the
desired trimming length
(between 1 mm (1/32˝) and
7 mm (9/32˝)).
Trimming
height
(approx.)
mm 1.0 2.5 4.0 5.5 7.0
inch
1/32 3/32 5/32 7/32 9/32
Indicator 1.0 2.5 4.0 5.5 7.0
• Actual hair length will be a little
longer than the height you set.
4
4
Lightly push the comb
attachment to ensure that
it has locked into place.
5
5
Turn the shaver on, bring the comb of the
comb attachment into contact with the skin,
and cut the beard by moving the trimmer back
against the flow of the beard.
Notes
• Be careful not to cut your hand on the blade when attaching
and removing the comb attachment.
• Do not use with shaving creams applied or when the beard is
wet. Wet beard can stick to the skin or clump making it difficult
for the blade to cut.
• Comb beard and sideburns before trimming.
• Hair trimmings may collect inside the comb attachment when a
large volume of beard is cut, so discard hair trimmings after
each use.
• If the comb attachment is not attached properly, it may become
loose during use resulting in excessive cutting.
Reading lamps when using
During use
When the battery capacity is low
All lamps disappear while using.
The battery capacity lamp
blinks for 5 seconds when the
power switch is pressed.
• You can shave 2 to 3 times after the battery capacity lamp blinks.
(This will differ depending on usage.)
• A full charge will supply enough power for approx. 18 shaves of 3
minutes each. (This will differ depending on usage.)

15
English
Cleaning the shaver
Cleaning using the self-cleaning recharger
►Preparing the self-cleaning recharger
Remove the shaver and the appliance plug from the self‑cleaning
recharger.
1
1
Place the self-cleaning recharger on a hard, flat
surface.
• When the self‑cleaning recharger is lifted, or on the soft
surface such as carpets, the lock release lever will not fit in
the recharger properly. In that case, the cleaning liquid unit
cannot be removed.
2
2
Press the cleaning
liquid unit removal
button (
1
) and
remove the cleaning
liquid unit (
2
).
3
3
Wash away the old cleaning liquid and beard
trimmings and then rinse the cleaning liquid unit.
• After washing, be sure to attach the cleaning liquid filter.
4
4
Pour tap water (1) and
detergent (2) into the
cleaning liquid unit.
• Do not let the water rise
above the maximum water
line. This may cause the
cleaning liquid to spill.
5
5
Attach the cleaning liquid unit.
• Immediately wipe up any cleaning liquid
that has been spilt.
Be careful not to drop cleaning liquid
onto leather products or wooden floors
as it may cause discoloration.
6
6
Press the top of the self-
cleaning recharger down and
securely attach until it clicks.
Notes
• The water and detergent will mix after cleaning begins, making
cleaning liquid.
• If “AUTO” mode cannot be selected or the STATUS lamp glows
for 5 seconds when the SELECT button is pressed, the cleaning
liquid needs to be replaced. Replace the cleaning liquid.
• When replaced, the cleaning liquid will last for approximately
30 days if used once per day. (This will differ depending on
beard thickness and the ambient temperature.)
• Use the detergent within approximately 6 months after opening
the package. When 6 months have passed, discard the
cleaning liquid, and then pour new water and detergent into the
cleaning liquid unit.
• Replace the water and detergent at the same time.
Otherwise the cleaning function may deteriorate.
• Only use self‑cleaning recharger detergent for Panasonic shavers.
16
English
►Cleaning the shaver
Remove any soap or water on the shaver if it has been washed
with hand soap or any other detergent.
Note
When cleaning the shaver after cutting a large volume of beard
with the comb attachment, hair trimmings may collect in the
cleaning tray of the self‑cleaning recharger. Discard hair
trimmings from around the trimmer before attaching the shaver
to the self‑cleaning recharger.
1
1
Insert the appliance plug into
the self-cleaning recharger.
2
2
Pull up the arm until it clicks.
3
3
Remove the protective cap
or comb attachment and
then attach the shaver.
4
4
Push down the arm until it
clicks.
1
2
4
3
5
5
5
Plug in the adaptor into a household outlet.
• Turn the shaver off before attaching.
• Check that the system outer foil is not deformed or
damaged when you are attaching the shaver.
• Put shaver into the self‑cleaning recharger with the trimmer
handle retracted. If the trimmer handle is not retracted, it
might scratch the cleaning tray.
6
6
Press the SELECT button to select the mode.
• The “Charge” mode starts when attaching the shaver.
• Each time you press the SELECT button, the mode
changes from “AUTO” “Charge”.
• The modes start approximately 6 seconds after they are
selected.
• The mode will be aborted if the power is cut off. In this case,
perform the mode again from the beginning.
• Do not press the cleaning liquid unit removal button as the
cleaning liquid may spill causing a malfunction.
Mode Time required (guide)
Charge
Charge
0 to 60 min
AUTO
Clean/Dry
10 min/350 min
Charge
0 to 60 min
• It is not possible to change the mode after
“AUTO” mode has started.
• Use the self‑cleaning recharger in temperatures between 5 °C
(41 °F) and 35 °C (95 °F).
The Clean or Dry function may not work out of recommended
ambient temperature range. In such a case, “AUTO” mode
cannot be selected and the STATUS lamp will glow for
approximately 5 seconds.

17
English
Cleaning the shaver without the self-cleaning recharger
1. Disconnect the cord from the shaver.
2.
Apply some hand soap and some water to the system outer foil.
3. Turn the shaver on.
4.
Turn off the shaver after 10 to 20 seconds.
5. Remove the outer foil section.
6. Clean the shaver, the outer foil section,
the trimmer, and the comb attachment
with running water.
7. Wipe off any drops of water with a dry cloth.
8. Dry the outer foil section, the shaver,
the trimmer, and the comb attachment
completely.
9. Attach the outer foil section to the shaver.
10
. Lubricate the shaver.
Lubrication
To maintain shaving comfort for a long time, it is recommended
that the oil provided with the shaver is used.
1. Switch off the shaver.
2. Apply one drop of oil to each
system outer foil.
3. Raise the trimmer and apply one
drop of oil.
4. Switch the shaver on, and run it for
approximately five seconds.
5. Switch off the shaver, and wipe off any excess oil from the
system outer foil with a soft cloth.
Replacing the system outer foil and the inner blades
system outer foil once every year
inner blades once every two years
►Removing the outer foil section
Press the foil frame release buttons and lift the
outer foil section upwards.
►Attaching the outer foil section
Securely attach the outer foil section to the shaver
until it clicks.

18
English
►Replacing the system outer foil
1. Press the system outer foil release buttons
and pull down the system outer foil.
2. Insert the system outer foil until it clicks.
• Always attach the system outer foil in
proper direction.
• Always insert the system outer foil to the
foil frame when attaching to the shaver.
►Replacing the inner blades
1. Remove the inner blades one at a time.
• Do not touch the edges (metal parts) of the inner
blades to prevent injury to your hand.
2. Insert the inner blades one at a time until they click.
►Replacement parts
Replacement parts are available at your dealer or Service Center.
Replacement parts for
ES‑RT97
System outer foil and inner
blades
WES9013
System outer foil WES9097
Inner blades WES9068
Special Detergent for Shaver Cleaning & Charging
System
WES4L03
Cleaning the self-cleaning recharger
Beard trimmings may become attached to the cleaning tray of the
self‑cleaning recharger. Follow the steps below to remove them. We
recommend doing this each time you change the cleaning liquid.
1. Be sure to remove the cleaning liquid unit
and the appliance plug from the self‑
cleaning recharger.
• Be careful not to spill the cleaning liquid.
• Some cleaning liquid components and
skin oil may separate and adhere to the
cleaning liquid unit and cleaning liquid
filter. This does not indicate a problem.
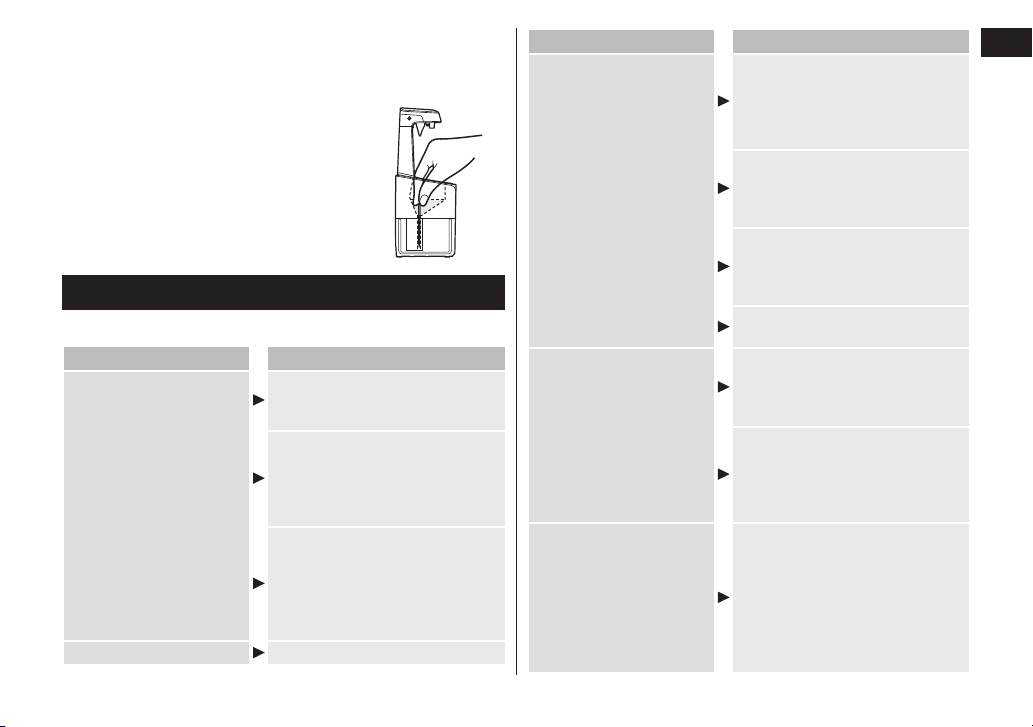
2. Pour water as illustrated while
tilting the cleaning liquid unit
and shaking it gently.
• You can clean with the
cleaning liquid filter removed.
• After washing, be sure to
attach the cleaning liquid filter.
3.
Gently wipe off any beard trimmings attached
to the inside of the cleaning tray with a cloth
or tissue paper dampened with water.
• Clean the corners and uneven parts of the
cleaning tray with a cotton swab
dampened with water.
19
English
►When the water does not drain from the cleaning tray
• Do not tilt the self‑cleaning recharger to pour out water. Doing so
may cause the cleaning liquid in the cleaning liquid unit to spill or
cause the self‑cleaning recharger to malfunction.
Beard trimmings may clog the drain at the
bottom of the cleaning tray.
In this case, you cannot clean or dry the shaver.
Push the beard trimmings down through the
drain with a toothpick etc.
Troubleshooting
►Self-cleaning recharger
Problem Action
The blade has not been
thoroughly washed.
If the shaver is not cleaned for
more than 2 weeks, first clean to
remove beard trimmings.
Do not add detergent and water
except when replacing the
cleaning liquid.
Doing so may deteriorate the
cleaning function. (See page 15.)
After cleaning, oil‑like droplets may
remain on the outside of the foil
frame. This is the lubricating
component of the cleaning liquid
and does not indicate a problem.
You may wipe it off with a soft cloth.
The STATUS lamp glows. See page 20.
Problem Action
The mode does not start.
Check that the AC adaptor is
connected to the self‑cleaning
recharger, and that the AC
adaptor is plugged in to a
household outlet. (See page 11.)
Confirm that the shaver is
properly attached to the self‑
cleaning recharger.
(See page 11.)
The Clean or Dry function may
stop out of recommended
ambient temperature range.
(5 – 35 °C (41 – 95 °F))
Check if the STATUS lamp glows.
(See page 20.)
Cleaning liquid has
accumulated in the
cleaning tray.
Remove any waste, etc. that has
accumulated in the drain at the
bottom of the cleaning tray.
(See this page.)
If you use the self‑cleaning
recharger when the shaver is wet
or when soap or shaving gel is on
the shaver, cleaning liquid may
accumulate in the cleaning tray.
The cleaning liquid unit
cannot be removed.
Place the self‑cleaning recharger
on a hard, flat surface.
When the self‑cleaning recharger
is lifted, or on the soft surface
such as carpets, the lock release
lever will not fit in the recharger
properly. In that case, the cleaning
liquid unit cannot be removed.

20
English
Problem Action
Makes a loud sound.
During cleaning:
The self‑cleaning recharger
makes a loud sound due to the
cleaning of the blades.
After cleaning:
The self‑cleaning recharger
makes a loud sound due to the
removal of water droplets in
order to speed drying.
The sound after cleaning is different
from the sound during cleaning. The
water level has dropped and it is
removing water droplets from the
blades after cleaning. This does not
indicate a problem.
The shaver cannot be
charged.
Gently wipe the metal terminal of
the appliance socket and the
charging terminal of the self‑
cleaning recharger with a cloth or
tissue dampened with water.
The blades are not dry or
are sticky.
The blades may not dry quickly
due to temperature conditions.
Wipe with a soft cloth before shaving.
The blades crack or
deform during cleaning.
Do not insert any foreign objects
into the recharger.
Replace the system outer foil and/
or inner blades. (See page 17.)
Problem Action
The cleaning liquid has
foamed.
If you mix soapy water or hand
soap with the detergent or use
another detergent, the cleaning
liquid will foam. Use the self‑
cleaning recharger after
thoroughly washing and drying
the shaver.
Replace the cleaning liquid.
Cleaning liquid leaked from
the cleaning liquid unit.
Do not press the cleaning liquid unit
removal button during the mode.
Place the self‑cleaning recharger
horizontally.
If you use the self‑cleaning
recharger when the shaver is wet or
when soap or shaving gel is on the
shaver, cleaning liquid may leak.
►When the STATUS lamp glows
Problem Action
It is time to replace the
cleaning liquid.
Pour new water and detergent
into the cleaning liquid unit.
The cleaning liquid unit is
not properly attached.
Properly attach the cleaning liquid
unit.
The self‑cleaning
recharger is tilted.
Place the self‑cleaning recharger
on a horizontal surface.
After performing the above operation, press the SELECT button
and select a mode.
►When all self-cleaning recharger’s lamps blink
Problem Action
Appliance failure
Contact an authorized service center.

21
English
►Shaver
Problem Action
Shavings fly all over.
This can be improved by cleaning
every time after shaving.
Clean the inner blades.
System outer foil gets hot.
Apply oil.
(See page 17.)
Replace the system outer foil if it
is damaged or deformed.
(See page 18.)
Operating time is short
even after charging.
Apply oil.
When the number of operations
per charge starts to decrease, the
battery is nearing the end of its life.
Makes a loud sound.
Apply oil.
Confirm that the blades are
properly attached.
Clean the system outer foil.
The odor is getting stronger.
This can be improved by cleaning
every time after shaving.
Problem Action
You do not get as close a
shave as before.
This can be improved by cleaning
every time after shaving.
Replace the system outer foil and/
or inner blades.
Expected life of system outer foil
and inner blades:
System outer foil:
Approximately 1 year
Inner blades:
Approximately 2 years
Apply oil.
The shaver cannot be
charged with the self‑
cleaning recharger.
Gently wipe the metal terminal of
the appliance socket and the
charging terminal of the self‑
cleaning recharger with a cloth or
tissue dampened with water.
Shaver stopped functioning.
Recommended ambient
temperature for operation is
5 – 35 °C (41 – 95 °F). The
shaver may stop functioning when
out of recommended ambient
temperature range.
The battery has reached the end
of its life.
If the problems still cannot be solved, contact the store where you
purchased the unit or a service center authorized by Panasonic for repair.

22
English
Battery life
The life of the battery is 3 years. The battery in this shaver is not
intended to be replaced by consumers.
Removing the built-in rechargeable battery
ATTENTION:
A lithium ion battery that is recyclable powers the product you
have purchased. Please call 1‑800‑8‑BATTERY for information
on how to recycle this battery.
Remove the built-in rechargeable battery before disposing of
the shaver.
This figure must only be used when disposing of the shaver, and
must not be used to repair it. If you dismantle the shaver yourself,
it will no longer be waterproof, which may cause it to malfunction.
• Remove the shaver from the AC adaptor.
• Press the power switch to turn on the power and then keep the
power on until the battery is completely discharged.
• Perform steps 1 to 5 and lift the battery, and then remove it.
• Please take care not to short‑circuit the battery.
Specifications
Power source
See the name plate on the AC adaptor.
(Automatic voltage conversion)
Motor voltage
3.6 V
Charging time Approx. 1 hour
This product is intended for household use only.
23
English
Federal Communication Commission Interference Statement
This equipment has been tested and found to comply with the
limits for a Class B digital device, pursuant to Part 15 of the FCC
Rules. These limits are designed to provide reasonable
protection against harmful interference in a residential
installation. This equipment generates, uses and can radiate
radio frequency energy and, if not installed and used in
accordance with the instructions, may cause harmful
interference to radio communications. However, there is no
guarantee that interference will not occur in a particular
installation. If this equipment does cause harmful interference to
radio or television reception, which can be determined by turning
the equipment off and on, the user is encouraged to try to
correct the interference by one of the following measures:
• Reorient or relocate the receiving antenna.
• Increase the separation between the equipment and receiver.
• Connect the equipment into an outlet on a circuit different from
that to which the receiver is connected.
• Consult the dealer or an experienced radio/TV technician for help.
FCC Caution: To assure continued compliance, install and use in
accordance with provided instructions. Any changes or
modifications not expressly approved by the party responsible
for compliance could void the user’s authority to operate this
equipment.
This device complies with part 15 of the FCC Rules. Operation is
subject to the following two conditions: (1) This device may not
cause harmful interference, and (2) this device must accept any
interference received, including interference that may cause
undesired operation.
Personal Care & Beauty Care Products
FOR USA AND PUERTO RICO ONLY
30-Day Quality
Satisfaction Guarantee
If you are dissatisfied with any Panasonic Personal Care &
Beauty Care Products for any reason, simply return it to the
place of purchase with a dated proof of purchase, in the original
packaging, with all accessories, parts and instructions, within
30 days of the date of purchase, for a full refund, or call
Panasonic at 1‑800‑338‑0552.
Abuse or misapplication of this product voids the guarantee.
FOR YOUR CONVENIENCE, WE HAVE ESTABLISHED A
TOLL-FREE (IN USA ONLY) NATIONAL ACCESSORY
PURCHASE HOT LINE AT 1-800-332-5368.

24
25
Français
Moded’emploi
(Domestique)
Rasoirrechargeable
ModèleNo
ES-RT97
Mercid’avoirchoisiceproduitPanasonic.
Avantdefairefonctionnercetappareil,veuillezliretouteslesinstructionsetlesconserverpouruneutilisationultérieure�
Consignes de sécurité ................... 26
Usageprévu���������������������������������������������� 31
Identicationdespièces�������������������������� 32
Chargementdurasoir������������������������������ 33
Utilisationdurasoir���������������������������������� 34
Nettoyagedurasoir���������������������������������� 37
Dépannage������������������������������������������������ 42
Duréedeviedelapile������������������������������ 45
Retraitdelapilerechargeableintégrée
����� 45
Caractéristiquestechniques������������������� 45
Tabledesmatières

26
Français
Consignesdesécurité
Anderéduirelerisquedeblessure,dedécès,dechocélectrique,
d’incendieoudedommagesàlapropriété,respecteztoujoursles
consignesdesécuritésuivantes.
Explicationdessymboles
Lessymbolessuivantssontutiliséspourrépertorieretdécrireleniveau
derisque,deblessuresetdedommagesàlapropriétépouvantêtre
causéslorsquelesconsignessontignoréesetquel’appareiln’estpas
utilisédemanièreconforme.
DANGER
Signaleundanger
potentielpouvant
entraînerdesblessures
gravesoulamort.
AVERTISSEMENT
Signaleundanger
potentielquipeut
entraînerdesblessures
gravesoulamort.
ATTENTION
Signaleundanger
susceptibled’entraîner
desblessuresmineures.
Lessymbolessuivantssontutiliséspourrépertorieretdécrireletypede
consignesàobserver.
Cesymboleestutilisépouravertirlesutilisateursqu’ils’agit
d’uneprocéduredefonctionnementspéciquequinedoitpas
êtreeffectuée.
Cesymboleestutilisépouravertirlesutilisateursqu’ils’agit
d’uneprocéduredefonctionnementspéciquequidoitêtre
suivieandepouvoirutiliserl’appareilentoutesécurité.
CONSIGNESDESÉCURITÉIMPORTANTES
Lorsdel’utilisationd’unappareilélectrique,ilfaut
toujoursprendredesprécautionsdebase,ycompris
lessuivantes:
Liseztouteslesinstructionsavantd’utilisercetappareil.
DANGER
Anderéduiretoutrisquede
chocélectrique:
1.Netouchezpasunappareilquiesttombédans
l’eau.Débranchez-leimmédiatement.
2.Neplacezninerangezl’appareillàoùilpeuttomber
ouêtreprécipitédansunebaignoireouunévier.Ne
déposezoun’échappezpasdansl’eauoudansun
autreliquide.
3.Débrancheztoujourscetappareildelaprise
électriqueimmédiatementaprèsusage,excepté
pendantlacharge.
4.Débranchezcetappareilavantdelenettoyer.
AVERTISSEMENT
Anderéduirelerisquedebrûlures,d’incendie,
dechocélectriqueoudeblessurescorporelles:
1.Unegrandevigilanceestnécessairelorsquecet
appareilestutilisépardesenfantsoudespersonnes
handicapées,sureuxouenleurprésence.
2.Utilisezcetappareiluniquementpoursonusage
prévu,commeledécritleprésentmanuel.N’utilisez
pasd’accessoiresquinesontpasrecommandéspar
lefabricant.

27
Français
3.N’utilisezjamaiscetappareilsilecordonoulache
estendommagé,s’ilnefonctionnepascorrectement,
s’ilesttombé,endommagéoutombédansl’eau.
Retournezl’appareilàuncentrederéparationpour
lefaireinspecteretréparer.
4.Gardezlecordonéloignédessurfaceschauffées.
5.Nefaitesjamaistomberoun’insérezpasunobjet
danslesouverturesdel’appareil.
6.N’utilisezpasàl’extérieur,dansdesendroitsoùdes
aérosols(pulvérisateurs)sontutilisésoulàoùde
l’oxygèneestadministré.
7.N’utilisezpascerasoiravecdeslamesderasageet/
ouunegrilleendommagées,carilpourraitprovoquer
desblessuresauvisage.
8.Brancheztoujourslacheàl’appareilenpremier,
puispourdébrancher,commuteztoutesles
commandessur“arrêt”avantdedébrancher.
CONSERVEZLESPRÉSENTESINSTRUCTIONS
AVERTISSEMENT
Cerasoirestdotéd’unepilerechargeable�Nepaslajeter
danslefeu,nilachauffer,lacharger,l’utiliseroula
laisserdansunenvironnementàhautetempérature�
-
Toutmanquementàcequiprécèdepeutentraînerune
surchauffe,uneinammationouuneexplosiondel’appareil.
Nepasbrancherl’adaptateuràuneprisesecteuroula
débrancheraveclesmainshumides�
-
Cecipourraitentraînerunchocélectriqueoudesblessures.
Nejamaisdémonterl’appareil,sauflorsdesamiseaurebut�
-
Cecipourraitprovoquerunincendie,unchocélectriqueoudes
blessures.
Nepasutiliserunautreadaptateurquel’adaptateur
secteuretlechargeurauto-nettoyantfournis�Etnepas
chargerunautreproduitàl’aidedel’adaptateursecteur
etlechargeurauto-nettoyantfournis�
-
Cecipourraitentraînerdesbrûluresouunincendieduesàun
court-circuit.
Nepasmodier,niréparerl’appareil�
-
Cecipourraitprovoquerunincendie,unchocélectriqueoudes
blessures.
Contacteruncentredeserviceagréépourlesréparations
(remplacementdelapile,etc.).
Nepasrangerl’appareildansunendroitàportéedes
enfants�Nepasleslaisserl’utiliser�
-
Desaccidentsetdesblessurespeuventsurvenirsivousmettez
leslamesintérieureset(ou)lerécipientd’huiledanslabouche,
ousivousingérezdudétergent.

28
Français
AVERTISSEMENT
Nepasendommager,modier,plierexcessivement,tirer
outordrelecordon�
Etnepasplacerd’objetlourdsurlecordon,nilepincer�
-
Cecipourraitprovoquerunchocélectriqueouunincendiedûà
uncourt-circuit.
Nepasutiliserunetensionnominalesupérieureàcellede
lapriseouducâblesecteur�
-
Undépassementdetensionnominaleenconnectantune
quantitétropimportantedechesdansuneprisesecteurpeut
entraînerunincendiedûàunesurchauffe.
S’assurerdefairefonctionnerl’appareilparlebiaisd’une
sourced’alimentationélectriquedontlatension
correspondàlatensionnominaleindiquéesur
l’adaptateursecteur�
Insérercomplètementlached’alimentation�
-
Sinon,cecipourraitprovoquerunincendieouunchocélectrique.
Nettoyerrégulièrementlached’alimentationetlache
del’appareilpouréviterl’accumulationdepoussière�
-
Sinon,cecipourraitprovoquerunincendiedûàundéfaut
d’isolementprovoquéparl’humidité.
Débrancherl’adaptateuretl’essuyeravecunchiffonsec.
Cesserimmédiatementd’utiliserl’appareiletdébrancher
l’adaptateurencasd’anomalieoudedysfonctionnement�
-
L’utiliserdansdetellesconditionspeutprovoquerunincendie,
unchocélectriqueouuneblessure.
<Encasd’anomalieoudedysfonctionnement>
• L’appareilprincipal,lechargeurauto-nettoyant,l’adaptateur
oulecordonestdéforméouanormalementchaud�
• L’appareilprincipal,lechargeurauto-nettoyant,
l’adaptateuroulecordonsentlebrûlé�
• Unbruitanormalestconstatéaucoursdel’utilisation
ouduchargementdel’appareilprincipal,duchargeur
auto-nettoyant,del’adaptateurouducordon�
-
Faireimmédiatementvérierouréparerl’appareildansuncentre
deserviceagréé.
Sidudétergententreencontactaveclapeau,laver
immédiatementavecdusavon�
Sivousressentezdesdouleurssurlapeauousurle
corps,cesserimmédiatementd’utiliserleproduitet
contacterunmédecin�
-
Fautedequoi,vouspourriezvousblesserouabîmervotrepeau.
Encasd’absorptionaccidentellededétergentoud’huile,
nepasprovoquerdevomissements,boireunegrande
quantitéd’eauetcontacterunmédecin�
Sidudétergentoudel’huileentreencontactavecles
yeux,laversoigneusementimmédiatementavecdel’eau
etcontacterunmédecin�
-
Lenon-respectdecesinstructionspeutentraînerdesproblèmes
physiques.
29
Français
AVERTISSEMENT
Cetappareiln’apasétéconçupourêtreutilisépardes
personnes(enfantsycompris)souffrantd’unhandicap
physique,sensorieloumental,ounedisposantpasde
l’expérienceetdesconnaissancesnécessairesàune
utilisationsûre,àmoinsqu’ellesaientreçutoutesles
consignesrequisesparlapersonneresponsabledeleur
sécuritéquantàl’utilisationdel’appareil�Nepaslaisser
unenfantjoueravecl’appareil�
-
Sinon,cecipourraitprovoquerunaccidentoudesblessures.
Lecordond’alimentationnepeutpasêtreremplacé�S’ilest
endommagé,l’adaptateursecteurdoitêtremisaurebut�
-
Sinon,cecipourraitprovoquerunaccidentoudesblessures.
ATTENTION
Nelaissezpasdebrochesoudedéchetsadhéreràla
ched’alimentationouàlachedel’appareil�
-
Cecipourraitprovoquerunchocélectriqueouunincendiedûà
uncourt-circuit.
Ilestinutiled’exercerunepressionexcessivedelagrille
deprotectiondusystèmesurlapartiesupérieurede
votrelèvreousurtouteautrepartiedevotrevisage�La
grilledeprotectiondusystèmenedoitpasêtreen
contactdirectavecunepeauimpropreoublessée�
-
Celapourraitabîmervotrepeau.
N’appuyezpasexcessivementsurlagrilledeprotection
dusystème�Demême,netouchezpaslagrillede
protectiondusystèmeavecvosdoigtsouvosongles
pendantl’utilisation�
-
Procéderainsipourraitblesserlapeauouréduireladuréedevie
delagrilledeprotectiondusystème.
Netouchezpaslasectiondelalame(sectionmétallique)
delalameintérieure�
-
Vouspourriezvousblesserauxmains.
N’utilisezpasceproduitpourlescheveuxoulespoilsde
touteautrepartieducorps�
-
Procéderainsipourraitblesserlapeauouréduireladuréedevie
delagrilledeprotectiondusystème.
Nepartagezpasvotrerasoiravecdesmembresdevotre
familleoud’autrespersonnes�
-
Celapourraitentraîneruneinfectionouuneinammation.
Neretirezpaslerasoirduchargeurauto-nettoyanten
mode“AUTOMATIQUE”�
-
Fautedequoi,vouspourriezvousbrûleràcausede
températuresélevéesautourdeslames.
Neserrezpastroplecordonenl’enroulantautourde
l’adaptateuravantdeleranger�
-
Lecordonpourraits’endommageretprovoquerunincendiedûà
uncourt-circuit.
N’utilisezpasledétergentpourautrechosequele
nettoyagedeslamesderasoir�
-
L’utiliseravecd’autresproduitspeutcauserunedécolorationou
desssures.
Avantutilisation,examinezlagrilledeprotectiondu
systèmepourdécelerdesssuresoudesdéformations�
-
Fautedequoi,celapourraitabîmervotrepeau.
30
Français
► Miseaurebutdelapilerechargeable
DANGER
Cettepilerechargeables’utiliseuniquementaveccerasoir�
Nepasutiliserlapileavecunquelconqueautreappareil�
Nepasrechargerlapileunefoisqu’elleaétéretiréede
l’appareil�
• Nepaslajeteraufeuoulasoumettreàunesourcedechaleur�
• Nepaslasoumettreàunchoc,ladémonter,lamodier
oulaperceravecunclou�
• Nepaslaisserlesbornespositivesetnégativesdelapile
entrerencontactl’uneavecl’autreviadesobjetsenmétal�
• Nepasrangeroutransporterlapileavecdesbijoux
métalliques,commedescolliersoudesépinglesàcheveux�
• Nepascharger,utiliseroulaisserlapiledansunendroit
oùelleseraexposéeàdestempératuresélevées,
commeenpleinsoleilouàproximitéd’autressources
dechaleur�
• Nejamaispelerletube�
-
Toutmanquementàcequiprécèdepeutentraînerune
surchauffe,uneinammationouuneexplosiondel’appareil.
AVERTISSEMENT
Unefoislapilerechargeableretirée,nepaslalaisserà
portéedesenfantsoudesnourrissons�
-
Encasd’absorptionaccidentelle,lapileestnocivepourlecorps.
Enpareilcas,consulterunmédecinimmédiatement.
ATTENTION
Assurez-vousdeplacerlecouvercledeprotectionsurle
rasoirlorsquevousletransportezoupourlestockage�
-
Sinon,cecipourraitblesserlapeauouréduireladuréedeviede
lagrilledeprotectiondusystème.
Débranchezl’adaptateuroulachedel’appareilen
tenantl’adaptateuroulachedel’appareilplutôtqu’en
tirantsurlecordon�
-
Sinon,cecipourraitprovoquerunchocélectriqueoudesblessures.
Veillezànepasvouscouperlesmainsaveclebecen
ouvrantledétergent�
-
Fautedequoi,vouspourriezvousblesser.
31
Français
AVERTISSEMENT
Siduliquideenprovenancedelapilefuit,prendreles
mesuressuivantes�Nepastoucherlapileàmainsnues�
-
Leliquideenprovenancedelapilepeutrendreaveugleencas
decontactaveclesyeux.
Nepassefrotterlesyeux.Laverimmédiatementavecdel’eau
propreetconsulterunmédecin.
-
Leliquideenprovenancedelapilepeutcauseruneinammation
oudesblessuresencasdecontactaveclapeauoudesvêtements.
Lerincercomplètementavecdel’eaupropreetconsulterun
médecin.
Usageprévu
• Cerasoiravec/sansmousseestutilisablesurpeausècheoupeau
mouilléeavecdugelderasage.Vouspouvezutilisercerasoirétanche
sousladoucheetlenettoyersousl’eau.Cesymbolesigniequele
rasoirpeutêtreutilisédanslebainousousladouche.
► Remarques
• Essayezlerasagemouilléaugelpendantunminimumdetrois
semainesetvousverrezladifférence!Ilvousfaudraunpeudetemps
pourvoushabitueràvotrerasoirPanasonicavec/sansmoussecar
votrepeauetvotrebarbeontbesoind’unmoisenvironpours’adapterà
unenouvelleméthodederasage.
• Veillezàcequelesdeuxlamesintérieuressoientinsérées.Siuneseule
lameestinsérée,lerasoirpeutêtreendommagé.
• Sivousnettoyezlerasoiràl’eau,veillezànepasutiliserd’eausaléeou
d’eauchaude.Nelaissezpastremperlerasoirdansl’eaupendantune
troplonguepériode.
• Nettoyezleboîtieruniquementavecuntissuimbibéd’eaucouranteou
d’eaucourantesavonneuse.N’utilisezpasdesolvant,d’essence,
d’alcooloud’autresproduitschimiques.
• Conservezlerasoirdansunendroitsecaprèsusage.
• Neconservezpaslerasoirouledétergentdansunendroitexposéau
soleilouàd’autressourcesdechaleur.
• Lechargeurauto-nettoyantnettoieleslamesintérieuresetlagrillede
protectiondusystème.Nettoyezavecdel’eaupourretirerlespoilsde
barbedesautreszones.

32
Français
Identicationdespièces
Avant
Arrière
A
Boîtier
1
Couvercledeprotection
2
Grilledeprotectiondusystème
3
Cadredelagrilledeprotection
4
Boutonsdedéverrouillagedu
cadredegrilledeprotection
5
Supportd’appuidupouce
6
Boutondemiseenmarche
7Témoindechargedela
pile( )
8Témoind’étatdecharge
( )
9
Prise
:
Sectiondelagrillede
protection
;
Boutonsdedéverrouillagedela
grilledeprotectiondusystème
<
Lamesintérieures
=
Tondeuseescamotable
>
Levierdelatondeuse
escamotable
?
Boutondeverrouillage/
déverrouillage
B
Chargeurauto-nettoyant
@
Brasdemaintien
A
Plotdecontactdechargement
B
Boutonderetraitdubacpour
liquidedenettoyage
C
Priseduchargeurauto-nettoyant
Levierdedégagement/verrouillage
E
Filtreduliquidedenettoyage
Niveaud’eaumaximum
Bacpourliquidedenettoyage
H
Indicateurd’état
I
Indicateurd’état“AUTO”
(automatique)
J
Boutondesélection
C
Adaptateursecteur(RE7-59)
K
Adaptateur
L
Fiched’alimentation
M
Cordon
N
Fichedel’appareil
D
Accessoirepeigne
Peigne
Fenêtredehauteurdecoupe
Boutonsdedéverrouillagede
l’accessoirepeigne
Boutondechangementdela
hauteurdecoupe
Accessoires
E
Détergentspécial(Détergent)
F
Huile
33
Français
Chargementdurasoir
Chargementàl’aideduchargeurauto-nettoyant
Essuyezavecsointoutetraced’eausurouàproximitéduchargeur
auto-nettoyantanqu’ilsoitbiensecavantledémarrageduchargement.
1
1
Insérezlachedel’appareil
danslechargeurauto-nettoyant�
2
2
Tirezlebrasdemaintienvers
lehautjusqu’àl’émissiond’un
bruitd’enclenchement�
3
3
Retirezlecouverclede
protectionoul’accessoire
peigne,puisxezlerasoir�
• Mettezlerasoirhorsmarcheavantde
lexer.
• Vériezquelagrilledeprotectiondu
systèmen’estpasdéforméeou
endommagéelorsquevousxezlerasoir.
1
2
4
3
5
• Mettezlerasoirdanslechargeurauto-nettoyantaveclelevierde
latondeuseescamotablerétracté.Silelevierdelatondeuse
escamotablen’estpasrétracté,ilrisquederayerlebacde
nettoyage.
4
4
Poussezlebrasdemaintienverslebasjusqu’à
l’émissiond’unbruitd’enclenchement�
5
5
Branchezl’adaptateurdansuneprisesecteur�
• Lemode“Chargement”démarrelorsquevousraccordezlerasoir.
• Vériezqueletémoind’étatdecharge( )s’allume.
• Larechargeestterminéeaprèsenviron1heure.
Laduréedechargepeutvarierselonl’étatdedéchargedelapile.
• Uneaugmentationdelachargenecauserapasderéductiondes
performancesdelapile.
• Ilestpossibledechargerl’appareilmêmesanslebacpourliquide
denettoyage.
• Silaformedelachenecorrespondpasàlaprisedecourant,
utilisezunadaptateurdeprisedelamêmeconguration.
6
6
Déconnectezl’adaptateurunefoislechargement
terminé�
Pendantlechargement Unefoislechargementterminé
Letémoind’étatdecharge( )
s’allume.
Letémoind’étatdecharge( )
s’éteint.
Rechargeanormale
Letémoind’étatdecharge( )clignoteradeuxfoisparseconde.
• Unefoisquelechargementestterminé,tournerlecommutateur
d’alimentationsurONlorsquelerasoirestbranchéouconnectéau
chargeurauto-nettoyantentraînel’allumagedutémoindecharge(
)
pendant5secondes.
Cecisigniequelerasoirestcomplètementrechargé.

34
Français
• Latempératureambianterecommandéepourlachargeestcompriseentre
10et35°C(50–95°F).Lachargepeutprendrepluslongtempsoulapile
peutnepassechargercorrectementàdestempératuresextrêmement
élevéesoubasses.
Chargezlerasoirselonlaplagedetempératuresambiantesrecommandée.
• Lorsquevouschargezlerasoirpourlapremièrefoisous’iln’apasété
utilisépendantplusde6mois,laduréedechargementrisquede
changerouletémoind’étatdecharge( )risquedenepass’allumer
pendantquelquesminutes.Letémoinnirapars’allumersilerasoir
resteconnecté.
Chargementsanslechargeurauto-nettoyant
Ilestégalementpossibledelerechargersanslechargeurauto-nettoyant.
1
1
Insérezlachedel’appareildansle
rasoir�
• Mettezlerasoirhorsmarcheavantd’insérer.
2
2
Branchezl’adaptateurdansune
prisesecteur�
• Essuyez,sinécessaire,toutesgouttesd’eau
situéessurlaprise.
1
2
3
3
Déconnectezl’adaptateurunefoislechargementterminé�
• Chargerlapilependantplusd’uneheuren’affecterapasles
performancesdelapile.
Remarque
Vousnepouvezpasutiliserlerasoirlorsqu’ilestencoursdechargement.
Utilisationdurasoir
1
1
Appuyezsurleboutondemiseenmarche�
2
2
Tenezlerasoircommeillustréet
rasez-vous�
• Commencezàvousraserenappuyant
légèrementsurvotrevisage.Tendezvotre
peauàl’aidedel’autremainetfaitesdes
allers-retoursendirectiondelabarbe.
Vouspouvezappuyerunpeuplusaufur
etàmesurequevotrepeaus’habitueau
rasoir.Néanmoins,lefaitd’appuyertrès
fortn’augmentepasl’efcacitédurasage.
Remarques
• Netouchezpasleboutondemiseenmarchependantl’utilisationdu
rasoir.Celarisqueraitdemettrelerasoirhorsmarche.Placeztoujours
vosdoigtssurlesupportd’appuidupoucependantl’utilisationdu
rasoir.
• Latempératureambianteadéquatepourl’utilisationestde5à35°C
(41à95°F).Sivousutilisezl’appareilau-delàdelaplageproposée,il
risquedecesserdefonctionner.

35
Français
Utilisationdelatondeuseescamotable
► Taillagedesfavoris
Faitesglisserlelevierdelatondeuse
escamotableverslehaut.Mettezlerasoiren
marche,positionnez-leàangledroitsurvotre
peauetdescendezpourtaillervosfavoris.
• Appuyezetmaintenezenfoncélebouton
deverrouillage/déverrouillageetfaites
glisserlelevierdelatondeuseescamotable
verslebaspourabaisserlatondeuse
escamotable.
► Pré-rasage
Latondeuseescamotable
peutêtreutiliséepourle
pré-rasagedeslongues
barbes.
► Au-dessusdeslèvres
Mettezlerasoirenmarcheetplacez-le
perpendiculairementàvotrepeauettaillez
autourdevotremoustache.
► Pourtaillerlesbordsdelabarbe
Taillezgraduellementvotre
barbeavecleboutondemise
enmarchefaceaucôtéopposé
devotrepeau,enprenantgarde
denepastropcouper.
Utilisationdel’accessoirepeigne
Remarque
Appliquezquelquesgouttesd’huilesurlatondeuseescamotableavant
etaprèschaqueutilisation.(Voirpage40.)
Sinoncecipourraitposerlesproblèmessuivantsdusàlarouille,à
l’usureprématuréeouàuncourtcircuit.
-
Latondeuseescamotables’estémoussée.
-
Duréedefonctionnementpluscourte.
-
Bruitplusfort.
Assurez-vousquelerasoiresthorsmarche.
1
1
Positionnezl’accessoire
peignesurleboîtierjusqu’à
l’émissiond’unbruit
d’enclenchement�
• Appuyezetmaintenezenfoncésles
boutonsdedéverrouillagede
l’accessoirepeignepourl’enlever.

36
Français
2
2
Faitesglisserlelevierdela
tondeuseescamotableversle
hautjusqu’àl’émissiond’un
bruitd’enclenchement�
3
3
Toutenappuyanteten
maintenantenfoncélebouton
dechangementdelahauteur
decoupe,déplacezlepeigne
verticalementjusqu’àla
longueurdecoupedésirée
(entre1mm(1/32po)et7mm
(9/32po))�
Hauteur
decoupe
(env.)
mm 1,0 2,5 4,0 5,5 7,0
po
1/32 3/32 5/32 7/32 9/32
Indicateur 1.0 2.5 4.0 5.5 7.0
• Lalongueurdecheveuxréellesera
unpeupluslonguequelahauteur
quevousavezréglée.
4
4
Poussezlégèrement
l’accessoirepeignepourvous
assurerqu’ilestbien
verrouillé�
5
5
Mettezlerasoirenmarche,amenezlepeignede
l’accessoirepeigneencontactavecvotrepeau,et
taillezlabarbeendéplaçantlatondeuseescamotable
danslesensopposéderepoussedelabarbe�
Remarques
• Faitesattentionànepasvouscouperlamainsurlalamelorsde
l’installationetduretraitdel’accessoirepeigne.
• Nepasutiliseraprèsapplicationdecrèmesàraserouquandlabarbe
esthumide.Unebarbehumiderisquedecolleràlapeauoudefaire
destouffesempêchantainsilalamedebiencouper.
• Peignezlabarbeetlesfavorisavantlataille.
• Lespoilscoupésrisquentdes’accumuleràl’intérieurdel’accessoire
peignelorsqu’ungrandvolumedebarbeesttaillé,ilvousfautdonc
lesévacueraprèschaqueutilisation.
• Sil’accessoirepeignen’estpascorrectementxé,ilrisquedese
desserrerpendantl’utilisationetdecauserunecoupeexcessive.
Témoinsd’étatdechargelorsdel’utilisation
Pendantl’utilisation
Lorsqueleniveaudelapileestfaible
Touslestémoinss’éteignent
pendantl’utilisation.
Letémoindechargedelapile
clignotependant5secondes
lorsquevousappuyezsurle
boutondemiseenmarche.
• Unefoisqueletémoindechargedelapileclignote,ilestpossibledese
raser2à3fois.(Celadépenddesconditionsd’utilisation.)
• Unepleinechargepermettrad’effectuerenviron18rasagesde
3minuteschacun.(Celadépenddesconditionsd’utilisation.)

37
Français
Nettoyagedurasoir
Nettoyageàl’aideduchargeurauto-nettoyant
► Préparationduchargeurauto-nettoyant
Retirezlerasoiretlachedel’appareilduchargeurauto-nettoyant.
1
1
Placezlechargeurauto-nettoyantsurunesurface
dureetplate�
• Lorsquelechargeurauto-nettoyantestrelevé,ousurunesurface
mollecommeuntapis,lelevierdedégagement/verrouillagene
rentrerapascorrectementdanslechargeur.Enpareilcas,iln’est
paspossiblederetirerlebacpourliquidedenettoyage.
2
2
Appuyezsurlebouton
deretraitdubacpour
liquidedenettoyage
(
1
)etretirezlebac
pourliquidede
nettoyage(
2
)�
3
3
Retirezleliquideduprécédentnettoyageetlespoils
debarbe,puisrincezlebacpourliquidedenettoyage�
• Unefoislenettoyageterminé,veillezàbienattacherleltredu
liquidedenettoyage.
4
4
Versezdel’eaudurobinet
(
1
)etdudétergent(
2
)
danslebacpourliquidede
nettoyage�
• Nelaissezpasl’eaudépasserle
niveaud’eaumaximum.Cela
pourraitentraînerunefuitedu
liquidedenettoyage.
5
5
Fixezlebacpourliquidedenettoyage�
• Essuyezimmédiatementleliquidede
nettoyageencasderenversement.
Veillezànepasverserdeliquidede
nettoyagesurdesproduitsencuiroudes
solsenbois.Celapourraitlesdécolorer.
6
6
Pressezlehautduchargeurauto-
nettoyantverslebasetxez-le
solidementjusqu’àcequ’unclicse
fasseentendre�

38
Français
Remarques
• L’eauetledétergentvontsemélangeraprèsledébutdunettoyage,
créantainsiduliquidedenettoyage.
• S’iln’estpaspossibledesélectionnerlemode“AUTOMATIQUE”ousi
l’indicateurd’états’allumependant5secondeslorsquevousappuyez
surleboutondesélection,ilestnécessairedechangerleliquidede
nettoyage.Changezleliquidedenettoyage.
• Unefoischangé,leliquidedenettoyagedureenviron30joursavec
uneutilisationparjour.(Celavarieselonl’épaisseurdelabarbeetla
températureambiante.)
• Utilisezledétergentapproximativementdansles6moisquisuivent
l’ouverturedel’emballage.Après6mois,jetezleliquidedenettoyage,
puisversezdel’eaupropreetdudétergentneufdanslebacpour
liquidedenettoyage.
• Changezl’eauetledétergentaumêmemoment.
Fautedequoicelapeutdétériorerlafonctiondenettoyage.
• N’utilisezqueledétergentspécialpourchargeurauto-nettoyantde
rasoirPanasonic.
► Nettoyagedurasoir
Retireztoutetracedesavonoud’eaudurasoirsicedernieraétélavé
avecdusavonordinaireoutoutautredétergent.
Remarque
Lorsdunettoyagedurasoiraprèslatailled’ungrandvolumedebarbe
avecl’accessoirepeigne,lespoilscoupésrisquentdes’accumuler
dansleplateaudenettoyageduchargeurauto-nettoyant.Évacuezles
poilscoupésdelatondeuseescamotableavantdexerlerasoirsurle
chargeurauto-nettoyant.
1
1
Insérezlachedel’appareil
danslechargeurauto-nettoyant�
2
2
Tirezlebrasdemaintienvers
lehautjusqu’àl’émissiond’un
bruitd’enclenchement�
3
3
Retirezlecouverclede
protectionoul’accessoire
peigne,puisxezlerasoir�
4
4
Poussezlebrasdemaintien
verslebasjusqu’àl’émission
d’unbruitd’enclenchement�
1
2
4
3
5
5
5
Branchezl’adaptateurdansuneprisesecteur�
• Mettezlerasoirhorsmarcheavantdelexer.
• Vériezquelagrilledeprotectiondusystèmen’estpasdéformée
ouendommagéelorsquevousxezlerasoir.
• Mettezlerasoirdanslechargeurauto-nettoyantaveclelevierde
latondeuseescamotablerétracté.Silelevierdelatondeuse
escamotablen’estpasrétracté,ilrisquederayerlebacde
nettoyage.

39
Français
6
6
Appuyezsurleboutondesélectionpourchoisirle
modesouhaité�
• Lemode“Chargement”démarrelorsquevousraccordezlerasoir.
• Chaquefoisquevousappuyezsurleboutondesélection,lemode
passeà“AUTOMATIQUE” “Chargement”.
• Lemodedémarreenviron6secondesaprèslasélection.
• Lemodes’arrêteimmédiatementencasdecoupuredecourant.
Danscecas,sélectionnezànouveaulemodesouhaité.
• N’appuyezpassurleboutonderetraitdubacpourliquidede
nettoyagecarleliquidedenettoyagepourraitdéborderetcauser
undysfonctionnement.
Mode Duréerequise(guide)
Chargement
Chargement
0à60min
AUTOMATIQUE
Nettoyage/Séchage
10min/350min
Chargement
0à60min
• Ilestimpossibledechangerlemodeunefoisquele
mode“AUTOMATIQUE”adémarré.
• Utilisezlechargeurauto-nettoyantuniquementlorsquelestempératures
sontcomprisesentre5°C(41°F)et35°C(95°F).
LafonctionNettoyageouSéchagepeutnepasfonctionnerencasde
températuresendehorsdelaplagerecommandée.Danscecas,iln’est
paspossibledesélectionnerlemode“AUTOMATIQUE”etl’indicateur
d’états’allumependantenviron5secondes.
Nettoyagedurasoirsanslechargeurauto-nettoyant
1. Débranchezlecordondurasoir.
2. Nettoyezlagrilledeprotectiondusystèmeavecdel’eausavonneuse.
3. Mettezlerasoirenmarche.
4. Mettezlerasoirhorsmarcheauboutde10
à20secondes.
5.
Détachezlasectiondelagrilledeprotection.
6. Nettoyezlerasoir,lasectiondelagrillede
protection,latondeuseescamotableet
l’accessoirepeigneavecdel’eau.
7. Essuyeztoutetraced’eauàl’aided’unchiffonsec.
8. Faitessécherlasectiondelagrillede
protection,lerasoir,latondeuse
escamotableetl’accessoirepeigne
complètement.
9. Positionnezlasectiondelagrilledeprotectionsurlerasoir.
10
.Lubriezlerasoir.
40
Français
Lubrication
Pourmaintenirleconfortderasagelepluslongtempspossible,l’utilisation
del’huilefournieaveclerasoirestrecommandée.
1. Mettezlerasoirhorsmarche.
2. Appliquezunegoutted’huilesur
chaquegrilledeprotectiondusystème.
3. Relevezlatondeuseescamotableet
appliquezunegoutted’huile.
4. Mettezlerasoirenmarcheetfaites-le
tournerpendantenvironcinqsecondes.
5. Mettezlerasoirhorsmarche,etessuyezl’excédentd’huiledelagrille
deprotectiondusystèmeavecunchiffondoux.
Remplacementdelagrilledeprotectiondu
systèmeetdeslamesintérieures
Grilledeprotectiondusystème Unefoisparan
Lamesintérieures Unefoistouslesdeuxans
► Retraitdelasectiondelagrilledeprotection
Appuyezsurlesboutonsdedéverrouillageducadredegrille
deprotectionetsoulevezlasectiondelagrilledeprotection.
► Fixationdelasectiondelagrilledeprotection
Fixezcorrectementlasectiondelagrilledeprotectionau
rasoirjusqu’àcequ’elles’enclenche.
► Remplacementdelagrilledeprotectiondusystème
1. Appuyezsurlesboutonsdedéverrouillagede
lagrilledeprotectiondusystèmeetabaissez
lagrilledeprotectiondusystème.
2. Installezlagrilledeprotectiondusystème
jusqu’àl’émissiond’unbruitd’enclenchement.
• Fixeztoujourslagrilledeprotectiondu
systèmedanslabonnedirection.
• Replacezlagrilledeprotectiondusystème
danssoncadredelagrilledeprotection
avantdelaxeraurasoir.
41
Français
► Remplacementdeslamesintérieures
1. Retirezleslamesintérieures,uneparune.
• Netouchezpaslel(partiemétallique)deslames
intérieurespournepasvousblesserlesmains.
2. Insérezleslamesintérieures,uneparune,jusqu’à
l’émissiond’unbruitd’enclenchement.
► Piècesderemplacement
Lespiècesderechangesontdisponibleschezvotremarchandoudans
votrecentredeserviceaprès-vente.
Piècesderemplacement
pourES-RT97
Grilledeprotectiondu
systèmeetlamesintérieures
WES9013
Grilledeprotectiondusystème
WES9087
Lamesintérieures WES9068
Détergentspécialpournettoyagedurasoiretsystèmede
chargement
WES4L03
Nettoyageduchargeurauto-nettoyant
Despoilspeuventsexersurleplateaudenettoyageduchargeur
auto-nettoyant.Suivezlesétapesci-dessouspourlesretirer.Nous
recommandonsd’effectuercetteopérationàchaquefoisquevous
changezlacartouchededétergent.
1.
Veillezàretirerlebacpourliquidedenettoyageet
lachedel’appareilduchargeurauto-nettoyant.
• Faitesattentionànepasrenverserleliquide
denettoyage.
• Certainscomposantsduliquidedenettoyage
etdelasécrétioncutanéepeuventseséparer
etadhéreraubacpourliquidedenettoyageet
aultreduliquidedenettoyage.Ceci
n’indiquepasdeproblèmedefonctionnement.
2. Versezdel’eaucommeillustré
touteninclinantlebacpour
liquidedenettoyageetenle
remuantdoucement.
• Vouspouveznettoyersansle
ltreduliquidedenettoyage.
• Unefoislenettoyageterminé,
veillezàbienattacherleltredu
liquidedenettoyage.
3. Essuyezdoucementtoutetracedepoilscollésà
l’intérieurduplateaudenettoyageàl’aided’un
chiffonoud’unmouchoirenpapierhumidié
avecdel’eau.
• Nettoyezlescoinsetlespartiesinégalesdu
plateaudenettoyageàl’aided’uncoton-tige
humidiéavecdel’eau.
► Lorsquel’eaunesortpasduplateaudenettoyage
• N’inclinezpaslechargeurauto-nettoyantpourverserl’eau.Cela
pourraitrenverserduliquidedubacpourliquidedenettoyageou
entraînerundysfonctionnementduchargeurauto-nettoyant.
Despoilspeuventboucherl’oriceenbasduplateau
denettoyage.
Danscecas,vousnepouvezpasnettoyerousécher
lerasoir.
Poussezlespoilshorsdel’oriceàl’aided’un
cure-dent,etc.

42
Français
Dépannage
► Chargeurauto-nettoyant
Problème Action
Lalamen’apasété
complètementnettoyée.
Silerasoirn’estpasnettoyépendant
plusde2semaines,nettoyez-le
d’abordpourenleverlespoilsdebarbe.
N’ajoutezpasdedétergentetd’eau
sauflorsduchangementdeliquide
denettoyage.
Cecipourraitdétériorerlafonctionde
nettoyage.(Voirpage38.)
Unefoislenettoyageterminé,des
gouttelettessemblablesàdel’huile
peuventsubsistersurl’extérieurdu
cadredelagrilledeprotection.Il
s’agitducomposantdelubrication
duliquidedenettoyageetcela
n’indiquepasundysfonctionnement.
Vouspouvezl’essuyeravecun
chiffondoux.
L’indicateurd’états’allume.
Voirpage44.
Problème Action
Lemodenedémarrepas.
Vériezquel’adaptateurCAest
raccordéauchargeurautonettoyant,
etquel’adaptateurCAestbranchéà
uneprisesecteur.(Voirpage33.)
Conrmezquelerasoirest
correctementxéauchargeur
auto-nettoyant.
(Voirpage33.)
LafonctionNettoyageouSéchage
peuts’arrêterencasdetempératures
endehorsdelaplagerecommandée.
(5–35°C(41–95°F))
Vériezquel’indicateurd’état
s’allume.(Voirpage44.)
Duliquidedenettoyages’est
accumulédanslebacde
nettoyage.
Retireztouslesdéchets,etc.quise
sontaccumulésdansledrainaufond
dubacdenettoyage.
(Voirpage41.)
Sivousutilisezlechargeurauto-
nettoyantlorsquelerasoirestmouillé
oulorsquedugelderasageoudu
savonsetrouvesurlerasoir,du
liquidedenettoyagepeuts’accumuler
danslebacdenettoyage.

43
Français
Problème Action
Impossibled’enleverlebac
pourliquidedenettoyage.
Placezlechargeurauto-nettoyantsur
unesurfacedureetplate.
Lorsquelechargeurauto-nettoyantest
relevé,ousurunesurfacemolle
commeuntapis,lelevierde
dégagement/verrouillagenerentrera
pascorrectementdanslechargeur.En
pareilcas,iln’estpaspossiblede
retirerlebacpourliquidedenettoyage.
Produitunbruitimportant.
Pendantlenettoyage:
lechargeurauto-nettoyantémet
unbruitimportantàcausedu
nettoyagedeslames.
Aprèslenettoyage:
lechargeurauto-nettoyantémet
unbruitimportantàcausedu
retraitdesgouttelettesd’eaupour
accélérerleséchage.
Lesonaprèslenettoyageestdifférent
dusonpendantlenettoyage.Leniveau
d’eauabaisséetlesgouttelettesd’eau
sontretiréesdeslamesaprèsle
nettoyage.Cecin’indiquepasde
problèmedefonctionnement.
Lerasoirneserechargepas.
Essuyezdélicatementlaborneen
métaldelapriseetleplotdecontact
dechargementduchargeurauto-
nettoyantavecunchiffonouuntissu
humectéd’eau.
Problème Action
Leslamesnesontpas
sèchesousontcollantes.
Leslamespeuventmettredutempsà
sécheràcausedesconditionsde
température.
Essuyezavecunchiffondouxavant
lerasage.
Leslamessessurentouse
déformentpendantlenettoyage.
N’insérezaucuncorpsétrangerdans
lechargeur.
Remplacezlagrilledeprotectiondu
systèmeet/ouleslamesintérieures.
(Voirpage40.)
Leliquidedenettoyagea
moussé.
Sivousmélangezdel’eausavonneuse
oudusavonpourlesmainsavecdu
détergentousivousutilisezunautre
détergent,leliquidedenettoyageva
mousser.Utilisezlechargeurauto-
nettoyantaprèsavoircomplètement
nettoyéetséchélerasoir.
Changezleliquidedenettoyage.
Duliquidedenettoyageafuitdu
bacpourliquidedenettoyage.
N’appuyezpassurleboutonde
retraitdubacpourliquidede
nettoyagependantlemode.
Positionnezlechargeurauto-
nettoyanthorizontalement.
Sivousutilisezlechargeurauto-
nettoyantlorsquelerasoirestmouillé
oulorsquedugelderasageoudu
savonsetrouvesurlerasoir,du
liquidedenettoyagepeutfuir.

44
Français
► Lorsquel’indicateurd’états’allume
Problème Action
Ilesttempsdechangerle
liquidedenettoyage.
Versezdel’eaupropreetdudétergent
danslebacpourliquidedenettoyage.
Lebacpourliquidede
nettoyagen’estpas
correctementxé.
Fixezcorrectementlebacpour
liquidedenettoyage.
Lechargeurauto-nettoyant
estincliné.
Placezlechargeurauto-nettoyantsur
unesurfacehorizontale.
Unefoislesopérationsci-dessuseffectuées,appuyezsurleboutonde
sélectionetsélectionnezunmode.
► Lorsquetouslestémoinsduchargeurauto-nettoyantclignotent
Problème Action
Pannedel’appareil
Contactezuncentredeserviceagréé.
► Rasoir
Problème Action
Lespoilsrasésvolentpartout.
Cecipeutêtreaméliorégrâceàun
nettoyagesystématiqueaprès
chaquerasage.
Nettoyezleslamesintérieures.
Lagrilledeprotectiondu
systèmechauffe.
Appliquezdel’huile.
(Voirpage40.)
Remplacezlagrilledeprotectiondu
systèmesielleestendommagéeou
déformée.
(Voirpage40.)
Problème Action
Laduréedefonctionnement
estcourtemêmeaprèsavoir
rechargé.
Appliquezdel’huile.
Lorsquelenombred’utilisationspar
chargecommenceàdiminuer,lapile
approchesandevie.
Produitunbruitimportant.
Appliquezdel’huile.
Assurez-vousqueleslamessont
correctementxées.
Nettoyezlagrilledeprotectiondu
système.
L’odeurdevientplusforte.
Cecipeutêtreaméliorégrâceàun
nettoyagesystématiqueaprès
chaquerasage.
Vousn’obtenezpasunrasage
aussiprécisqu’auparavant.
Cecipeutêtreaméliorégrâceàun
nettoyagesystématiqueaprès
chaquerasage.
Remplacezlagrilledeprotectiondu
systèmeet/ouleslamesintérieures.
Duréedevieprévuedelagrillede
protectiondusystèmeetdeslames
intérieures:
Grilledeprotectiondusystème:
Environ1an
Lamesintérieures:
Environ2ans
Appliquezdel’huile.
Impossibledechargerlerasoir
aveclechargeurauto-nettoyant.
Essuyezdélicatementlaborneen
métaldelapriseetleplotdecontact
dechargementduchargeurauto-
nettoyantavecunchiffonouuntissu
humectéd’eau.

45
Français
Problème Action
Lerasoirnefonctionneplus.
Latempératureambiante
recommandéepourl’utilisationest
compriseentre5et35°C(41–95°F).
Lerasoirpeutcesserdefonctionnerà
destempératuresnoncomprisesdans
laplagerecommandée.
Lapileaatteintsandevie.
Silesproblèmesnesonttoujourspasrésolus,contactezlemagasinoù
vousavezachetél’appareilouuncentredeserviceaprès-venteagréé
parPanasonicpourfaireréparerl’appareil.
Duréedeviedelapile
Laduréedeviedelapileestde3ans.Vousnedevezpasremplacerla
piledanscerasoirvous-même.
Retraitdelapilerechargeableintégrée
ATTENTION:
L’appareilquevousvousêtesprocuréestalimentéparunepileau
lithium-ion.Pourdesrenseignementssurlerecyclagedelapile,
veuillezcomposerle1-800-8-BATTERY.
Retirezlapilerechargeableintégréeavantdemettrelerasoiraurebut�
Cetteguredoituniquementêtreutiliséelorsdelamiseaurebutdurasoir,
etnedoitpasserviràleréparer.Sivousdémontezlerasoirvous-même,il
perdrasonimperméabilité,cequipeutentraînerdesdysfonctionnements.
• Débranchezlerasoirdel’adaptateursecteur.
• Appuyezsurleboutondemiseenmarchepourmettrel’appareilen
marche,puislaissez-leenmarchejusqu’àcequelapilesoit
entièrementdéchargée.
• Effectuezlesétapesde
1
à
5
,soulevezlapile,etretirez-la.
• Faitesattentionànepascourt-circuiterlapile.
Caractéristiquestechniques
Sourced’alimentation
Voirlaplaquesignalétiquesurl’adaptateursecteur.
(Conversiondetensionautomatique)
Tensiondumoteur
3,6V
Tempsdechargement
Environ1heure
Ceproduitestdestinéàuneutilisationdomestiqueuniquement.

46
Français
DéclarationsurlebrouillageradioélectriquedelaCommissionfédérale
descommunications
Leprésentéquipementafaitl’objetd’essaisetaétéjugéconformeaux
limitespourundispositifnumériquedeclasseB,envertuduChapitre
15desrèglementsdelaFCC.Ceslimitessontconçuespourfournir
uneprotectionraisonnablecontrelesinterférencesnuisibleslorsque
l’appareilfonctionnedansuneinstallationrésidentielle.Leprésent
équipementgénère,utiliseetpeutémettredel’énergieRFs’iln’estpas
installéetutiliséconformémentaumoded’emploi,cequipeut
provoquerdesinterférencesnuisiblesauxcommunicationsradio.
Cependant,iln’yaaucunegarantiequelesinterférencesne
surviendrontpasdansuneinstallationparticulière.Sicetéquipement
émetdesinterférencesnuisiblesàlaréceptiondelaradiooudela
télévision,cequipeutêtredéterminélorsdelamiseenmarchepuis
horsmarchedel’équipement,l’utilisateurdoitcorrigercesinterférences
enprenantl’unedesmesuressuivantes:
• Réorienteroudéplacerl’antenneréceptrice.
• Augmenterladistanceentrel’équipementetlerécepteur.
• Connecterl’équipementàlaprised’uncircuitdifférentdeceluisur
lequellerécepteurestconnecté.
• Consulterledétaillantouuntechnicienspécialiséenradio/TVpour
obtenirdel’aide.
AvertissementdelaFCC:Pourassureruneconformitécontinue,
installeretutiliserconformémentauxconsignesfournies.Quelque
changementoumodicationnonexpressémentapprouvé(e)parla
partieresponsabledelaconformitépourraitannulerl’autoritéde
l’utilisateuràfairefonctionnerleprésentéquipement.
Cetappareilestconformeàlapartie15desrèglementsdelaFCC.
L’utilisationestsoumiseauxdeuxconditionssuivantes:(1)Cetappareil
nedoitpasprovoquerd’interférencesnuisibleset(2),cetappareildoit
supportertouteinterférencereçue,ycomprislesinterférencespouvant
provoquerunfonctionnementindésirable.
47
Español
Instruccionesdefuncionamiento
(Electrodoméstico)
Afeitadorarecargable
Modelon.
ºES-RT97
GraciasporcompraresteproductoPanasonic.
Antesdeponerestaunidadenfuncionamiento,lealasinstruccionesensutotalidadyguárdelasparasuusoenelfuturo�
Precauciones de seguridad ........... 48
Usoprevisto���������������������������������������������� 53
Identicacióndelaspartes��������������������� 54
Cargadelaafeitadora������������������������������ 55
Utilizacióndelaafeitadora���������������������� 56
Limpiezadelaafeitadora������������������������� 59
Solucióndeproblemas���������������������������� 64
Vidadelabatería�������������������������������������� 67
Retirarlabateríarecargableinterna������� 67
Especicaciones�������������������������������������� 67
Contenido

48
Español
Precaucionesdeseguridad
Parareducirelriesgodesufrirlesiones,descargaseléctricas,oinclusoel
fallecimiento,ydeprovocarunincendioodañosenlapropiedad,cumpla
siemprelasprecaucionesdeseguridadqueguranacontinuación.
Explicacióndelossímbolos
Lossiguientessímbolosseusanparaclasicarydescribirelnivelde
peligro,lesiónydañoalapropiedadquepuedenprovocarsedebidoal
incumplimientodelasinstruccionesyalusoindebido.
PELIGRO
Denotaunpeligro
potencialqueresultará
enunalesióngraveola
muerte.
ADVERTENCIA
Denotaunpeligro
potencialquepodría
resultarenunalesión
graveolamuerte.
PRECAUCIÓN
Denotaunpeligroque
podríaresultarenuna
lesiónleve.
Lossiguientessímbolosseusanparaclasicarydescribireltipode
instruccionesquedebencumplirse.
Estesímboloseutilizaparaadvertiralosusuariosdeun
procedimientoespecícodefuncionamientoquenodeberealizarse.
Estesímboloseutilizaparaadvertiralosusuariosdeun
procedimientoespecícodefuncionamientoquedebeseguirse
parahacerfuncionarlaunidaddeformasegura.
INSTRUCCIONES
IMPORTANTESDESEGURIDAD
Alutilizarundispositivoeléctrico,Siempredebentomarse
algunasprecaucionesbásicas,incluyendolassiguientes:
Leatodaslasinstruccionesantesdeutilizarestedispositivo.
PELIGRO
Parareducirelriesgode
descargaseléctricas:
1.Nointentealcanzarundispositivoquesehayacaído
alagua.Desenchúfeloinmediatamente.
2.Nocoloqueniguardeeldispositivodondepueda
caerseenunabañera.Nolocoloquenilodejecaer
enaguaoalgúnotrolíquido.
3.
Exceptocuandoloestécargando,desenchufesiempre
esteaparatodelatomaeléctricaluegodeutilizarlo.
4.Desenchufeestedispositivoantesdelimpiarlo.
ADVERTENCIA
Parareducirelriesgodequemaduras,
fuego,descargaseléctricasolesiones:
1.Esnecesariaunasupervisióncercanacuandoel
dispositivoseautilizadopor,en,ocercadeniñoso
minusválidos.
2.Utiliceestedispositivosolamenteparaelusoparael
quesehadiseñadocomosedescribeeneste
manual.Noutiliceningúnaccesorioquenohasido
recomendadoporelfabricante.
49
Español
3.
Nuncautiliceeldispositivositieneelcordónoel
enchufedañado,sinofuncionacorrectamente,osise
hacaído,dañadoomojado.Devuelvaeldispositivoa
uncentrodeservicioparaexaminarloyrepararlo.
4.
Mantengaelcablealejadodelassuperciescalientes.
5.Nuncadejecaerniintroduzcaningúnobjetopor
cualquierabertura.
6.Noutilicelaafeitadoraenexterioresodondese
esténutilizandoaerosoles(spray)odondeseesté
administrandooxígeno.
7.Noutiliceestedispositivosilashojasdecorteolas
láminasestándañadas,yaquepodríacausarle
heridasenlacara.
8.
Siempreconecteprimeroelenchufealdispositivoy,
luego,altomacorriente.Paradesconectarlo,coloque
todosloscontrolesenlaposición“apagado”y,a
continuación,retireelenchufedeltomacorriente.
GUARDEESTASINSTRUCCIONES
ADVERTENCIA
Estaafeitadoraincorporaunabateríarecargable�Nola
arrojealfuegonilaexpongaaaltastemperaturas�
Asimismo,nolacargue,utilicenicoloqueenunentorno
contemperaturaselevadas�
-
Delocontrario,podríaprovocarunsobrecalentamiento,un
incendioounaexplosión.
Noconectenidesconecteeladaptadoraunatomade
corrientesitienelasmanosmojadas�
-
Delocontrario,podríasufrirdescargaseléctricasolesiones.
Nuncalodesmonte,exceptocuandosedeshagadelproducto�
-
Delocontrario,podríaprovocarunincendio,unadescarga
eléctricaosufrirlesiones.
NoutiliceotroadaptadordistintodeladaptadordeCAni
elrecargadordelimpiezaautomáticasuministrados�
Asimismo,nocargueotroproductoconeladaptadorde
CAnielrecargadordelimpiezaautomáticasuministrados�
-
Delocontrario,podríasufrirquemadurasoprovocarunincendio
debidoauncortocircuito.
Nolomodiquenilorepare�
-
Delocontrario,podríaprovocarunincendio,unadescarga
eléctricaosufrirlesiones.
Póngaseencontactoconuncentrodeservicioautorizadopara
sureparación(cambiodebatería,etc.).
Guárdelofueradelalcancedelosniñosobebés�Noles
permitautilizarlo�
-
Ponerlascuchillasinternasy/oelcontenedordelaceiteenla
bocaoingerireldetergentepuedeprovocaraccidentesy
lesiones.

50
Español
ADVERTENCIA
Nodañenimodique,dobleenérgicamente,tireo
retuerzaelcable�
Además,nocoloqueobjetospesadossobreelmismoni
lopellizque�
-
Delocontrario,podríaprovocarunadescargaeléctricaoun
incendiodebidoauncortocircuito.
Noloutilicedemaneraquesuperelacapacidadnominal
delatomadecorrienteodelcableado�
-
Superarelvalornominalalconectardemasiadosenchufesaunatoma
decorrientepuedecausarunincendiodebidoalsobrecalentamiento.
Asegúresesiempredequeelaparatofuncioneenuna
fuentedealimentaciónquecoincidaconlatensión
nominalindicadaeneladaptadordeCA�
Introduzcacompletamentelaclavijadelcabledealimentación�
-
Delocontrario,podríaproducirseunincendioounadescargaeléctrica.
Limpieregularmentelaclavijadelcabledealimentacióny
laclavijadelaparatoparaevitarlaacumulacióndepolvo�
-
Delocontrario,podríaprovocarunincendiodebidoaunfallodel
aislamientoprovocadoporlahumedad.
Desconecteeladaptadorylímpieloconunpañoseco.
Suspendainmediatamenteelusoyretireeladaptadorsi
hayunaanomalíaounfuncionamientoincorrecto�
-
Elusoendichascondicionespuedeprovocarunincendio,una
descargaeléctricaoheridas.
<Casosdeanomalíaofuncionamientoincorrecto>
• Launidadprincipal,elrecargadordelimpieza
automática,eladaptadoroelcableestándeformadoso
anormalmentecalientes�
• Launidadprincipal,elrecargadordelimpieza
automática,eladaptadoroelcablehuelenaquemado�
• Seescuchaunruidoextrañoduranteelusoolacarga
delaunidadprincipal,elrecargadordelimpieza
automática,eladaptadoroelcable�
-
Soliciteinmediatamenteunarevisiónoreparaciónenuncentro
deservicioautorizado.
Sieldetergenteentraencontactoconlapiel,lávelaa
fondodeformainmediataconjabón�
Sisientedolorenlapieloencualquierpartedelcuerpo,
dejedeutilizarelproductoinmediatamenteypóngaseen
contactoconunmédico�
-
Elincumplimientodeestasinstruccionespuedetenercomo
consecuencialesionesfísicasoheridascutáneas.
Siseingiereneldetergenteoelaceitedeforma
accidental,noinduzcaelvómito;bebaabundanteaguay
póngaseencontactoconunmédico�
Sieldetergenteoelaceiteentranencontactoconlos
ojos,aclárelosinmediatamenteyafondoconagua
corrienteypóngaseencontactoconunmédico�
-
Elincumplimientodeestasinstruccionespuedetenercomo
consecuenciaproblemasfísicos.

51
Español
ADVERTENCIA
Esteaparatonodebeserutilizadoporpersonas
(incluyendoniños)concapacidadesfísicas,sensorialeso
mentalesreducidas,oconfaltadeconocimientoy
experiencia,amenosqueseencuentrenbajosupervisión
obajoinstruccionessobreelusodelaparatodeuna
personaresponsabledelaseguridad�Supervisealos
niñospequeñosparaasegurarsedequenose
encuentrenpróximosalaparato�
-
Delocontrario,podríasufrirunaccidenteounalesión.
Elcabledealimentaciónnopuedesustituirse�Sielcable
dealimentaciónpresentadaños,debedesecharseel
adaptadordeCA�
-
Delocontrario,podríasufrirunaccidenteounalesión.
PRECAUCIÓN
Nopermitaquealleresosuciedadseintroduzcanenla
clavijadelcabledealimentaciónoenlaclavijadelaparato�
-
Delocontrario,podríaprovocarunadescargaeléctricaoun
incendiodebidoauncortocircuito.
Noejerzaunapresiónexcesivaalaplicarlalámina
exteriorsobreellabioocualquierotrapartedelacara�
Noapliquelaláminaexteriordirectamentesobre
imperfeccionesdelapieloheridas�
-
Delocontrario,puedeprovocarlesionescutáneas.
Nopresioneconfuerzalaláminaexterior�Evite,además,
tocarlaláminaexteriorconlosdedosolasuñascuando
utiliceelaparato�
-
Delocontrario,podríaprovocarsufrirlesionescutáneaso
reducirlavidadelaláminaexterior.
Notoquelaseccióndelacuchilla(secciónmetálica)dela
hojainterna�
-
Delocontrario,podríasufrirlesionesenlasmanos.
Noutiliceesteproductoparaelpelodelacabezao
cualquierotrapartedelcuerpo�
-
Delocontrario,podríaprovocarsufrirlesionescutáneaso
reducirlavidadelaláminaexterior.
Nocompartasuafeitadoraconsusfamiliaresniconotras
personas�
-
Delocontrariopodríasufririnfeccionesoinamación.
Noretirelaafeitadoradelrecargadordelimpieza
automáticaduranteelusodelmodo“Automático”�
-
Delocontrario,podríasufrirquemadurasproducidasporla
elevadatemperaturaalrededordelascuchillas.
Noenrolleelcablealrededordeladaptadorcuandologuarde�
-
Delocontrario,puedecausarqueelalambredelcableserompa
conlacargayprovocarunincendiodebidoauncortocircuito.
Noutiliceeldetergenteparaningúnotronquenosea
lavarlascuchillasdelaafeitadora�
-
Elusoconotrosproductospuedeproducirdecoloracióno
agrietamiento.
Veriquequelaláminaexteriornopresentegrietasni
estédeformadaantesdeusar�
-
Delocontrario,podríasufrirheridasenlapiel.

52
Español
► Eliminacióndelabateríarecargable
PELIGRO
Labateríarecargabledebeutilizarseexclusivamentecon
estaafeitadora�Noutilicelabateríaconotrosproductos�
Nocarguelabateríaunavezretiradadelproducto�
• Nolaarrojealfuegonileapliquecalor�
• Nolagolpee,desmonte,modiqueoperforeconunclavo�
• Nopermitaquelosterminalespositivoynegativodela
bateríaentrenencontactoentreellosatravésde
objetosmetálicos�
• Notransportenialmacenelabateríajuntoconjoyas
metálicascomoporejemplocollaresuhorquillasparaelpelo�
• Nocargue,utilicenidejelabateríaallídondequede
expuestaatemperaturaselevadas,comoporejemplo
bajolaluzsolardirectaocercadeotrasfuentesdecalor�
• Nopeleeltubo�
-
Delocontrario,podríaprovocarunsobrecalentamiento,un
incendioounaexplosión.
ADVERTENCIA
Trasretirarlabateríarecargable,manténgalafueradel
alcancedelosbebésylosniños�
-
Labateríaproduciríalesionescorporalessiseingiriera
accidentalmente.
Siestosucediera,consulteconunmédicoinmediatamente.
PRECAUCIÓN
Asegúresedecolocarlaafeitadoraensutapaprotectora
cuandodebatransportarlaoalmacenarla�
-
Delocontrario,podríaprovocarsufrirlesionescutáneaso
reducirlavidadelaláminaexterior.
Desconecteeladaptadorolaclavijadelaparato
sujetándolos,evitandotirardelcable�
-
Delocontrario,podridasufrirunadescargaeléctricaolesiones.
Tengacuidadodenoproducirseningúncorteenlas
manosconlaboquillacuandoabraeldetergente�
-
Delocontrario,podríasufrirheridas.

53
Español
ADVERTENCIA
Siellíquidodelabateríaseltrahaciafuera,sigalos
procedimientosqueseindicanacontinuación�Notoque
labateríaconlasmanosdesnudas�
-
Ellíquidodelabateríapuedeproducirceguerasientraen
contactoconlosojos.
Nosefrotelosojos.Lávelosinmediatamenteconagualimpiay
consulteconunmédico.
-
Ellíquidodelabateríapuedeproducirinamaciónoheridassi
entraencontactoconlapielolaropa.
Laveinmediatamenteconagualimpiayconsulteconunmédico.
Usoprevisto
• EstaafeitadoraWET/DRYpuedeutilizarseparaafeitarenmojado
empleandoespumaoparaafeitarenseco.Puedeutilizaresta
afeitadoraimpermeablebajoladuchaylimpiarlaconagua.Elsímbolo
siguienteindicaquepuedeutilizarseenunabañeraoducha.
► Notas
• Afeíteseconespumadurantetressemanasyobserveladiferencia.Su
afeitadoraPanasonicenMojado/Secorequierealgodetiempopara
ajustarsedebidoaquesupielybarbanecesitanalrededordeunmes
paraacostumbrarseaunnuevométododeafeitado.
• Mantengainsertadasambascuchillasinternas.Sisolamenteestá
insertadaunadelascuchillasinternas,laafeitadorapodríadañarse.
• Silimpialaafeitadoraconagua,noutiliceaguasaladaniaguacaliente.
Nomojelaafeitadoraduranteunlargoperiododetiempo.
• Limpielacarcasasóloconunpañosuaveligeramentehumedecidocon
aguacorrienteoaguacorrienteyjabón.Noutilicedisolvente,bencina,
alcoholniotrosproductosquímicos.
• Despuésdeluso,guardelaafeitadoraenunlugarpocohúmedo.
• Noguardelaafeitadoraoeldetergenteenunlugarenelqueesté
expuestaalaluzsolardirectauotrasfuentesdecalor.
• Elrecargadordelimpiezaautomáticalimpialascuchillasinternasyla
láminaexteriordelsistema.Laveconaguaparaeliminarlosrecortesde
barbaenotrasáreas.

54
Español
Identicacióndelaspartes
Frontal
Posterior
A
Cuerpoprincipal
1
Tapaprotectora
2
Láminaexterior
3
Marcodelalámina
4
Botonesdeliberacióndelmarco
delalámina
5
Descansoparadedos
6
Interruptordeencendido
7Lámparadecapacidadde
batería(
)
8Lámparadeestadode
carga(
)
9
Conexióndelaparato
:
Seccióndelaláminaexterior
;
Botonesdeliberacióndela
láminaexterior
<
Cuchillasinternas
=
Cortapatillas
>
Mangodelcortapatillas
?
Botóndedesbloqueo
B
Recargadordelimpieza
automática
@
Brazo
A
Terminaldecarga
B
Botóndeextraccióndela
unidaddellíquidodelimpieza
C
Tomadelrecargadorde
limpiezaautomática
Palancadedesbloqueo
E
Filtrodellíquidodelimpieza
Nivelmáximodeagua
Unidaddellíquidodelimpieza
H
Lámparadeestado
I
Lámparadeautomático
J
Botóndeselección
C
AdaptadordeCA(RE7-59)
K
Adaptador
L
Clavijadelcabledealimentación
M
Cable
N
Clavijadelaparato
D
Accesoriodepeine
Peine
Ventanadealturaderecorte
Botonesdeliberacióndel
accesoriodepeine
Botóndecambiodealturade
recorte
Accesorios
E
Detergenteespecial
(Detergente)
F
Aceite

55
Español
Cargadelaafeitadora
Cargautilizandoelrecargadordelimpiezaautomática
Frotecuidadosamentelasgotasdeaguaquepuedanquedareno
alrededordelrecargadordelimpiezaautomáticaparaquequedeseco
antesdecargarlo.
1
1
Insertelaclavijadelaparatoenel
recargadordelimpiezaautomática�
2
2
Tiredelbrazohastaqueoiga
unclic�
3
3
Retirelatapaprotectoraoel
accesoriodepeiney,a
continuación,instalela
afeitadora�
• Apaguelaafeitadoraantesdeinstalarla.
• Compruebequelaláminaexteriorno
estádeformadanidañadaalinstalar
laafeitadora.
1
2
4
3
5
• Introduzcalamáquitadeafeitarenelrecargadordelimpieza
automáticaconelmangodelcortapatillasretraído.Sielmangodel
cortapatillasnoseretrae,podríaarañarlabandejadelimpieza.
4
4
Empujeelbrazohaciaabajohastaqueoigaunclic�
5
5
Enchufeeladaptadorenunatomadecorrientedoméstica�
• Elmodo“Cargar”seiniciacuandoseacoplalaafeitadora.
• Compruebequelalámparadeestadodecarga( )seilumine.
• Lacargaestácompletatras,aproximadamente,1hora.
Eltiempodecargapuedevariarenfuncióndelacapacidaddecarga.
• Larecargacompletanoempeoraráelredimientodelabatería.
• Puedecargarseinclusoconlaunidaddellíquidodelimpiezaextraída.
• Sieltipodeenchufenoencajaconeltomacorriente,utiliceun
adaptadordeenchufeconlaconguraciónadecuada.
6
6
Desconecteeladaptadorunavezcompletadala
carga�
Durantelacarga
Cuandolacargasehayacompletado
Lalámparadeestadodecarga
( )seilumina.
Lalámparadeestadodecarga
( )seapaga.
Cargaanormal
Lalámparadeestadodecarga( )parpadearádosvecescadasegundo.
• Unaveznalizadalarecarga,laluzdeestadodecarga( )se
iluminarádurante5segundossisecolocaelinterruptorenlaposición
deencendidomientraslamáquinadeafeitarestáenchufadao
conectadaalrecargadordelimpiezaautomática.
Estoindicaquelaafeitadoraestátotalmentecargada.
• Latemperaturaambienterecomendadaparalacargaesdeentre10y35°C
(50y95°F).Elrendimientodelasbateríaspodríaverseafectadoolas
bateríaspodríanrequerirmástiempoparacargarsecorrectamenteen
condicionesdetemperaturaextremadamentebajaoalta.
Carguelaafeitadoradentrodelrangodetemperaturaambienterecomendada.

56
Español
• Cuandocarguelaafeitadoraporprimeravezocuandonolahaya
utilizadodurantemásde6meses,eltiempodecargapuedevariarola
lámparadeestadodecarga( )podríanoiluminarseduranteunos
minutos.Simantienelaafeitadoraconectada,nalmenteseiluminará.
Cargasinelrecargadordelimpiezaautomática
Laafeitadorapuedecargarsetambiénsinelrecargadordelimpiezaautomática.
1
1
Introduzcalaclavijadelaparatoen
laafeitadora�
• Apaguelaafeitadoraantesdeintroducirla.
2
2
Enchufeeladaptadorenunatoma
decorrientedoméstica�
• Limpieconunpañolasgotasdeaguadela
conexióndelaparato.
1
2
3
3
Desconecteeladaptadorunavezcompletadalacarga�
• Cargarlabateríadurantemásde1horanoafectaráasurendimiento.
Nota
Nopuedeponerenfuncionamientolaafeitadoramientrasseestácargando.
Utilizacióndelaafeitadora
1
1
Pulseelinterruptordeencendido�
2
2
Sujetelaafeitadoracomose
muestrayaféitese�
• Comienceaafeitarseaplicandounasuave
presiónsobrelacara.Estirelapielconla
manolibreymuevalaafeitadorahacia
delanteyatrásenladireccióndelabarba.
Puedeincrementarlapresiónamedida
quelapielseacostumbrealaafeitadora.
Aplicarunapresiónexcesivano
proporcionaunafeitadomásapurado.
Notas
• Nocoloquelosdedosenelinterruptordeencendidomientrasesté
utilizandolaafeitadora.Estopuedeocasionarquelaafeitadorase
apague.Coloquelosdedoseneldescansoparadedosmientrasesté
utilizandolaafeitadora.
• Latemperaturaambienteadecuadaparaelusoesde5–35°C
(41–95°F).Siutilizaelaparatoaunatemperaturafueradelrango
recomendado,estepuededejardefuncionar.

57
Español
Utilizacióndelcortapatillas
► Recortarlaspatillas
Desliceelmangodelcortapatillashacia
arriba.Enciendalaafeitadoraycolóquelaen
ángulorectoconsupielymuévalahacia
abajopararecortarlaspatillas.
• Mantengapulsadoelbotóndedesbloqueo
ydesliceelmangodelcortapatillashacia
abajoparahacerbajarelcortapatillas.
► Afeitadoprevio
Elcortapatillaspuede
utilizarsepararealizarun
afeitadoprevioenbarbas
abundantes.
► Porencimadeloslabios
Enciendalaafeitadora,colóquelaenel
ángulocorrectosobrelapielyrecortela
zonaalrededordelbigote.
► Recortedelbordedelabarba
Cortelabarbadeforma
gradual,conelinterruptorde
encendidoenelladoopuestoal
delapiel,evitandocortaren
exceso.
Usodelaccesoriodepeine
Nota
Apliqueelaceiteenelcortapatillasantesydespuésdecadauso.
(consultelapágina62.)
Noaplicaraceiteproduciráoxidación,desgasteodeterioro,pudiendo
ocasionarlosproblemasqueseindicanacontinuación.
-
Elcortapatillashaperdidoecaciadecorte.
-
Tiempodefuncionamientomásbreve.
-
Unruidodefuncionamientomáselevado.
Asegúresedequelaafeitadoraestéapagada.
1
1
Acopleelaccesoriodepeine
enelcuerpoprincipalhasta
queoigaunclic�
• Pararetirarlo,mantengapulsados
losbotonesdeliberacióndel
accesoriodepeine.
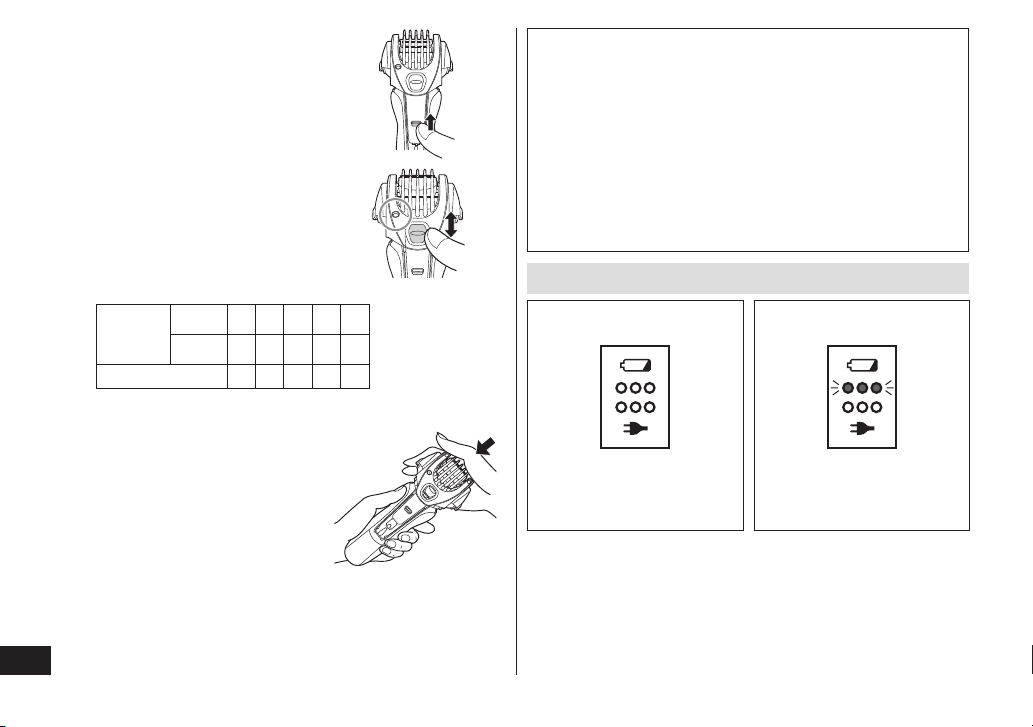
58
Español
2
2
Desliceelmangodel
cortapatillashaciaarriba
hastaqueoigaunclic�
3
3
Mientrasmantienepulsadoel
botóndecambiodealturade
recorte,muevaelpeine
verticalmentehastalalongitud
derecortedeseada(entre
1mm(1/32˝)y7mm(9/32˝))�
Alturade
recorte
(aprox.)
mm 1,0 2,5 4,0 5,5 7,0
pulgada
1/32 3/32 5/32 7/32 9/32
Indicador 1.0 2.5 4.0 5.5 7.0
• Lalongitudrealdelpeloseráligeramente
superioralaalturaestablecida.
4
4
Empujeligeramenteel
accesoriodepeinepara
asegurarsedequehaya
quedadocorrectamente
ajustadoensusitio�
5
5
Enciendalaafeitadora,coloqueelpeinedelaccesorio
depeinedemodoqueestéencontactoconlapiely
cortelabarbamoviendoelcortapatillasenla
direcciónopuestaalnacimientodelpelodelabarba�
Notas
• Tengacuidadodenocortarselamanoconlacuchillacuandoacople
oretireelaccesoriodepeine.
• Noloutiliceconcremasdeafeitarocuandolabarbaestémojada.La
barbamojadapuedeadherirsealapieloamontonarse,dicultando
quelacuchillapuedacortarla.
• Peinelabarbaylaspatillasantesderecortarlas.
• Losrecortesdepelopuedenacumularseenelinteriordelaccesorio
depeinecuandosecortaunagrancantidaddebarba,porloque
deberáeliminarlosdespuésdecadauso.
• Sielaccesoriodepeinenoestácorrectamenteacoplado,puede
aojarseduranteeluso,dandocomoresultadouncorteexcesivo.
Lecturadelaslucesduranteeluso
Duranteeluso
Cuandolacapacidaddela
bateríaesbaja
Duranteeluso,todaslas
lámparasseapagan.
Lalámparadecapacidaddela
bateríaparpadeadurante5
segundoscuandosepulsael
interruptordeencendido.
• Puedeafeitarse2ó3vecesdespuésdequelalámparadecapacidadde
labateríaparpadee.(Estopuedevariardependiendodelautilización.)
• Unacargacompletaproporcionarásucientealimentacióndurante18afeitadas
de3minutoscadauna.(Estopuedevariardependiendodelautilización.)

59
Español
Limpiezadelaafeitadora
Limpiezautilizandoelrecargadordelimpiezaautomática
► Preparacióndelrecargadordelimpiezaautomática
Retireelenchufedelaafeitadorayeldispositivodelrecargadorde
limpiezaautomática.
1
1
Coloqueelrecargadordelimpiezaautomáticasobre
unasuperciedurayplana�
• Cuandoselevanteelrecargadordelimpiezaautomáticaose
coloquesobreunasupercieblanda,comoporejemplouna
alfombra,lapalancadedesbloqueonoencajarácorrectamenteen
elrecargador.Enestecaso,nopodráextraerselaunidaddel
líquidodelimpieza.
2
2
Pulseelbotónde
extraccióndela
unidaddellíquidode
limpieza(
1
)y
extraigalaunidad
dellíquidode
limpieza(
2
)�
3
3
Elimineellíquidodelimpiezausadoylosrecortes
debarbay,acontinuación,enjuaguelaunidaddel
líquidodelimpieza�
• Trasenjuagar,asegúresedeacoplarelltrodellíquidodelimpieza.
4
4
Viertaaguacorriente(
1
)y
detergente(
2
)enlaunidad
dellíquidodelimpieza�
• Evitequeelaguasobrepaseel
nivelmarcado.Estocausaríaque
ellíquidodelimpiezasalpicara.
5
5
Acoplelaunidaddellíquidode
limpieza�
• Limpieinmediatamentecualquierrestode
líquidodelimpiezaquehayapodido
derramarse.
Tengacuidadodenoverterlíquidodelimpieza
sobreproductosdecueroosuelosdemadera,
yaquepodríaprovocardecoloración.
6
6
Presioneelrecargadordelimpieza
automáticayajústelormemente
hastaqueseoigaunchasquido�
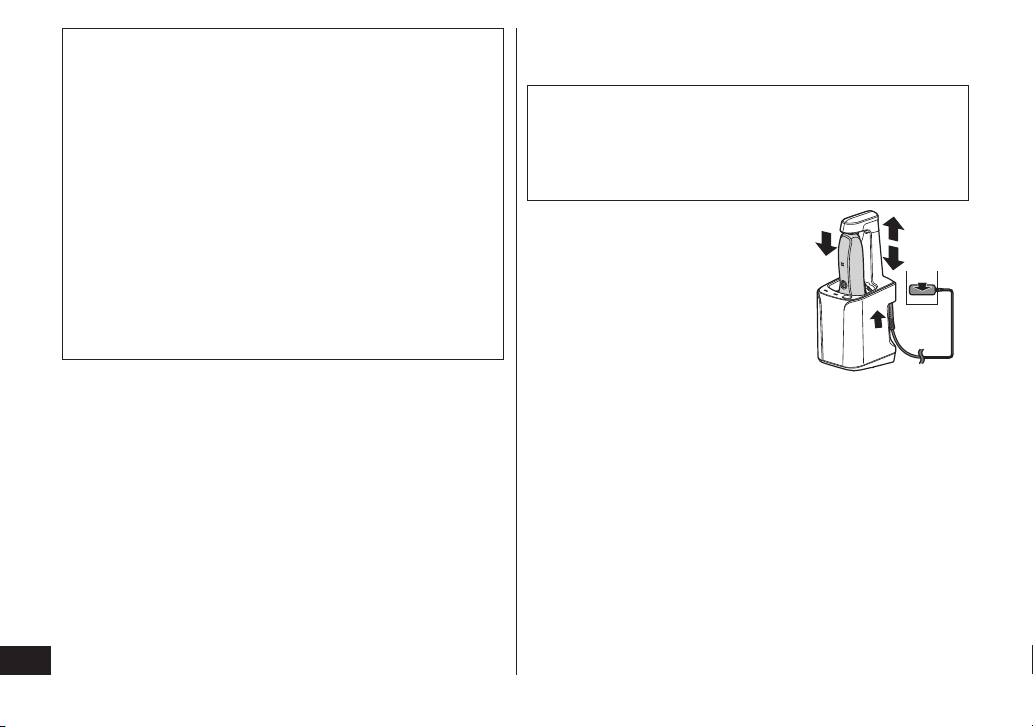
60
Español
Notas
• Elaguayeldetergentesemezclaránunavezseinicielalimpieza
paraproducirlíquidodelimpieza.
• Sinoesposibleseleccionarelmodo“Automático”olalámparade
estadoseiluminadurante5segundoscuandosepulsaelbotónde
selección,esnecesariosustituirellíquidodelimpieza.Sustituyael
líquidodelimpieza.
• Unavezsustituido,ellíquidodelimpiezadurará30días
aproximadamentesiseutilizaunavezaldía.(Estovariará
dependiendodelespesordelabarbaylatemperaturaambiente.)
• Utiliceeldetergenteenunplazode6mesesaproximadamentetrasla
aberturadelenvase.Unaveztranscurridos6meses,desecheel
líquidodelimpiezay,acontinuación,viertaagualimpiaydetergente
enlaunidaddelíquidodelimpieza.
• Sustituyaelaguayeldetergentealavez.
Delocontrario,lafuncióndelimpiezapuededeteriorarse.
• Utilicesolamenteeldetergenteespecialparaelrecargadorde
limpiezaautomáticaparaafeitadorasPanasonic.
► Limpiezadelaafeitadora
Retireeljabónoelaguadelaafeitadorasisehalavadoconjabónde
manosocualquierotrodetergente.
Nota
Cuandolimpielaafeitadoratrascortarunagrancantidaddebarbacon
elaccesoriodepeine,losrecortesdepelopuedenacumularseenla
bandejadelimpiezadelrecargadordelimpiezaautomática.Eliminelos
recortesdepeloqueseencuentrenalrededordelcortapatillasantesde
acoplarlaafeitadoraalrecargadordelimpiezaautomática.
1
1
Insertelaclavijadelaparato
enelrecargadordelimpieza
automática�
2
2
Tiredelbrazohastaqueoiga
unclic�
3
3
Retirelatapaprotectoraoel
accesoriodepeiney,a
continuación,instalela
afeitadora�
4
4
Empujeelbrazohaciaabajo
hastaqueoigaunclic�
1
2
4
3
5
5
5
Enchufeeladaptadorenunatomadecorrientedoméstica�
• Apaguelaafeitadoraantesdeinstalarla.
• Compruebequelaláminaexteriornoestádeformadanidañadaal
instalarlaafeitadora.
• Introduzcalamáquitadeafeitarenelrecargadordelimpieza
automáticaconelmangodelcortapatillasretraído.Sielmangodel
cortapatillasnoseretrae,podríaarañarlabandejadelimpieza.

61
Español
6
6
Pulseelbotóndeselecciónparaseleccionarelmodo�
• Elmodo“Cargar”seiniciacuandoseacoplalaafeitadora.
• Cadavezquepulseelbotóndeselección,elmodocambiaráde
“Automático” “Cargar”.
• Losmodosseiniciaránaproximadamente6segundosdespuésde
habersidoseleccionados.
• Elmodoseráabortadosisecortalaenergía.Enestecaso,
reinicieelmododenuevodesdeelprincipio.
• Nopulseelbotóndeextraccióndelaunidaddellíquidode
limpieza;ellíquidodelimpiezapodríaverterseyprovocarun
funcionamientoincorrecto.
Modo Tiemporequerido(guía)
Carga
Carga
De0a60
minutos
Automático
Limpiar/Secar
10minutos/350minutos
Carga
De0a60
minutos
• Noesposiblecambiarelmodounavezquesehaya
iniciadoelmodo“Automático”.
• Useelrecargadordelimpiezaautomáticaatemperaturasentre5°C
(41°F)y35°C(95°F).
LafunciónLimpiaroSecarpuedenofuncionarsilatemperaturaestá
fueradelintervalorecomendadodetemperaturaambiente.Enese
caso,nopodráseleccionarseelmodo“Automático”ylalámparade
estadoseiluminarádurante5segundosaproximadamente.
Limpiezadelaafeitadorasinelrecargadorde
limpiezaautomática
1. Desconecteelcabledelaafeitadora.
2. Apliquejabóndemanosyunpocodeaguaenlaláminaexterior.
3. Enciendalaafeitadora.
4. Apaguelaafeitadoratranscurridosentre10
y20segundos.
5.
Cómoretirarlaseccióndelaláminaexterior.
6.
Limpielaafeitadora,laseccióndelalámina
exterior,elcortapatillasyelaccesoriode
peineconaguacorriente.
7.
Limpielasgotasdeaguaconunpañoseco.
8. Sequecompletamentelaseccióndela
láminaexterior,laafeitadora,el
cortapatillasyelaccesoriodepeine.
9. Montelaseccióndelaláminaexteriorenlaafeitadora.
10
.Lubriquelaafeitadora.
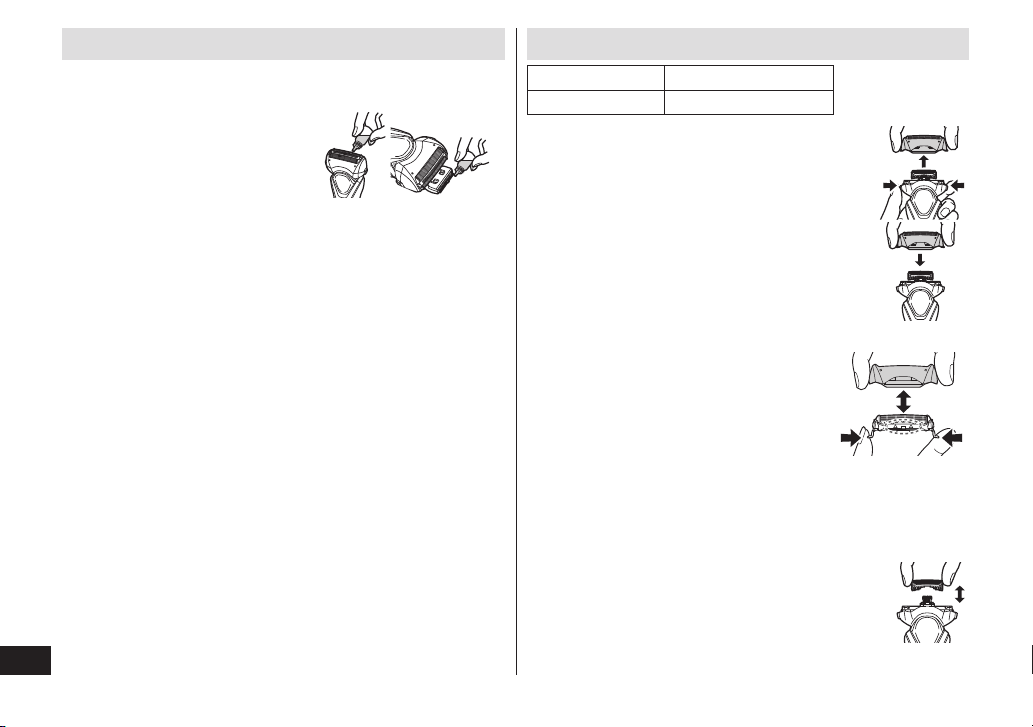
62
Español
Lubricación
Paramantenerlacomodidadenelafeitadopormuchotiempo,se
recomiendaqueseutiliceelaceitequesesuministraconlaafeitadora.
1. Apaguelaafeitadora.
2. Apliqueunagotadeaceiteencada
láminaexterior.
3. Levanteelcortapatillasyapliqueuna
gotadeaceite.
4. Enciendalaafeitadoraydéjela
funcionandoporaproximadamente
5segundos.
5. Apaguelaafeitadoraylimpieelexcesodeaceitedelaláminaexterior
conunpañosuave.
Sustitucióndelaláminaexteriorylascuchillasinternas
láminaexterior unavezalaño
cuchillasinternas unavezcadadosaños
► Cómoretirarlaseccióndelaláminaexterior
Pulselosbotonesdeliberacióndelmarcodelaláminay
levantelaseccióndelaláminaexteriorhaciaarriba.
► Cómocolocarlaseccióndelaláminaexterior
Sujeteconrmezalaseccióndelaláminaexteriore
introdúzcalaenlaafeitadorahastaquehagaclic.
► Sustitucióndelaláminaexterior
1. Pulselosbotonesdeliberacióndelalámina
exteriordelsistemaytiredelaláminaexterior
delsistemahaciaabajo.
2. Introduzcalaláminaexteriorhastaqueseoiga
unclic.
• Montesiemprelaláminaexteriorenla
direccióncorrecta.
• Siempreinsertelaláminaexteriordelsistema
almarcodelaláminacuandolamonteenla
afeitadora.
► Sustitucióndelascuchillasinternas
1. Retirelascuchillasinternasunaalavez.
• Notoquelosbordes(partesdemetal)delascuchillas
internasparaevitardañosenlasmanos.
2. Introduzcalascuchillasinternasdeunaenunahastaque
haganclic.

63
Español
► Piezasderepuesto
Laspiezasderepuestoestándisponiblesensudistribuidoroenel
CentrodeServicio.
Partesderepuestopara
elmodeloES-RT97
Láminaexteriorycuchillas
internasdelsistema
WES9013
Láminaexterior WES9087
Cuchillasinternas WES9068
Detergenteespecialparaelsistemadelimpiezaycarga
delaafeitadora
WES4L03
Limpiezadelrecargadordelimpiezaautomática
Losrecortesdelabarbapuedenquedarseadheridosalabandejade
limpiezadelrecargadordelimpiezaautomática.Sigalospasosdescritos
acontinuaciónparaeliminarlos.Esrecomendablehacerestocadavez
quecambieelcartuchodedetergente.
1. Asegúresedeextraerlaunidaddellíquidode
limpiezaylaclavijadelaparatodelrecargador
delimpiezaautomática.
• Tengacuidadodenoderramarellíquidode
limpieza.
• Esposiblequealgunoscomponentesdel
líquidodelimpiezaydelaceiteparalapielse
separenyseadhieranalaunidadyelltro
dellíquidodelimpieza.Estonorepresenta
unproblema.
2. Viertaaguatalycomose
muestra,mientrasinclinala
unidaddellíquidodelimpiezayla
agitasuavemente.
• Puedelimpiarconelltrodel
líquidodelimpiezaextraído.
• Trasenjuagar,asegúresede
acoplarelltrodellíquidode
limpieza.
3.
Frotesuavementecualquierrecortedebarba
adheridoalinteriordelabandejadelimpiezacon
unpañoopañuelodepapelhumedecidoconagua.
• Limpielasesquinasylaspartesdesniveladas
delabandejadelimpiezaconuntrozode
algodónhumedecidoconagua.
► Cuandoelaguanosevacíadelabandejadelimpieza
• Novuelqueelrecargadordelimpiezaautomáticaparavaciarelagua.
Delocontrariovaciarátambiénellíquidolimpiadordelaunidaddel
líquidodelimpiezaoprovocaráunmalfuncionamientodelrecargador
delimpiezaautomática.
Losrecortesdebarbapuedenatascarlasalidade
aguadelaparteinferiordelabandejadelimpieza.
Enestecaso,nopodrálimpiarnisecarlaafeitadora.
Empujelosrecortesdebarbaporelagujerodesalida
conunpalillodedientes,etc.

64
Español
Solucióndeproblemas
► Recargadordelimpiezaautomática
Problema Acción
Lacuchillanosehalavado
correctamente.
Silaafeitadoranoselimpiadurantemás
de2semanas,primerodeberálimpiarla
paraeliminarlosrecortesdebarba.
Noañadadetergenteyaguaexcepto
cuandocambieellíquidodelimpieza.
Delocontrario,lafuncióndelimpieza
podríadeteriorarse.(consultela
página60.)
Traslalimpieza,puedenquedar
gotitasdeaceiteenelexteriordel
marcodelalámina.Esteesel
componentelubricantedellíquidode
limpiezayestonoindicauna
problema.Puedeeliminarlasconun
pañosuave.
Lalámparadeestadose
ilumina.
Consultelapágina66.
Problema Acción
Elmodonoseinicia.
CompruebequeeladaptadordeCA
estéconectadoalrecargadorde
limpiezaautomáticayqueel
adaptadordeCAestéenchufadoa
unatomadecorriente.(consultela
página55.)
Conrmequelaafeitadoraesté
correctamenteacopladaenel
recargadordelimpiezaautomática.
(consultelapágina55.)
LafunciónLimpiaroSecarsepuede
detenersilatemperaturaestáfuera
delintervalorecomendadode
temperaturaambiente.
(5–35°C(41–95°F))
Compruebesilalámparadeestado
seilumina.(consultelapágina66.)
Ellíquidodelimpiezaseha
acumuladoenlabandejade
limpieza.
Eliminecualquierrestodesuciedad,
etc.quesehayaacumuladoenla
salidadelaaguadelaparteinferior
delabandejadelimpieza.
(consultelapágina63.)
Siutilizarecargadordelimpieza
automáticacuandolaafeitadoraesté
mojadaocuandolaafeitadoratenga
jabónogeldeafeitar,esposibleque
seacumulelíquidodelimpiezaenla
bandejadelimpieza.

65
Español
Problema Acción
Lascuchillasnoestánsecas
oestánpegajosas.
Esposiblequelascuchillasnose
sequenrápidamentedebidoala
temperaturaambiente.
Limpieconunpañosuaveantesde
realizarelafeitado.
Lascuchillasseagrietano
deformandurantelalimpieza.
Nointroduzcaobjetosextrañosenel
recargador.
Sustituyalaláminaexteriory/olas
cuchillasinternas.(consultela
página62.)
Ellíquidodelimpiezaha
formadoespuma.
Simezclaaguajabonosaojabónde
manosconeldetergenteoutilizaotro
detergente,ellíquidodelimpieza
formaráespuma.Utiliceelrecargador
delimpiezaautomáticatraslavary
secarminuciosamentelaafeitadora.
Sustituyaellíquidodelimpieza.
Sehaltradolíquidode
limpiezadelaunidaddel
líquidodelimpieza.
Nopulseelbotóndeextraccióndela
unidaddellíquidodelimpieza
duranteelmodo.
Coloqueelrecargadordelimpieza
automáticadeformahorizontal.
Siutilizarecargadordelimpieza
automáticacuandolaafeitadoraesté
mojadaocuandolaafeitadoratenga
jabónogeldeafeitar,esposibleque
seltrelíquidodelimpieza.
Problema Acción
Launidaddellíquidode
limpiezanopuedeextraerse.
Coloqueelrecargadordelimpieza
automáticasobreunasuperciedura
yplana.
Cuandoselevanteelrecargadorde
limpiezaautomáticaosecoloque
sobreunasupercieblanda,como
porejemplounaalfombra,lapalanca
dedesbloqueonoencajará
correctamenteenelrecargador.En
estecaso,nopodráextraersela
unidaddellíquidodelimpieza.
Emiteunsonidofuerte.
Durantelalimpieza:
Elrecargadordelimpieza
automáticaemiteunsonidoagudo
debidoalalimpiezadelascuchillas.
Traslalimpieza:
Elrecargadordelimpieza
automáticaemiteunsonidoagudo
debidoalaeliminacióndegotasde
aguaquepermiteunsecadorápido.
Elsonidoemitidotraslalimpiezaes
distintodelsonidoqueseemitedurante
lamisma.Elniveldeaguahadescendido
yseestáneliminandolasgotasdeagua
delascuchillastraslalimpieza.Estono
representaunproblema.
Noesposiblecargarla
afeitadora.
Limpiesuavementeelterminal
metálicodelaconexióndelaparatoy
elterminaldecargadelrecargador
delimpiezaautomáticaconunpaño
ounpañuelodepapelhumedecidos
conagua.

66
Español
► Cuandolalámparadeestadoseilumina
Problema Acción
Eselmomentodesustituirel
líquidodelimpieza.
Viertaagualimpiaydetergenteenla
unidaddellíquidodelimpieza.
Launidaddellíquidode
limpiezanoestá
correctamenteacoplada.
Acoplecorrectamentelaunidaddel
líquidodelimpieza.
Elrecargadordelimpieza
automáticaestáinclinado.
Coloqueelrecargadordelimpieza
automáticasobreunasupercie
horizontal.
Trasrealizarlaoperaciónanterior,pulseelbotóndeseleccióny
seleccioneunmodo.
► Cuandoparpadeentodaslaslámparasdelrecargador
delimpiezaautomática
Problema Acción
Fallodelaparato
Póngaseencontactoconuncentro
deservicioautorizado.
► Afeitadora
Problema Acción
Lospelosrecortadosvuelan
entodaslasdirecciones.
Estopuedemejorarselimpiandola
afeitadoradespuésdecadaafeitado.
Limpielascuchillasinternas.
Laláminaexteriorsecalienta.
Apliqueaceite.
(consultelapágina62.)
Sustituyalaláminaexteriorsiestá
dañadaodeformada.
(consultelapágina62.)
Problema Acción
Eltiempodefuncionamiento
esbreve,inclusodespuésde
lacarga.
Apliqueaceite.
Cuandoelnúmerodeoperaciones
porcargaempieceadisminuir,la
bateríaestaráaproximándosealnal
desuvidaútil.
Emiteunsonidofuerte.
Apliqueaceite.
Conrmequelascuchillasestán
correctamentecolocadas.
Limpielaláminaexterior.
Elolorescadavezmásfuerte.
Estopuedemejorarselimpiandola
afeitadoradespuésdecadaafeitado.
Noobtieneunafeitadotan
apuradocomoantes.
Estopuedemejorarselimpiandola
afeitadoradespuésdecadaafeitado.
Sustituyalaláminaexteriory/olas
cuchillasinternas.
Vidaútilestimadadelalámina
exteriorylascuchillasinternas:
Láminaexterior:
Aproximadamente1año
Cuchillasinternas:
Aproximadamente2años
Apliqueaceite.
Laafeitadoranopuede
cargarseconelrecargador
delimpiezaautomática.
Limpiesuavementeelterminal
metálicodelaconexióndelaparatoy
elterminaldecargadelrecargador
delimpiezaautomáticaconunpaño
ounpañuelodepapelhumedecidos
conagua.

67
Español
Problema Acción
Laafeitadorahadejadode
funcionar.
Latemperaturaambiente
recomendadaparaelfuncionamiento
esdeentre5y35ºC(41y95°F).Es
posiblequelaafeitadoradejede
funcionarcuandolatemperatura
ambientenosealarecomendada.
Labateríahaalcanzadoelnaldesu
vidaútil.
Sinosepuedenresolverlosproblemas,póngaseencontactoconla
tiendaenlaquecomprólaunidadoconuncentrodeservicioautorizado
porPanasonicpararealizarlareparación.
Vidadelabatería
Lavidaútildelabateríaesde3años.Labateríadeestaafeitadorano
estádiseñadaparaquelosconsumidoreslasustituyan.
Retirarlabateríarecargableinterna
ATENCIÓN:
Elproductoquehacompradosealimentaconunabateríadeiones
Litioreciclable.Llamealteléfono1-800-8-BATTERYparaobtener
informaciónacercadecómoreciclarlabatería.
Retirelabateríarecargableinternaantesdedeshacersedelaafeitadora�
Estagurasolodebeutilizarsealdesecharlaafeitadora,nopara
repararla.Siusteddesmontalaafeitadora,dejarádeserresistenteal
agua,loquepuedeocasionarunfuncionamientoincorrecto.
• RetirelaafeitadoradeladaptadordeCA.
• Pulseelinterruptordeencendidoparaencenderelaparatoydéjelo
encendidohastaquelabateríaestecompletamentedescargada.
• Lleveacabolospasos
1
a
5
ylevantelabatería,despuésretírela.
• Tengacuidadodenocortocircuitarloscontactosdelabatería.
Especicaciones
Fuentedealimentación
Anoteelnúmerodeplacaqueseencuentraen
eladaptadordeCA.
(Conversióndevoltajeautomática)
Voltajedelmotor
3,6V
Tiempodecarga Aproximadamente1hora
Esteproductoestádestinadosolamenteparasuusodoméstico.
68
Español
DeclaracióndeInterferenciadelaComisiónFederalde
Comunicaciones
Esteequipohasidoprobadoyseencuentraenconformidadconlos
límitesestablecidosparadispositivosdigitalesdelaClaseB,en
aplicacióndelodispuestoenlaSección15deloslineamientosdela
CFC.Estoslímiteshansidodiseñadosparaproporcionarprotección
razonablecontralainterferenciaperjudicialenunainstalación
residencial.Esteequipogenera,usaypuedeirradiarenergíaderadio
frecuenciay,sinoseinstalayseusaenconformidadconlas
instruccionesproporcionadas,podríaocasionarinterferenciaperjudicial
alasradiocomunicaciones.Sinembargo,noestágarantizadoqueno
sepresentaráningunainterferenciaenunainstalaciónenparticular.Si
esteequipoocasionainterferenciasperjudicialesenlarecepciónde
radioodetelevisión,locualsepuededeterminarapagandoy
encendiendoelequipo,selepidealusuariotratardecorregirla
interferenciamediantelarealizacióndeunadelassiguientesmedidas:
• Cambiedeorientaciónodelugarlaantenaderecepción.
• Incrementelaseparaciónentreelequipoyelreceptor.
• Conecteelequipoenunatomadecorrientequeseadeuncircuito
diferenteaaquelenelqueestáconectadoelreceptor.
• Póngaseencontactoconeldistribuidoroconuntécnico
experimentadoenradio/TVparasolicitarayuda.
PrecaucionesdelaCFC:Paragarantizarlaconformidaddeforma
continua,instaleyuseelaparatodeacuerdoalasinstrucciones
proporcionadas.Cualquiercambioomodicaciónqueserealicequeno
estéaprobadoporlaparteresponsabledelaconformidadpodría
invalidarlaautoridaddelusuarioparausaresteequipo.
Estedispositivoestáenconformidadconlaparte15delanormativade
laFCC.Elfuncionamientoestásujetoalassiguientesdoscondiciones:
(1)Estedispositivonopuedecausarinterferenciasperjudiciales,y(2)
estedispositivodebeaceptarcualquierinterferenciarecibida,incluyendo
interferenciasquepodríanproducirunfuncionamientonodeseado.
PARASUCONVENIENCIA,AHORADISPONEMOSDEUNALÍNEA
NACIONALDELLAMADAGRATISPARALACOMPRADE
ACCESORIOS(SOLAMENTEENUSA);LLAMEAL1-800-332-5368�

69
MEMO

70
MEMO

71
MEMO

F EN, CA, ES
IN USA CONTACT:
Panasonic Corporation of North America
Two Riverfront Plaza, Newark, NJ 07102‑5490
IN CANADA CONTACT:
AU CANADA, COMMUNIQUEZ AVEC:
Panasonic Canada Inc.
5770 Ambler Drive, Mississauga, Ontario L4W 2T3
www.panasonic.com
EN MEXICO CONTACTE CON:
Panasonic de México S.A. de C.V.
Félix Cuevas No. 6 Piso 2 y 3
Col. Tlacoquemecatl Del Valle
Del. Benito Juárez
México, D.F. C.P.03200
01 (55) 5488‑1000
EN PANAMA CONTACTE CON:
Panasonic Latin America. S.A.
P.O. Box 0816‑03164
Panama, Republic of Panama
(507) 229‑2955
Service • Assistance • Accessories
Dépannage • Assistance • Accessoires
Call 1-800-338-0552 (In USA)
http://www.panasonic.com/personalcare
http://www.us.panasonic.com/consumersupport
www.panasonic.ca/english/support (In Canada)
www.panasonic.ca/french/support (Au Canada)
http://www.panasonic.com
Printed in China
Imprimé en Chine
Impreso en China
0000000000 X0000‑0