Loading ...
Loading ...
Loading ...
12 13
12
Figure 6
Figure 7
HOW TO LIGHT THE SURFACE BURNERS
1. Push in and turn the control knob counterclockwise
to the LITE position. All surface burners will click
but only the burner with control knob turned to LITE
will produce a flame.
2. After the burner ignites, turn the control knob to
the desired flame size.
NOTE: ALWAYS position cooking cookware on the
burner grate before lighting the burner.
CAUTION: The flame SHOULD NOT extend beyond the
sides or the pot or pan.
IN CASE OF POWER FAILURE
WARNING: Use extreme caution when lighting burners this way.
1. Hold a lit match to the desired burner head.
2. Push and turn the control knob to the “LITE” position.
3. Once burner ignites, adjust flame to the desired size.
MIN
MAX
OFF
LITE
13
Figure 8
OPERATION INSTRUCTIONS - OVEN
OVEN
POSITIONING RACKS AND BAKEWARE
NOTE: To avoid damage to the porcelain finish, DO NOT place food or bakeware directly on the oven door or bottom.
Positioning Oven Rack
1. Slightly tilt up the front edge of the rack and slide rack back until it clears the stop position.
2. Make sure the rack is level.
NOTE: Position racks to the desired rack positon before turning on the oven.
NOTE: DO NOT position racks with bakeware on them.
Removing Oven Rack
Pull the rack out to the stop position, then raise the front edge and continue to pull towards you.
NOTE: DO NOT remove racks with bakeware on them.
COOKING MODES
Preheating
• Preheat means to bring the oven up to a specified temperature before putting food into the oven.
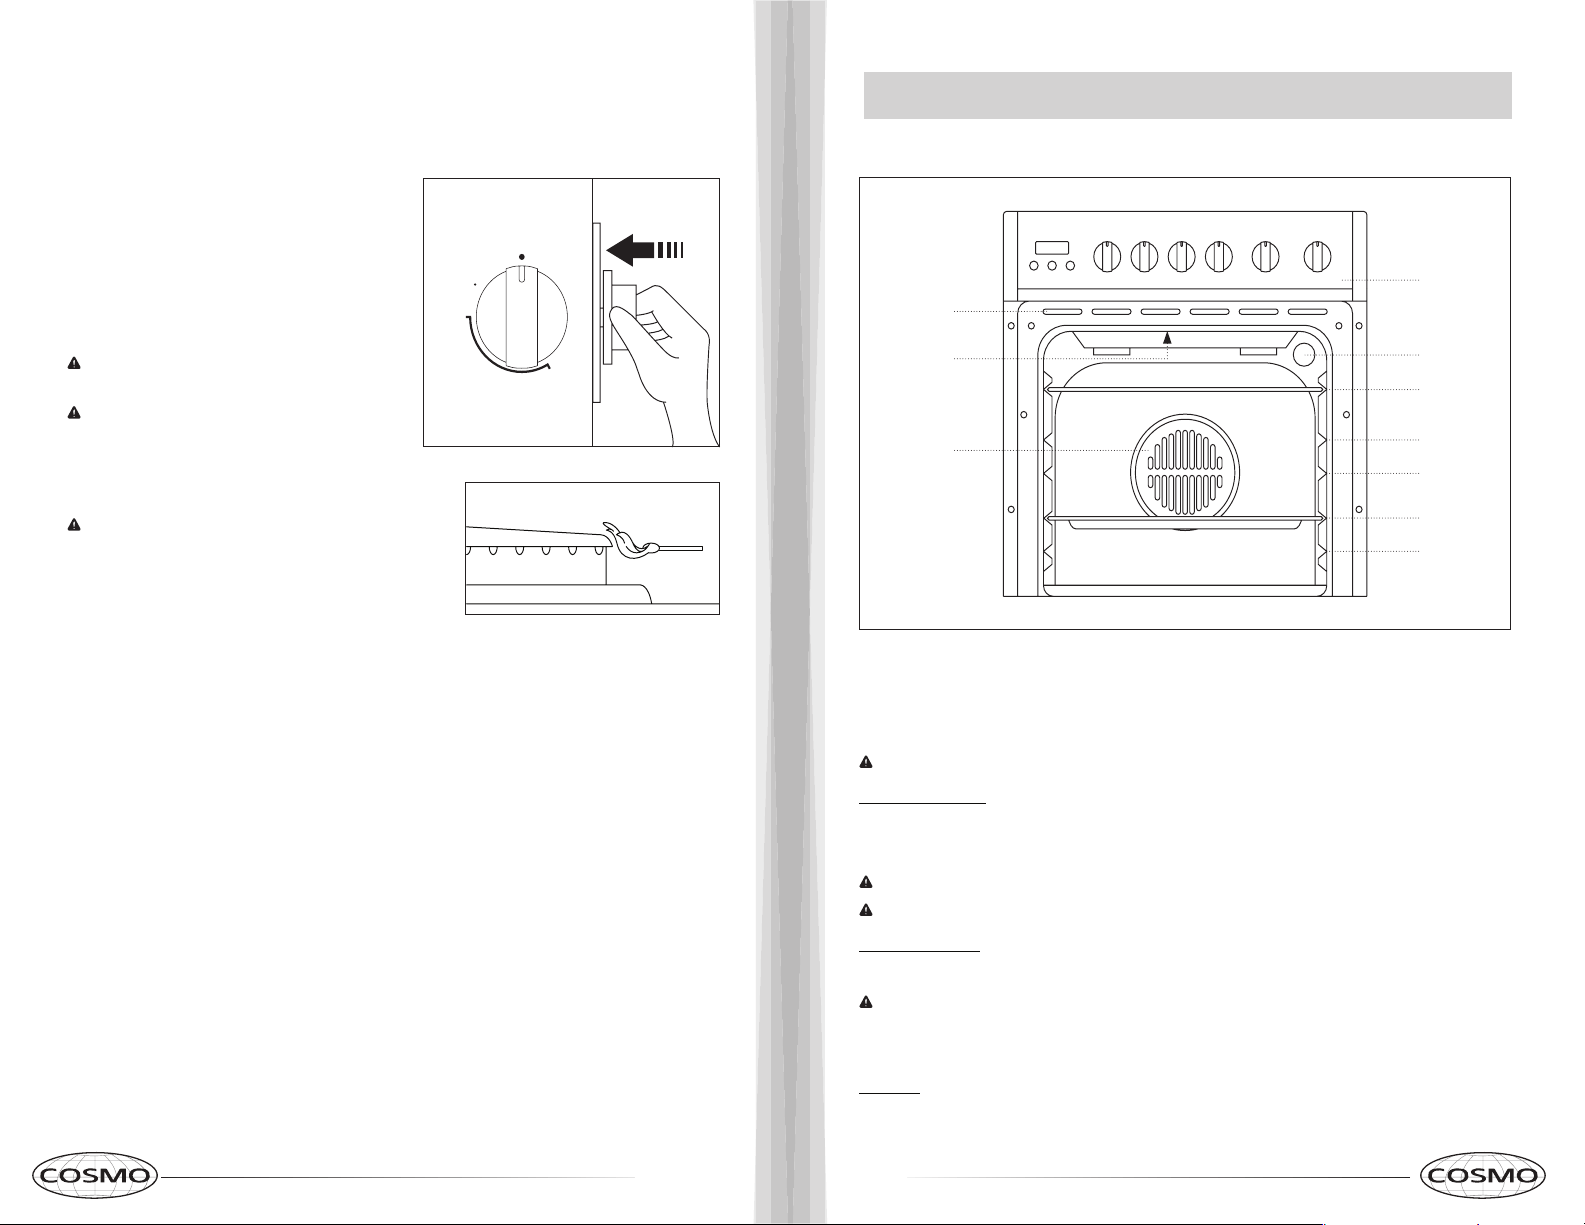
a
c
f-1
f-2
f-3
f-4
f-5
a. Control Panel
b. Cooling Vents
c. Oven Interior Light
d. Top Central Heating Element
e. Convection Fan and Heating Element
f. Rack Position Guide
b
e
d
OPERATION INSTRUCTIONS - OVEN
Loading ...
Loading ...
Loading ...