Loading ...
Loading ...
Loading ...
18
Troubleshooting
FIG. 25
REMOVING DRAIN FITTING TO CLEAN
FLOW CONTROL
Clip
Hose
Clamp
Drain
Hose
Flow
Control
Drain
Fitting
PROBLEM CAUSE CORRECTION
Water running to the
drain (while unit is not in
the Clean Rinse cycle)
Inner valve defect causing leak Replace seals and rotor
Filter media in household
plumbing
Crack in distributor or riser tube Replace distributor or riser tube.
Procedure for removing error code from display:
1. Unplug power supply from electrical outlet.
2. Correct problem.
3. Plug power supply back in.
4. Wait 8 minutes. The error code will return if the problem was not corrected.
Assistance from customer service may be needed with the following:
FIG. 24
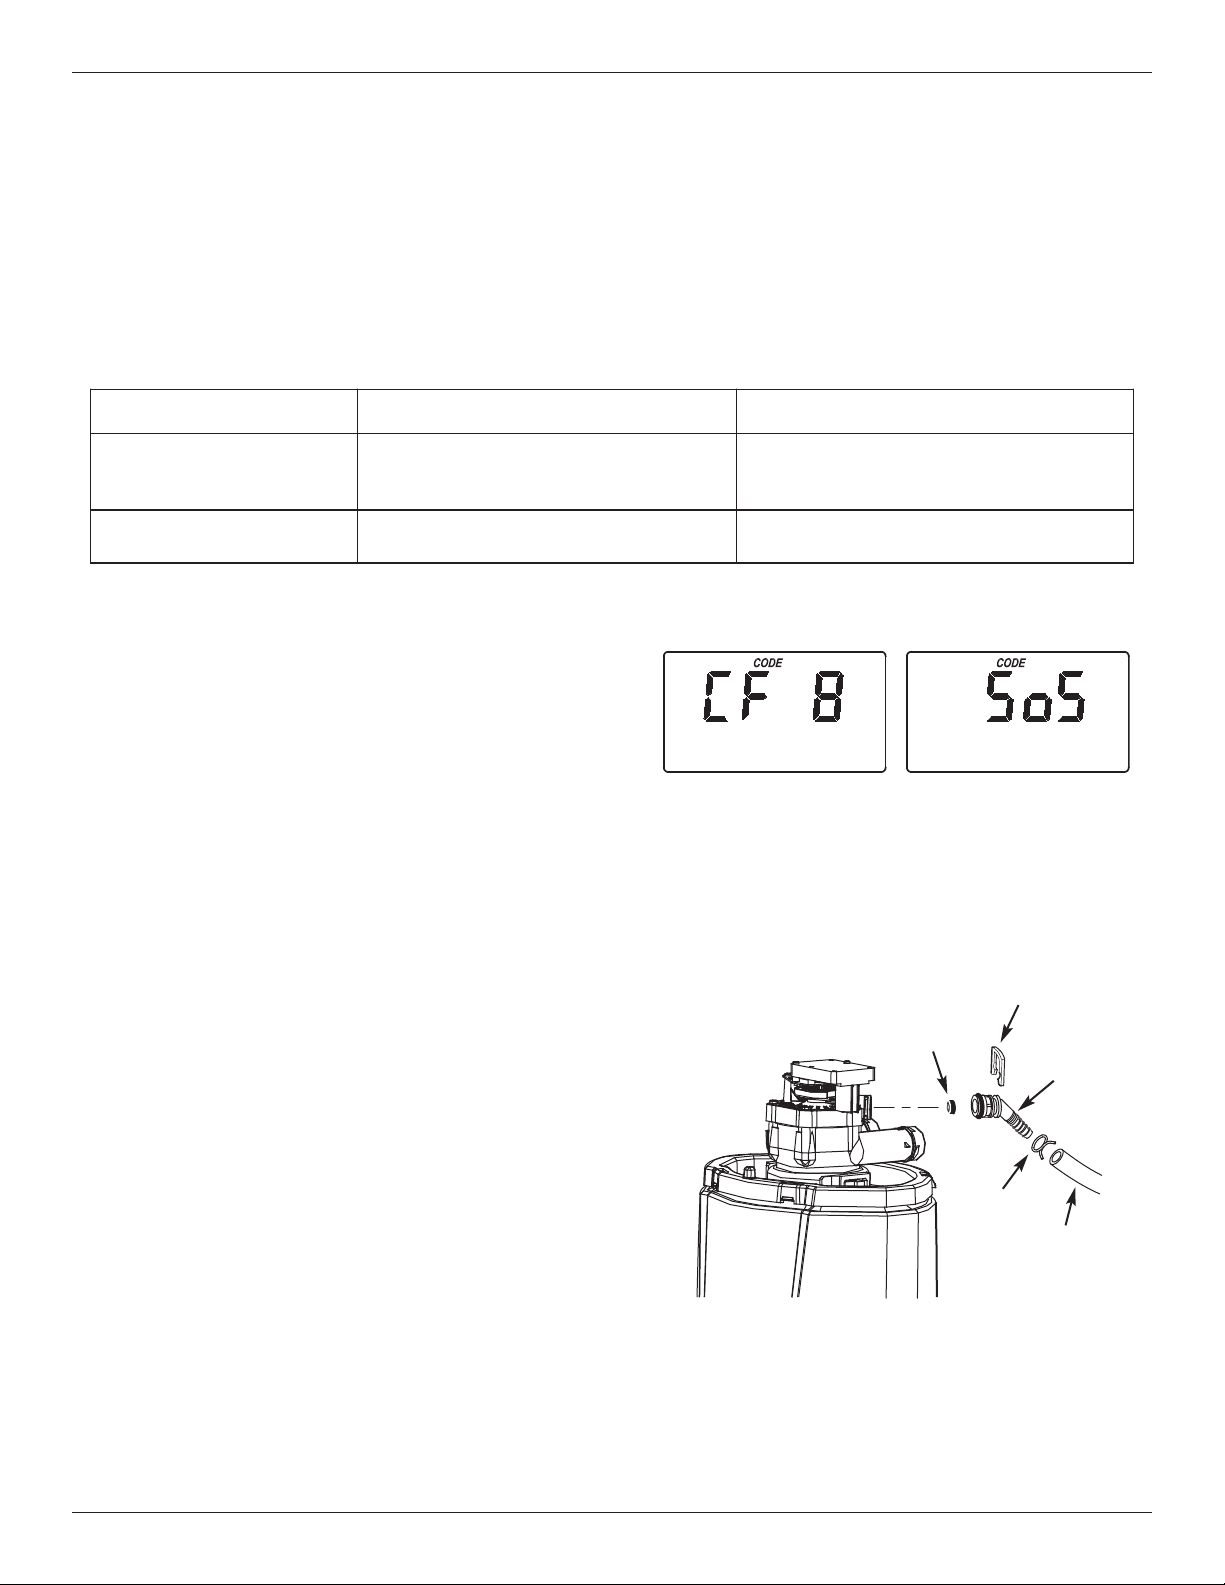
RESETTING TO FACTORY DEFAULTS
To reset the electronic controller to its factory default
for all settings (time, number of days between Clean
Rinse cycles, etc.):
1. Press the PROGRAM button and hold it until the
display changes twice to show “CODE” and the
flashing model code.
2. Press the
r UP button twice to display a flashing
“SoS”.
3. Press the PROGRAM button, and the electronic
controller will restart.
4. Set the present time, as described on page 12.
CLEANING THE DRAIN FLOW CONTROL
This procedure is not required if the Central Water
Filtration System is operating normally. It should be
performed only if a problem with lack of water flow to
drain is encountered, as detailed in the troubleshooting
table on Page 17.
1. Remove the clip holding the drain fitting into the
valve (See Figure 25).
2. Remove the drain fitting from the valve
3. Clear any obstruction.
4. Reinstall the drain fitting into the valve.
5. Reinstall the clip to secure the drain fitting in the
valve.
Need help troubleshooting? Call Toll Free 1-866-986-3223 or visit whirlpoolwatersolutions.com
When you call, please be prepared to provide the model and serial number,
located on the rating decal on back of the cover.
Loading ...
Loading ...
Loading ...