Loading ...
Loading ...
Loading ...
14
Operating Your Outdoor Grill
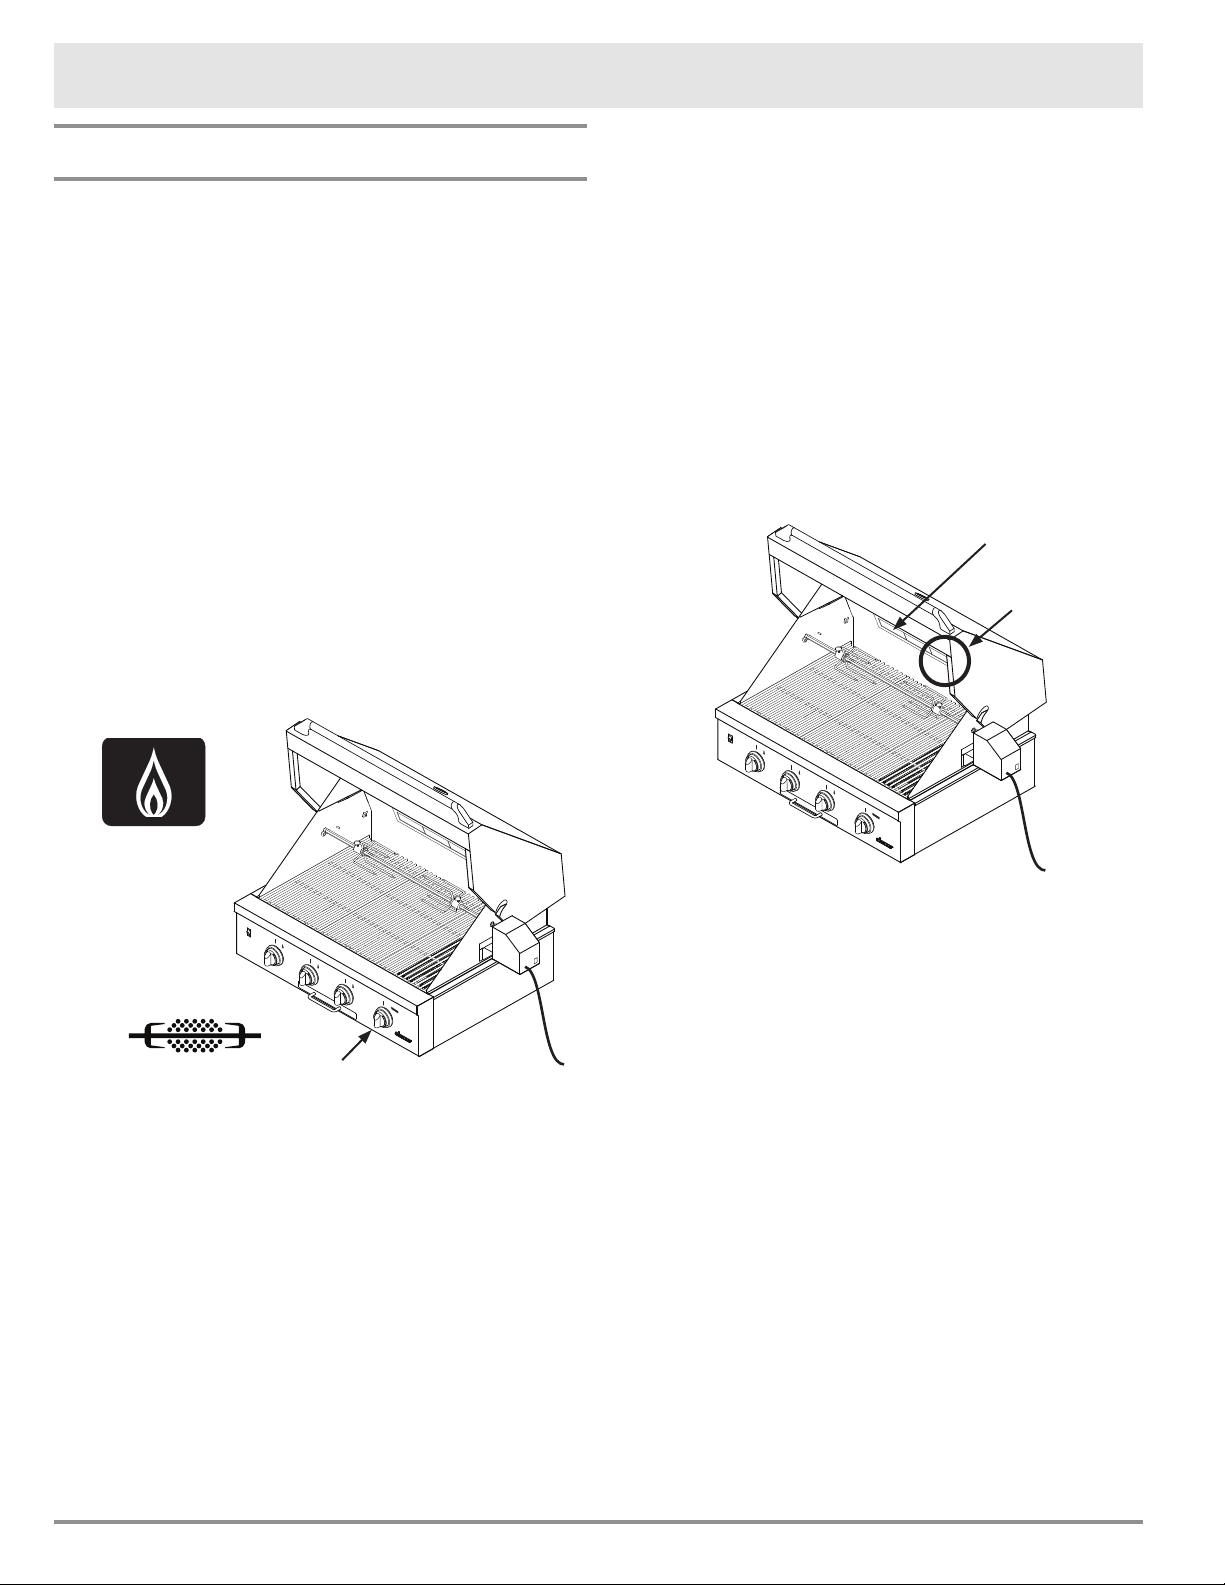
Manual Lighting Procedure - Rotisserie
1. Make sure the drip tray is in place.
2. Make sure all control knobs are in the OFF position.
3. If using a LP tank, turn the valve on the top of the
tank, counter-clockwise, to the fully open position.
4. Use the provided match holder or a long stem match
to light the burner manually. Push in on the rotisserie
burner control knob and turn it counter-clockwise
while holding the end of the lit match just below the
rotisserie burner igniter electrodes (the two wires on
the left side of the burner). If you do not experience
immediate ignition, turn the knob back to the OFF
position. Leave the canopy open and wait ve min-
utes. Repeat the lighting procedure.
5. If the burner does not light after two tries, see the
Before You Call for Service section on page 22.
Rotisserie Cooking (cont.)
4. Make sure the motor power cord is routed away from
all surfaces that become hot when any of the burners
are lit.
5. Turn on the motor and watch the meat rotate sev-
eral times. Make sure the food is rotating evenly and
does not rub against the rotisserie burner. If neces-
sary, turn off the motor, remove the rotisserie rod and
readjust. If the food is not rotating properly, it will not
cook evenly.
6. Push in on the rotisserie burner control knob and
turn it counter-clockwise to the LIGHT/HIGH posi-
tion. The igniter will spark repeatedly until the burner
lights. The spark makes a “clicking” sound. The burner
should light within ve seconds. A minute after light-
ing, the rotisserie burner will begin to glow red. If the
burner does not ignite in ve seconds, turn the burner
knob to the OFF position. Keep the canopy open. Wait
ve minutes. Repeat the lighting procedure. If the
burner does not ignite after three tries, you may use
the manual lighting procedure. Also see the Before
You Call for Service section on page 22.
7. Dacor recommends that you place a rimmed pan
underneath the food to catch juices and prevent are-
ups.
8. Close the canopy.
9. During cooking, check the food periodically using the
temperature information on the
Safe Cooking Tem-
perature
Chart
on page 16. Check the internal
meat temperature with a meat thermometer to deter-
mine doneness.
10. If the food is done, remove the entire rotisserie rod
with hot pads. Put it on a clean cookie sheet.
11. Use hot pads to loosen the thumb screws and remove
the rotisserie rod and forks.
12. Allow the meat to rest for 10 to 15 minutes before
carving.
Rotisserie burner knob
LIGHT/HIGH
Rotisserie burner
Electrode
location
Loading ...
Loading ...
Loading ...