Loading ...
Loading ...
Loading ...
13
Assembly of the burner caps
Make sure that all of the surface burner caps and surface
burner grates are installed correctly and at the correct loca
-
tions.
1. Remove all packing material from the cooktop area.
2. Make sure burner head and caps are properly placed
on the surface burners.
Important: The burner head has a hole which fits over the
ignitor. Make sure the head fits snugly before placing the
burner caps.
Note: Unpack the burner grates and position them on the
cooktop after the burner heads and caps are properly
installed.
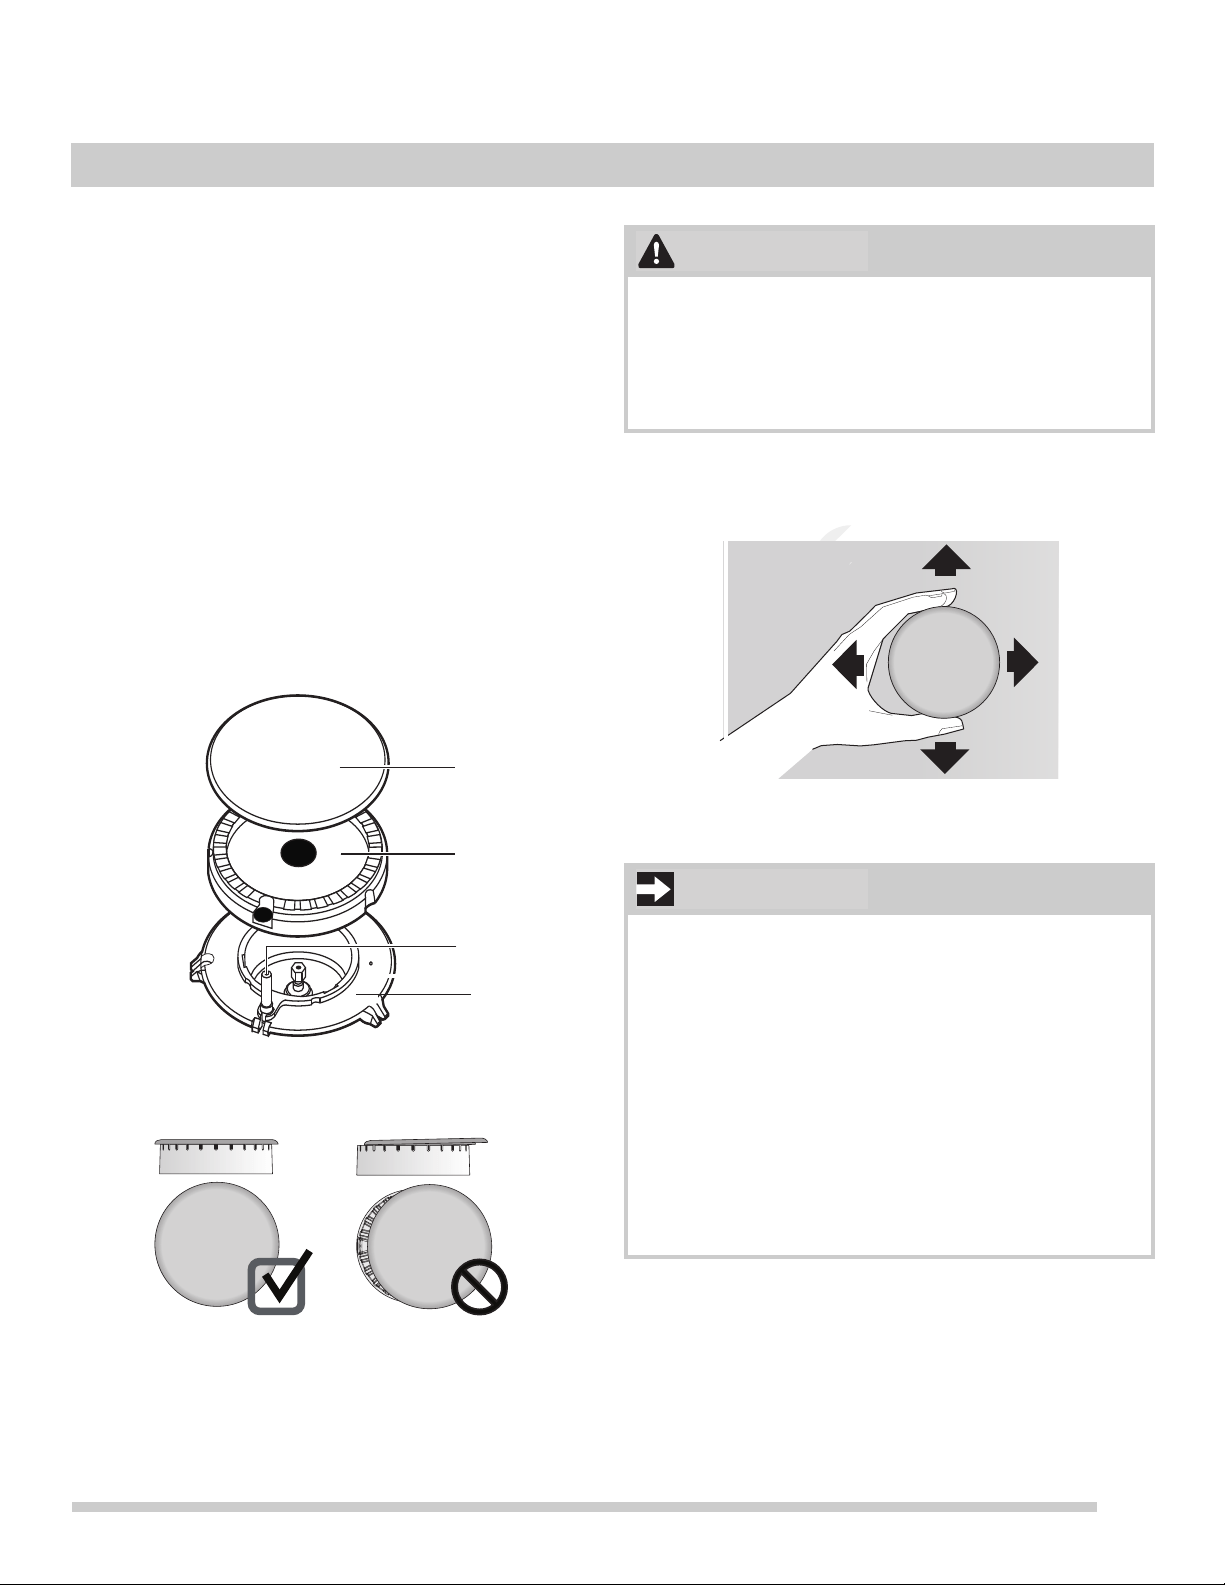
On round-style burners, the burner cap lip (Figure 1) should
fit snug into the center of the burner head and rest level.
Refer to
Figure 2 for correct and incorrect burner cap place-
ment.
Figure 2: Proper burner cap placement
Once in place, you may check the fit by gently sliding the
burner cap from side to side (
Figure 3) to be sure it is
centered and firmly seated.
Figure 3: Gently move cap for proper placement
Figure 1: Burner cap (A) burner head (B) ignitor (C)
orifice (D)
A
B
C
D
• Do not allow spills, food, cleaning agents, or any
other material to enter the gas orifice holder opening.
• Always keep the burner caps and burner heads in
place whenever the surface burners are in use.
• Never place flammable items on the cooktop.
Please note that the burner cap should not move off the
center of the burner head when sliding from side to side.
• Check and be sure that all oval-style burner caps
(some models) are correctly in place on oval burner
heads.
• Do not use the surface burners without the burner
caps and heads properly installed. Improperly seated
burner caps and heads may prevent burners from
lighting or cause uneven flame and heating.
• Missing pieces or improper installation may lead to
spills, burns, or damage to your range and cookware.
• Never place flammable items on the cooktop.
CAUTION
IMPORTANT
BEFORE SETTING SURFACE CONTROLS
Loading ...
Loading ...
Loading ...