Loading ...
Loading ...
Loading ...
18
T
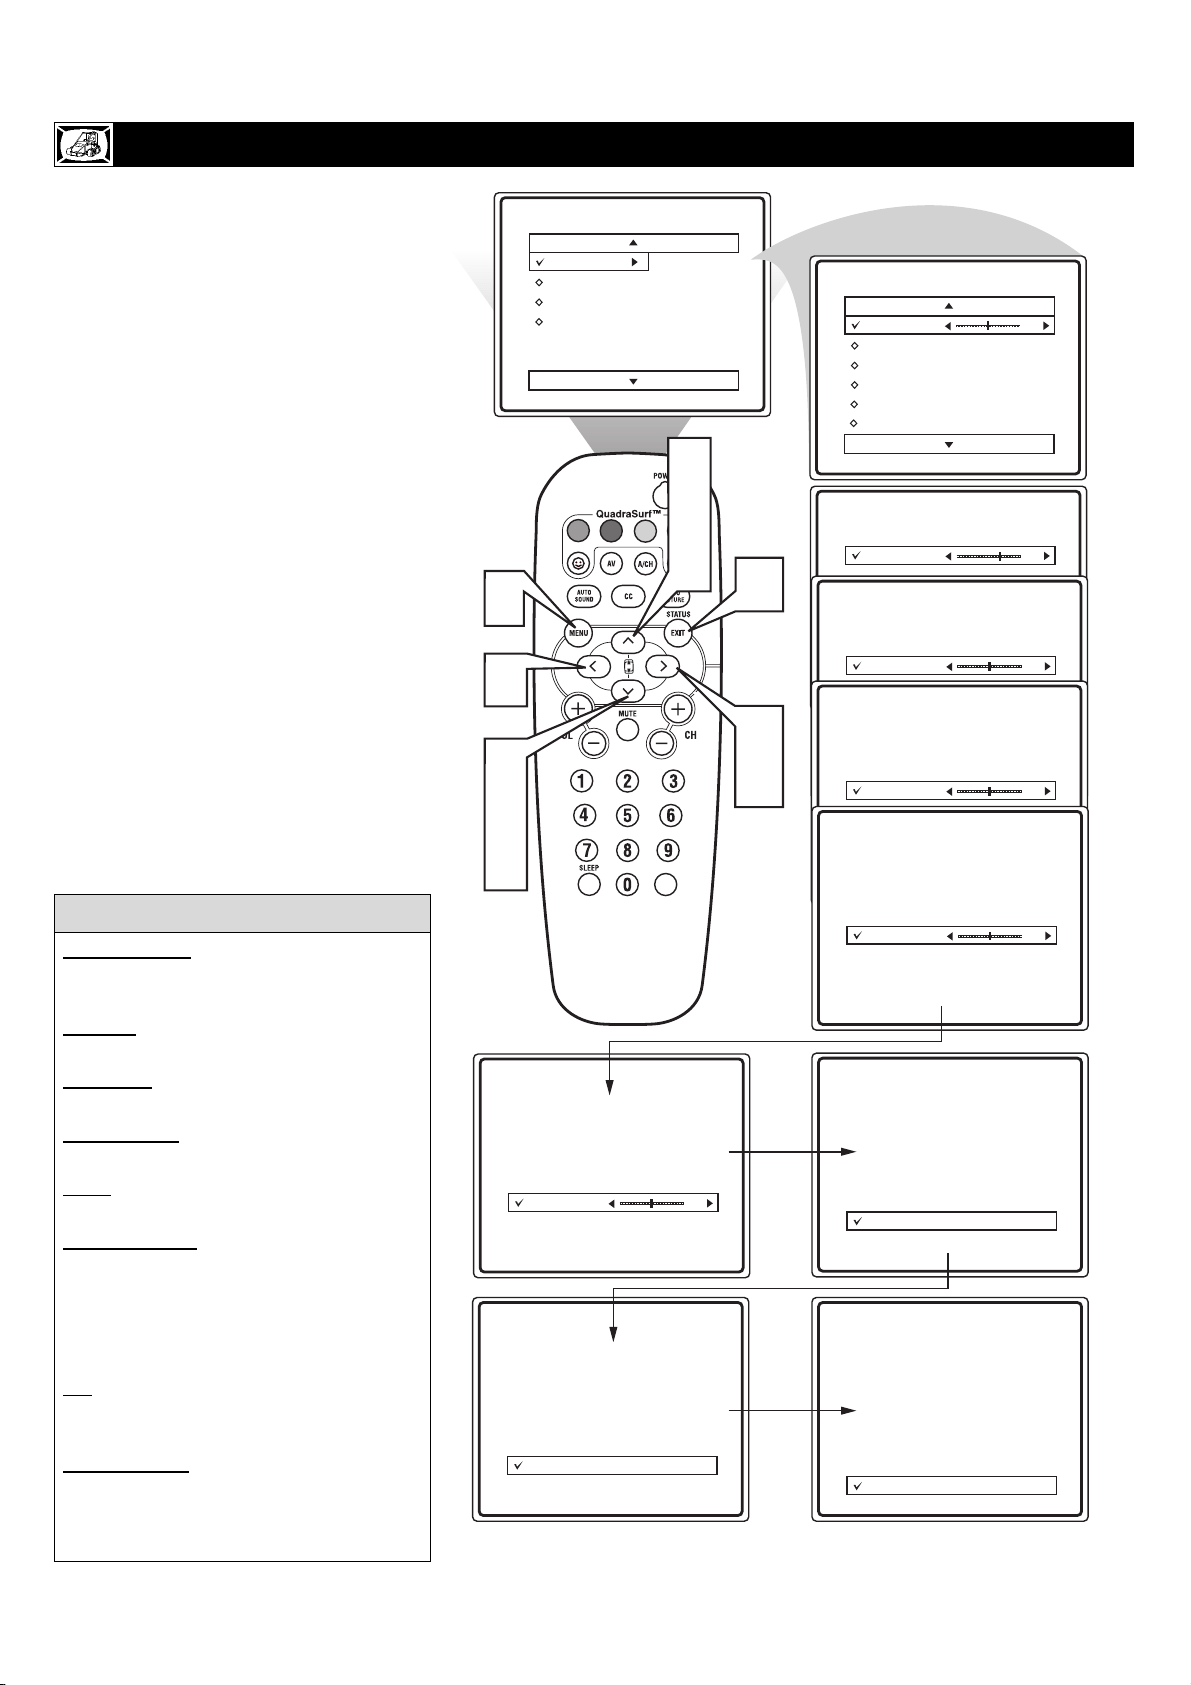
o adjust your TV picture controls, select a
channel and follow the steps shown below:
1
Press the MENU button on the
remote to display the on-screen menu.
2
Press the CURSOR UP Î or DOWN
ï buttons until the word PICTURE is
highlighted.
3
Press the CURSOR RIGHT Æ but-
ton to display the PICTURE menu
features.
4
Press CURSOR UP Î or DOWN ï
buttons to scroll the Picture features
and highlight the control you wish to
adjust (Brightness, Color, Picture,
Sharpness, Tint, Color Temp., DNR, or
Contrast +).
5
Press the CURSOR RIGHT Æ or the
CURSOR LEFT ß buttons to adjust
the selected control or to make selec-
tions for the choosen control.
6
Press the CURSOR UP Î or DOWN
ï buttons to select and adjust other
Picture Menu controls.
7
When finished, press the STATUS
/EXIT button to remove the menu
from the TV’s screen.
HOW TO USE THE PICTURE ADJUSTMENT CONTROLS
Main
Picture
Sound
Features
Install
Brightness
Color
Picture
Sharpness
Tint
More...
Picture
Brightness
Color
Picture
Sharpness
Tint
Color Temp.
50
Picture
Brightness
Color
Picture
Sharpness
Tint
Color Temp.
65
Picture
Brightness
Color
Picture
Sharpness
Tint
Color Temp.
50
Picture
Brightness
Color
Picture
Sharpness
Tint
Color Temp.
50
Picture
Brightness
Color
Picture
Sharpness
Tint
Color Temp.
50
Picture
Brightness
Color
Picture
Sharpness
Tint
Color Temp.
0
Picture
Brightness
Color
Picture
Sharpness
Tint
Color Temp.
Normal
Picture
Brightness
Color
Picture
Sharpness
Tint
DNR
On
Contrast +
On
VOL
7
2
4
6
3
5
1
2
4
6
5
BRIGHTNESS: Press the Æ or Í buttons
until darkest parts of the picture are as bright
as you prefer.
COLOR: Press the Æ or Í buttons to add
or eliminate color.
PICTURE: Press the Æ or Í buttons until
lightest parts of the picture show good detail.
SHARPNESS
: Press the
Æ or Í buttons to
improve detail in the picture.
TINT: Press the Æ or Í buttons to obtain
natural skin tones.
COLOR
TEMP: Press the Æ or Í buttons
to select NORMAL, COOL, or WARM pic-
ture preferences. (NORMAL will keep the
whites, white; COOL will make the whites,
bluish; and WARM will make the whites,
reddish.)
NR: Press the Æ or Í buttons to turn NR
ON or OFF. Noise Reduction helps to elimi-
nate “noise” from the picture.
CONTRAST +: Press the Æ or Í buttons to
turn CONTRAST + ON or OFF. When ON,
this control will optimize the picture contrast
for improve picture clarity.
HELPFUL
HINT
Loading ...
Loading ...
Loading ...