Loading ...
Loading ...
Loading ...
6
than you experienced in Stage 1. Pull slower if needed to develop a detectable burr before
moving to Stage 3. You will notice that the edge developed in Stage 2 is sharper than the
edge formed in Stage 1.
Do not move to Stage 3 (manual) until you are confident that you detect a burr after Stage 2.
Once a burr is detected, you can make a pair of faster pulls in Stage 2 to remove the burr
and minimize the time you will need to hone and polish the edge in Stage 3.
STAGE 3
Since Stage 3 is a manual polishing stage you can turn off the power switch. If the knife is
fully honed in Stage 2 only 4-5 back and forth strokes will be needed in the single slot of
Stage 3 (the far right slot, see Figure 6) to hone a small second bevel along the edge which
will be exceedingly sharp and effective. It should cut paper smoothly allowing you to make
straight or curved cuts easily.
For optimum results in Stage 3 center the blade within the slot width and keep the length
of the blade aligned with the center line of the slot as you move the blade back and forth
in the slot without lifting. Apply only a light downward pressure, about 3-4 pounds, on the
blade as you sharpen in Stage 3. For optimum results make smooth consistent strokes while
maintaining the light downward pressure to insure that the two disks rotate as you move the
blade back and forth. The finished edge will be very sharp and burr free.
RESHARPENING THE KNIFE EDGE
To resharpen follow the procedure for Stage 3 described above, making two to three (2-3)
complete back and forth stroke pairs while maintaining recommended downward pressure.
Listen to confirm the sharpening disks are turning. Then test the edge for sharpness. If
necessary resharpen again but first use Stage 2 followed by two to three (2-3) back and forth
pairs of strokes in Stage 3. In severe cases with a very dull knife you may find it necessary
to repeat Stages 1, 2 or 3 as described above. Generally you should be able to resharpen
several times using only Stage 3 before having to resharpen in Stage 2 or 1.
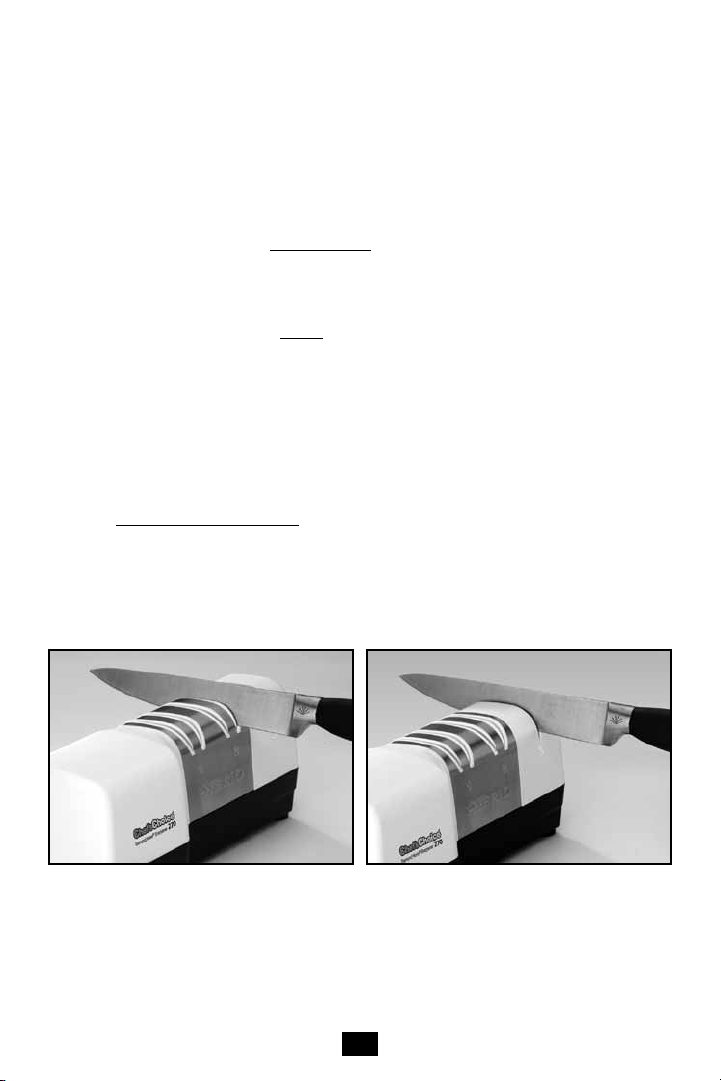
Figure 5. Inserting the knife in right slot of Stage 2.
Alternate individual pulls in left and right slots.
Figure 6. Knife in Stage 3. Use back and forth sharpen-
ing strokes with light downward pressure. See text.
Loading ...
Loading ...
Loading ...