Loading ...
Loading ...
Loading ...
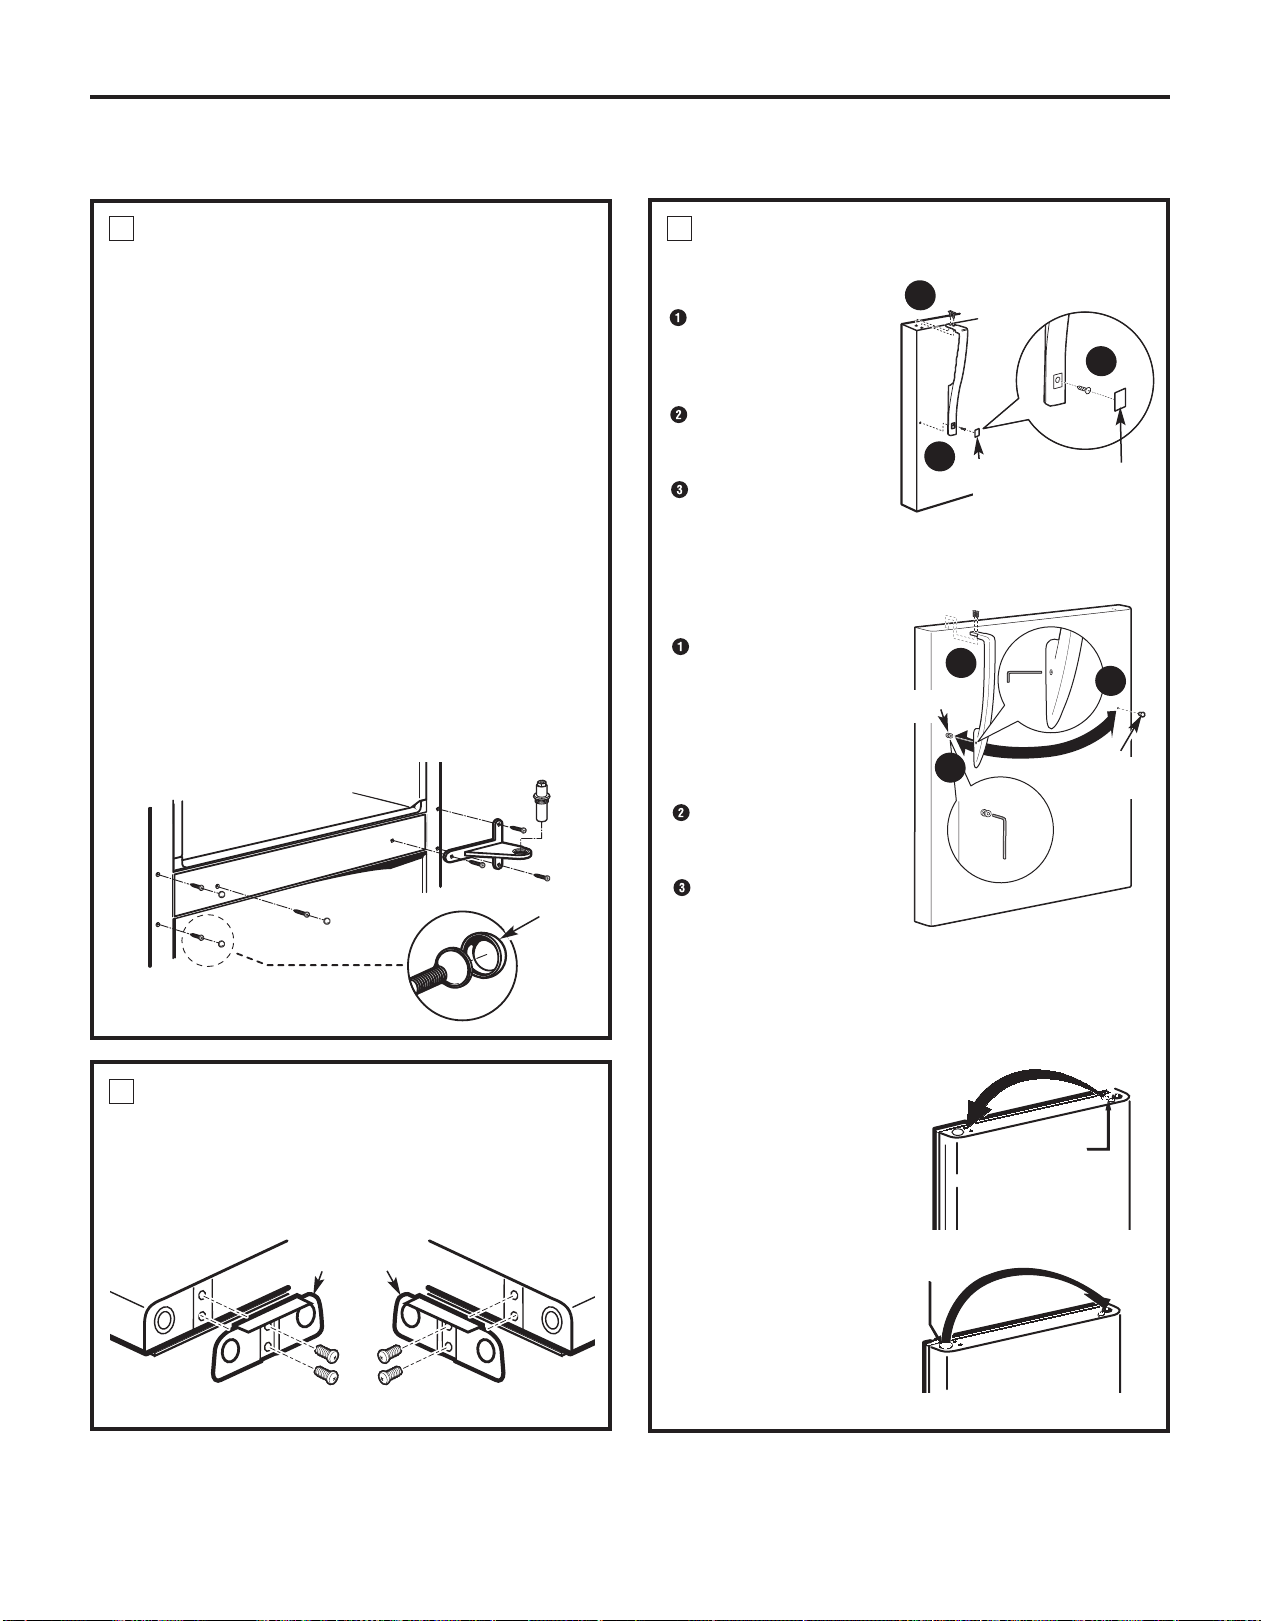
TRANSFER CENTER HINGE BRACKET
TO THE LEFT
Remove the center hinge bracket by removing the three
Torx
®
screws.
NOTE: Keep these screws with the hinge bracket.
They are long screws and will be used when installing
the hinge on the other side.
On some models, you will need to remove the color-
matched caps from the screw heads before you can
remove the screws. Use the edge of a thin flat blade to
gently pry the caps off the screw heads. (A putty knife
works well for this.) Cover the blade with tape to prevent
scratching the paint.
Remove the three Torx
®
screws from the center left
side of the cabinet. Screw them into the holes on the
right side.
Place the center hinge bracket over the holes at the
center left side of the cabinet. Insert and tighten the
three long screws.
Replace the caps by snapping them over the screws
with your finger.
5
TRANSFER DOOR STOPS
On each door, move the metal door stop from the right
to the left.
Move any screws from the left to the right.
6
16
Door Stop
Door Stop
Left Side
Right Side
Screw Cap
Installation Instructions
REVERSING THE DOOR SWING (CONT.)
TRANSFER REFRIGERATOR DOOR
HANDLE TO THE RIGHT
Plastic handle:
Remove the plug button
by carefully prying under
the edge with a putty
knife.
Remove the exposed
screw holding the
handle.
Remove the two screws
holding the handle to the
top of the door.
Stainless steel handle (on
some models):
Remove the two screws
holding the handle to
the top of the door.
Loosen the set screw
with the 3/32” Allen
wrench (supplied) and
remove the handle.
Remove the handle
fastener with the 3/16”
Allen wrench (supplied).
Transfer the fastener to
the right side and move
the plug button to the
left side of the refrigerator door.
7
After removing the handle:
Move the small plug buttons
from the top right side of the
door top and insert them into
the holes on the opposite side.
Small Plug
Buttons
Move the large plug
button from the left edge
of the door and insert it
into the hole on the
opposite side.
1
2
3
Handle
Plug
Handle
Plug
1
2
3
Fastener
Plug
Button
Plug Button
Loading ...
Loading ...
Loading ...