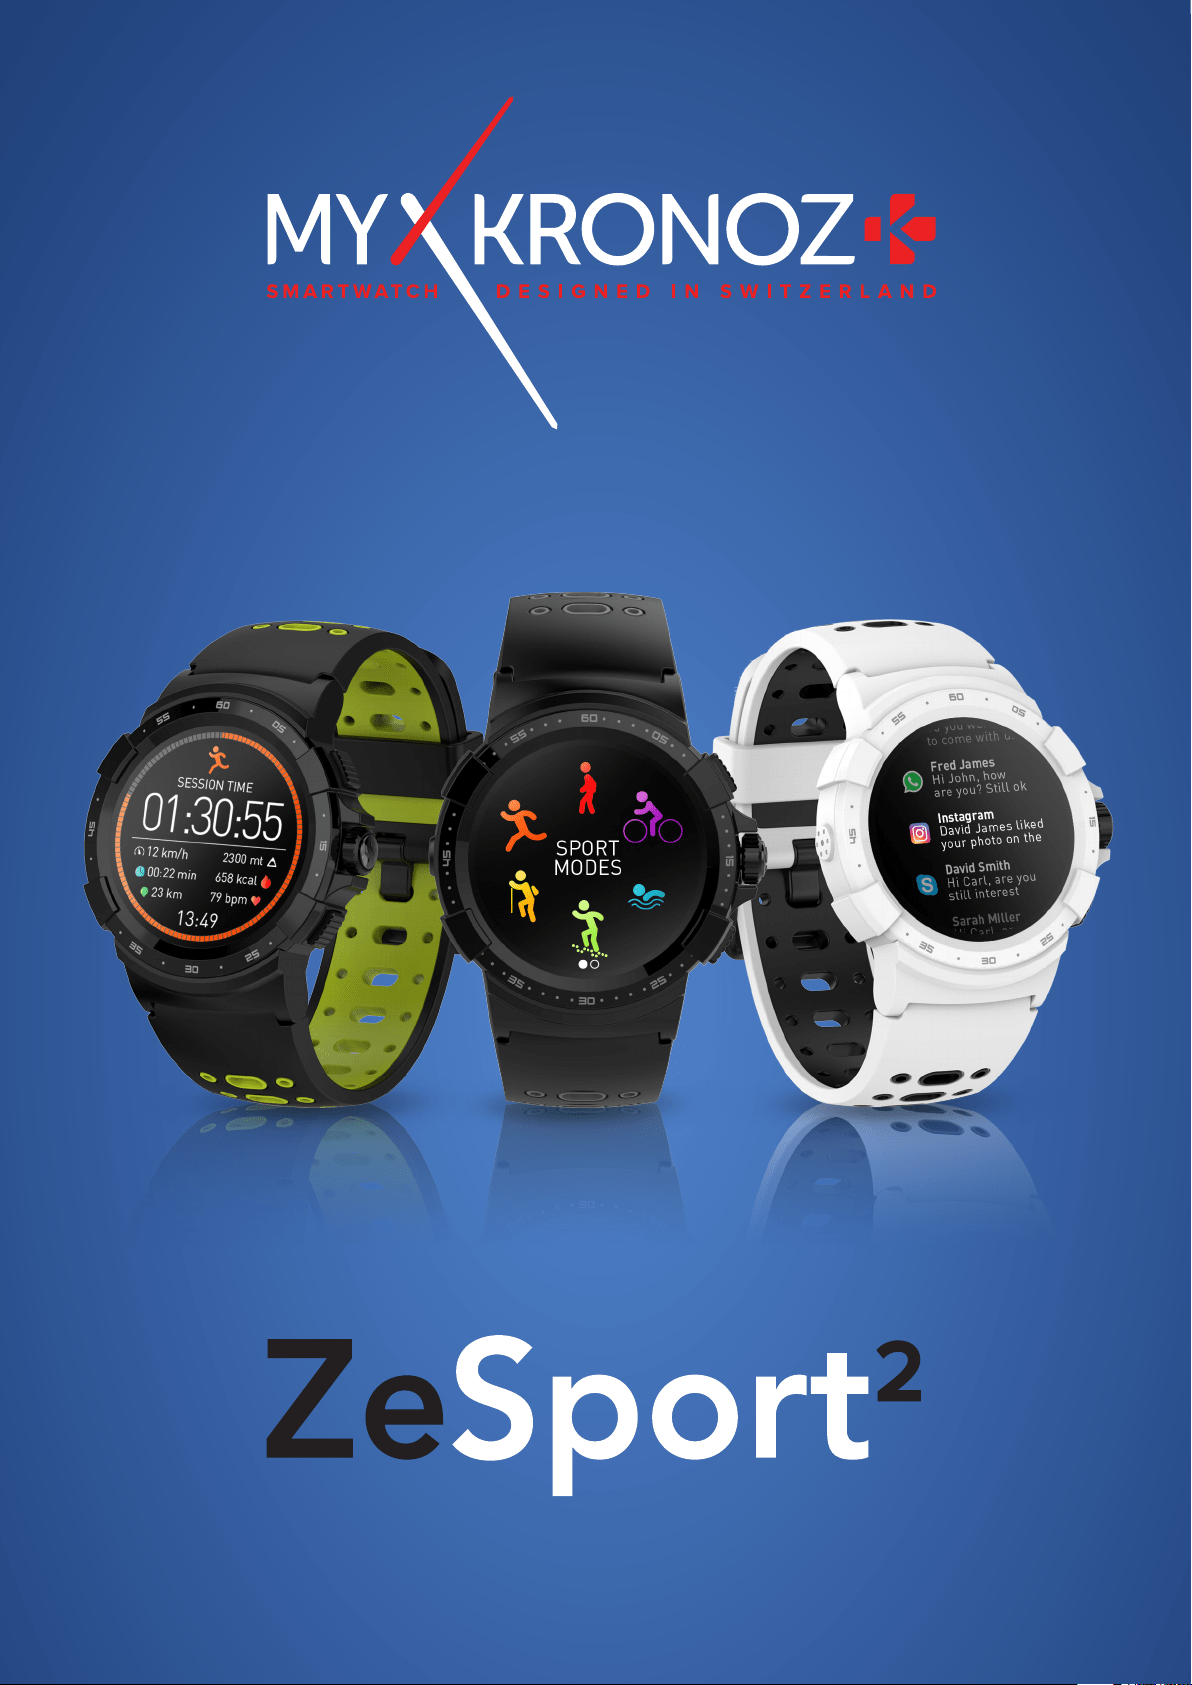
USER GUIDE
- 2 -
GET STARTED
1. Product overview
2. Charging
3. Basic touchscreen operations
4. Shortcuts
PAIRING
5. System requirements
6. Set up
7. Firmware update
ACTIVITY TRACKING & SPORT MODES
8. Sport modes
9. Sensors
10. Heart rate
11. Activity tracking
12. Sleep monitoring
13. Stopwatch
14. Timer
CONNECTED FEATURES
15. Notifications
16. SMS
17. Incoming calls
18. Reminder
19. Weather forecast
20. Camera remote
21. Music control
22. Find my phone
23. Anti-lost alert
CLOCK
24. Customize your watch face
25. Menu style
26. Alarm
27. Settings
MAINTENANCE
28. Product care
29. Replace the watchband
30. Tech specs
Warnings / Safety Instructions / Regulatory Notice
03
04
05
06
07
08
09
10
12
13
14
16
16
17
17
19
19
20
21
22
22
23
23
24
25
25
26
27
27
28
29
TABLE OF CONTENTS
- 3 -
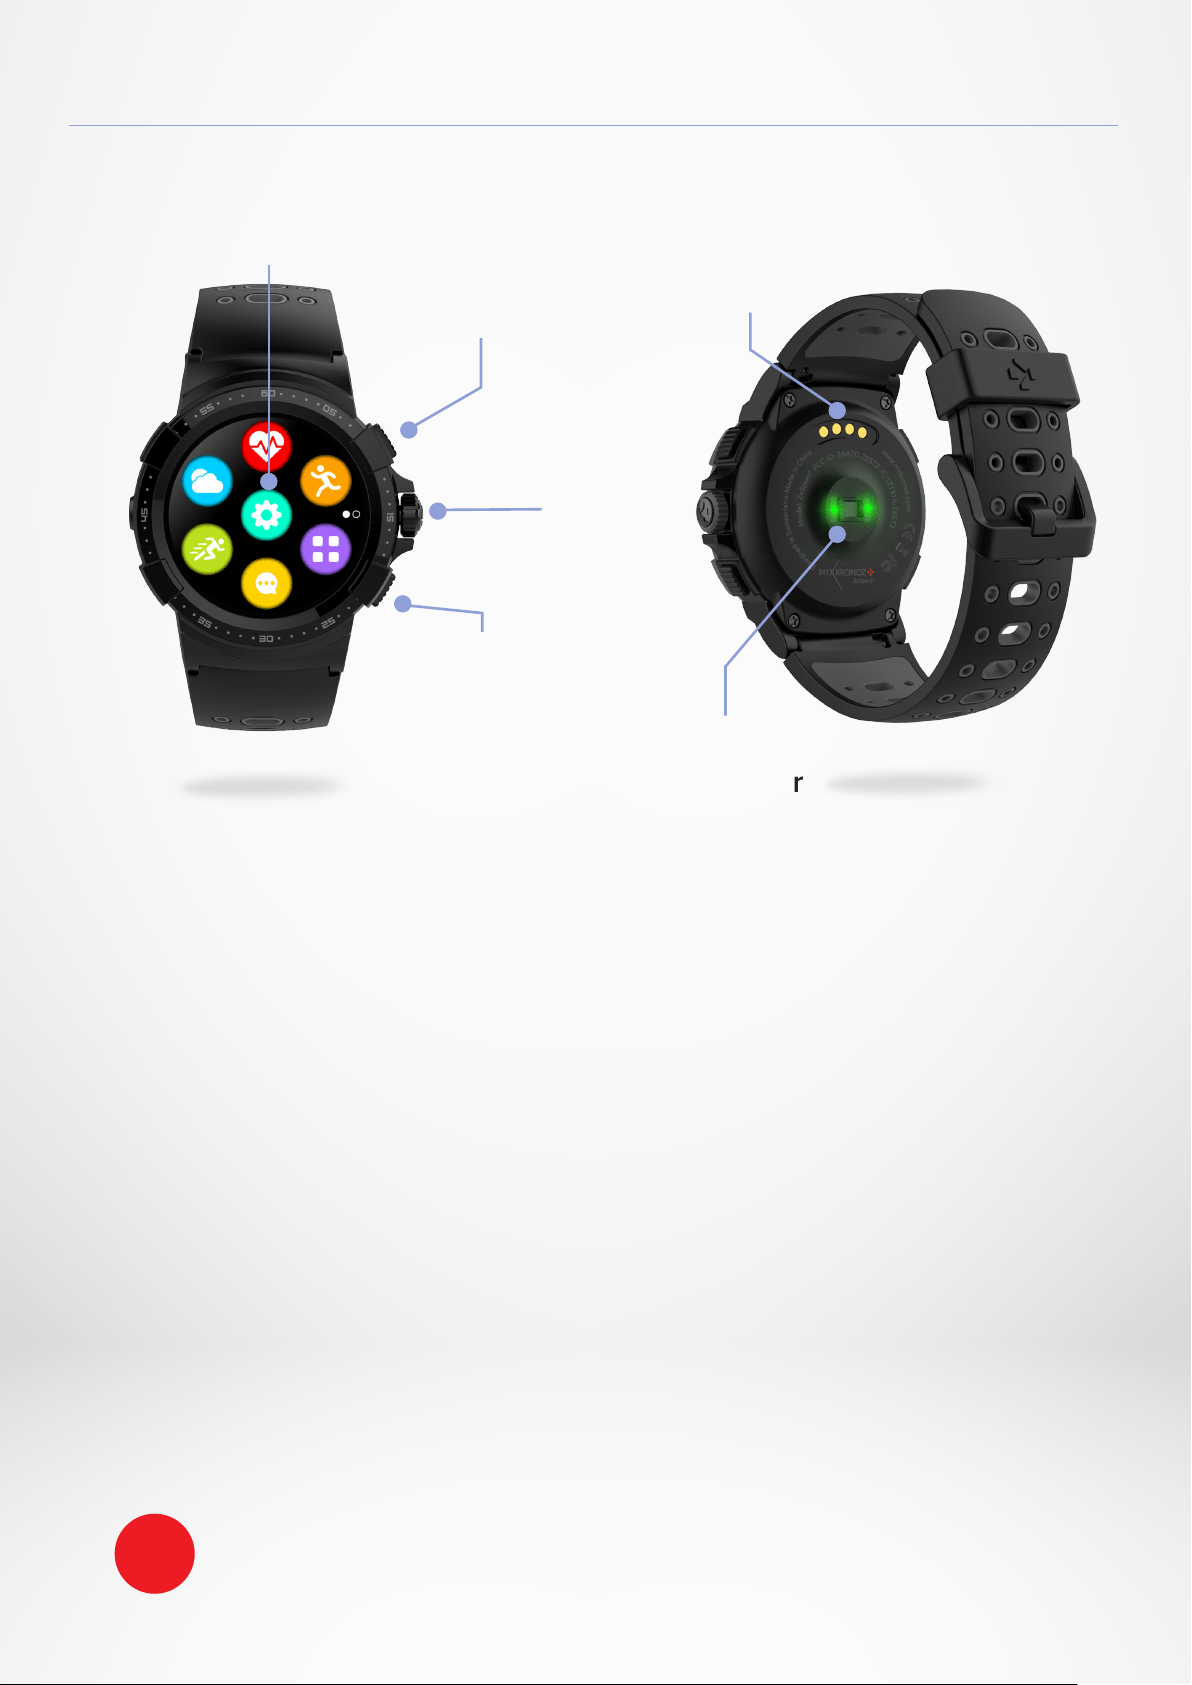
1. PRODUCT OVERVIEW
I UPPER BUTTON
• Press to light up the screen.
• Return to home page from any screens.
• Press to access Sport modes.
• Press & hold to power ON/OFF.
I LOWER BUTTON
• Press to light up the screen.
• Go one step back in the menu structure.
• Put the device in standby mode.
I SMART CROWN
• Turn the crown to navigate through the main menu.
• Press the crown to validate.
• Turn the crown to adjust some settings (alarm, timer, reminder,...).
Color
touchscreen
Upper
button
Charging
terminals
Smart
crown
& Button
Lower
button
Optical heart
rate sensor
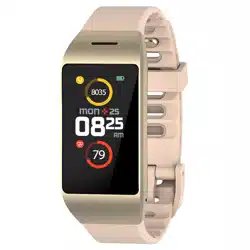
To get the most accurate data we recommend wearing ZeSport
2
on your non dominant
hand and not too loose. Take ZeSport
2
outside to an open area and stand still for a while
to acquire a GPS signal.
i
- 4 -
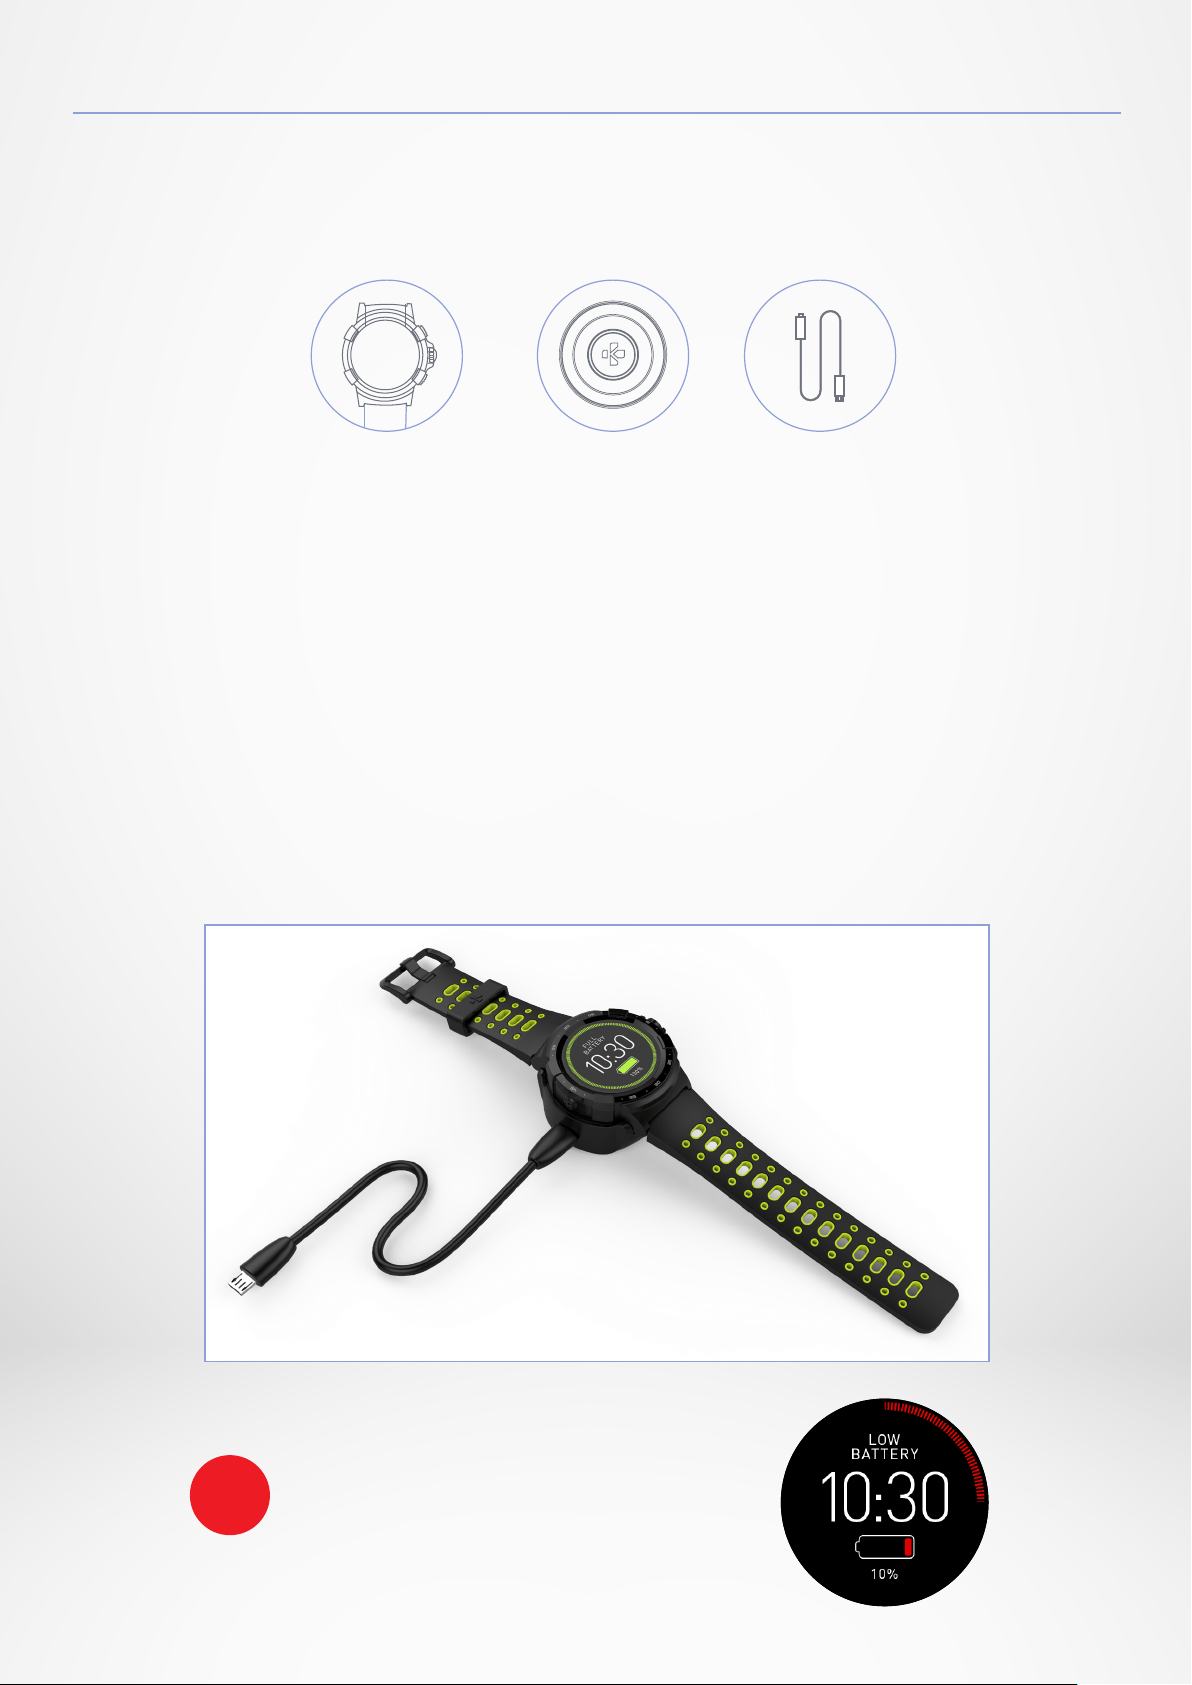
2. CHARGING
We recommend you to initially charge your ZeSport
2
for about
90 minutes before using it for the first time.
ZESPORT
2
CHARGER CABLE
1. Position the back of your ZeSport
2
on the charging dock.
2. Plug the USB cable into the charger.
3. Plug the large end of the USB cable into a USB power source.
4. A battery indicator will fill in to indicate charging is in progress and turn to solid
green when it’s fully charged.
5. Unplug the cable after ZeSport
2
is charged.
A fully charged ZeSport
2
has an autonomy of 4 days. Note that battery life
and charging cycles may vary depending on usage, settings and connected
functions enabled.
When the battery level gets low, a low battery
indicator will appear on the watch screen.
i
- 5 -
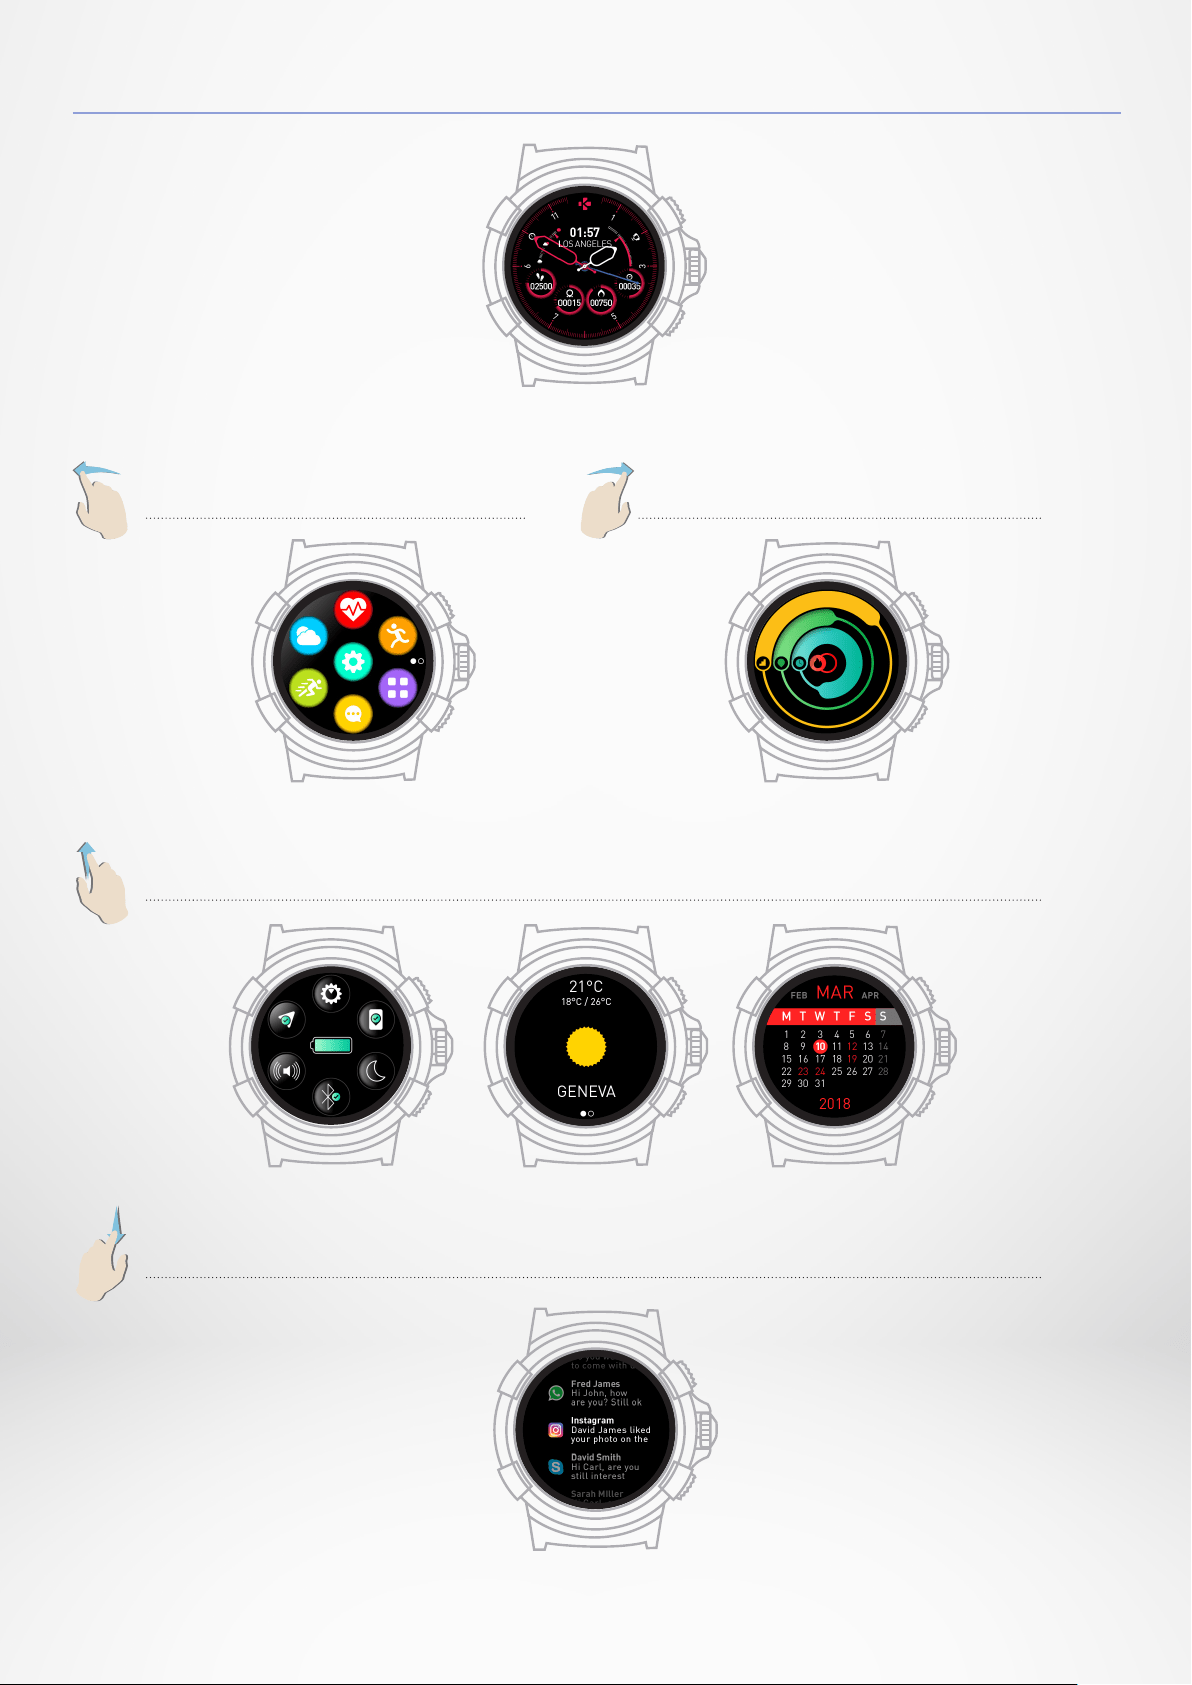
3. BASIC TOUCHSCREEN OPERATIONS
SWIPE LEFT from the Watchface
SWIPE UP from the Watchface
SWIPE DOWN from the Watchface
SWIPE RIGHT from the Watchface
Watchface
Main menu
1. Shortcuts 2. Weather 3. Calendar
Notifications
Activity data
and other features
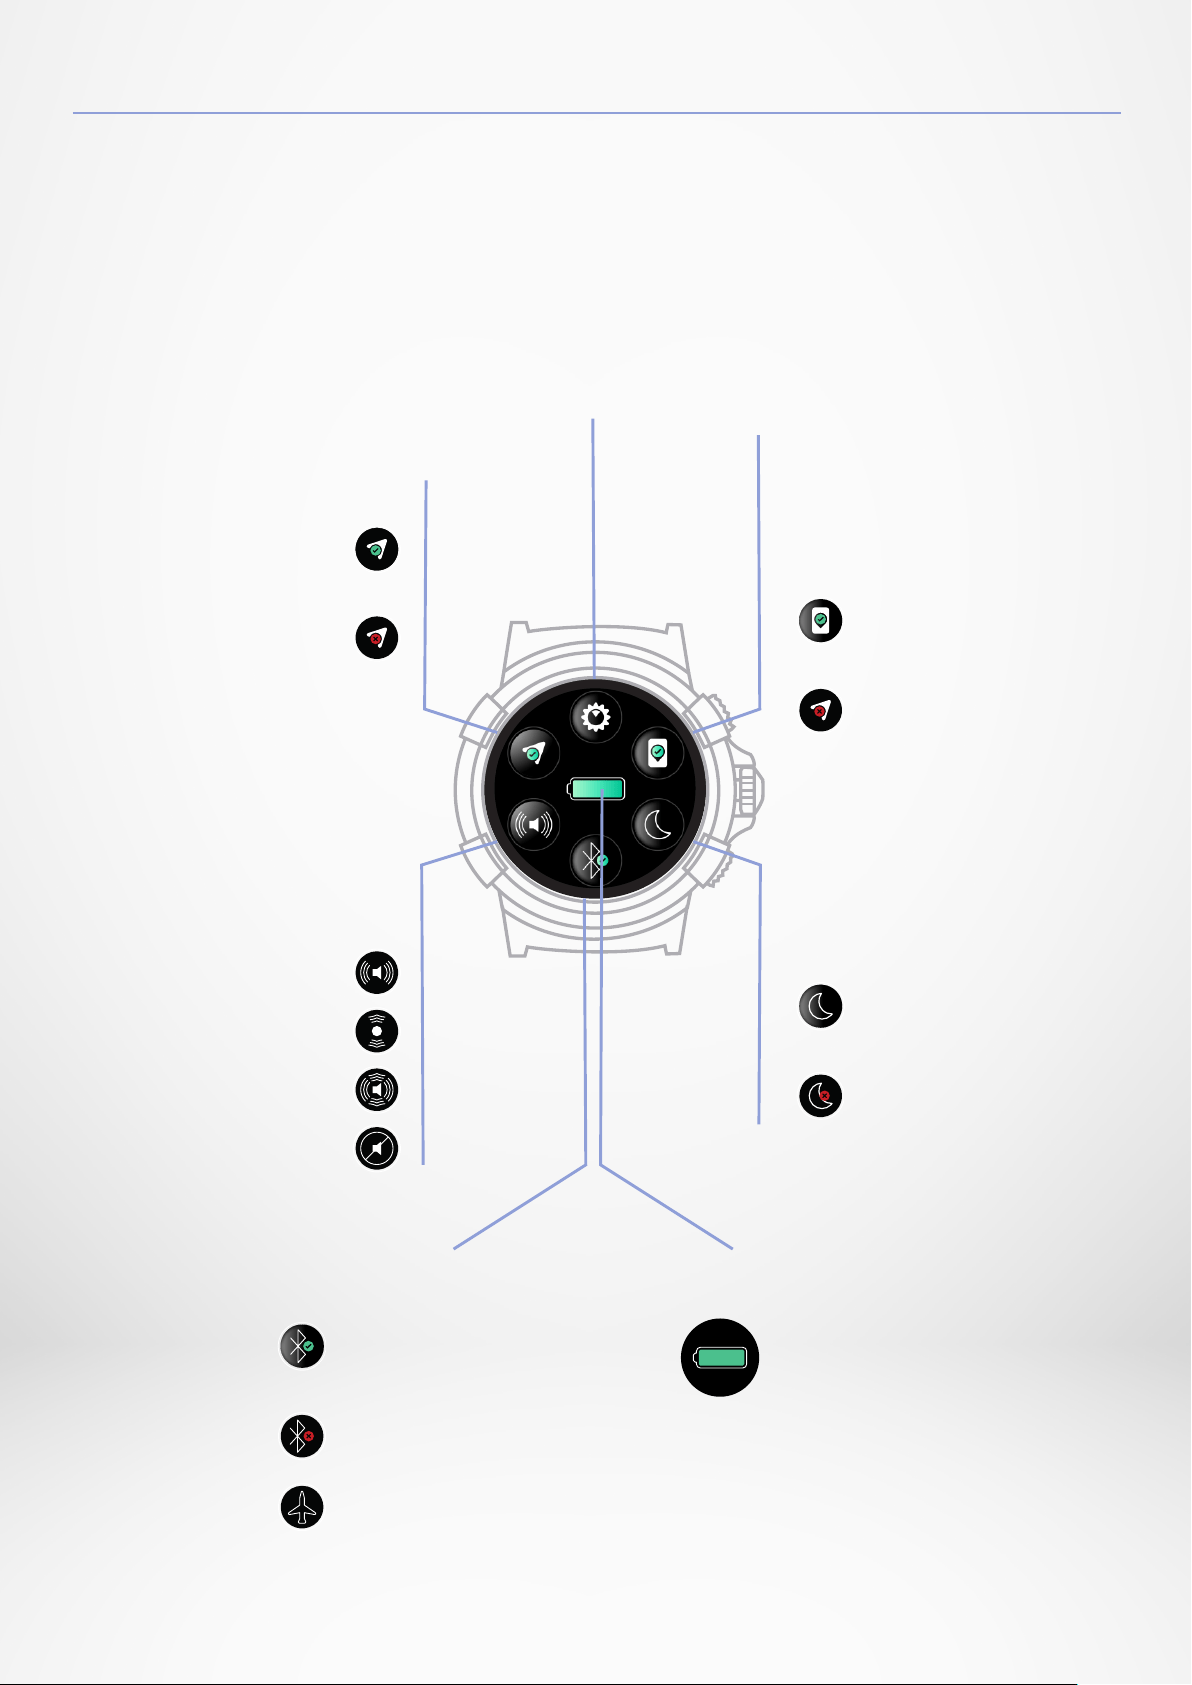
- 6 -
Swipe down from the main watch face
to access ZeSport
2
shortcuts
GPS
Vibration
and sounds
Find my phone
Helps you find your phone
as long as it is in range with
your ZeSport
2
Do not disturb
Find my phone is enabled
Find my phone is disabled
Do not disturb
is enabled
Do not disturb
is disabled
GPS is enabled
GPS is disabled
Turn on buzzer
Turn on vibration
Turn on vibration and buzzer
Mute
Bluetooth is ON
and the watch is paired
Bluetooth is ON
but the watch is not paired
Airplane mode is enabled
Shows the remaining battery
level of your watch
Brightness
Set screen brightness
for better visibility
Bluetooth status Battery level
4. SHORTCUTS
- 7 -
Visit www.mykronoz.com to get the latest compatibility list.
-
iOS
-
iOS 8+ devices with Bluetooth 4.0 BLE
iPhone 4s, 5, 5c, 5s, 6, 6s, 6s plus, 7, 7 plus, 8, 8 plus, X, Xr, Xs & Xs Max
-
ANDROID
-
Selected Android 5.0+ devices that support
Bluetooth 4.0 BLE
ZeSport
2
will sync the notifications of SMS, emails, social media,
calendar events, and personal life reminders once the ZeSport
2
app
has been successfully installed on your smartphone.
i
It is required to install ZeSport
2
mobile app on your smartphone to
properly set up and use your watch.
5. SYSTEM REQUIREMENTS
- 8 -
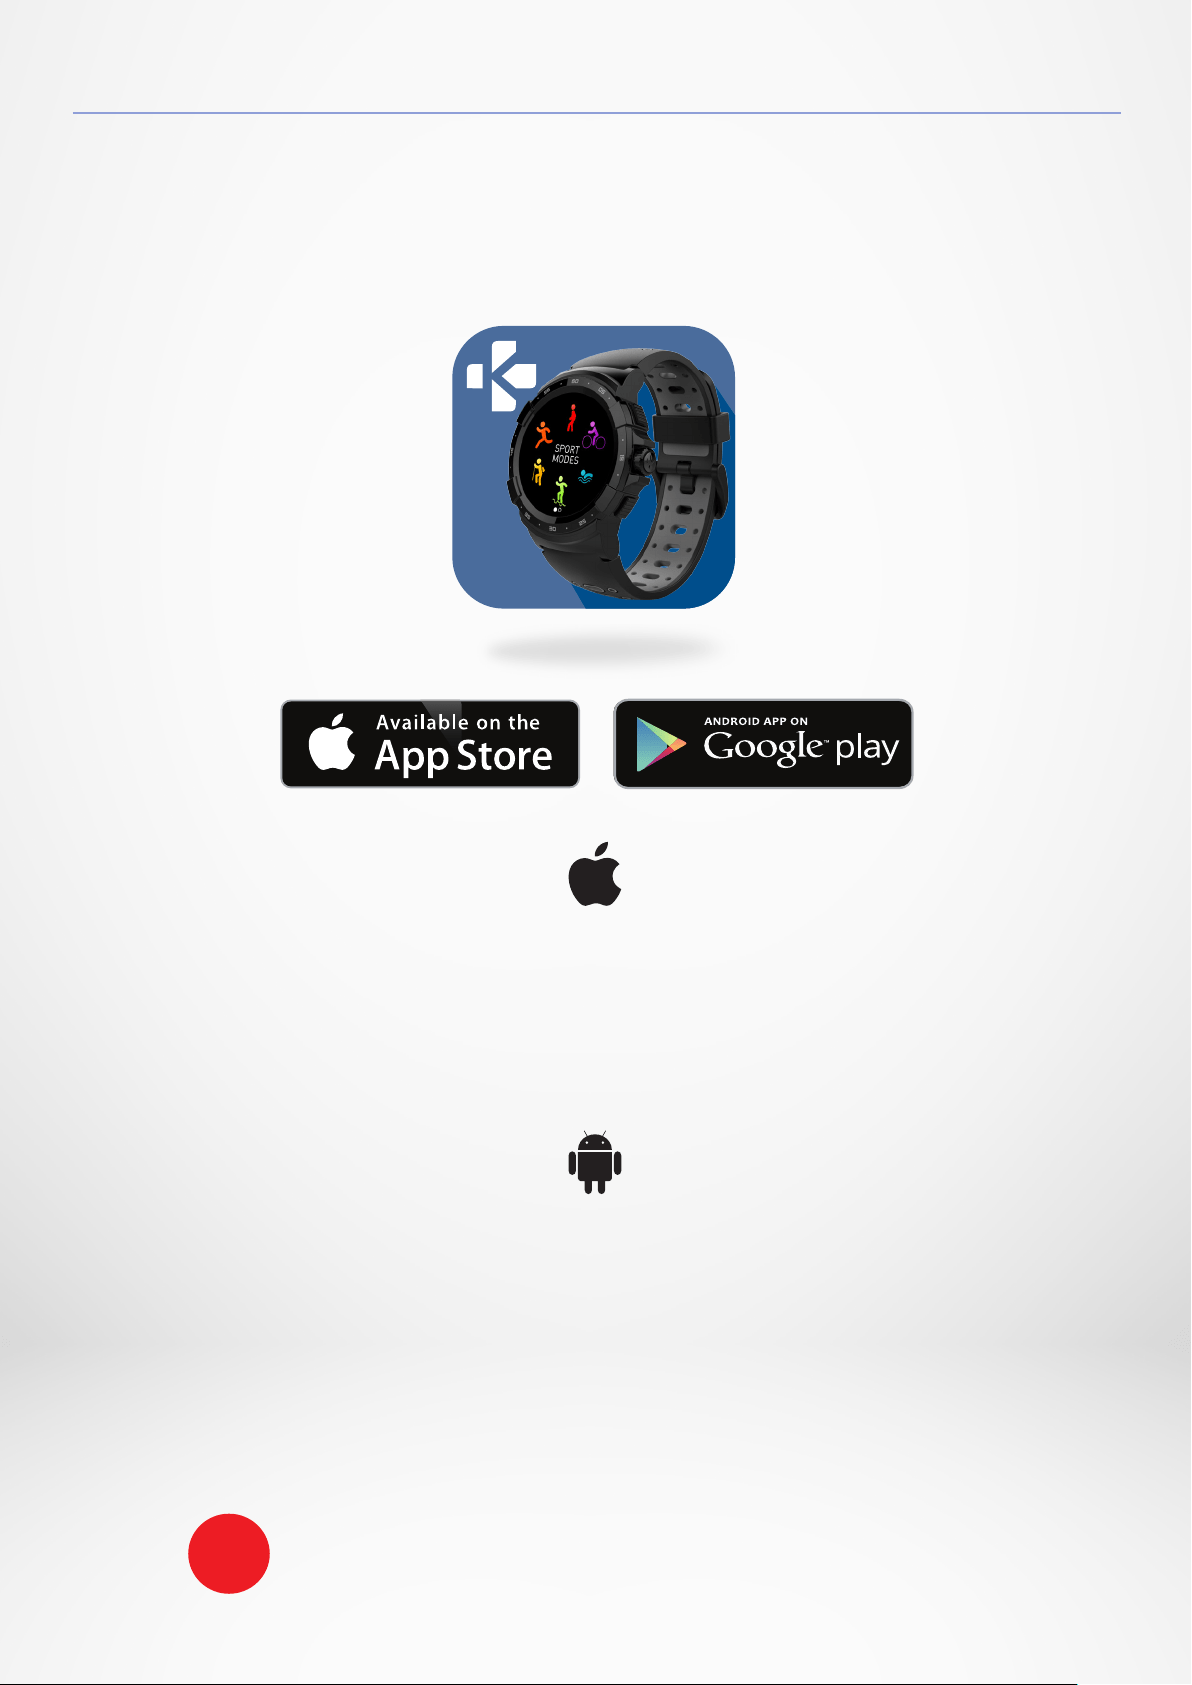
6. SET UP
When turning on your ZeSport
2
for the first time, you’ll be prompted
to download the ZeSport
2
mobile app on your smartphone in order
to proceed to its initial set up.
I TO SET UP YOUR ZESPORT
2
:
• Ensure that Bluetooth is enabled on your smartphone.
• Download the ZeSport
2
mobile app from the App store or the Google play store.
• Open the ZeSport
2
mobile app on your smartphone, sign up if you are a new
member or log in with your existing account. After entering your personal
information, follow the on-screen instructions.
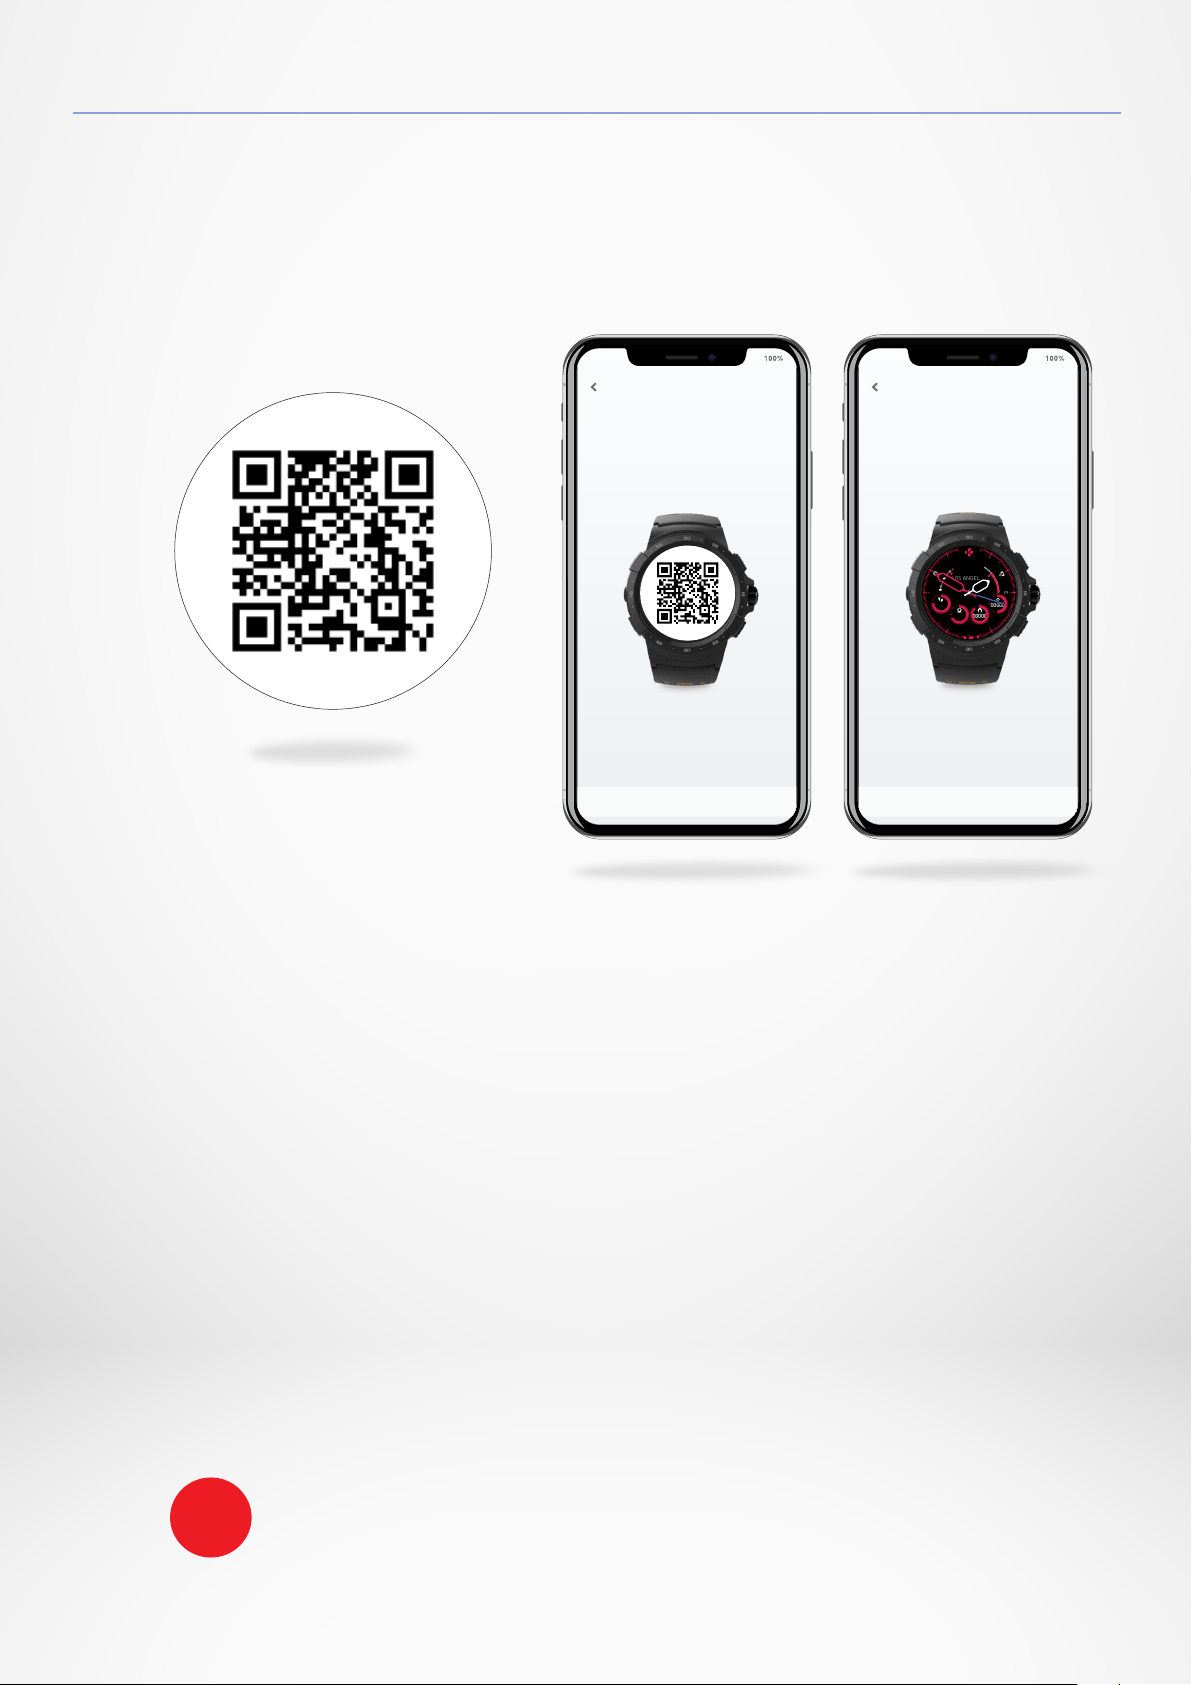
• Scan the QR code displays on your watch to pair your device with your smartphone.
• When ZeSport
2
is successfully paired, you will be notified on both devices.
• When you’re done pairing, read through the user guide to learn more about your
ZeSport
2
.
ZESPORT
2
APP
PAIRING
Please put the QR code on
ZeSport
2
into the viewfinder
SET UP
Scan the QR code that displays
on your watch
START PAIRING
GOOD
SUCCESSFUL PAIRING!
OK
SET UP
01:57
LOS ANGELES
01:57
LOS ANGELES
11
9
3
7
5
1
00000
00000
00000 00000
ZESPORT
2
APP
PAIRING
Please put the QR code on
ZeSport
2
into the viewfinder
SET UP
Scan the QR code that displays
on your watch
START PAIRING
GOOD
SUCCESSFUL PAIRING!
OK
SET UP
01:57
LOS ANGELES
01:57
LOS ANGELES
11
9
3
7
5
1
00000
00000
00000 00000
If you want or encounter any issues while pairing your watch through the QR
code pairing mode, you can set up ZeSport
2
using the alternative mode.
1. Click on Alternative Pairing Mode
2. Continue following the on-screen instructions to pair ZeSport
2
to your phone.
i
- 9 -
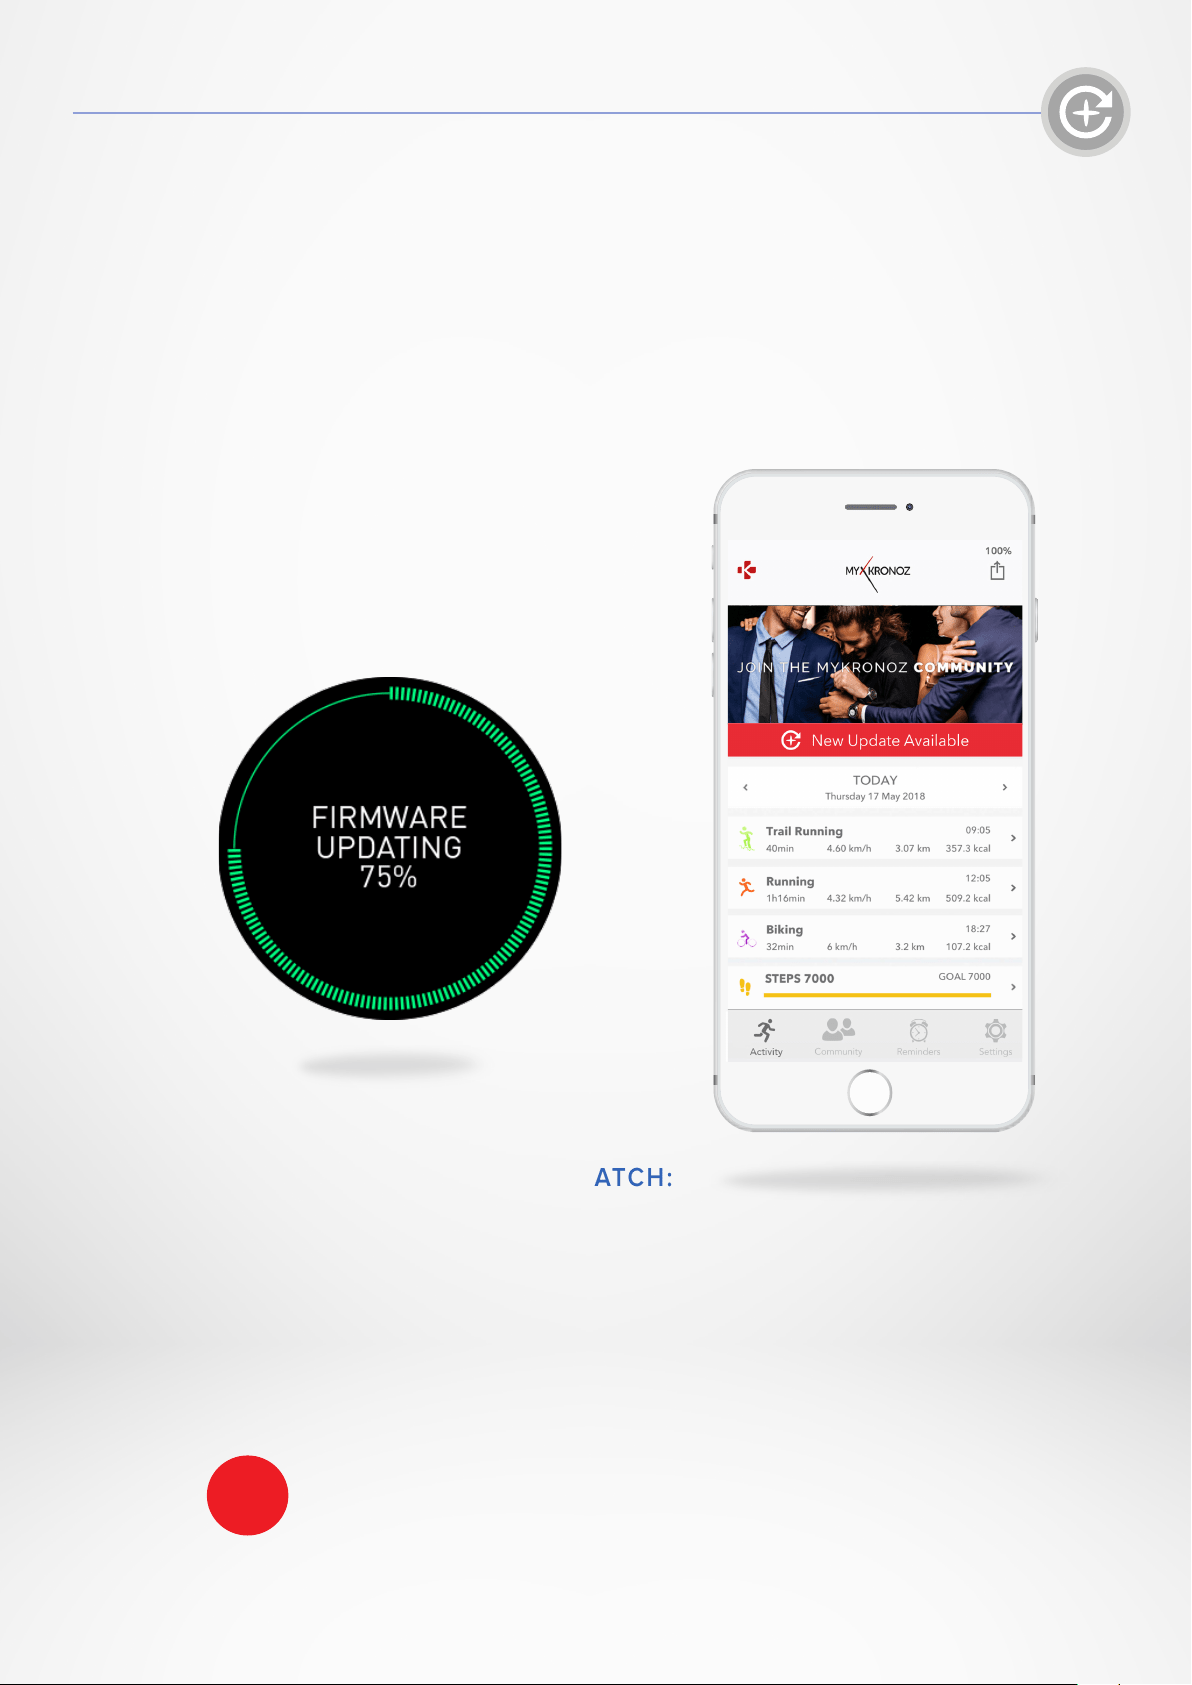
7. FIRMWARE UPDATE
MyKronoz will provide regular firmware updates which you will need
to install in order to access our latest upgrades and features for your
watch. With ZeSport
2
, all these updates need to be done by OTA
(Over The Air) and through the mobile app. Before updating, make
sure your phone and your watch have more than 30% battery.
When a new update is available you’ll see a notification in the
ZeSport
2
app prompting you to update.
After starting the update, a progress bar
appears on ZeSport
2
in the ZeSport
2
app until the update is fully complete.
I IN ORDER TO UPDATE YOUR WATCH:
• Connect your ZeSport
2
to the mobile app.
• If a new update is available you will be prompted from the home
screen.
• You must accept it in order to start the updating process.
During all the update process you must keep your watch near your
smartphone and your application must be open. Avoid using your
phone during the update process.
i
- 10 -
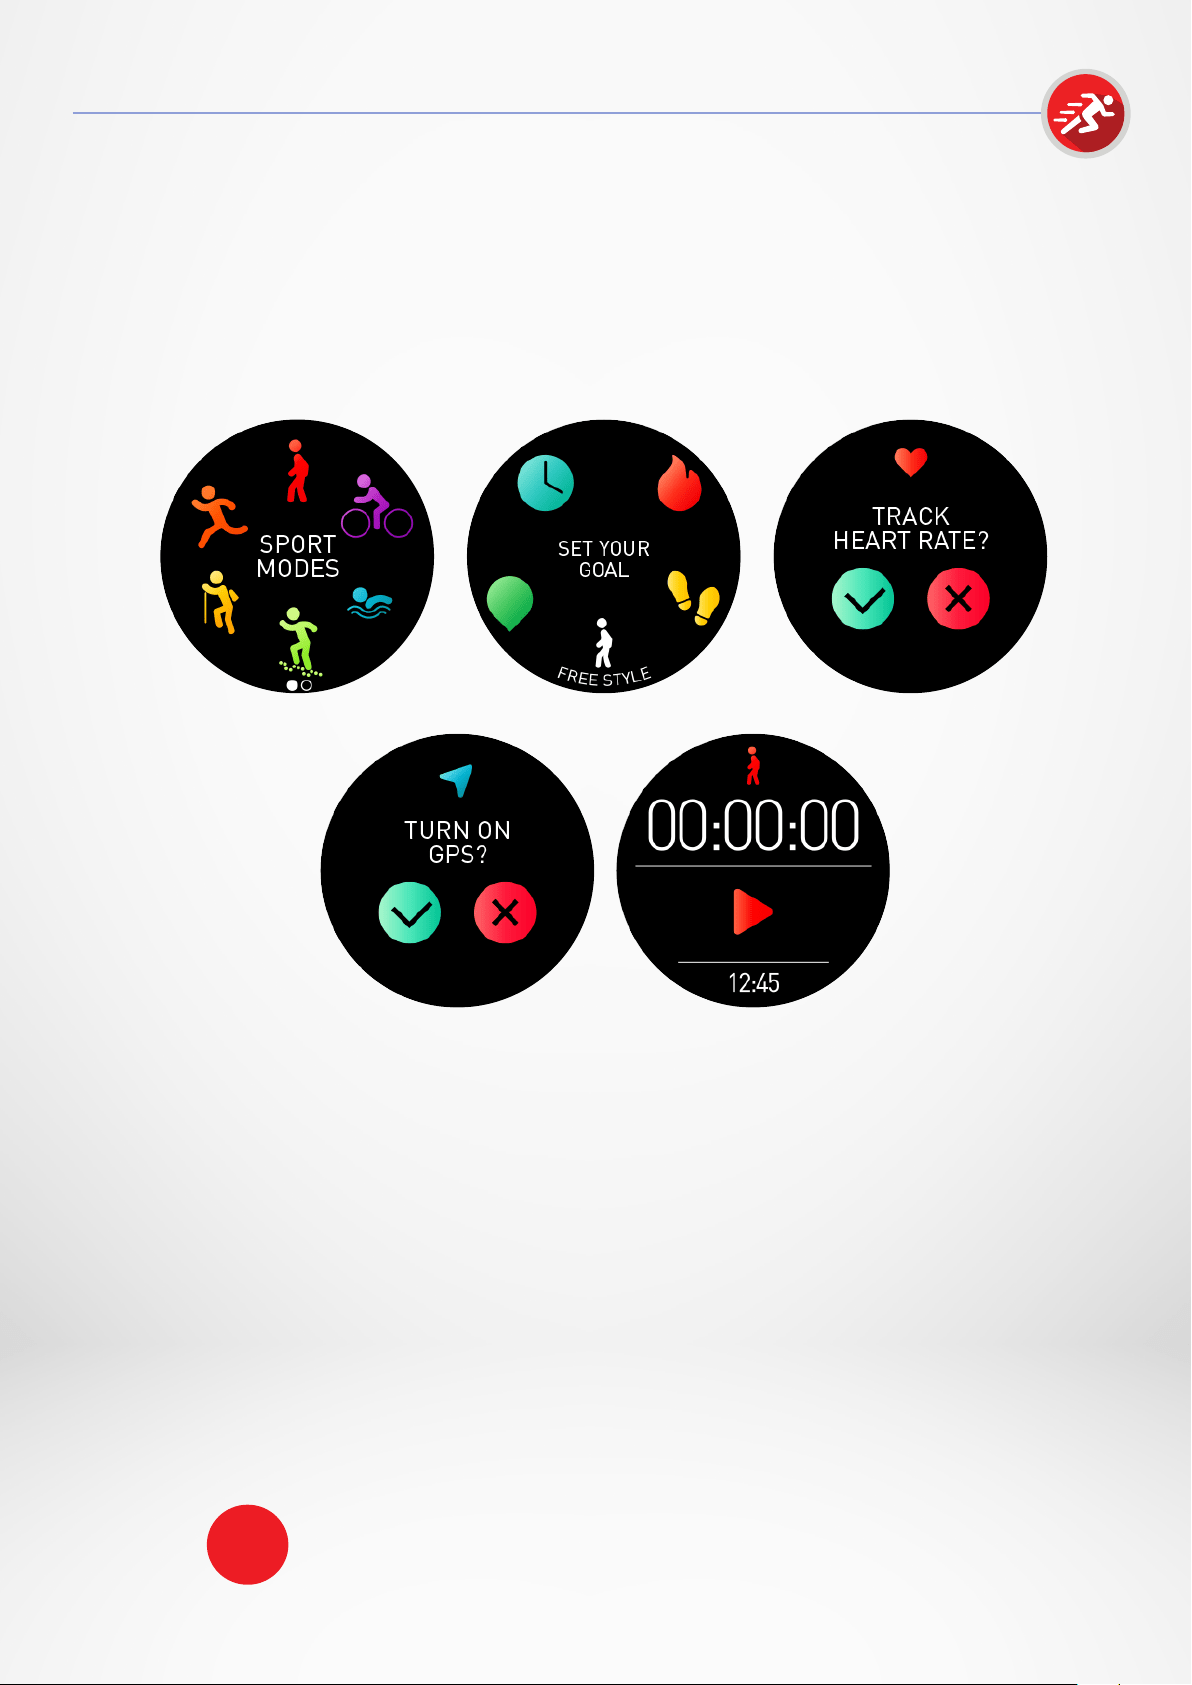
8. SPORT MODES
I START AN ACTIVITY
Your ZeSport
2
can be used for indoor, outdoor and fitness activities.
When you start an activity, you will be prompted to activate GPS and
heart rate monitoring depending on the activity you select.
When you stop an activity, your watch returns to normal mode.
• Press the upper button from the home page to enter the Sport modes
or access it through your watch menu.
• Select an activity among the available activities (walking, cycling,
swimming, trail running, indoor running, outdoor running & hiking).
• Follow the on-screen instructions and enter additional information if
necessary.
• If your activity requires GPS, make sure to go outside and wait a few
seconds/minutes until the watch acquires satellite signals.
• Press Play to start the activity.
The watch does not track your activity data until the timer start.
For greater accuracy, make sure to wear ZeSport
2
on your
non-dominant hand.
i

- 11 -
I PAUSE/STOP/SAVE AN ACTIVITY
TO PAUSE AN ACTIVITY:
• From the Sport interface, tap the screen or press the lower button.
• Tap on Pause.
• Press on pause to resume excercising or press on the stop icon to save
or delete your activity.
TO SAVE AN ACTIVITY:
• From the Sport interface, tap the screen or press the lower button.
• Tap on Stop.
• Select Save.
TO DISCARD AN ACTIVITY:
• From the Sport interface, tap the screen or press the lower button.
• Tap on Stop.
• Select Discard.
VIEW YOUR HISTORY:
To view your recorded workout session:
• Access the Sport menu.
• Swipe left.
• Select one of the stored activities on the list.
You can also view additional details by using the ZeSport
2
Mobile App:
• Go to the Access to the Daily activity page.
• Select an activity.
Your ZeSport
2
saves all your sports activities data such as overall steps,
distance, pace, calories burned, elevation and so on. All your sports
activities are organized by day in your mobile app.
DELETE AN ACTIVITY:
To erase a stored activity:
• From the watch history activity menu, select and long press a stored activity.
• Click on the Delete icon.
- 12 -
9. SENSORS
I INDOOR ACTIVITIES
The ZeSport
2
can be used for indoor sports activities, such as indoor
running, swimming or stationary cycling. In this case, GPS is automatically
disabled. When you walk or run with GPS o, speed, distance and other
activity data are calculated using the 6-axis accelerometer built into the
device.
TIP: For indoor cycling speed and distance positioning your hands on the
handrails of the treadmill significantly reduces the data accuracy, speed
and distance are not available.
I OUTDOOR ACTIVITIES
For outdoor activities such as running, trail running or cycling, GPS is turned
on. Make sure that your device has access to satellite signals when you
enable GPS for the first time.
I SWIMMING
The ZeSport
2
is intended for surface swimming (no deeper than 5m).
Before starting an indoor swimming activity, make sure to select your
pool length.
Note: ZeSport
2
is not a diving watch and would void the warranty. Heart
rate monitoring is not available for swimming activities.
I ALTIMETER & BAROMETER
Thanks to its altimeter and barometer, the ZeSport
2
continuously collects
altitude and pressure data to provide you with accurate environmental
information during your outdoor activities.
The altimeter displays your approximate altitude based on pressure
changes.
The barometer displays environmental pressure data based on the fixed
altitude at which the altimeter was most recently calibrated.
I 9 AXIS MOTION SENSORS
ZeSport
2
features an integrated:
• 3-axis gyroscope.
• 3-axis accelerometer.
• 3-axis magnetometer.
- 13 -
I WEAR THE DEVICE
•
Make sure to wear your device above your wrist bone.
•
To track your pulse, go to the HR menu of your ZeSport
2
. Tap on the Heart icon.
Note: In order to obtain relevant and accurate data, please attach your watch
securely around your wrist without overtightening the strap.
Your watch should not move on your wrist, when running or exercising.
I HR TIPS
If your heart rate data does not seem to be reliable or is not visible,
please follow these steps:
•
Clean your arm before putting your device on.
•
Avoid applying cream or lotions on the area where you are wearing your device.
•
Wear the watch around the wrist, just above the bone. Tighten the watch to your wrist.
•
While exercising, wear a silicone band.
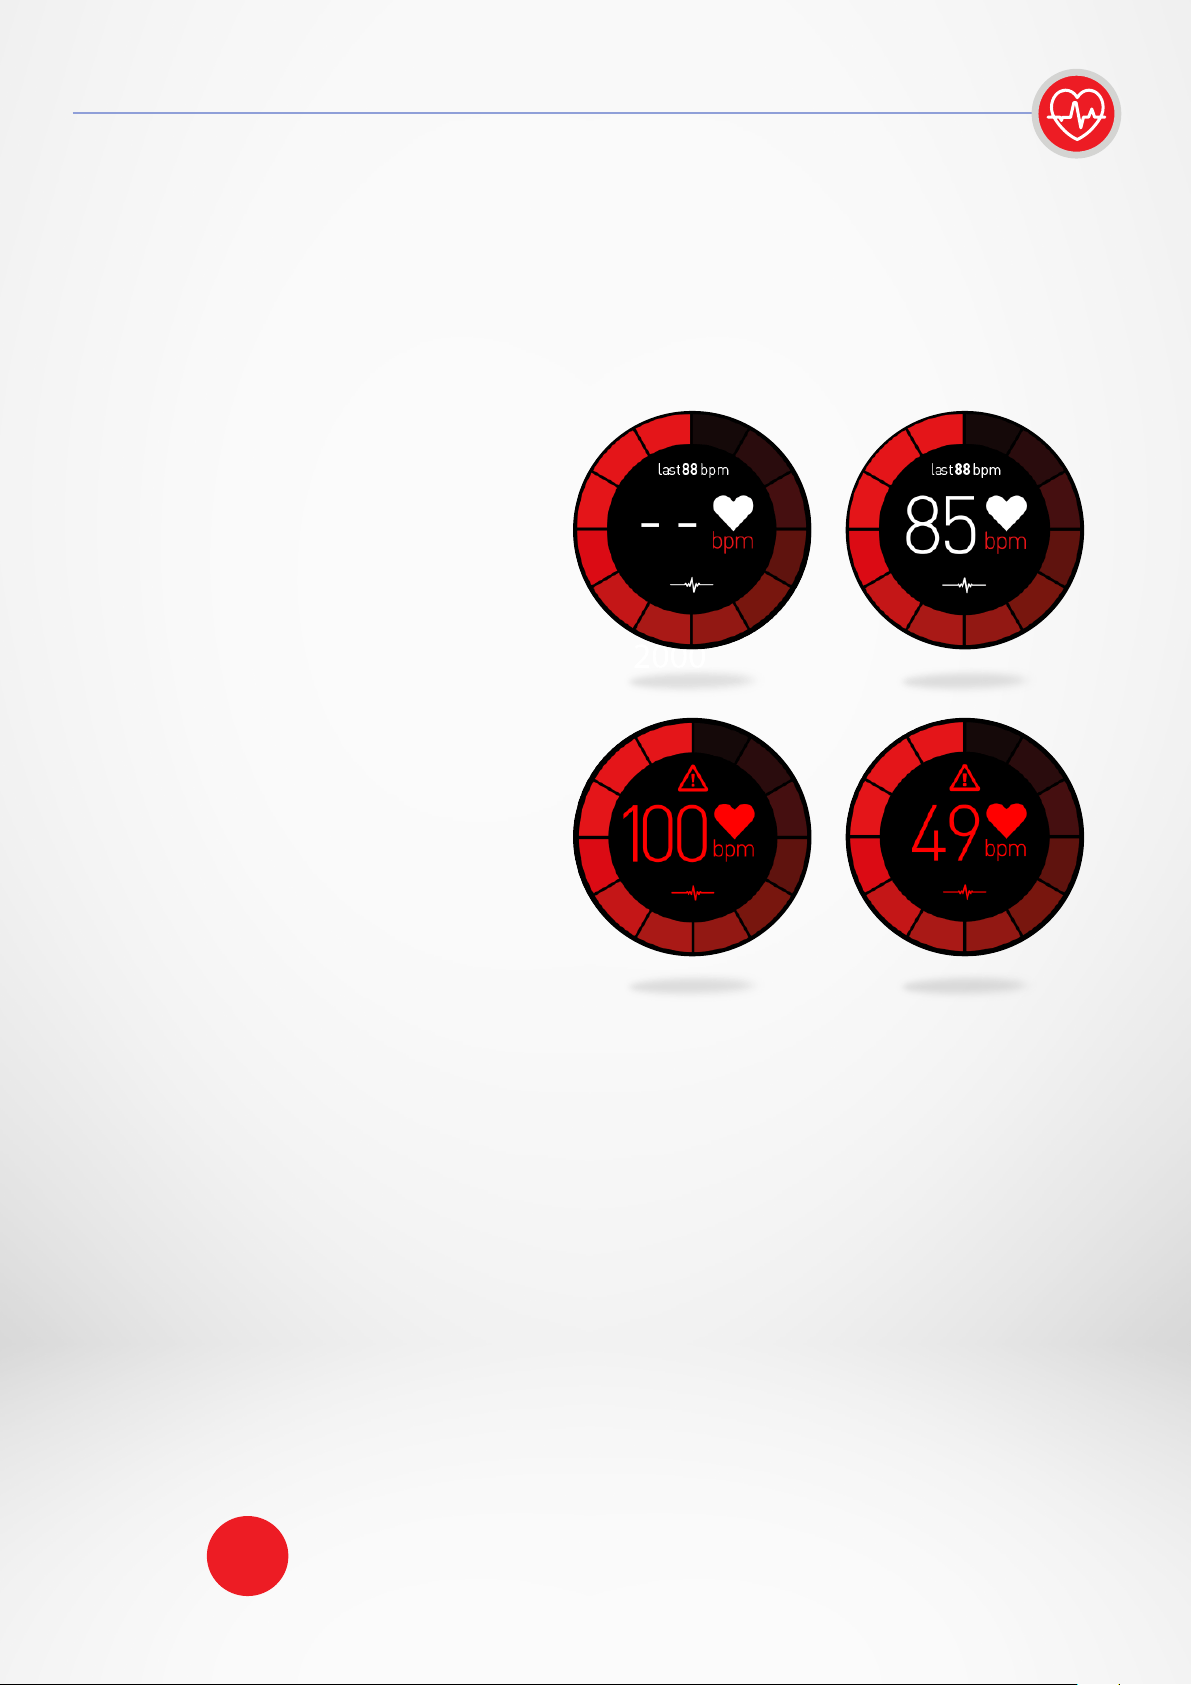
I TRACK YOUR PULSE
TO MEASURE
YOUR HEART RATE:
•
Securely attach your ZeSport
2
around your wrist.
•
Go to the heart rate menu of your
watch.
•
Touch the screen or press the
crown to start measuring your
heart rate.
TO SET YOUR HEART RATE ALERT:
ZeSport
2
can also alert you when your heart rate is going above or below preset limits. You
can customize those limits in the device Settings > Activity > Heart rate > Max HR/Min HR/Auto
tracking.
ZeSport
2
can also alert you when your heart rate is going above or below preset limits. You
can customize those limits in the mobile app settings.
It will take about 10 seconds to get
the results displayed on your watch
screen. It is possible to set automated
measurements from the mobile app.
Simply enable this function in the
setting menu of the app and decide
on the frequency between each
measurement.
10. HEART RATE
Warning: setting automatic HR on a very regular basis will impact
the battery life.
i
- 14 -
I DEFINE YOUR PROFILE
Make sure to edit and update your gender, birthday, weight and height. The
ZeSport
2
relies on this information to evaluate and calculate your activity data
accuracy.
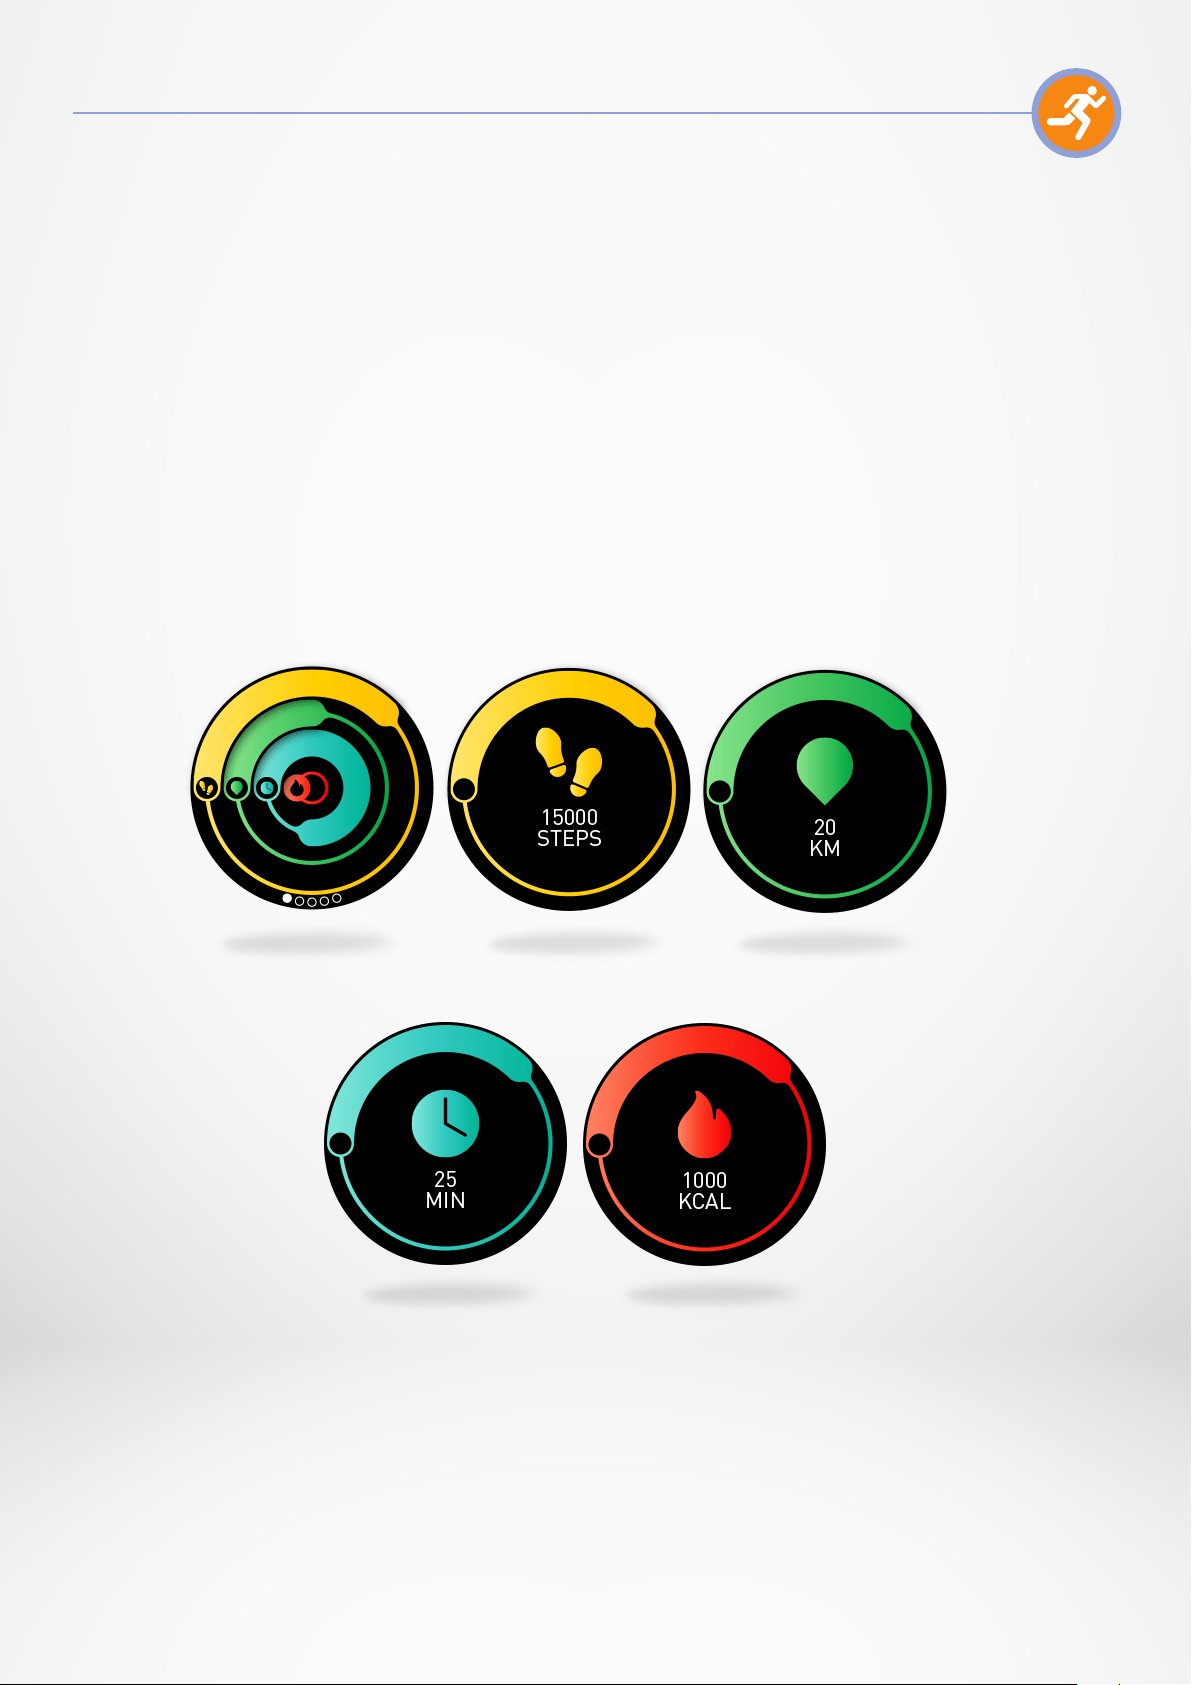
I ACTIVITY TRACKING
The activity tracking feature tracks your daily activity, daily step counts, distance
traveled, active minutes and calories burned. Your watch has a built-in 6-axis
accelerometer that allows you to track your daily activity based on your
movements. This, together with your profile information, allows your watch to
calculate your steps, walking distance, minutes of activity and calories burned. In
order to get the most accurate results we recommend you to wear your watch on
your left wrist if you’re right handed and on your right one if you are left handed.
The number of steps taken, the distance covered and other activity data are visible
on most watch dials. You can find your data in real time in the activity menu of your
watch. To access this menu, from the main screen, slide your finger up. Slide your
finger to the left to view each step, distance, active minutes and calories burned.
Overall activity Steps
Calories
Distance
11. ACTIVITY TRACKING
Active minutes
- 15 -
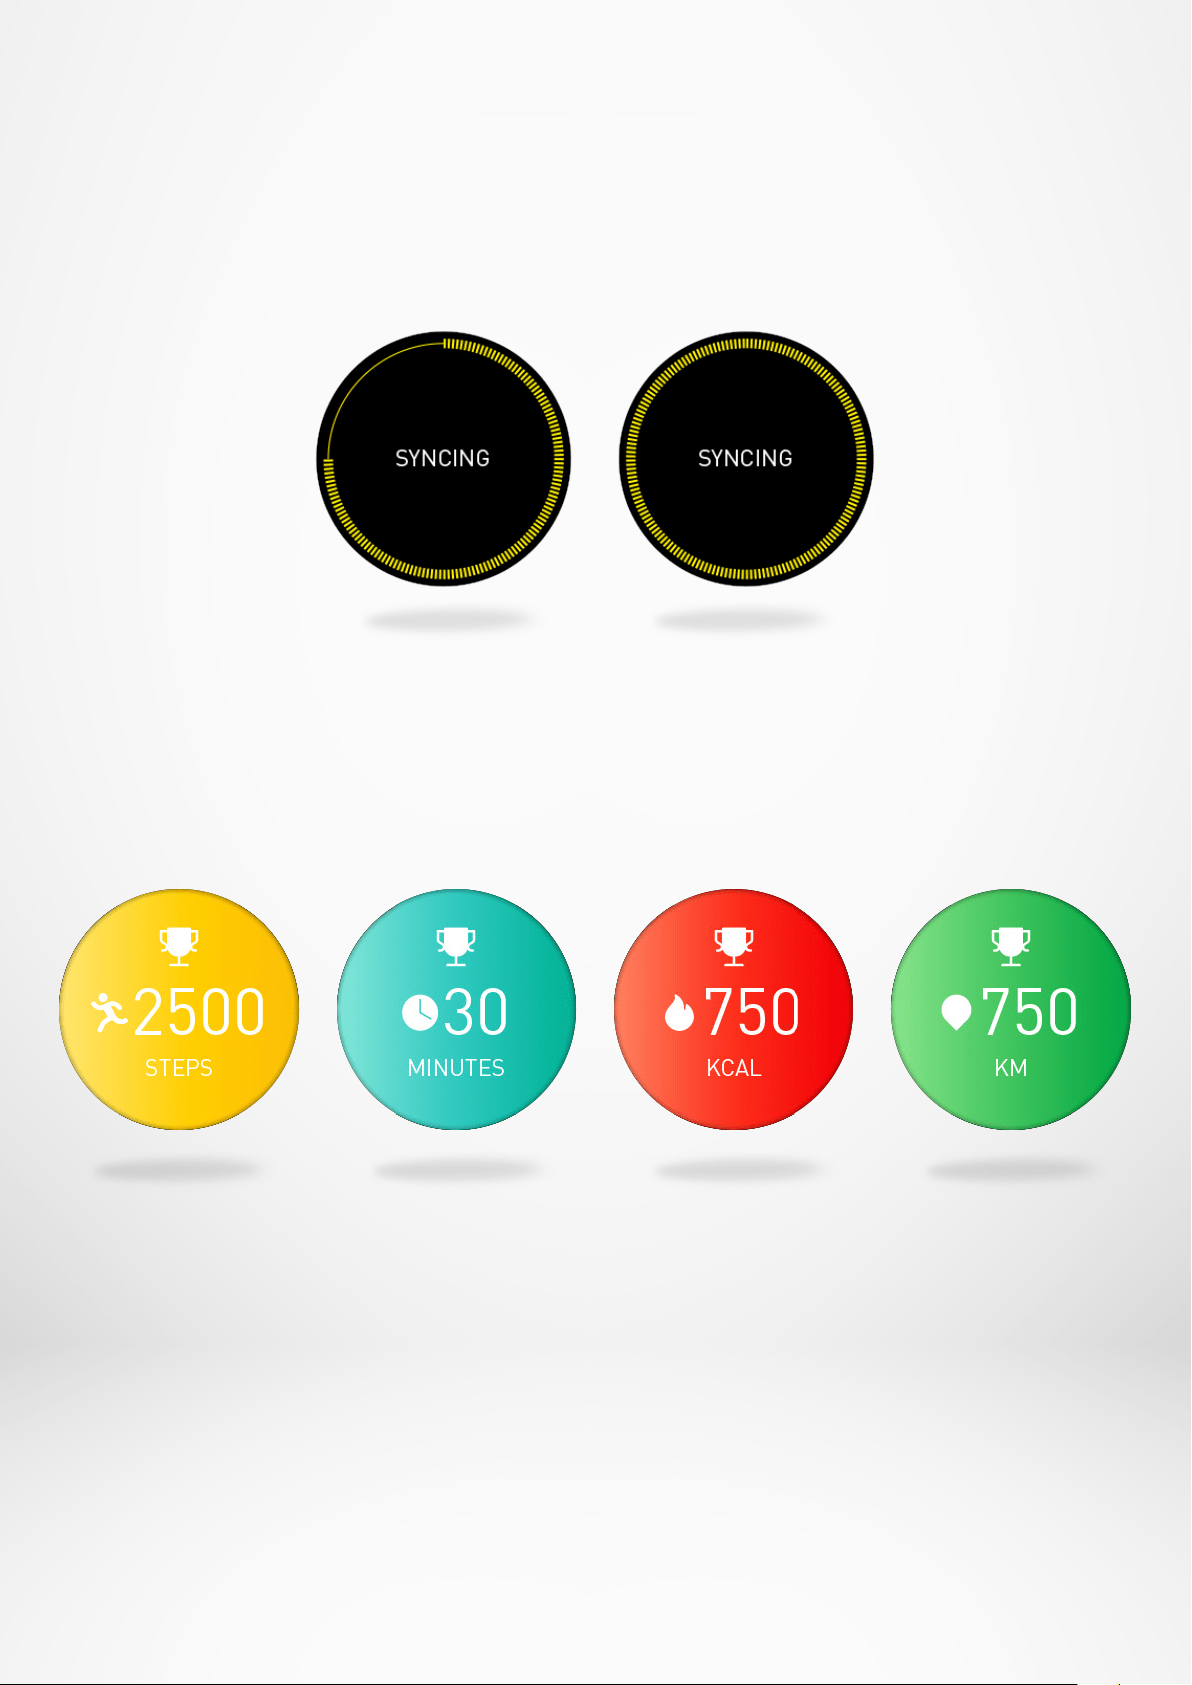
I SYNC YOUR DAILY ACTIVITY
We recommend syncing regularly (once a day) your data to your dashboard to
track your daily progress, see sports history and visualize your sleep patterns.
To synchronize your data manually, simply go to the activity page of the ZeSport
2
application and slide your finger down.
Each time you open the ZeSport
2
, your watch syncs automatically when it’s nearby.
TIPS: A goal alert appears for your daily steps goal, distance traveled goal,
calories burned goal and active minutes goal. This alert appears on your watch
and also in the App. The activity tracker resets at midnight and ZeSport
2
has the
ability to store up to 10 days of your activity data. Then, you will have to synchronize
your ZeSport
2
with your mobile app in order to avoid a loss of data.
I SET UP YOUR DAILY ACTIVITY GOAL
You can set your daily goals from the mobile app or in the activity section of the
watch Settings > Activity > Goals.
We recommend you set ambitious but realistic goals in order to keep a healthy daily
activity. You can obviously raise your goals over time to increase your performance.
On average it is recommended to have at least 30 minutes of physical activity per
day and walk 10000 steps.
- 16 -
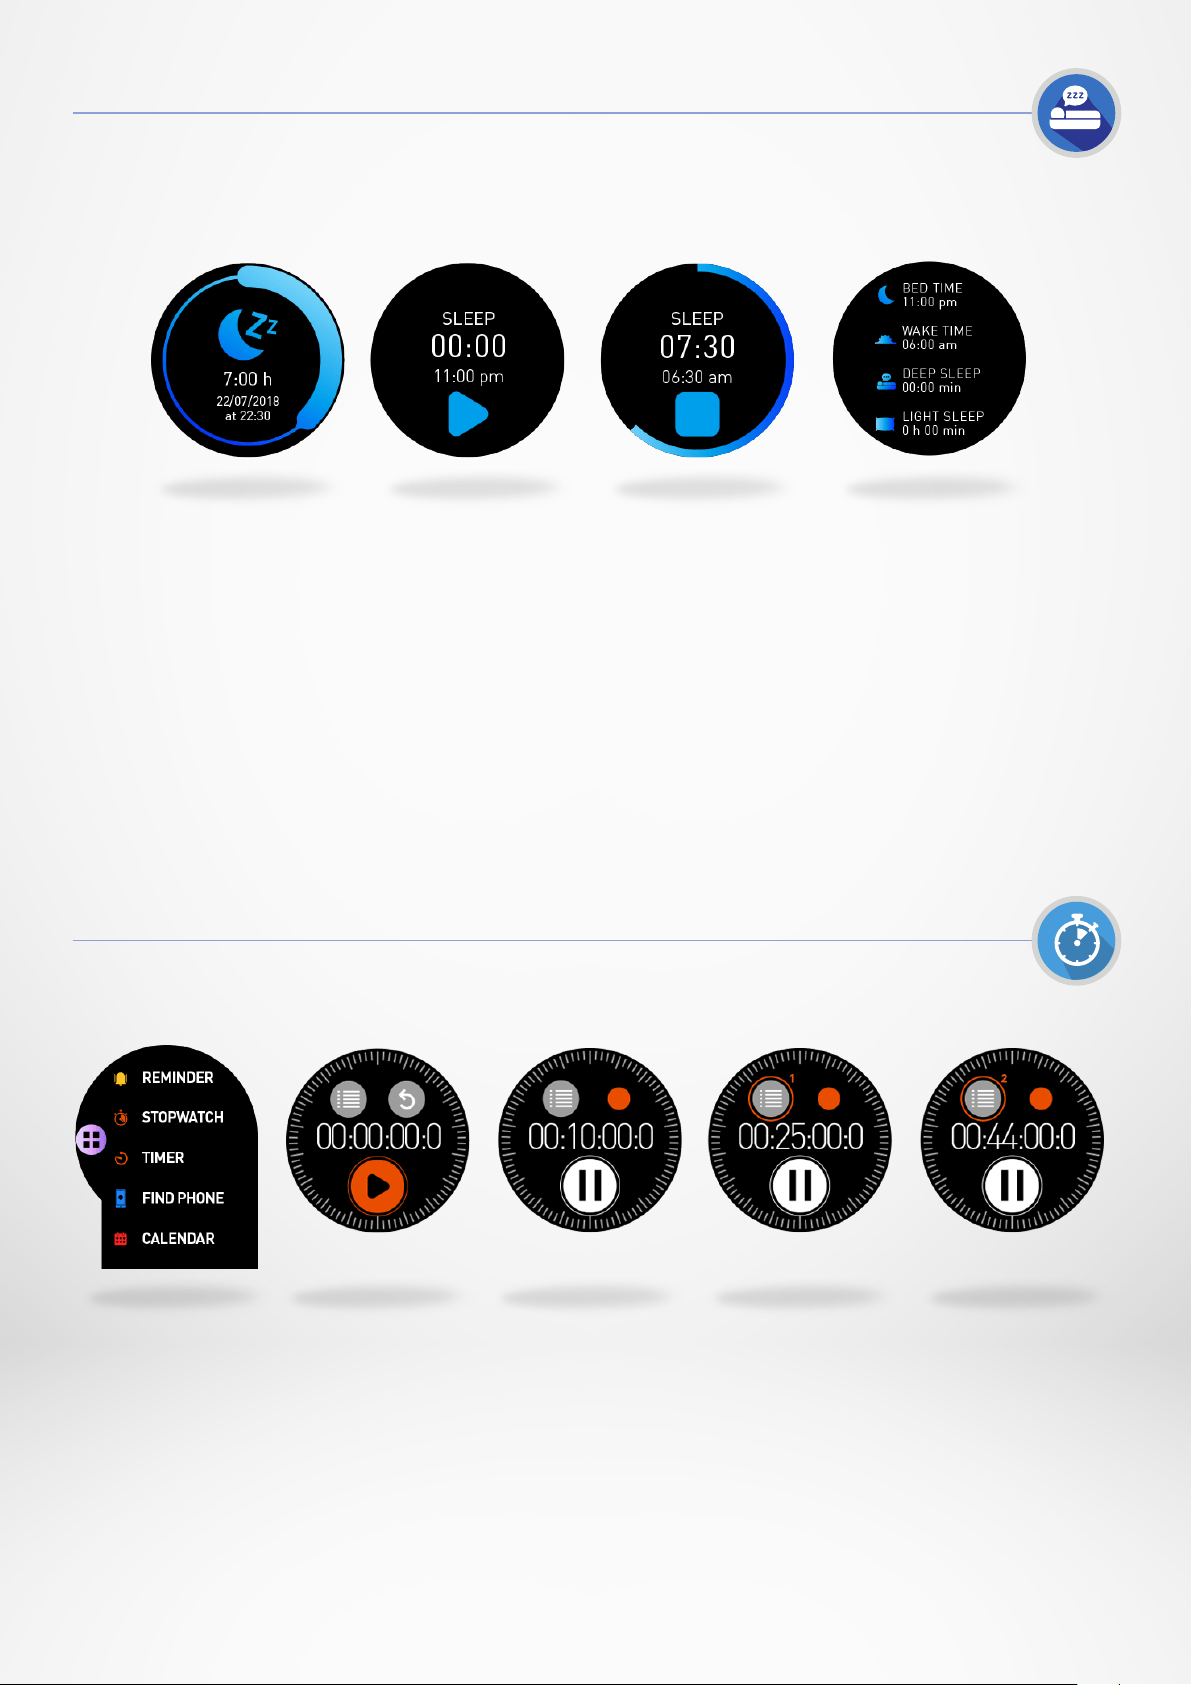
ZeSport
2
can detect your micro-movements during your sleep and deduce the
quality of sleep, the time taken to fall asleep, how many times you woke up in the
night, the hours of light sleep and deep sleep, etc.
You can find all data related to your sleep on the ZeSport
2
App. Go to the Dashboard
home page and click on the Sleep band. You can also view data from your last night
on your ZeSport
2
. Go to the Sleep menu of your device.
Start and stop the sleep mode:
•
Press the sleep app icon from the ZeSport
2
main menu.
•
Press Start to enable sleep monitoring.
•
Press End to stop sleep monitoring.
To view your sleep data, sync your watch when you wake up and get more details
by checking the dashboard.
I TO USE THE STOPWATCH
•
Open the stopwatch app from the App menu.
•
Start the stopwatch by pressing the play icon.
•
Track individual lap performance by pressing the orange icon while measuring is on.
•
Stop counting by pressing the pause button.
To view the full lap-by-lap report, press the lap counter at the top left of the screen.
Make sure to stop the stopwatch first. To delete the report, press the cross.
12. SLEEP MONITORING
13. STOPWATCH
- 17 -
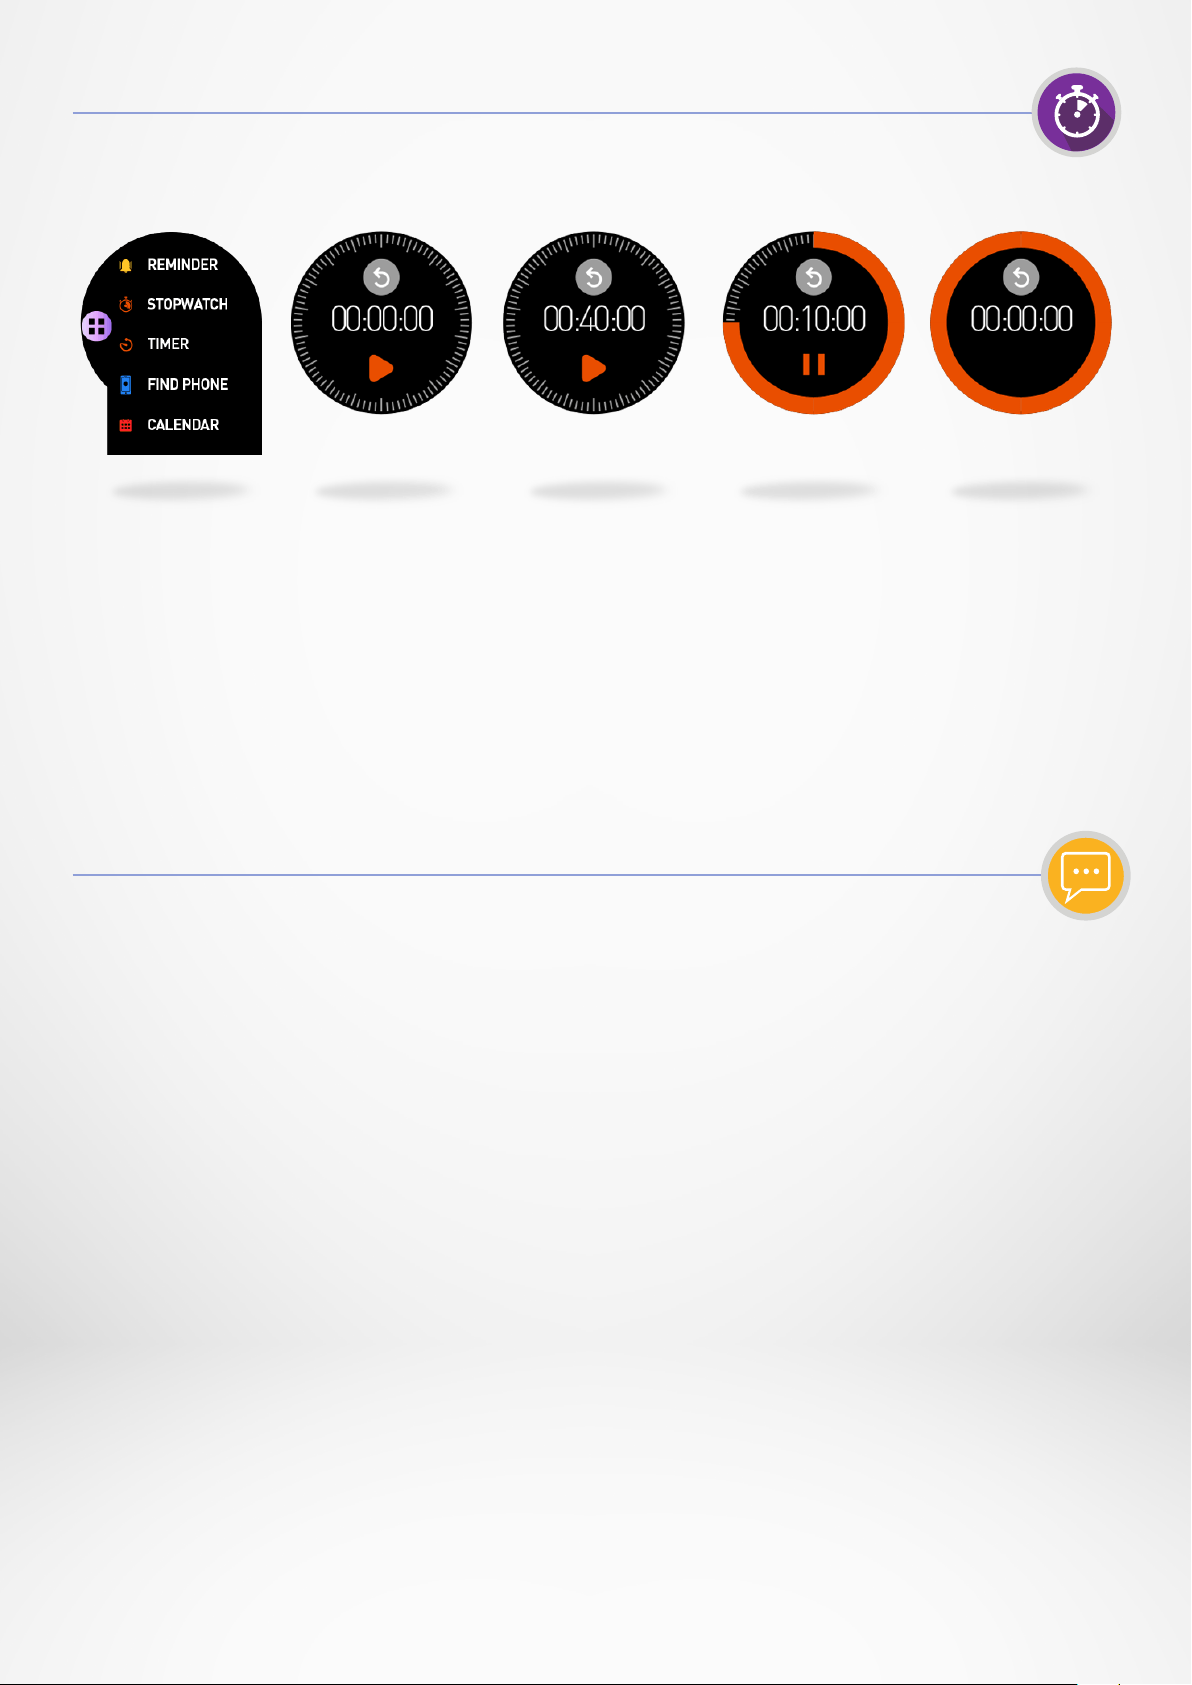
I TO USE THE TIMER
•
Open the timer app from the App menu.
•
Adjust the timer duration by using the digital crown and start the timer by pressing
the green icon. Stop it by clicking on the same icon.
•
Press the back arrow to reset the timer to 0.
•
At the end of the countdown, your watch will alert you with a sound or/and vibration.
Before enabling notifications, make sure that the ZeSport
2
device is well paired
with your smartphone.
I SETTING UP NOTIFICATIONS FOR IOS USERS
If you are using an iOS device, go to the Settings of your iOS device:
•
Tap «Notification center».
•
Select which type of notifications you wish to receive on ZeSport
2
.
•
Enable «Show in Notification Center» to receive the notification on ZeSport
2
.
I SETTING UP NOTIFICATIONS FOR ANDROID USERS
If you are using an Android device, access the ZeSport
2
App settings and click on
Notifications. Then, select the items to display on the watch.
14. TIMER
15. NOTIFICATIONS
- 18 -
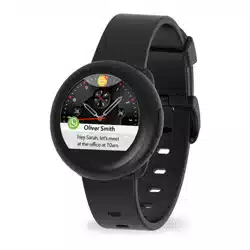
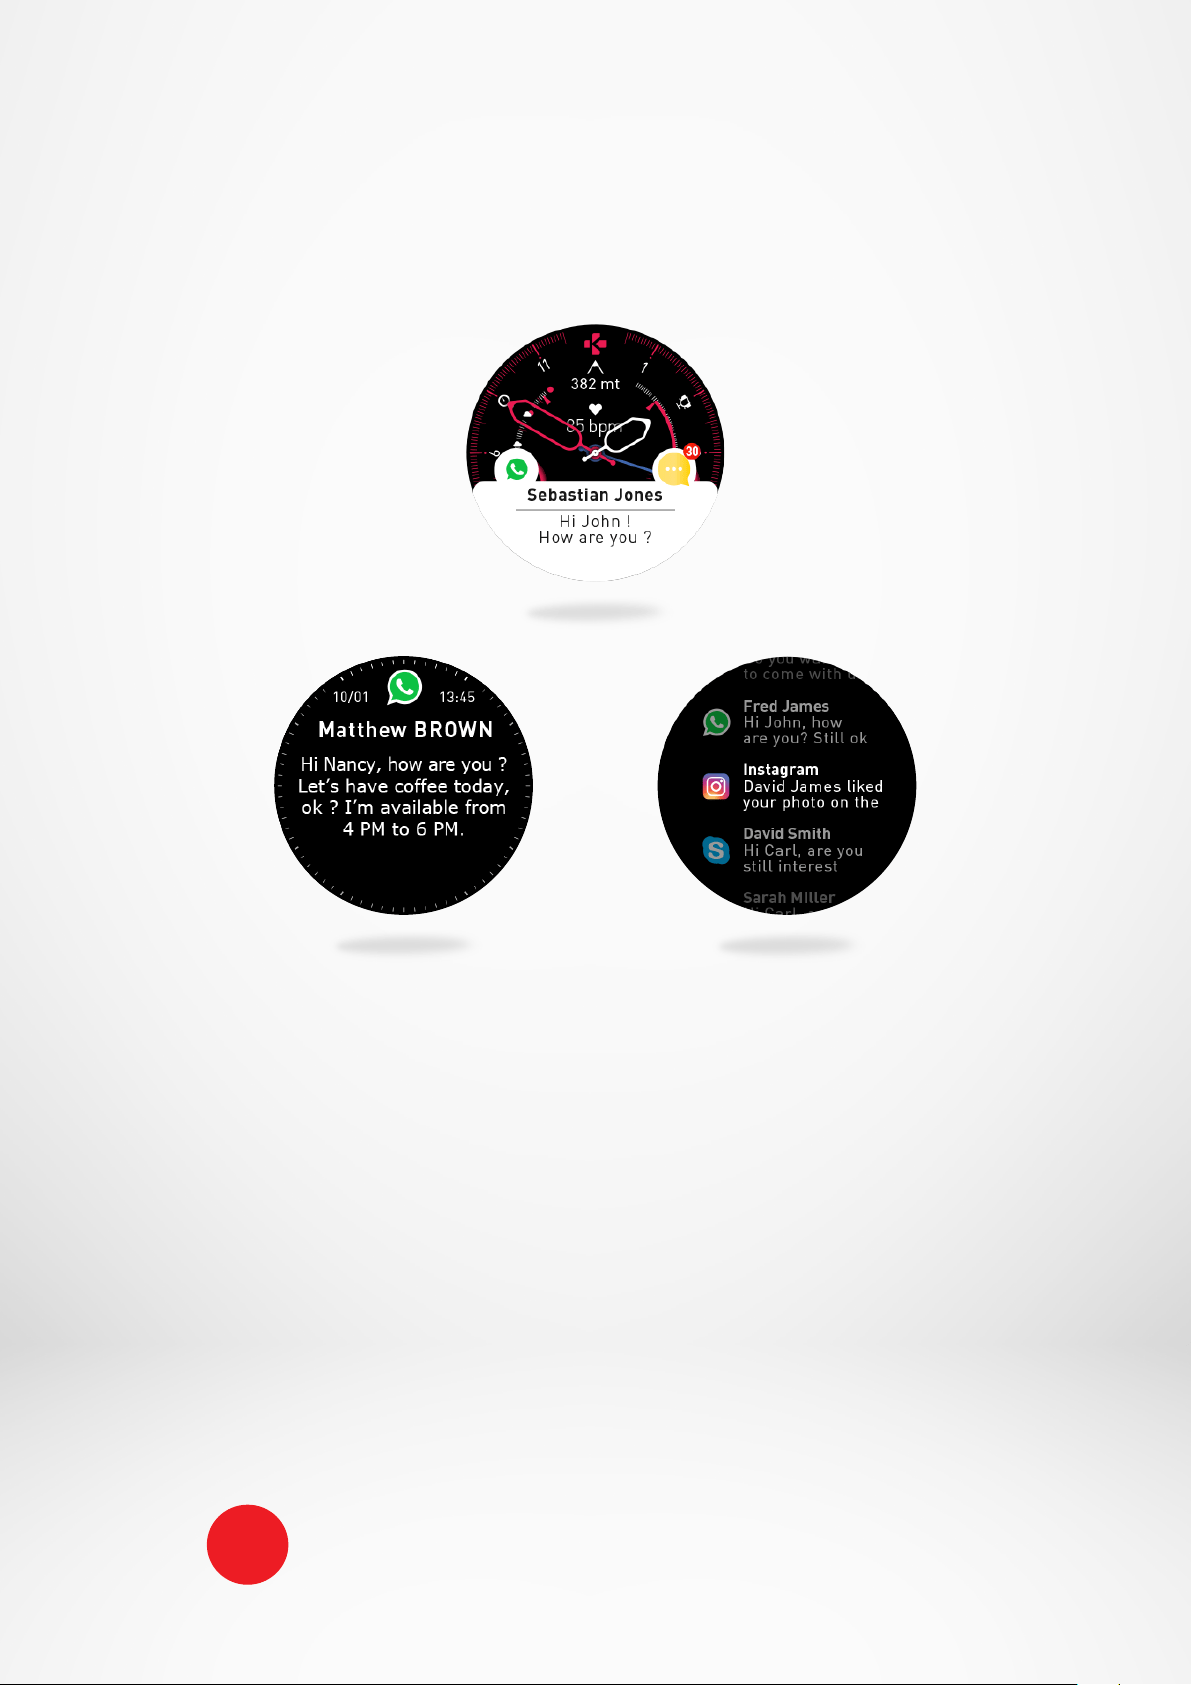
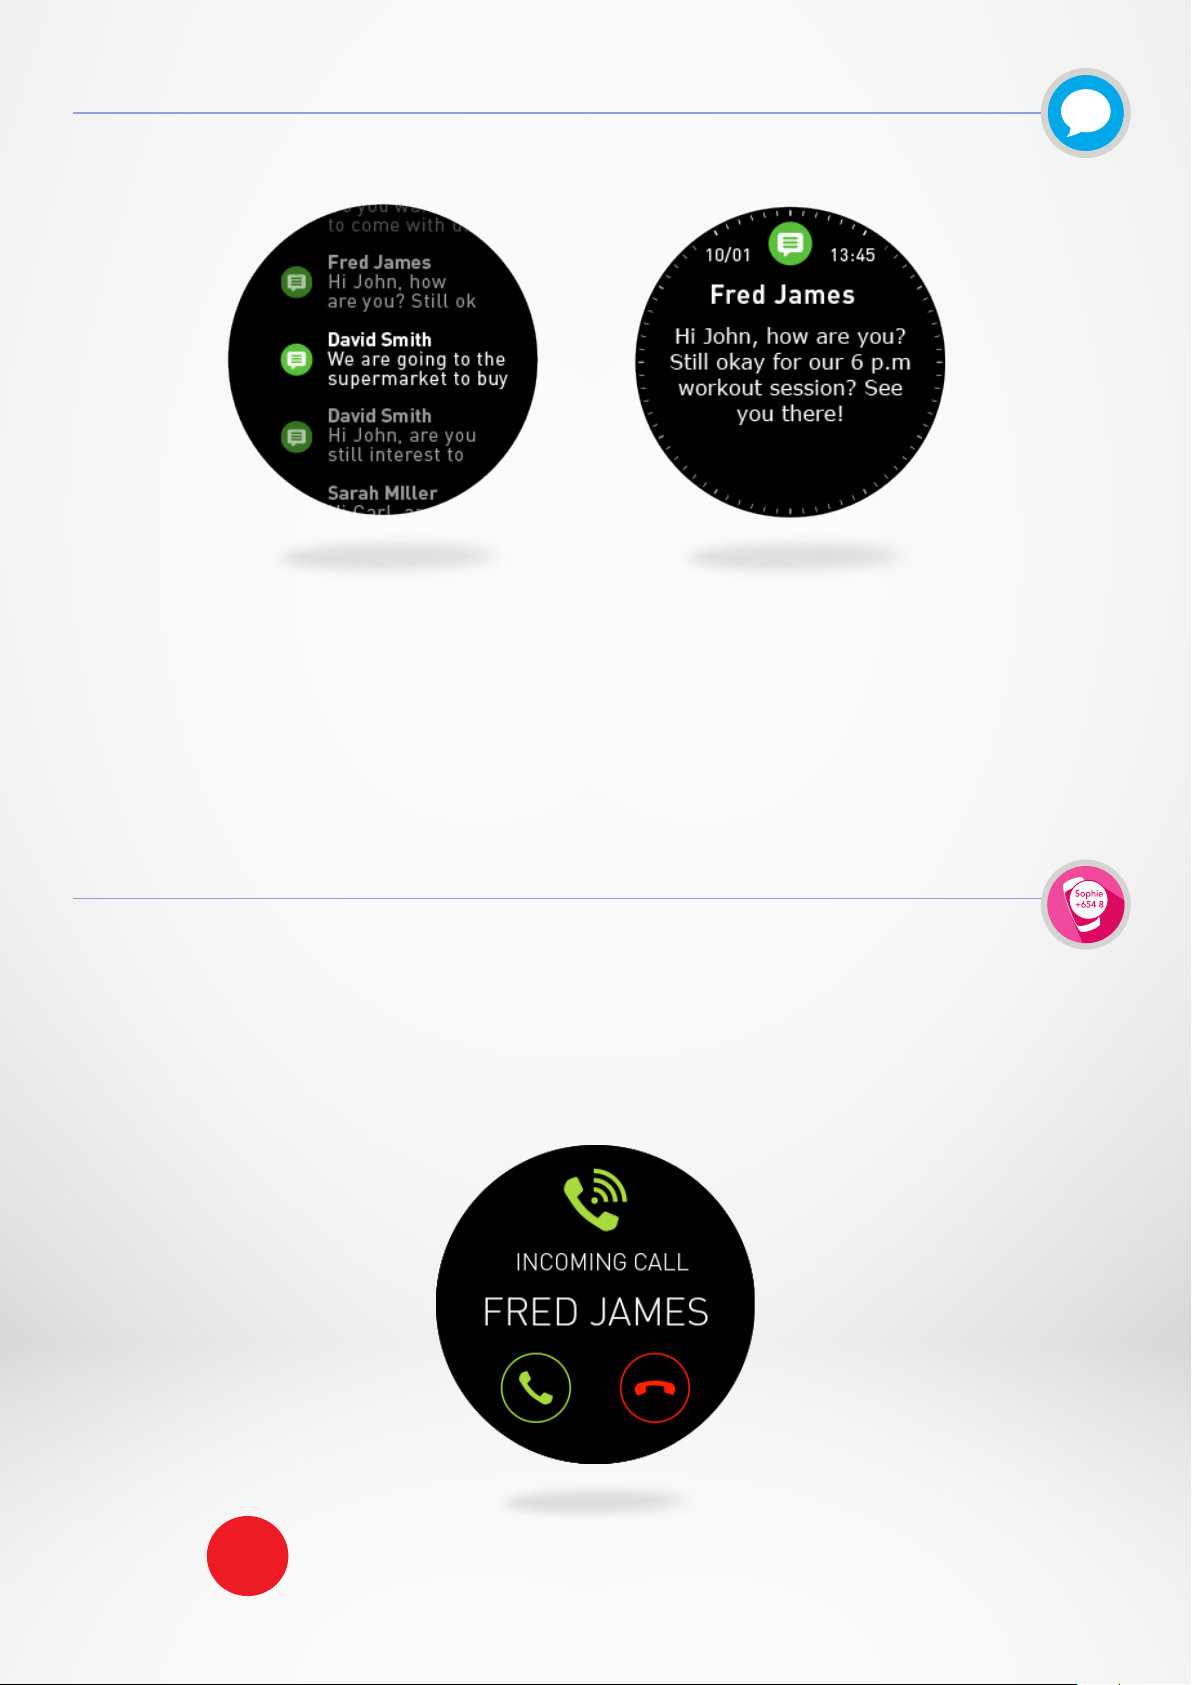
I VIEWING AND MANAGING YOUR NOTIFICATIONS
Each notification will appear over your selected watch face with its dedicated icon to
identify the item. Some notifications may be identified with a generic icon.
•
To read your notifications, from the homescreen, simply tap on the notification
area and it will open instantly.
•
To read it later, swipe right.
•
To delete it, swipe left.
•
To access to the notifications list, from the homepage, swipe up. Use the crown
or your finger to navigate and click on a notification to open it.
•
To delete all your notifications, long press the screen and confirm.
•
To delete one notification, select it, swipe left and confirm.
ZeSport
2
can store up to 20 notifications, after which the oldest are
replaced as you receive new ones.
i
- 19 -
With ZeSport
2
, you can receive and read your SMS straight from your wrist.
•
Quick reply (only available for Android users): ZeSport
2
allows you to reply using
preset short answers directly from your watch.
•
To delete all your SMS notifications, go to the SMS list and long press the screen.
•
To erase a SMS, select the message and slide your finger to the left.
16. SMS
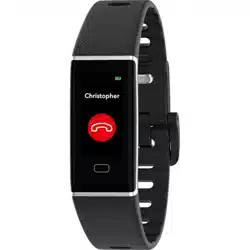
17. INCOMING CALLS
If your ZeSport
2
is paired to a phone, it lets you accept or reject incoming calls.
To accept a call, tap the green phone on your ZeSport
2
’s screen. Note that you can’t
talk into the watch, accepting a phone call answers the call on your smartphone.
To reject a call, tap the red phone icon.
The caller’s name always appears on your watch if that person is saved in your
contacts list. If not, you see a phone number.
Android users can also reply to an incoming call by sending a
short preset text message from their watch (not available for iOS users).
i
- 20 -
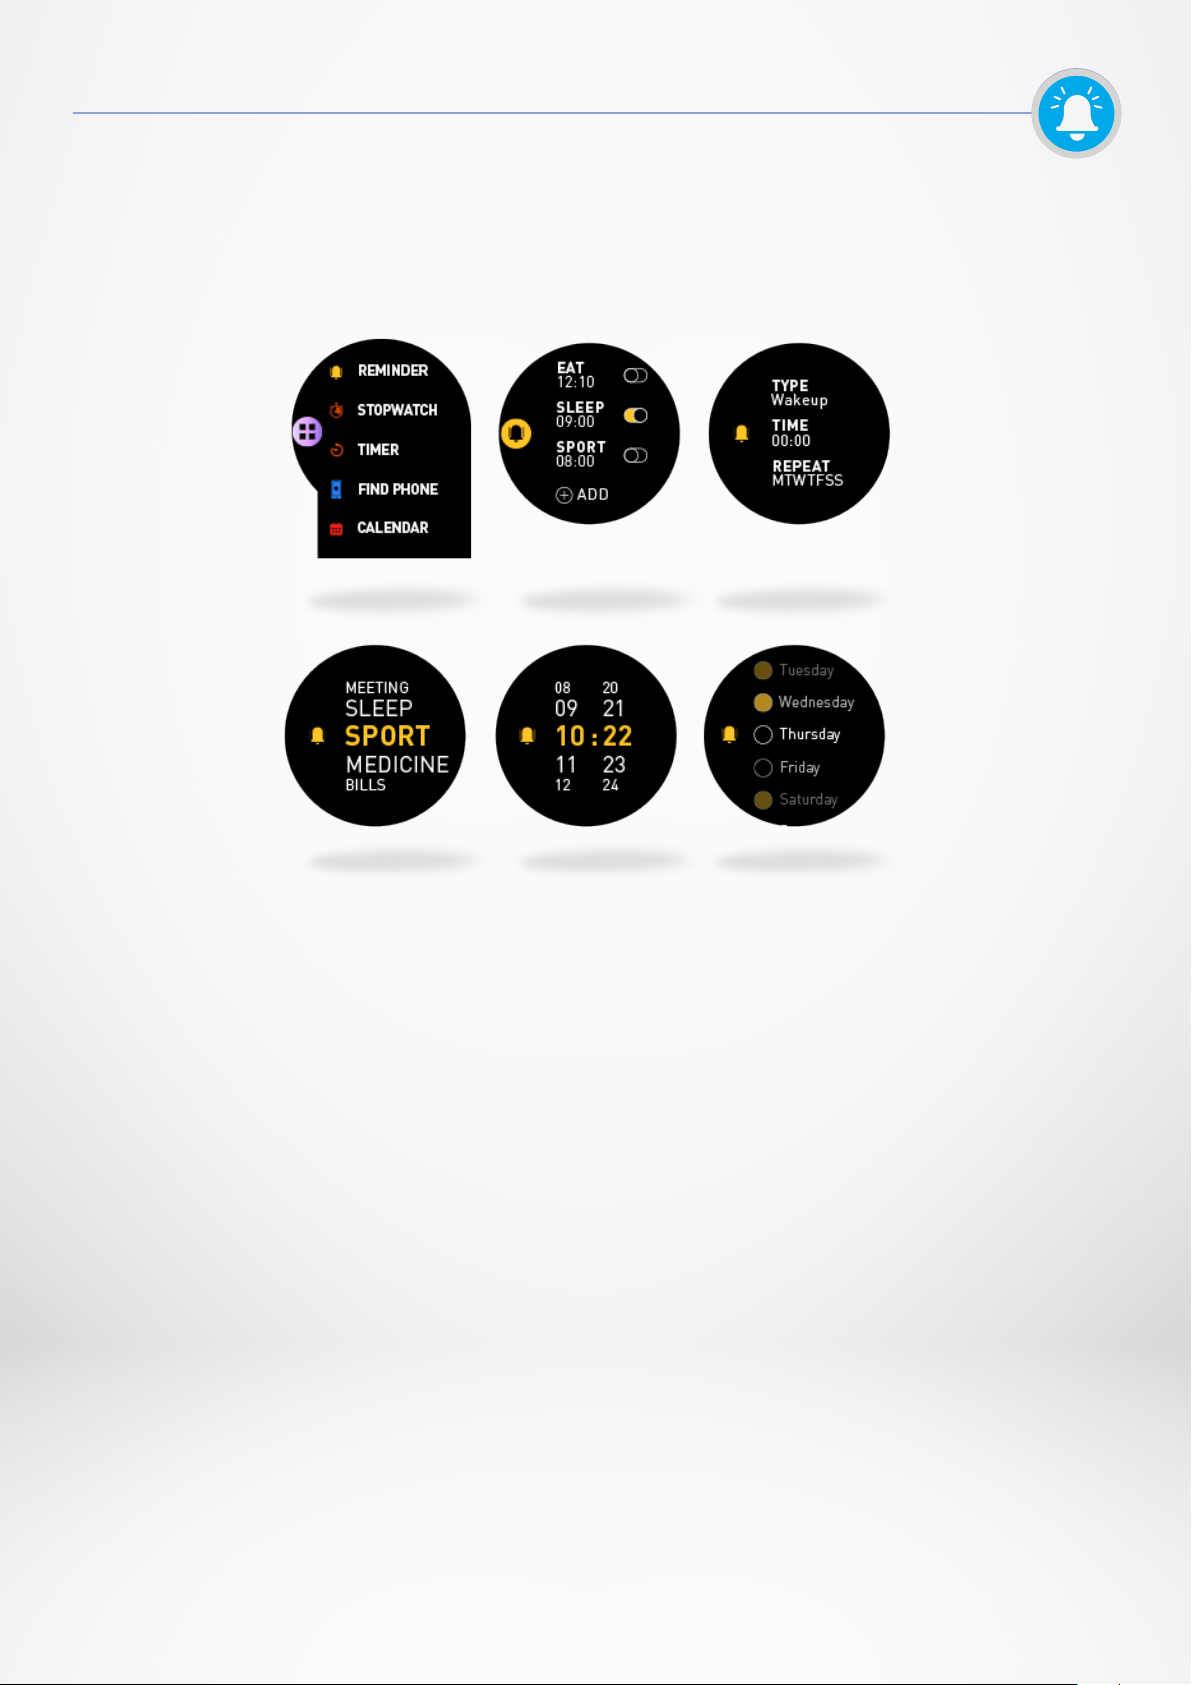
You can set and manage reminders directly with the ZeSport
2
mobile app.
You can create up to 10 reminders and select the type, time and schedule for them.
For each reminder, you can decide the type of alert you want to receive (ringtone,
vibration or both). A single tap on your ZeSport
2
helps dismiss the reminder. If not
dismissed, the same alert will repeat after two minutes.
I TO SET A REMINDER FROM THE WATCH
•
Open the App menu.
•
Click on Reminder.
•
Tap on Add.
•
Set up your preferred reminder type.
•
Choose the date (repeat) and time of the reminder.
•
Select the type of alert.
To confirm your selection/settings, press the crown.
To modify a reminder, tap on it form the reminder list.
To delete a reminder, select and long press a reminder. Confirm the deletion.
I TO SET A REMINDER FROM THE APP
•
Open the ZeSport
2
mobile app.
•
Click on the reminder tab.
•
Set up your preferred reminder type.
•
Choose the date and time of the reminder.
•
Select the type of alert.
18. REMINDER
- 21 -
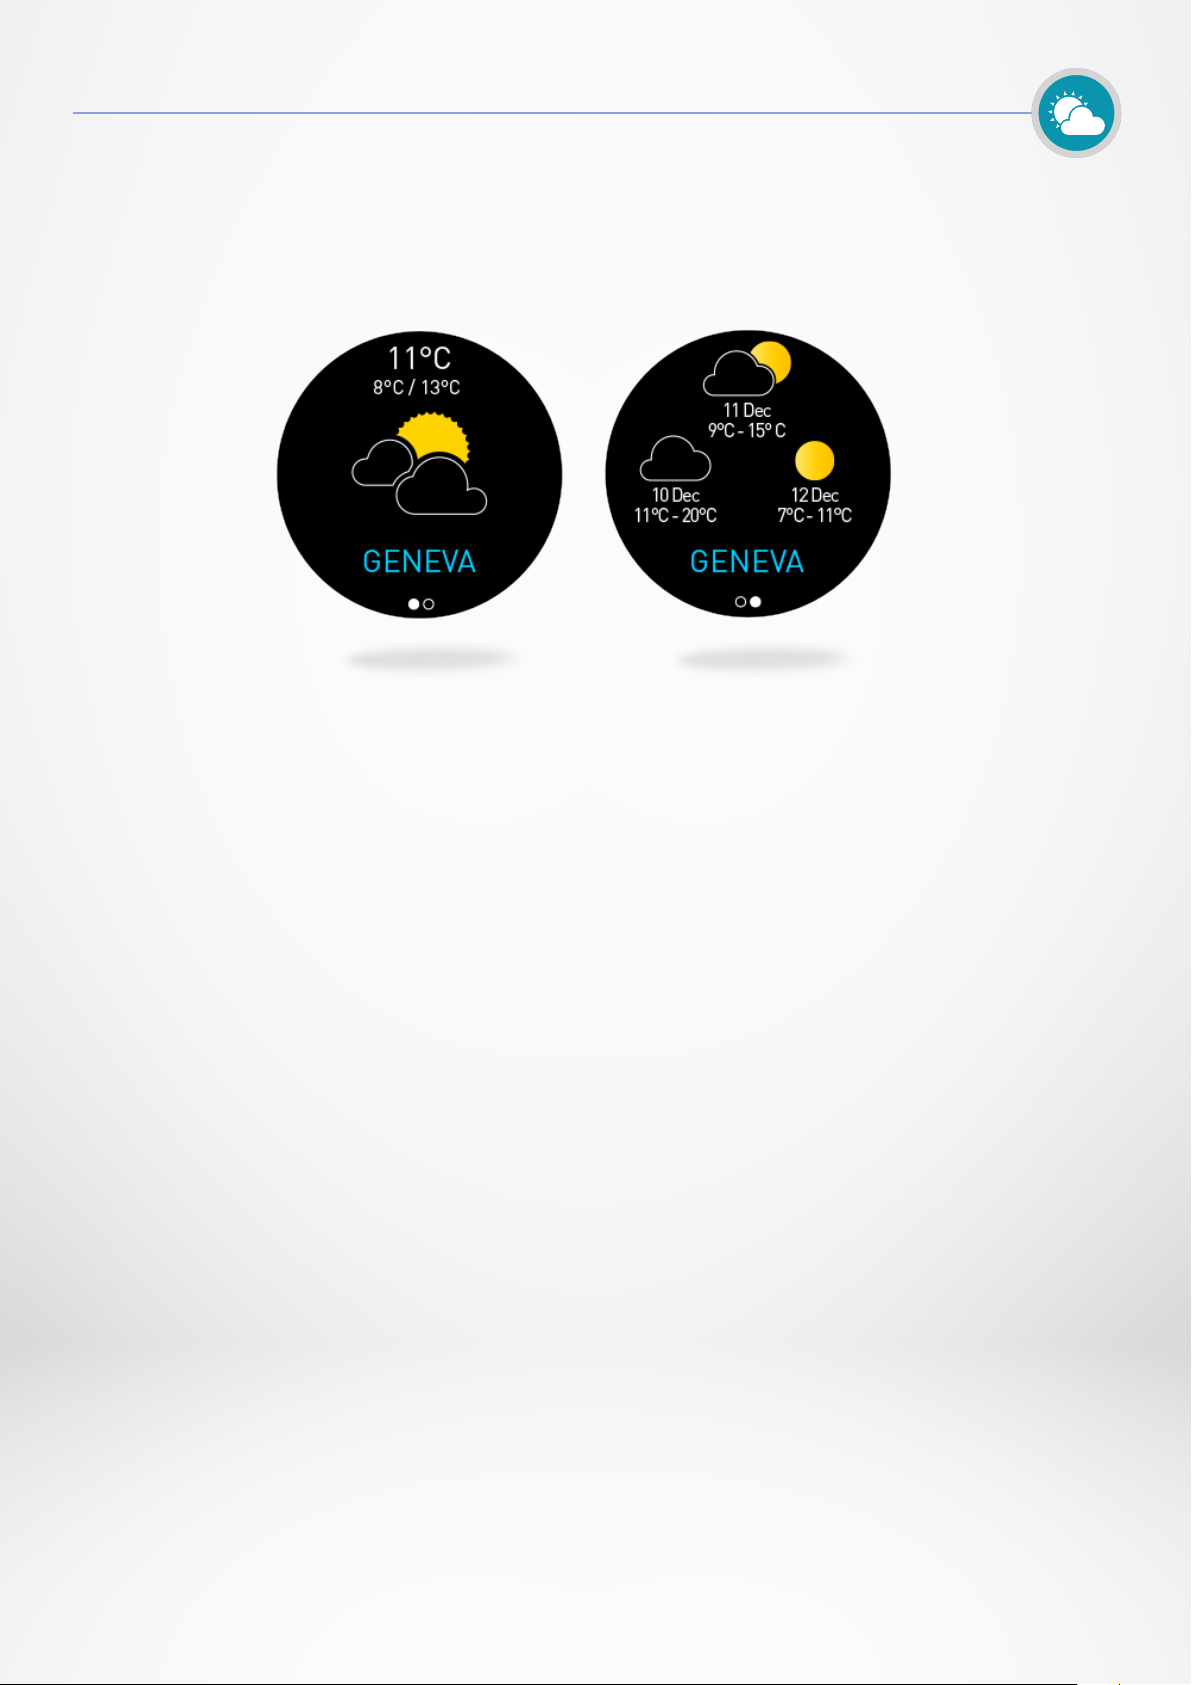
Your MyKronoz device gives you access to the weather forecast (over 3 days)
for your desired location. By default, the watch displays the weather forecast for
Geneva.
If you wish to change the location, simply go to the Settings menu of the application >
Select Advanced Settings > Click on Weather.
Manual mode allows you to type your location directly:
•
Go to the Settings menu of your App.
•
Click on «Advanced settings».
•
Enable Manual mode.
•
Type and select your city.
Auto mode allows you to have the weather forecast according to your GPS location.
In this case, you will need to enable GPS on your smartphone to take advantage of
this feature.
•
Go to the Settings menu of your App.
•
Click on «Advanced settings».
•
Enable Auto mode.
Be aware that data synchronization will be done throughout the day according to your
positioning. If the weather for your current location doesn’t appear, make sure that you
turned on locations services for the ZeSport
2
app.
Good to know: From the weather settings, select your preferred temperature units.
The information displayed on your watch can vary according to location, smartphone
settings and phone networks.
19. WEATHER FORECAST

- 22 -
ZeSport
2
can be used as a remote control to take pictures from your smartphone.
This feature is useful when you want to take a group photo or when you want to take
a selfie.
I TO USE ZESPORT
2
AS A CAMERA REMOTE
•
Open the camera on your smartphone.
•
Go into the camera menu of your watch.
•
Then, tap the screen to start the countdown and take photos.
All the pictures that you take with your ZeSport
2
are stored in the gallery of your phone.
With ZeSport
2
, you can take control of your favorite music player on your Smartphone.
I TO CONTROL MUSIC
•
First launch the music from the player on your phone.
•
Play, pause & skip tracks directly from your watch.
The Volume can be adjusted using the digital crown.
20. CAMERA REMOTE
21. MUSIC CONTROL
From your IOS device
From your Android device
- 23 -
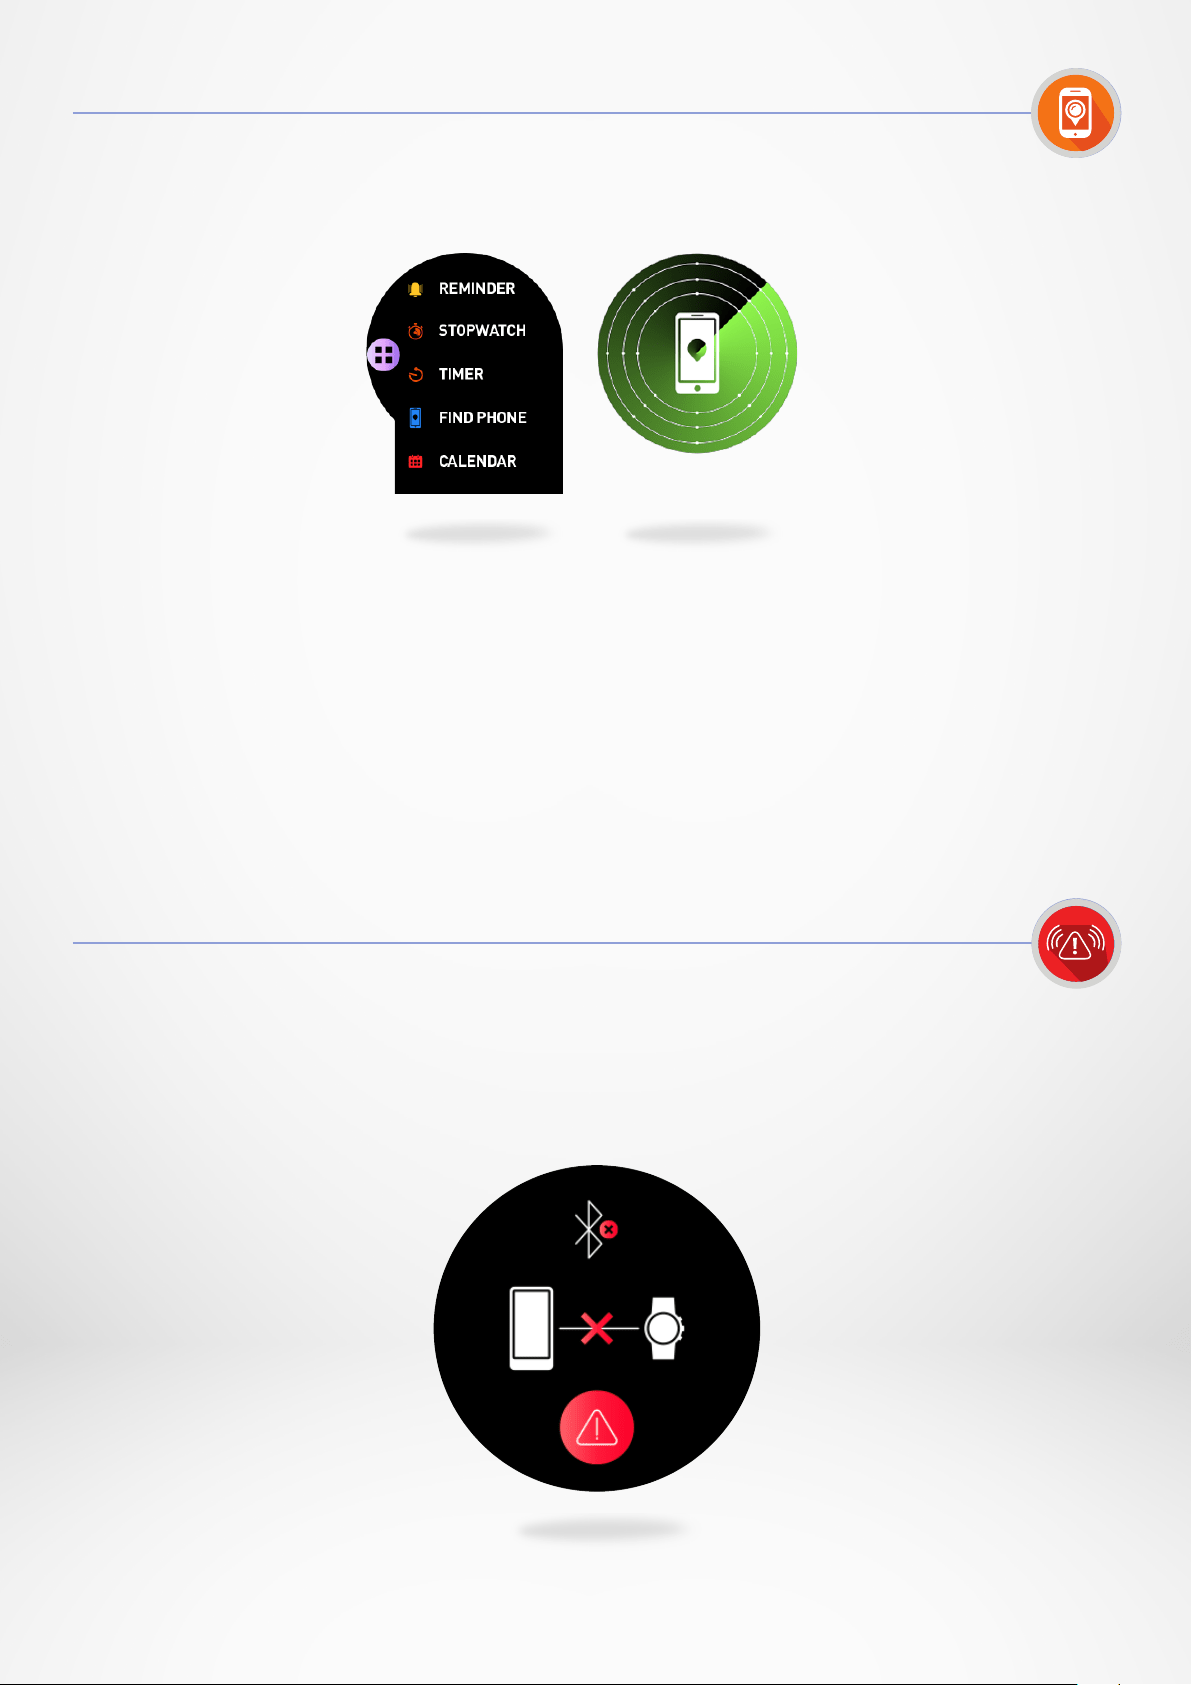
23. ANTILOST ALERT
If you misplace your phone, the Find my phone function will make your phone ring
or vibrate so you can easily find it. To enjoy this feature, ensure that your phone and
watch are within range (10m).
I TO ENABLE THIS FEATURE
•
From the watch shortcuts, tap on the Find my phone widget.
•
Click again to disable it.
You can also enable this feature by going in the App menu of your watch. Click on Find
my phone.
This alert notifies you with a vibration or a sound (depending on your watch settings)
when your ZeSport
2
is going out of range (BT range 10m) from your phone. Note
that you can turn this function o by disabling the Anti-lost alert in your application’s
notification menu (Anti-lost alert is OFF by default).
22. FIND MY PHONE
- 24 -
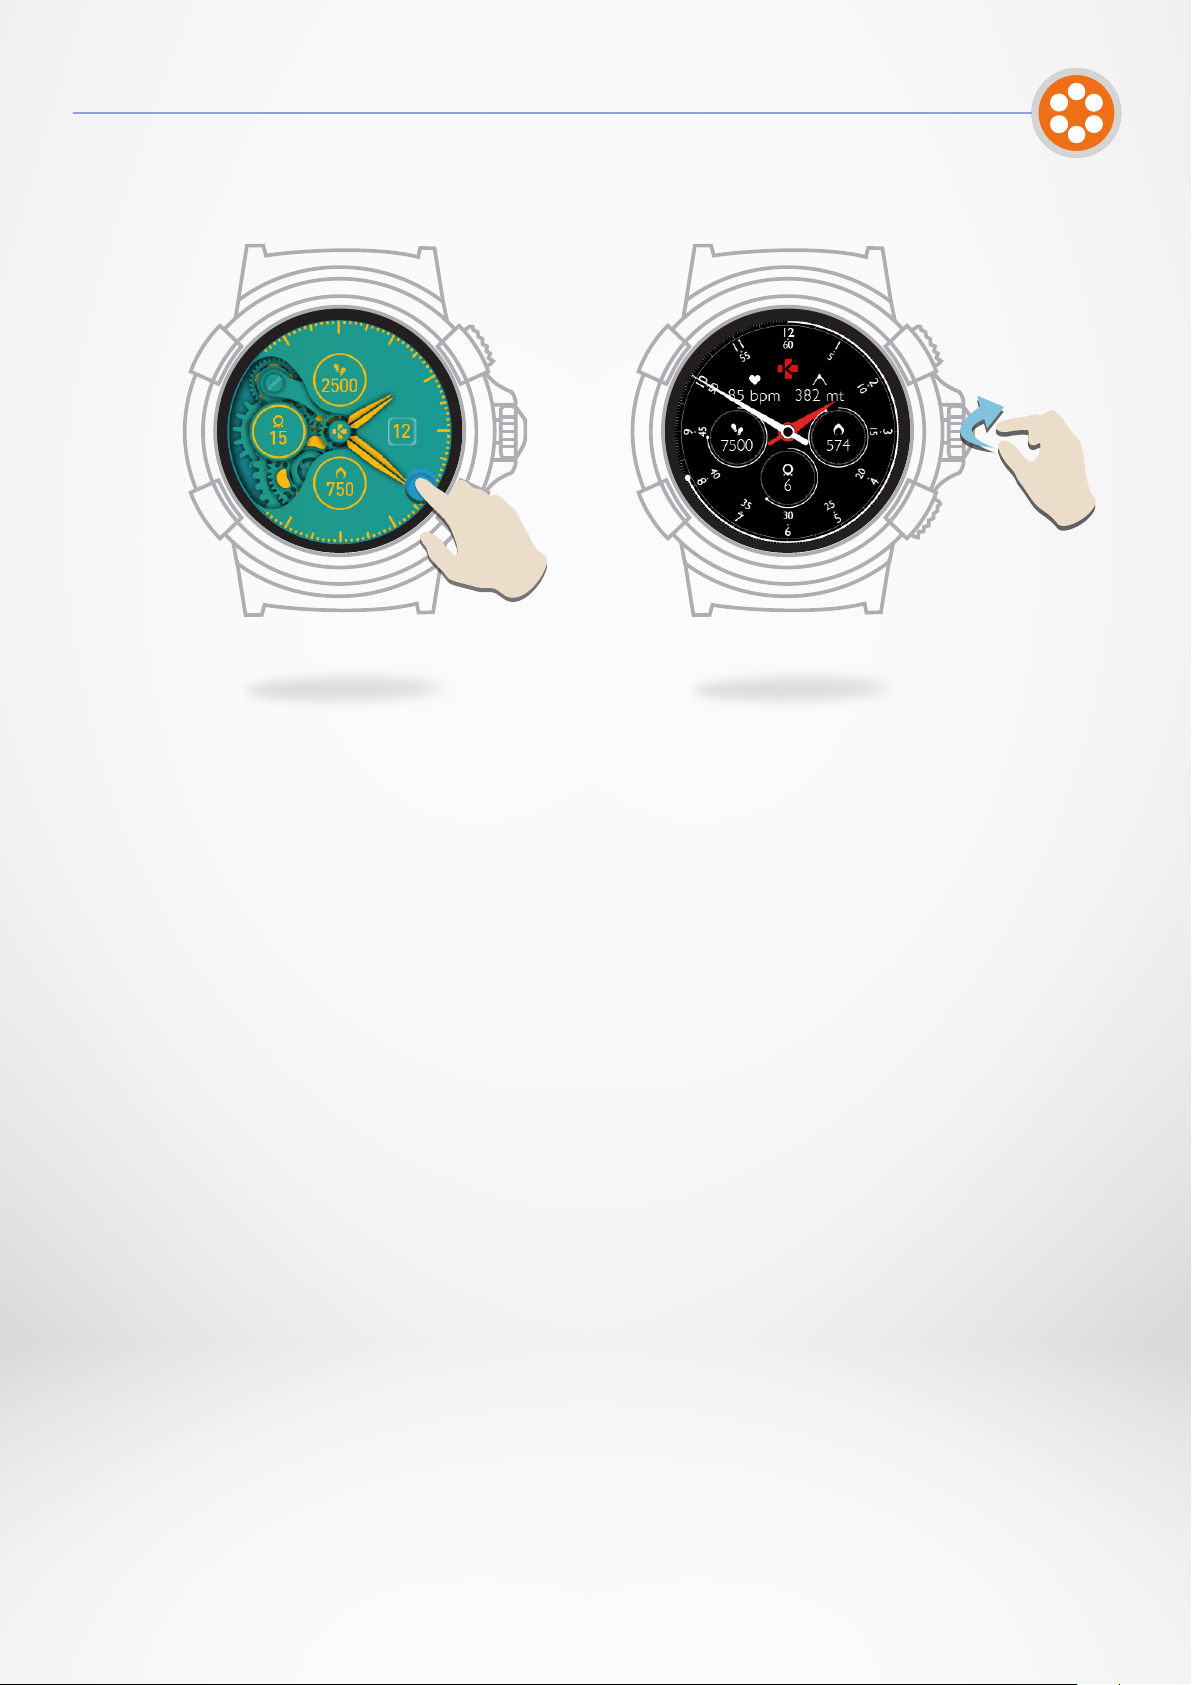
I TO CHANGE THE WATCH FACE FROM THE DEVICE
•
Long press the current dial on your watch.
•
Slide your finger from right to left on the screen to scroll through the dierent watch
faces.
•
Select your favorite watch face by tapping on it.
I TO CHANGE THE WATCH FACE FROM THE APP
•
Go to the settings tab of the mobile app.
•
Click on watch face.
•
Select your preferred watch face and click on save.
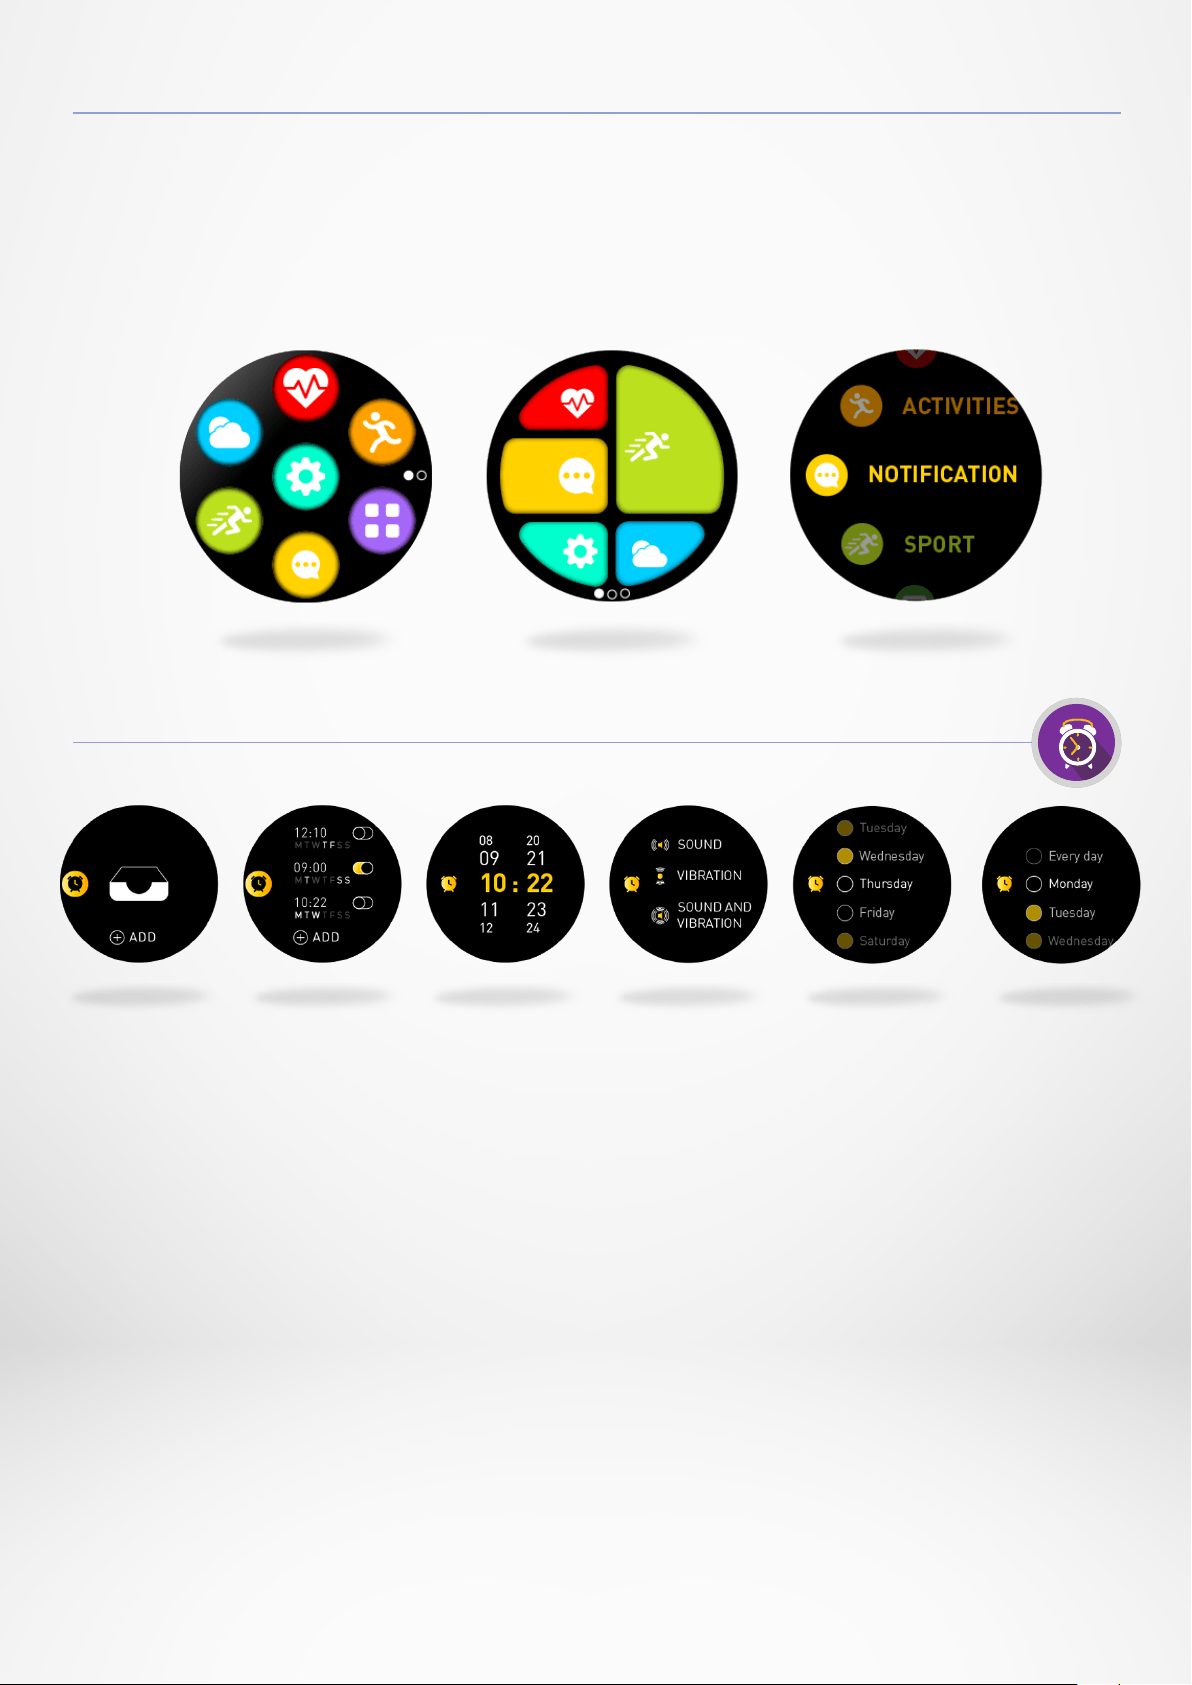
24. CUSTOMIZE YOUR WATCH FACE
- 25 -
25. MENU STYLE
I TO CHANGE THE MENU STYLE OF YOUR WATCH:
Choose your favorite menu style by going into the settings menu of your watch:
•
Click on Display menu and Select Menu.
•
Select the menu style of your choice.
I TO SET AN ALARM FROM THE WATCH
•
Open the Alarm menu.
•
Tap on Add.
•
Set the alarm time by using the crown.
•
Select the type of alert.
•
Select the alarm day (or repeat).
To confirm your selection/settings, press the crown.
To modify a reminder, tap on it and modify it.
To delete a reminder, select and long press the reminder. Confirm the deletion.
I TO SET AN ALARM FROM THE APP
•
Open the ZeSport
2
mobile app.
•
Click on the reminder tab and select wake up.
•
Select the custom repeat or the alarm date/time.
•
Select the type of alert.
•
Click on save.
26. ALARM
- 26 -
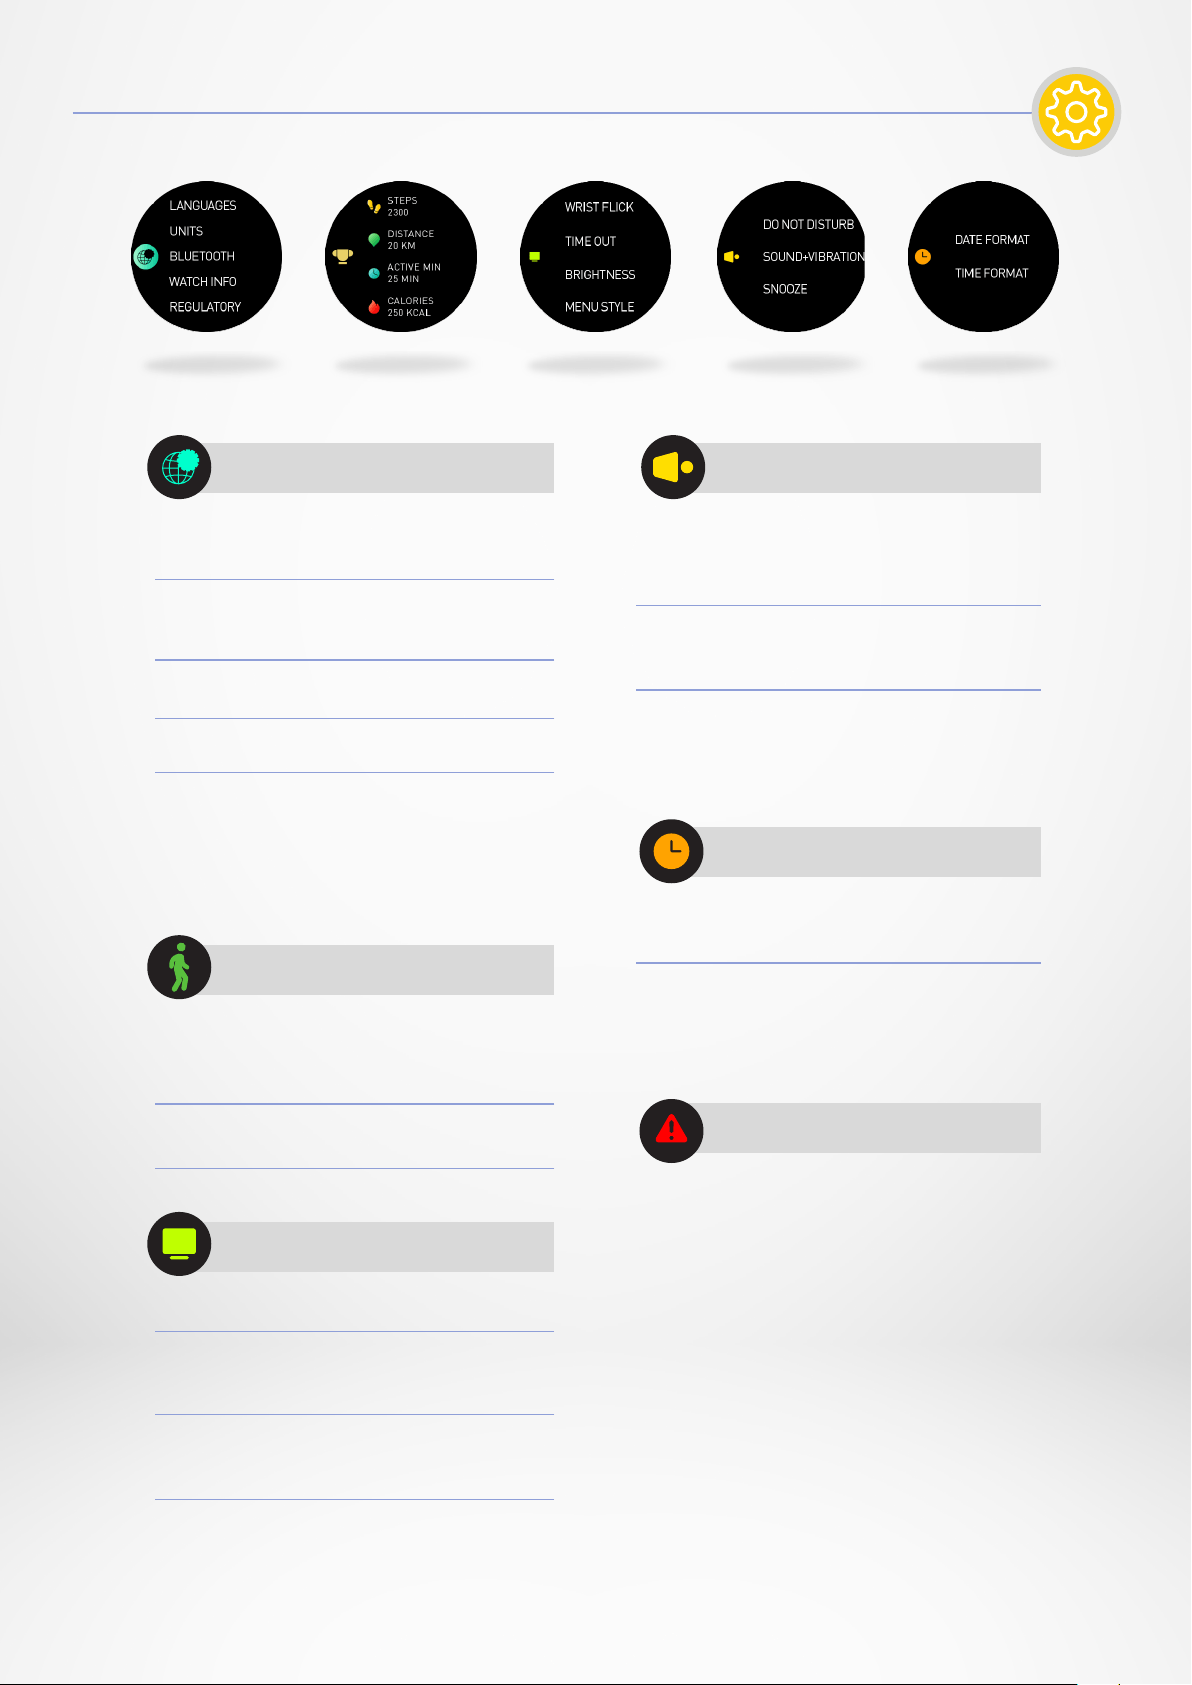
GENERAL
Language: set the language
displayed on the device
Units: select metric or imperial
units
Bluetooth: enable or disable it
Regulatory: watch certification
Watch Information: view the
firmware version & device serial
number
ACTIVITY
Heart rate: set your minimum
and maximum heart rate
frequency
Goals: set your goals
DISPLAY
Wrist flick: enable or disable it
Brightness: change the screen
brightness
Screen time out: set the
standby mode
Menu: select a menu style
SOUND
Do not disturb: set a time frame
when you don’t want to be
disturbed
Sound/Vibration: set the
vibration/sound mode
Snooze: adjust the snooze time
TIME
Date format: change date
format
Time format: change time
format
RESET
Push 8 seconds on the upper
button to restore your watch
26. SETTINGS
- 27 -
To keep your watch in the best condition, please clean your strap and charging area
regularly, especially after a sports session or heavy perspiration.
Rinse the bracelet only with clear water and dry it with a dry cloth before attaching it
around your wrist.
To remove any stains, use a little detergent and rub with a slightly damp cloth or
toothbrush. For stubborn stains, do not hesitate to use an eraser.
If you have a light-coloured bracelet, avoid contact with dark coloured clothing.
To obtain accurate data and for better comfort, please do not over tighten the wristband.
If you activate heart rate monitoring, we advise you to wear your watch higher on your
wrist (2 fingers widths above your wrist bone).
Rubbing and prolonged wearing of the wristband may irritate the skin, so give your wrist
a break by removing the band for one hour after prolonged wearing.
Sweat or moisture residues can corrode the charging contacts, especially during
charging.
Wipe your watch with a slightly damp cloth. Do not hesitate to use a mild detergent.
Let the device dry before wearing it on your wrist.
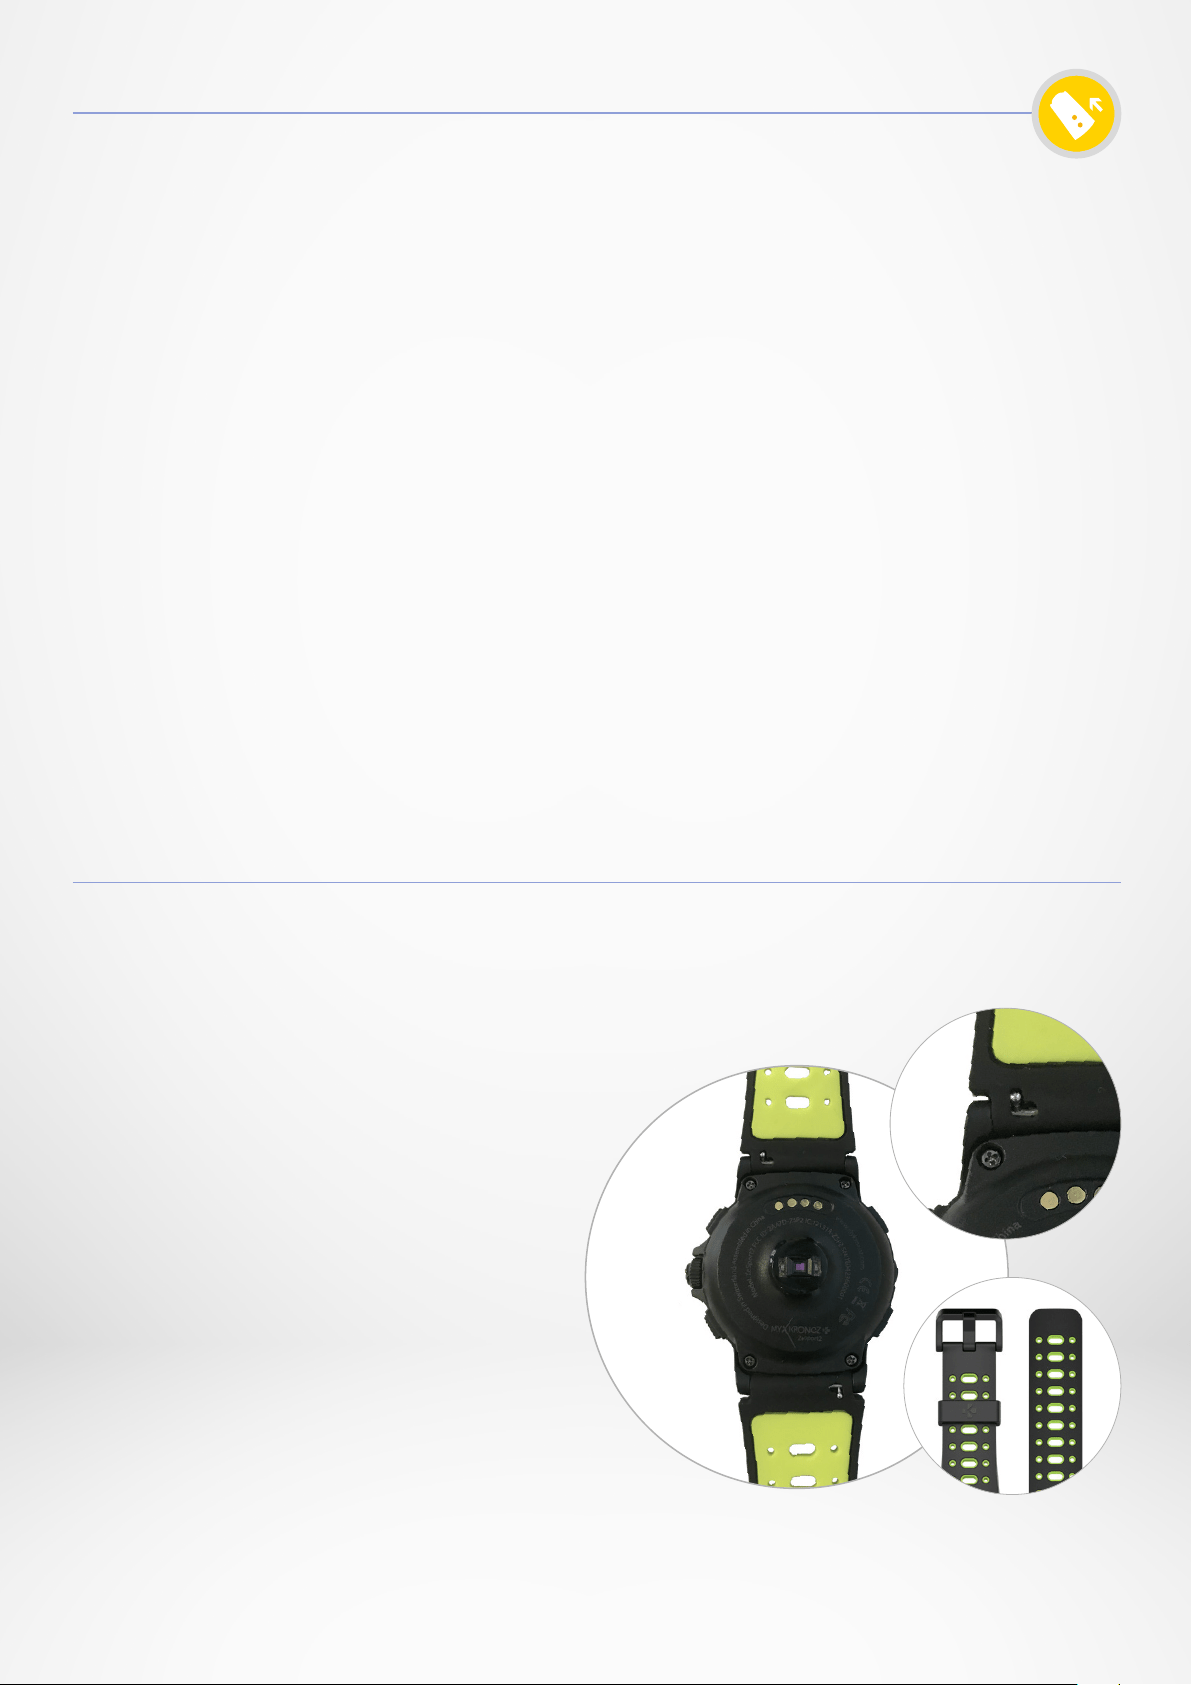
ZeSport
2
uses standard 22mm interchangeable watch bands, in order to make it
easy for you to perfectly match your watch and your style.
1. Push the spring bar inward to
release the strap from the watch
case.
2. Push the spring bar inward while
aligning it with the holes on
either side of the watch case.
3. Release the spring bar to
secure the strap.
4. Verify that the strap is correctly
fastened by gently tugging on
the strap.
28. PRODUCT CARE
29. REPLACE THE WATCH BAND
- 28 -
Dimensions: 54.9 x 48 x 14.39 mm
Weight: 74 gr
Material: Silicone
Watch band size: 22 mm
Connectivity Bluetooth 4.2 BLE
Battery type: Li-ion 460 mAh
Battery life: Up to 4 days (watch mode)
GPS mode: 7 - 8 hours
Charging time: 1 - 2 hours
Memory : ROM: 4MB+128MB / RAM: 4MB
Display type: TFT SPI Color touchscreen
Display size and resolution: 1.3 inches / 240*240 pixels
Sensors: 6-axis A+G-sensor, optical HR sensor,
altimeter, barometer, magnetometer
Operating temperature: -10°C to + 55°C
Water resistance: IP68 / 3 ATM
Free Android and iOS app
Accessories included: Magnetic charging station
International warranty: 1 year
What’s in the box: Charger dock, ZeSport
2
, Get started guide.
30. TECH SPECS

- 29 -
WARNING
I
Connecting the charging cable improperly may cause serious damage to the
device. Any damage caused by misuse is not covered by the warranty. Unplug
the cable after ZeSport
2
is fully charged.
I
ZeSport
2
unit and charging dock contain strong magnets that may interfere
with pacemakers, credit cards, watches and other magnet-sensitive objects.
If you use a pacemaker or any other electronic medical device, please
consult your physician before wearing or handling ZeSport
2
.
I
This product is not a medical device and should not be used to diagnose
or treat any medical condition.
I
This product is in compliance with the IP rating IP68. IP68 indicates that
the product is resistant against dust ingress and immersion in water with a
depth of more than 1 meter.
I
ZeSport
2
is water resistant up to 30 meters (3 ATM). ZeSport
2
is resistant
to water splashes, rain, submersion and showering. ZeSport
2
can be used
for shallow water activities like swimming (down to 5m deep) but should
not be exposed to water at high pressure, such as ocean waves or a
waterfall. ZeSport
2
should not be used for scuba diving and water skiing.
Do not expose your ZeSport
2
to soapy water, perfume, detergents, lotions,
sunscreen, and high velocity water. Please note that all bands are not
appropriate for water use. For example, leather band.
ABOUT THIS MANUAL
SUPPORT
The features of
ZeSport
2
and the contents of the user manual are
subject to change. To get the latest instructions on how to use
this product, please refer to the online user manual available on
www.mykronoz.com
If you have any question or require assistance regarding our product,
please visit www.mykronoz.com/support/ submit a request at
https://support.mykronoz.com/hc/en-us/requests/new
- 30 -
Before using the device, read these instructions carefully.
BATTERY
•
ZeSport
2
has built-in batteries. Do not disassemble the battery on your own.
KRONOZ LLC is not responsible for any damage or personal injury caused by
the removal of the battery or any component.
•
Do not expose your product to extremely high or low temperatures. Excessive
temperature during charging could cause heat, smoke, fire or deformation of
the battery or even explosion. Do not expose the battery in the sun, excessive
smoke or dust. Charge the battery in a cool, ventilated room.
•
Do not open, crush, bend, deform, puncture or shred secondary cells or batteries.
In the event of a battery break or leak, prevent battery liquid contact with skin or
eyes. If this happens, immediately flush the areas with water (do not rib the eye)
or seek medical help.
•
Do not short-circuit. Short-circuiting can occur when a metallic object, such as coins,
causes direct connection of positive and negative terminals of the battery. Short-
circuiting may damage the battery.
•
Do not use batteries that have been damaged or have been exhausted.
•
Keep the batteries out of children’s reach and in a safe place to prevent danger.
•
Do not place the batteries in the water. Do not expose your product to water at
high pressure, such as ocean waves or waterfall. Do not use your product in a
sauna or steam room.
•
Do not dispose of batteries in fire as they may cause explosion. Dispose of used
batteries in accordance with your local regulations (such as recycling). Do not
dispose as household waste.
•
Use only the USB cable supplied to charge this battery. Do not charge for more
than 24 hours.
•
Do not attempt to repair or maintain the watch by yourself, service and
maintenance should be performed by authorized technicians.
•
This device has a recording function. Please be sure to comply with the relevant
laws and regulations on the use of these features. In accordance with relevant
regulations, without permissions any personal characteristic sound recording
being copied and disseminated may be seen as an invasion of privacy.
Inappropriate use of photography, video and photo, audio recording function
records could violate the copyright owner’s right. For this, the user must assume
full responsibility. KRONOZ LLC is not responsible for any damage caused by
improper use of the device.
•
This device is not waterproof. Do not immerse the device in water or any other
liquids.
SAFETY INSTRUCTIONS
CAUTION
- 31 -
USA FCC STATEMENT
This device complies with Part 15 of the FCC Rules. Operation is subject to the
following two conditions : (1) this device may not cause harmful interference, and
(2) this device must accept any interference received, including interference that
may cause undesired operation.
CAUTIONS
Changes or modifications not expressly approved by the party responsible for
compliance could void the user’s authority to operate this equipment.
FCC NOTICE
This equipment complies within the limits of a Class B digital device, pursuant
to part 15 of the FCC Rules. These limits are designed to provide reasonable
protections against radio and TV interference in residential areas. However, even
during normal operation, this equipment may cause TV or radio interference. If the
equipment does cause harmful interference to radio or television reception, which
can be determined by turning the equipment o and on, the user is encouraged
to try one or more of the following corrective measures:
• Reposition the receiving antenna.
• Increase the distance between the equipment and receiver.
• Connect the equipment into an outlet on a circuit dierent from which the
receiver is connected.
• Consult the dealer or an experienced radio/TV technician for help.
FCC EXPOSURE RF EXPOSURE STATEMENTS
This equipment complies with FCC radiation exposure requirement set forth
for an uncontrolled environment. End users must follow the specific operating
instructions for satisfying RF exposure compliance.
ISED EXPOSURE RF EXPOSURE STATEMENTS
This device complies with the ISED RSS-102 RF exposure requirement set forth for
an uncontrolled environment and are safe for intended operation as described in
this manual.
Cet appareil est conforme aux exigences d’exposition RF de l’ISED RSS-102
définies pour un environnement non contrôlé et est sûr pour le fonctionnement
prévu comme décrit dans ce manuel.
CANADA INDUSTRY CANADA IC STATEMENT
This device complies with Industry Canada license-exempt RSSs. Operation is
subject to the following two conditions :
(1) this device may not cause interference, and (2) this device must accept any
interference, including interference that may cause undesired operation of
the device.
Cet appareil est conforme à la norme CNR d’Industrie Canada applicable aux
appareils radio exempts de licence. Son utilisation est soumise aux deux conditions
suivantes: (1) cet appareil ne doit pas provoquer d’interférences et (2) cet appareil
doit accepter toute interférence, y compris les interférences qui peuvent causer
un fonctionnement indésirable du dispositif.
REGULARY NOTICE
2AA7D-ZSP2
12131A-ZSP2
- 32 -
EUROPEAN UNION
CE DIRECTIVE
Declaration of conformity with regard to the EU Directive 2014/53/EC.
Kronoz LLC hereby declares that this device is in compliance with the essential
requirements and other relevant provisions of the R&TTE Directive 2014/53/EC.
The complete declaration of conformity is available on request via our customer
service: https://support.mykronoz.com/hc/en-us/requests/new
Déclaration de conformité à l’égard de la directive européenne 2014/53/EC
Kronoz LLC déclare que cet appareil est conforme aux exigences essentielles
et aux autres dispositions pertinentes de la directive R&TTE 2014/53/EC. La
déclaration de conformité complète est disponible sur demande auprès de
notre service client: https://support.mykronoz.com/hc/en-us/requests/new
(1)使用30 分鐘請休息10 分鐘。
(2)未滿2歲幼兒不看螢幕,2歲以上每天看螢幕不要超過1 小時。
依據低功率電波輻射性電機管理辦法
第十二條
※經型式認證合格之低功率射頻電機,非經許可,公司、商號或使用者均不
得擅自變更頻率、加大功率或變更原設計之特性及功能。
第十四條
※低功率射頻電機之使用不得影響飛航安全及干擾合法通信;經發現有干擾
現象時,應立即停用,並改善至無干擾時方得繼續使用。
-前項合法通信,指依電信法規定作業之無線電通信。
-低功率射頻電機須忍受合法通信或工業、科學及醫療用電波輻射性電機設備
之干擾。
ACCESS TO THE REQUIRED INFORMATION ON THE ELABEL
Users can access the E-Label screen on ZeSport
2
by going to Settings > Gene-
ral > Regulatory. No special access codes or permissions are required to go
through the above steps beyond entering a user-defined password to protect
against unauthorized access to the device. Additional regulatory information
are in « Regulatory notices » of this document. The information is stored on the
device, no special accessories or supplemental plug-ins (e.g., a SIM/USIM card)
are required to access the information.
- 33 -
DISPOSAL AND RECYCLING INFORMATION
After the implementation of the European Directive 2012/19/EU in the national legal
system, the following applies : electrical and electronic devices may not be dis
-
posed of with domestic waste. Consumers are obliged by law to return electrical
and electronic device at the end of their service lives to the public collecting points
set up for this purpose or point of sale. Details to this are defined by the national law
of the respective country. This symbol on the product, the instruction manual or
the package indicates that a product is subject to these regulations. By recycling,
reusing the materials or other forms of utilizing old devices, you are making an
important contribution to protecting our environment.
©2018 Kronoz LLC, all rights reserved. Kronoz LLC,
Avenue Louis-Casai 18 - 1209 Geneva - Switzerland
All brands or product names are or may be trademarks of their respective owners.
Pictures and specifications are not contractual. Les marques citées sont des
marques déposées par leur fabricant respectif. Photos et caractéristiques
non contractuelles.
Designed in Switzerland - Made in China

www.mykronoz.com
MORE THAN TIME