Loading ...
Loading ...
Loading ...
135
Advanced Guide
Basic Guide
Camera Basics
Auto Mode /
Hybrid Auto Mode
Other Shooting Modes
Playback Mode
Wireless Features
Setting Menu
Accessories
Appendix
Index
P Mode
Tv, Av, M, C1, and C2 Mode
Before Use
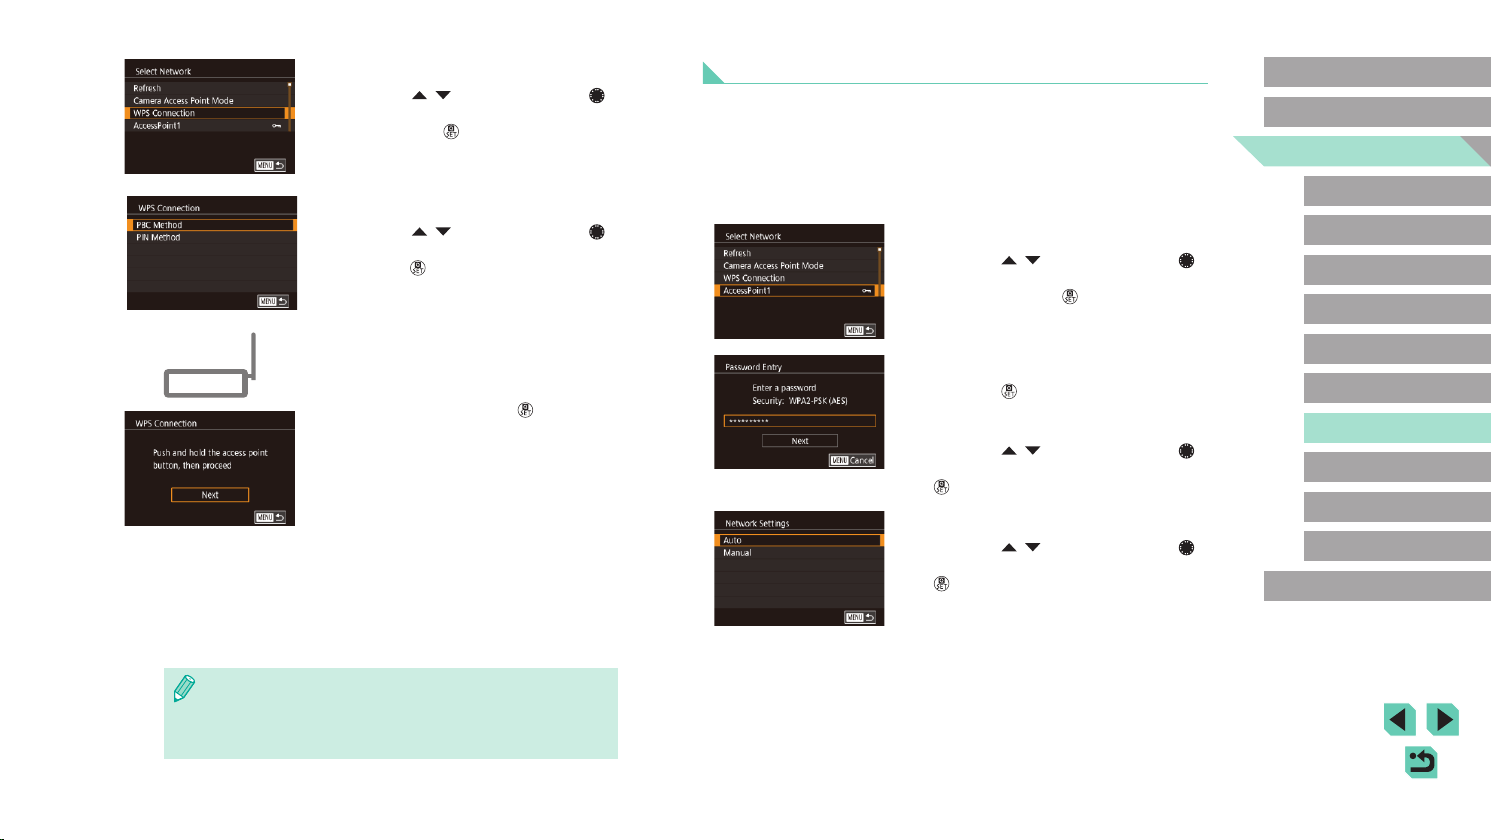
Connecting to Listed Access Points
1
View the listed access points.
● View the listed networks (access points)
as described in steps 1 – 3 of “Using
WPS-Compatible Access Points”
(=
134).
2
Choose an access point.
● Press the [ ][ ] buttons or turn the [ ]
dial to choose a network (access point),
and then press the [ ] button.
3
Enter the access point password.
● Press the [ ] button to access the
keyboard, and then enter the password
(=
37).
● Press the [
][ ] buttons or turn the [ ]
dial to choose [Next], and then press the
[ ] button.
4
Choose [Auto].
● Press the [ ][ ] buttons or turn the [ ]
dial to choose [Auto], and then press the
[ ] button.
5
Send the images.
● Follow steps 6 – 9 in “Connecting to
a Smartphone via the Wi-Fi Menu”
(=
132) to choose the smartphone,
adjust the privacy setting, and send the
images.
4
Choose [WPS Connection].
● Press the [ ][ ] buttons or turn the [ ]
dial to choose [WPS Connection], and
then press the [ ] button.
5
Choose [PBC Method].
● Press the [ ][ ] buttons or turn the [ ]
dial to choose [PBC Method], and then
press the [ ] button.
6
Establish the connection.
● On the access point, hold down the WPS
connection button for a few seconds.
● On the camera, press the [
] button to
go to the next step.
7
Send the images.
● Follow steps 6 – 9 in “Connecting to
a Smartphone via the Wi-Fi Menu”
(=
132) to choose the smartphone,
adjust the privacy setting, and send the
images.
● If you chose [PIN Method] in step 5, a PIN code will be displayed
on the screen. Be sure to set this code in the access point.
Choose a device in the [Select a Device] screen. For further
details, refer to the user manual included with your access point.
Loading ...
Loading ...
Loading ...