Loading ...
Loading ...
Loading ...
site side. For this, place the wheel chock
behind the front wheel diagonally across.
3. Loosen the wheel lug bolts a half turn.
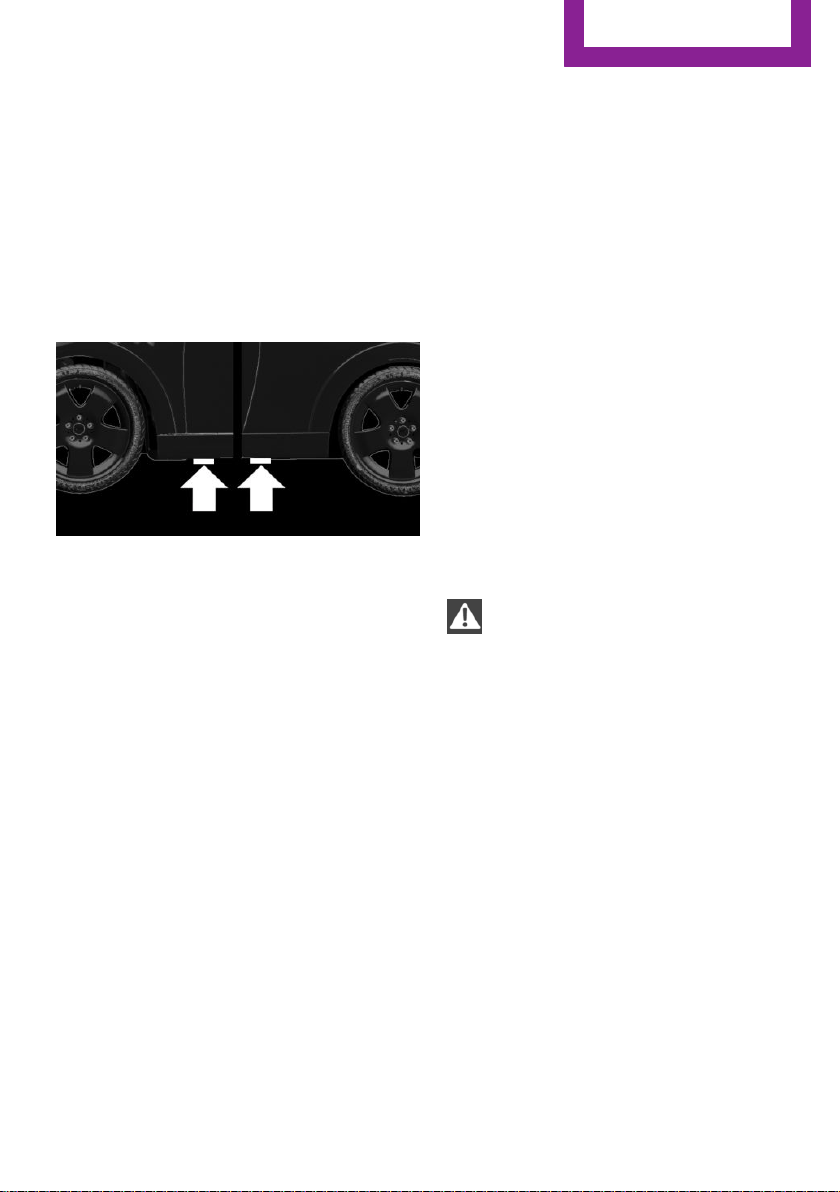
Jacking up the vehicle
1. Place the vehicle jack at the jacking point
closest to the wheel such that the vehicle
jack foot is vertically beneath the vehicle
jacking point with the entire surface on the
ground.
2. Insert the vehicle jack head in the rectan‐
gular recess of the jacking point for crank‐
ing it up.
3. Crank it up until the wheel in question lifts
off of the ground.
Wheel mounting
Mount one emergency wheel only.
1.
Unscrew the wheel lug bolts and remove
the wheel.
2. Put the new wheel or emergency wheel on
and screw in at least two bolts.
If non-original MINI light-alloy wheels are
mounted, the accompanying lug bolts may
have to be used as well.
3. Screw in the remaining the lug bolts and
tighten all bolts well in a crosswise pattern.
4. Lower the vehicle and remove the vehicle
jack.
After the wheel change
1. Tighten the lug bolts crosswise. The tight‐
ening torque is 101 lb ft/140 Nm.
2. Stow the nonworking wheel in the cargo
area.
The nonworking wheel cannot be stored in
the emergency wheel bracket because of
its size.
3. Check tire inflation pressure at the next op‐
portunity and correct as needed.
4. Reinitialize the Flat Tire Monitor, refer to
page 108.
Reinitialize the Tire Pressure Monitor, refer
to page 105.
5. Check to make sure the lug bolts are tight
with a calibrated torque wrench.
6. Replace the damaged tires as soon as pos‐
sible.
Driving with emergency wheel
WARNING
The emergency wheel has particular di‐
mensions. When driving with an emergency
wheel, changed driving properties may occur at
higher speeds, for example reduced lane stabil‐
ity when braking, longer braking distance and
changed self-steering properties in the limit
area. There is risk of an accident. Drive moder‐
ately and do not exceed a speed of
50 mph/80 km/h.◀
Vehicle battery
Maintenance
The battery is maintenance-free.
The added amount of acid is sufficient for the
service life of the battery.
More information about the battery can be re‐
quested from a dealer’s service center or an‐
other qualified service center or repair shop.
Seite 213
Replacing components
MOBILITY
213
Online Edition for Part no. 01 40 2 964 571 - X/15
Loading ...
Loading ...
Loading ...