Loading ...
Loading ...
Loading ...
16 17
POR783
PROGRAMMABLE
CONTROLLER
ELECTRIC CLOCK
4. Setthecookingdurationyouwantbyusing–or+.5
seconds after the last change, the “cook time” indicator
willstopashing,andthetimeofdaywillbedisplayed.
Setting the cooking end time
1� Check the clock displays the correct time of day�
2� Select the desired oven function and temperature� The
oven indicator light will glow and the heating source will
come on�
3� Press “mode“ until the “end time” indicator begins
ashing.
4� Enter the time of day you want to finish cooking by
pressing–or+.5secondsafterthelastchange,the“end
time” indicator willstopashingandthecurrenttimeof
day will be displayed�
Setting the delayed start cooking time
1� Program the “cook time“ and “end time“ as described
in the relevant sections� Once both the “cook time“ and
“end time“ have been set, the “cook time“ and “end time”
indicatorswillstopashingandthecurrenttimeofday
will be displayed�
To check or cancel settings
1� To check your settings, press “mode” until the setting you
wantisdisplayed.Aredlightwillashnexttothemode
(cook time, end time etc) that is currently on display�
2. Tocancel“delayedstart”press“mode”untilalightashes
nextto“endtime”.Pressandhold“–”untiltheclockno
longerreverses(“0:00”andyouwillhearabeep).Ifyou
have left the temperature and function knobs at a setting
theovenwillstartoncethe“endtime”lightstopsashing.
3. Tocancel“autoshutoff”press“mode”untilalightashes
nextto“cooktime”.Pressandhold“–”untiltheclockno
longer reverses (“0:00” and you will hear a beep)� This
automaticallycancels“delayedstart”.Ifyouhaveleftthe
temperature and function knobs at a setting, the oven will
startoncethe“cooktime”lightstopsashing.Because
you have cancelled “auto off” the oven will continue to
heat until you manually turn it off�
On completion of cooking
The oven will turn off, the timer will beep and the “end time”
and/or“cooktime”indicatorswillash.
1� Turn the function and temperature controls to the off
position�
2. Press“+”or“–”or“mode”tostopthetimerfrombeeping.
Switching the clock display ON and OFF
1. Presstogether“+”and“–”for2secondstoswitch’off’
the display�
2. Presstogether“+”and“–”for2secondstoswitchthe
clock display ’on’ again�
Setting the stop time
1� Select the desired oven function and cooking temperature�
2� Press the “Timer” as often as necessary, until the “end
time” symbol
appearsashing.
3. Setthedesiredswitch-offtimeusingthe–or+whilstthe
“timer arrow” isashing.After5secondsfromthelast
time adjustment the “timer arrow” will disappear and
your appliance is now programmed�
4� When the set time has elapsed, a signal will sound� To
stopthesignal,press“+”or“–”.
Setting the delayed start cooking time
The “cook time” and “stop time” functions can be combined
to switch the oven on and off at a
specific time during the day�
1� Select the desired oven function and cooking temperature�
2� Press “Timer” as often as necessary, until the “cook time”
symbol appears�
3. Setthedesiredcookingtimebyusing–or+,whilstthe
“timer arrow” isashing.
4� Press “Timer” as often as necessary, until the “end time”
symbol appearsashing
5. Setthedesiredswitch-offtimeusingthe–or+whilstthe
“timerarrow”isashing.The“cooktime” and “end
time” arrows are lit to confirm that the oven has been
programmed�
On completion of cooking
When the set time has elapsed, a signal will sound for
1 minute, the oven will switch off and the remaining time
indication “0�00” will appear on the display�
1. Tostopthesignal,press“+”or“–”.
Setting the minute minder
For setting a countdown period� When the period of time has
elapsed, an audible signal is sounded�
1� Press “Timer” as often as necessary, until the “minute
minder” symbol appearsashing.Setthedesired
lengthoftimeusing–or+whilstthe“timerarrow” is
ashing.After5secondsfromthelasttimeadjustmentthe
“timer arrow” will disappear and the minute minder
has been set� Once the set time has elapsed, a signal
will sound for 1 minute� The time indication “0�00” and
aashing“minuteminder”symbol will appear on the
display�
2. Tostopthesignal,press“+”or“–”.
Models POR667, PORS668L/R, POR668,
PGR659, PXR698, PDR790, PDR794
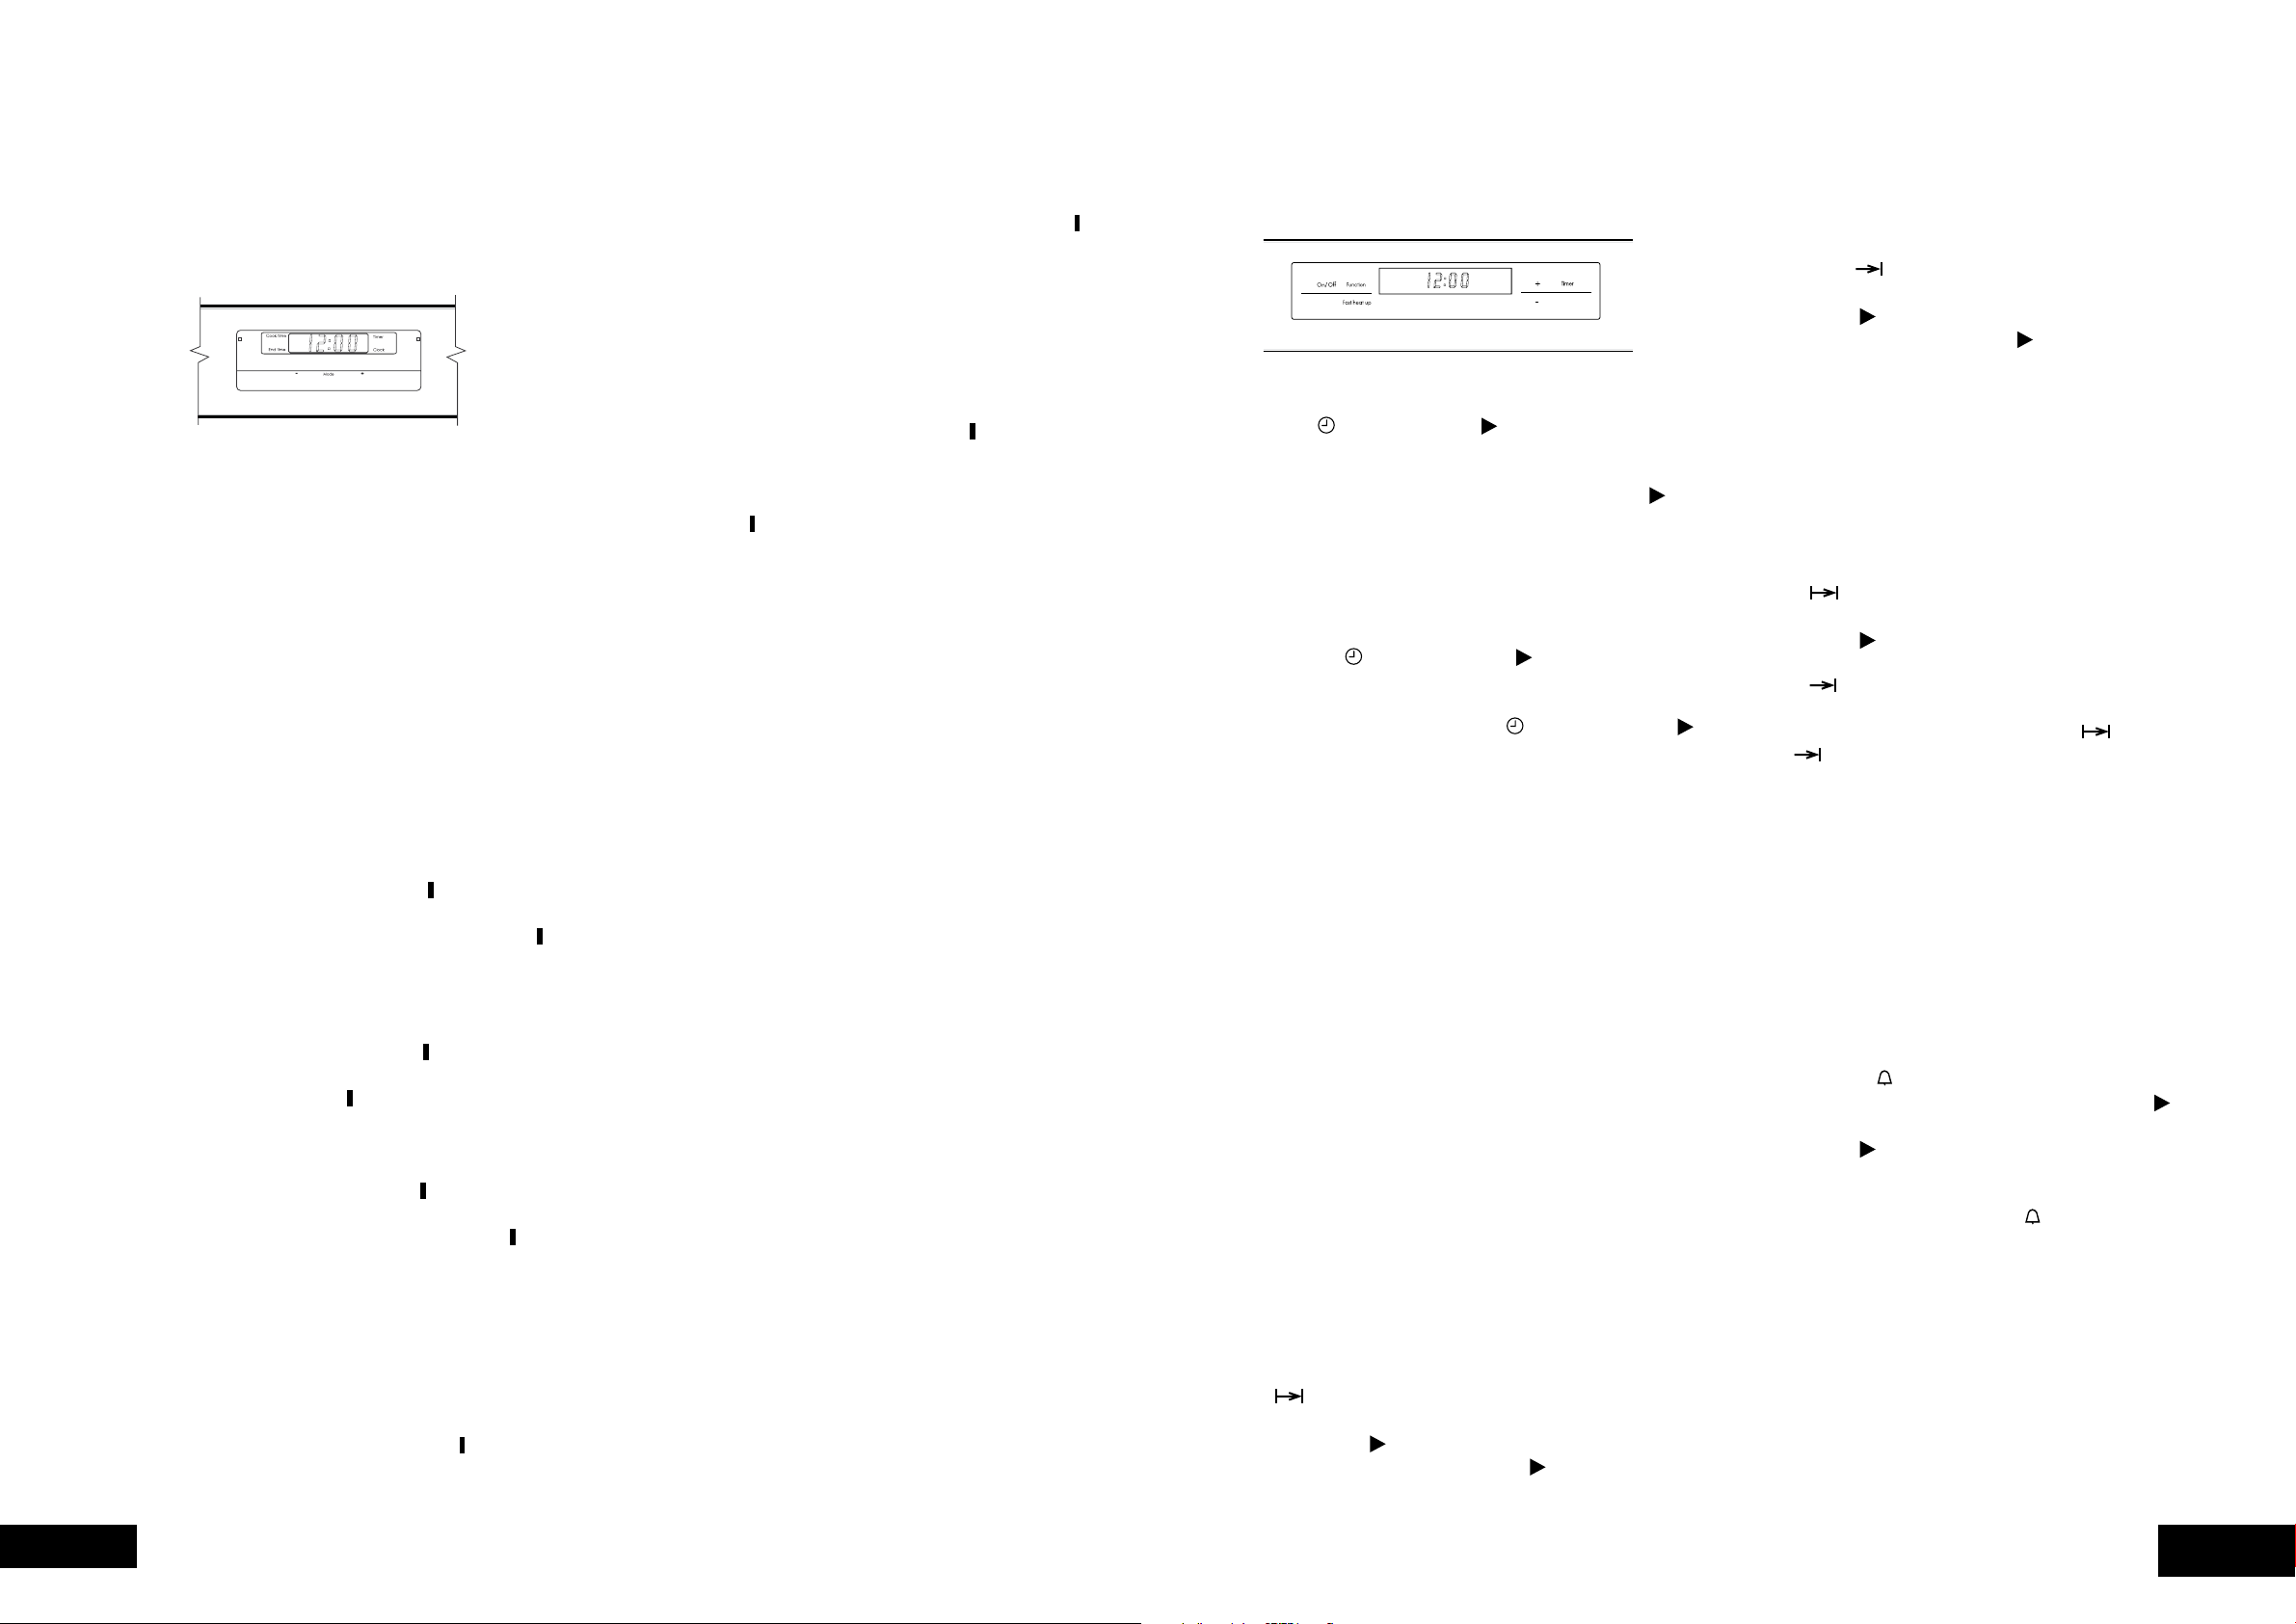
touch control electronic clock
General features
Your touch control clock has the following features:
• Timer–allowsyoutosetacountdowntimethatwillbeep
when the set time has elapsed�
• Cookingduration–Youcansetacookingduration.A
timer will count down the preset cooking time, beep when
the time has elapsed and turn the oven off�
• Endcookingtime–youcansetacookingnishtime.A
timer will count down the preset cooking time, beep when
the finish time has been reached and turn the oven off�
• Delayedstartcookingtime–Youcancombinethe
cooking time and stop cooking time to switch the oven on
and off at a specific time during the day�
Setting the time of day
You must set the time of day before you can operate your
appliance� When power is supplied to your oven “12�00“
will be displayed and the “clock” indicator willash.
1. Tosetthetimeofdayinhoursandminutes,press–or+.
5 seconds after the last change, the “clock” indicator
will disappear, confirming the time has been set�
Change the time of day (daylight saving)
1� Press “mode” until the “clock” indicator beginsashing.
2. Press–or+tochangethetime.5secondsafterthelast
change, the “clock” indicator will disappear, confirming
the time has been set�
Setting the timer
1� Press “mode“ until the “timer” indicator beginsashing.
2. Setthecountdowntimeyouwantbyusing–and+.5
seconds after the last change the “timer” indicator will
stopashing,conrmingthetimerhasbeenset.
3. Tostopthebeeper,press–,+or“mode”.
Setting the cooking duration
1� Check the clock displays the correct time of day�
2� Select the desired oven function and temperature�
The oven indicator light will glow and the heating source
will come on�
3� Press “mode“ until the “cook time” indicator
beginsashing.
touch control
Setting the time of day
After the appliance has been electrically connected the “set
clock” symbol and “timer arrow willashontheclock
display�
1. Tosetthetimeofdayinhoursandminutespressthe–or
+.5secondsafterthelastchangethe“timerarrow”
will disappear, confirming the time has been set�
Change the time of day (daylight saving)
1� Switch off the appliance by pressing “On / Off”�
2� Press “Timer” as many times as necessary until the “set
clock” symbol and “timer arrow” ashontheclock
display�
3. Press“+”or“–”tochangethetime.5secondsafterthe
last change the “set clock” symbol and “timer arrow”
will disappear, confirming the time has been set�
Setting the oven function
1� Switch on the appliance by pressing the “On / Off”� The
oven lights will light�
2� Press the “Function” as many times as necessary until
the desired function appears� The suggested cooking
temperature appears in the display and the degrees
symbol“°”ashes.Ifthesuggestedtemperatureisnot
changed within approximately 5 seconds the degrees
symbol“°”stopsashingandtheovenbeginstoheat.
The suggested temperature display is replaced with the
oven centre temperature and a thermometer icon� The
thermometer icon rises slowly, indicating the degree to
which the oven is currently being heated�
Changing the oven temperature
1. Pressthe–or+,todecreaseorincreasethetemperature.
Setting the cooking time
1� Select the desired oven function and cooking temperature�
2� Press the “Timer” as often as necessary, until the “cook
time” symbol appears�
3. Setthedesiredcookingtimebyusingthe–or+,whilst
the “timer arrow” isashing.After5secondsfromthe
last time adjustment the “timer arrow” will disappear
and your appliance is now programmed�
4� When the set time has elapsed, a signal will sound� To
stopthesignal,press“+”or“–”.
Loading ...
Loading ...
Loading ...