Loading ...
Loading ...
Loading ...
20 21
COOKING GUIDE
ADDITIONAL
FUNCTIONALITY
choosing the best oven settings
The following table is intended as a guide and experience may show some variation in cooking times necessary to meet
individualrequirements.Itmaybenecessarytochangesomecookingtimesandtemperaturesfrompreviousoven.
For best baking results preheat oven for 30 minutes�
Modes without Oven Fan
food temperature °C oven shelf position* time in minutes
scones
Plain or fruit 220 2 10 -15
biscuits
Rolled 170 2 10 - 15
Spooned 190 2 12 - 15
Shortbread biscuits 160 1 or 2 30 - 35
meringues
Hard - individual 110 2 90
Soft - individual 180 2 15 - 20
Pavlova - 6 egg 110 1 75
cakes
Patty cakes 190 3 15 - 20
Sponge - 4 egg 180 2 20 - 30
Shallow butter cake 180 2 30 - 40
Rich fruit cake 140 2 180
pastry - shortcrust
Cornish pasties 200 2 40 - 45
Custard tart 200 / 180 1 10 / 20 - 30
pastry - choux
Cream puffs 210 2 25 - 30
yeast goods
Bread 210 1 25 - 30
*Counting from the bottom shelf up�
cooking hints
• Selectthecorrectshelflocationforfoodbeingcooked.
• Makesuredisheswilltintotheovenbeforeyouswitchiton.
• Keepedgesofbakingdishesatleast40mmfromthe
side of the oven� This allows free circulation of heat and
ensures even cooking�
• Donotopentheovendoormorethannecessary.
• Donotplacefoodswithalotofliquidintotheovenwith
other foods� This will cause food to steam and not brown�
• Aftertheovenisturnedoffitretainstheheatforsome
time� Use this heat to finish custards or to dry bread�
• Donotusealotofcookingoilwhenroasting.Thiswill
prevent splattering oil on the sides of the oven and the
oven door� Polyunsaturated fats can leave residue which is
very difficult to remove�
• Whencookingthingswhichrequireahighheatfrom
below (e�g� tarts), place the cooking dish on a scone tray
in the desired shelf position�
• Forspongesandcakesusealuminium,brightnishedor
non-stick utensils�
• Removeunnecessarytraysordisheswhenroastingor
baking�
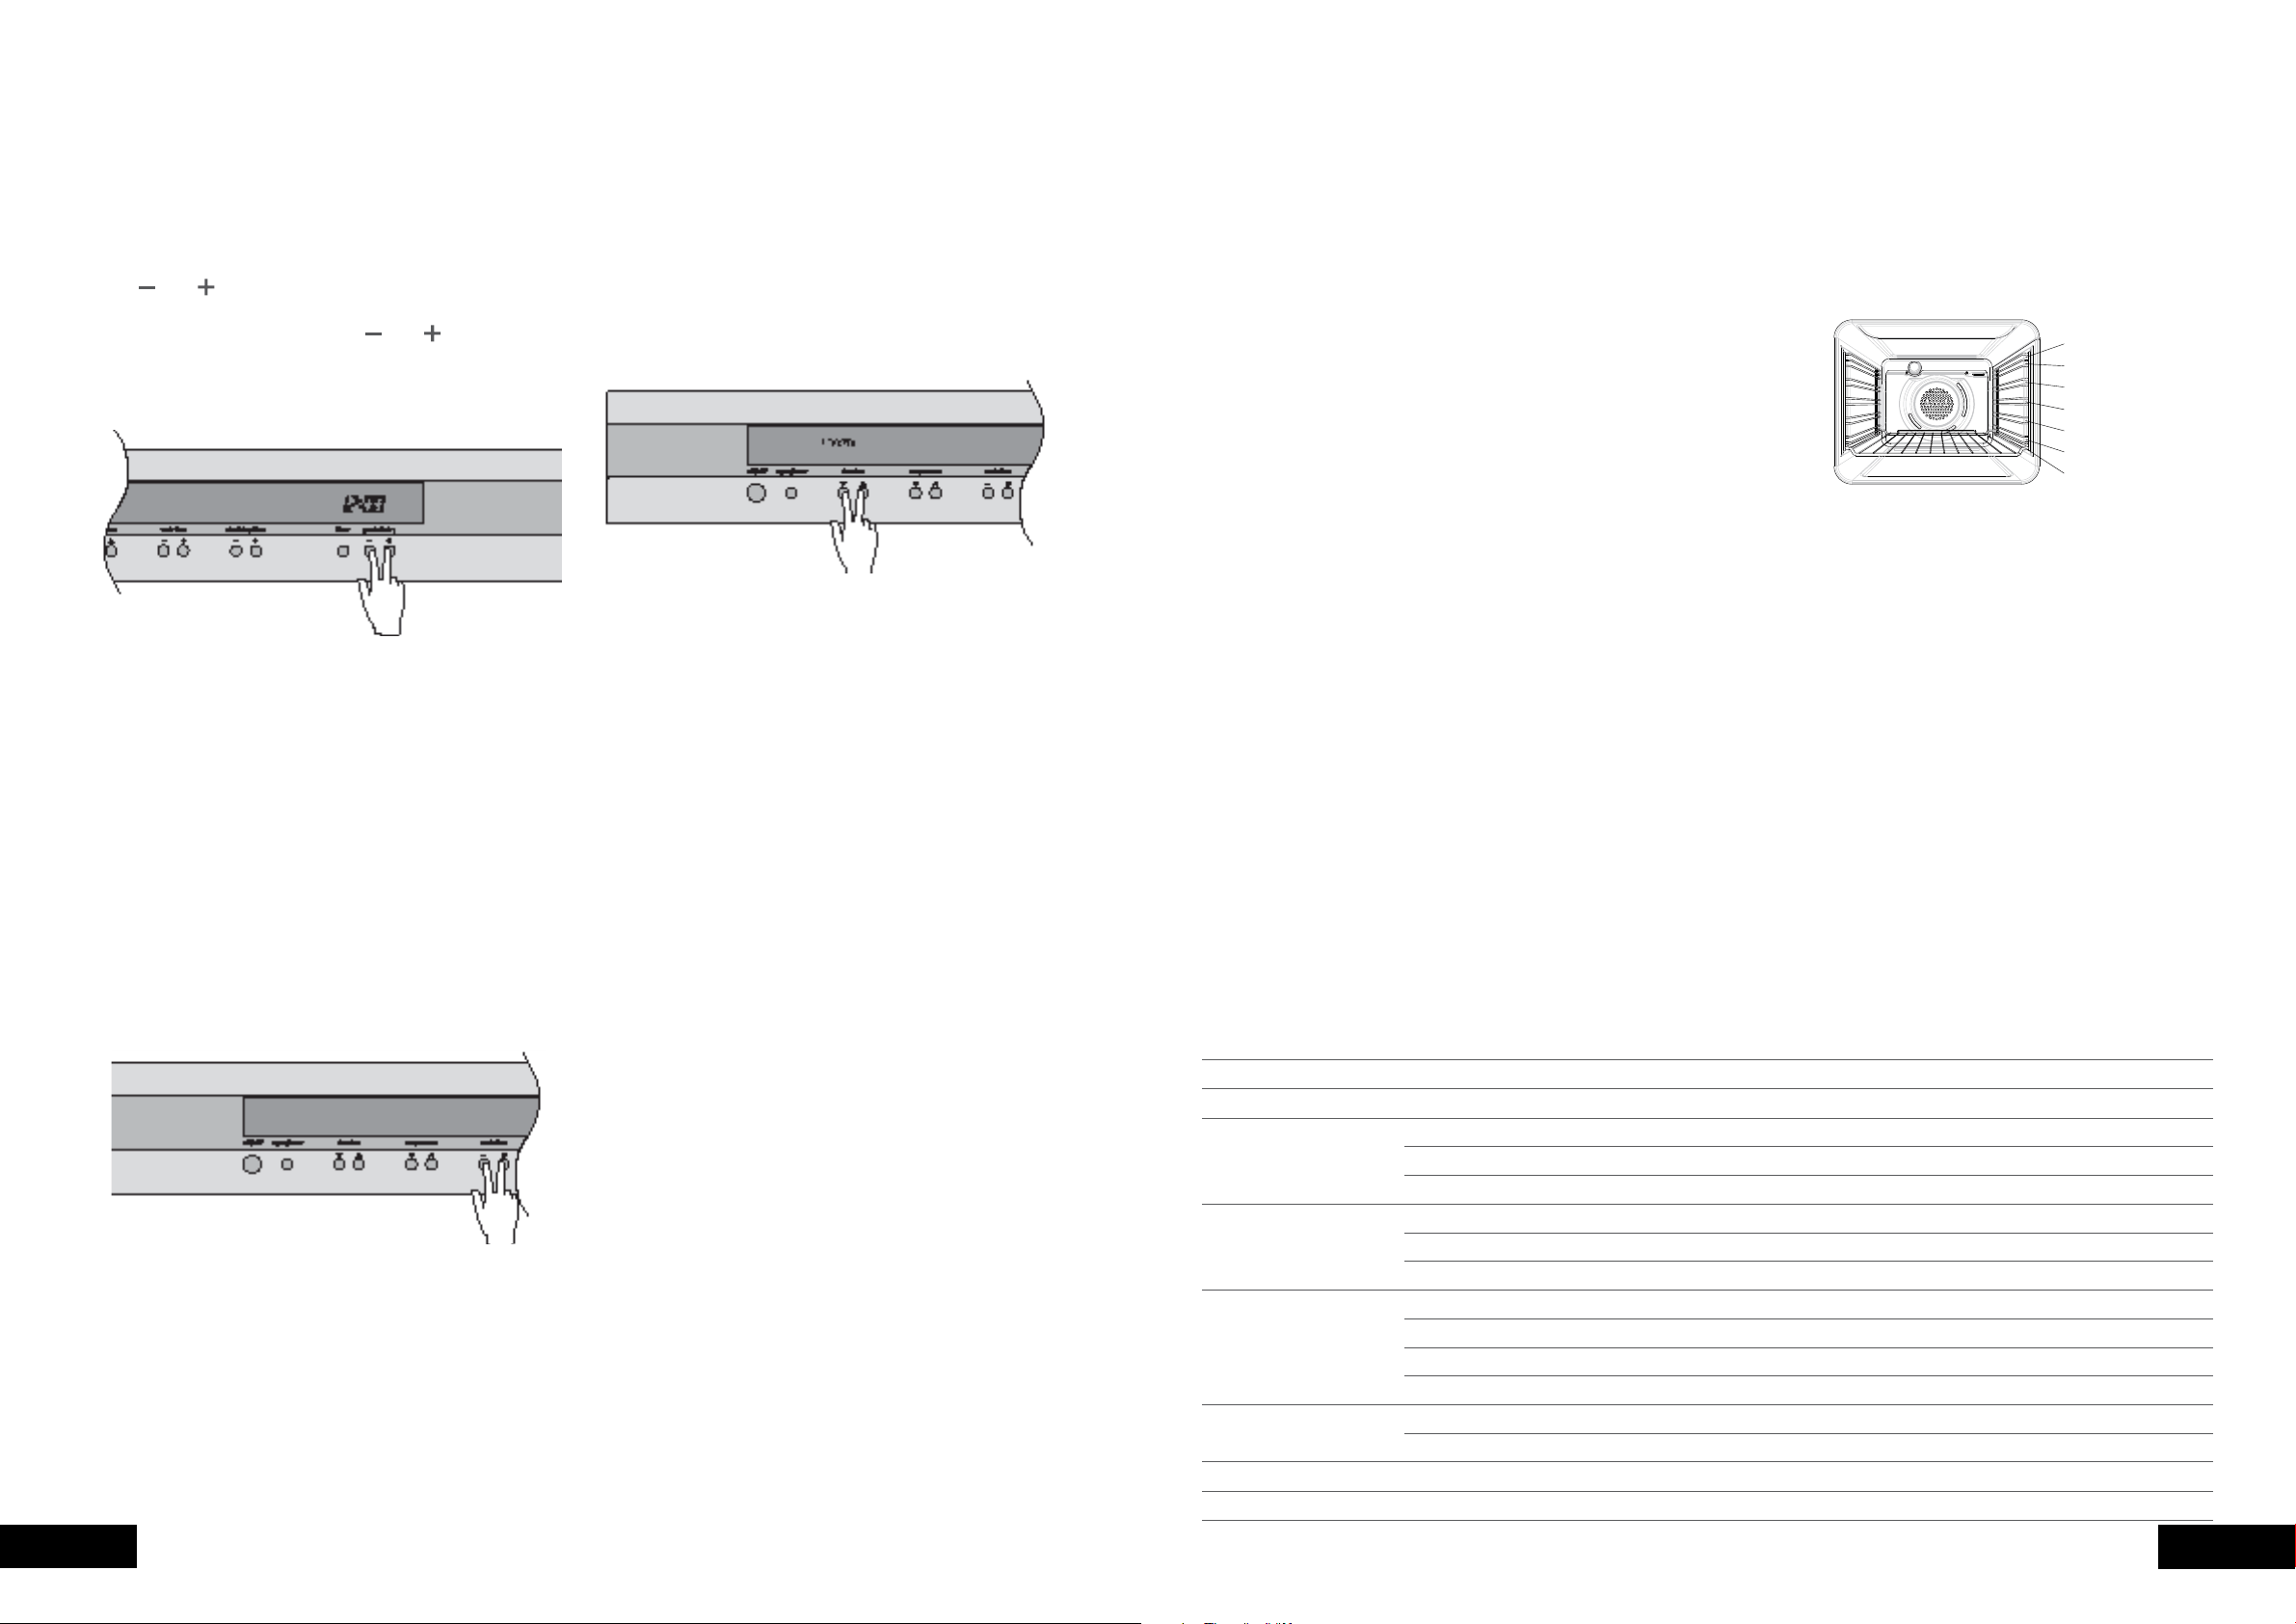
oven shelf location
Your oven has seven for shelves� These are numbered from 1
(the lowest shelf position) to 7 (the highest shelf position)�
See diagram�
To give maximum space above and below the shelves, load
them in this way:
• Whencookingwith1shelf,useposition3or4.
• Whencookingwith2shelves,useposition3and5.
Refer to cooking guide�
Use the oven efficiently, by cooking many trays of food at the
same time� For example:
• Cook2traysofscones,smallcakesorsausagerolls.
• Cookaroastdinneratthesametimeasyoucookchips
or vegetables�
1
2
3
4
5
6
7
8
9
1
2
3
4
5
6
7
7 Position Rack
9 Position Rack
Adjusting the clock
The time of day is independent of the oven and can be
adjusted at any point�
1� To set the time of day in hours and minutes press and hold
the and buttons simultaneously for 1 second until the
dotsontheclockdisplaystartashing.
2� Adjust the time of day using the and buttons�
3� After 8 seconds from the last adjustment, the dots will stop
ashing,conrmingthetimehasbeenset.Youcanalso
confirm your changes by pressing the timer button�
Demo Mode
This mode is intended to be used in retail shops to
demonstrate the oven functionality without any power
consumption except to the oven lamps�
1� Ensure the oven is off by pressing the ON/OFF button�
2� Press and hold the ON/OFF button until the display
turnsONthenOFF.Immediatelyafterpressthecooktime
buttons simultaneously, hold until the words ‘Demo mode’ are
displayed, a single beep will sound to confirm the operation�
Releasing Demo Mode
1� Ensure the oven is off by pressing the ON/OFF button�
2� Press and hold the ON/OFF button until the display turns
ONthenOFF.Immediatelyafterpressthecooktimebuttons
simultaneously, hold until the words ‘Normal mode’ are
displayed, a single beep will sound to confirm the operation�
Activating the child lock
When the child lock is engaged, the oven cannot be
switched on�
1� Switch off the appliance using the “ON/OFF” button�
2� Press the function buttons simultaneously, hold until the
wordsLOCKEDaredisplayed,asinglebeepwillsoundto
confirm the operation� The child lock is now engaged�
Note:
Releasing the child lock
Press the function buttons at the same time, hold until the word
LOCKEDisclearedfromthedisplay.Thechildlockisnow
released and the oven is ready to use�
Beep on touch
The beep sound can be activated anytime a button is pressed�
1� Ensure the oven is off by pressing the ON/OFF button�
2� Press the temperature buttons simultaneously for
one second, a single beep will sound to confirm
operation� Repeat the above procedure to reset the
beep mode to touch mode� As default the beep on
touch mode is off�
Maximum operation times for safety
The oven automatically switches itself off if the temperature is
not adjusted or the appliance is left operating for:
• 12.5hourswhensetbetween30°Cand120°C
• 8.5hourswhensetbetween120°Cand200°C
• 5.5hourswhensetbetween200°Cand250°C
Loading ...
Loading ...
Loading ...