Loading ...
Loading ...
Loading ...
10 INSTALLATION
Choosing the Proper
Location
,QVWDOOWKHZDVKHURQDVROLGÀRRUWKDWLVVWURQJDQG
rigid enough to support the weight of the washer,
HYHQZKHQIXOO\ORDGHGZLWKRXWÀH[LQJRUERXQFLQJ
,IWKHÀRRUKDVWRRPXFKÀH[\RXPD\QHHGWR
UHLQIRUFHLWWRPDNHLWPRUHULJLG,IWKHÀRRULVQRW
solid, it may cause severe vibration and noise.
NOTE
x %HIRUHLQVWDOOLQJWKHZDVKHUPDNHVXUHWKHÀRRU
is clean, dry and free of dust, dirt, water and oil so
the washer feet cannot slide easily. Leveling feet
WKDWFDQPRYHRUVOLGHRQWKHÀRRUFDQFRQWULEXWHWR
excess vibration and noise due to poor contact with
WKHÀRRU
x If a drip pan must be used, take extra care to follow
the instructions provided with the drip pan and make
VXUHWKHOHYHOLQJIHHWDUHDGMXVWHGIRU¿UPDQGHYHQ
contact with the pan. Use of drip pans and failure to
properly level the machine may result in increased
vibration and noise during operation.
x $OORZIRUVXI¿FLHQWVSDFHEHWZHHQWKHZDOOVDQGWKH
washer for installation.
Power Outlet
x The power outlet must be within 60 inches (1.5 m)
of either side of the washer.
x The appliance and outlet must be positioned so that
the plug is easily accessible.
x Do not overload the outlet with more than one
appliance.
x The outlet must be grounded in accordance with
current electrical wiring codes and regulations.
x Use a time-delay fuse or circuit breaker.
NOTE
x It is the personal responsibility and obligation of the
product owner to have a proper outlet installed by
TXDOL¿HGVHUYLFHSHUVRQQHO
Flooring
x To minimize noise and vibration, the washer must
EHLQVWDOOHGRQDVROLGO\FRQVWUXFWHGÀRRU
x Allowable slope under the entire washer is a
maximum 1 inch (2.5 cm) difference from side to
side or from front to back.
x Installing on carpeting and soft tile surfaces is not
recommended.
x Never install the washer on a platform or weakly
supported structure.
NOTE
x 7KHZDVKHUPXVWEHLQVWDOOHGRQ¿UPÀRRULQJWR
minimize vibration during the spin cycle. Concrete
ÀRRULQJLVEHVWEXWDZRRGÀRRULVVXI¿FLHQW
provided it is built to FHA standards.
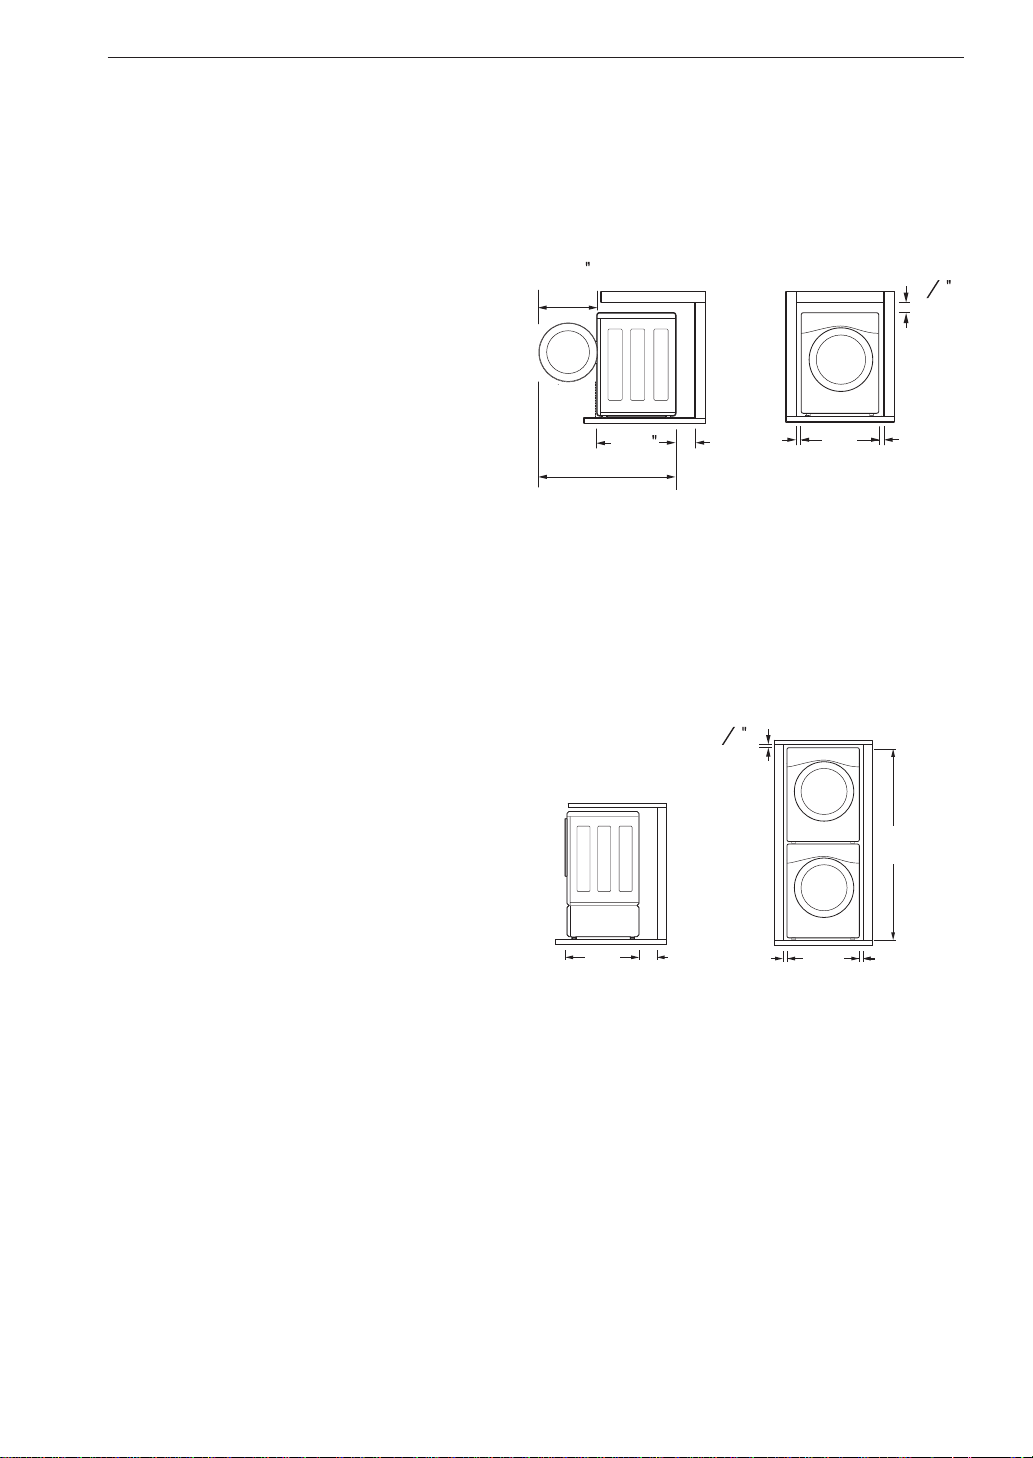
Floor Installation
(70 cm)(2.5 cm) (2.5 cm)
27"
1" 1"
(0.5 cm)
13
64
4"
(10 cm)
(62.6 cm)
(77 cm)
55"
(139.6 cm)
24
¾
30
¼
7RHQVXUHVXI¿FLHQWFOHDUDQFHIRUZDWHUOLQHVWKH
GUDLQOLQHDQGDLUÀRZDOORZPLQLPXPFOHDUDQFHVRI
at least 1 inch (2.5 cm) at the sides and 4 inches (10
cm) behind the unit. Be sure to allow for wall, door,
RUÀRRUPROGLQJVWKDWPD\LQFUHDVHWKHUHTXLUHG
clearances.
Stacked or Pedestal Installation
30 ¼"
(77 cm)
4"
(10 cm)
27"
(70 cm)
1"
(2.5 cm)
1"
(2.5 cm)
77 ½"
(196.8 cm)
(0.5 cm)
13
64
NOTE
x Refer to the instructions packaged with the optional
pedestal kit before installing with a pedestal kit.
x Do not use a drip pan with a pedestal or pedestal
washer installation as it can block the drawer. Using
a drip pan may result in increased vibration and
noise during operation.
Loading ...
Loading ...
Loading ...