Loading ...
Loading ...
Loading ...
12
13
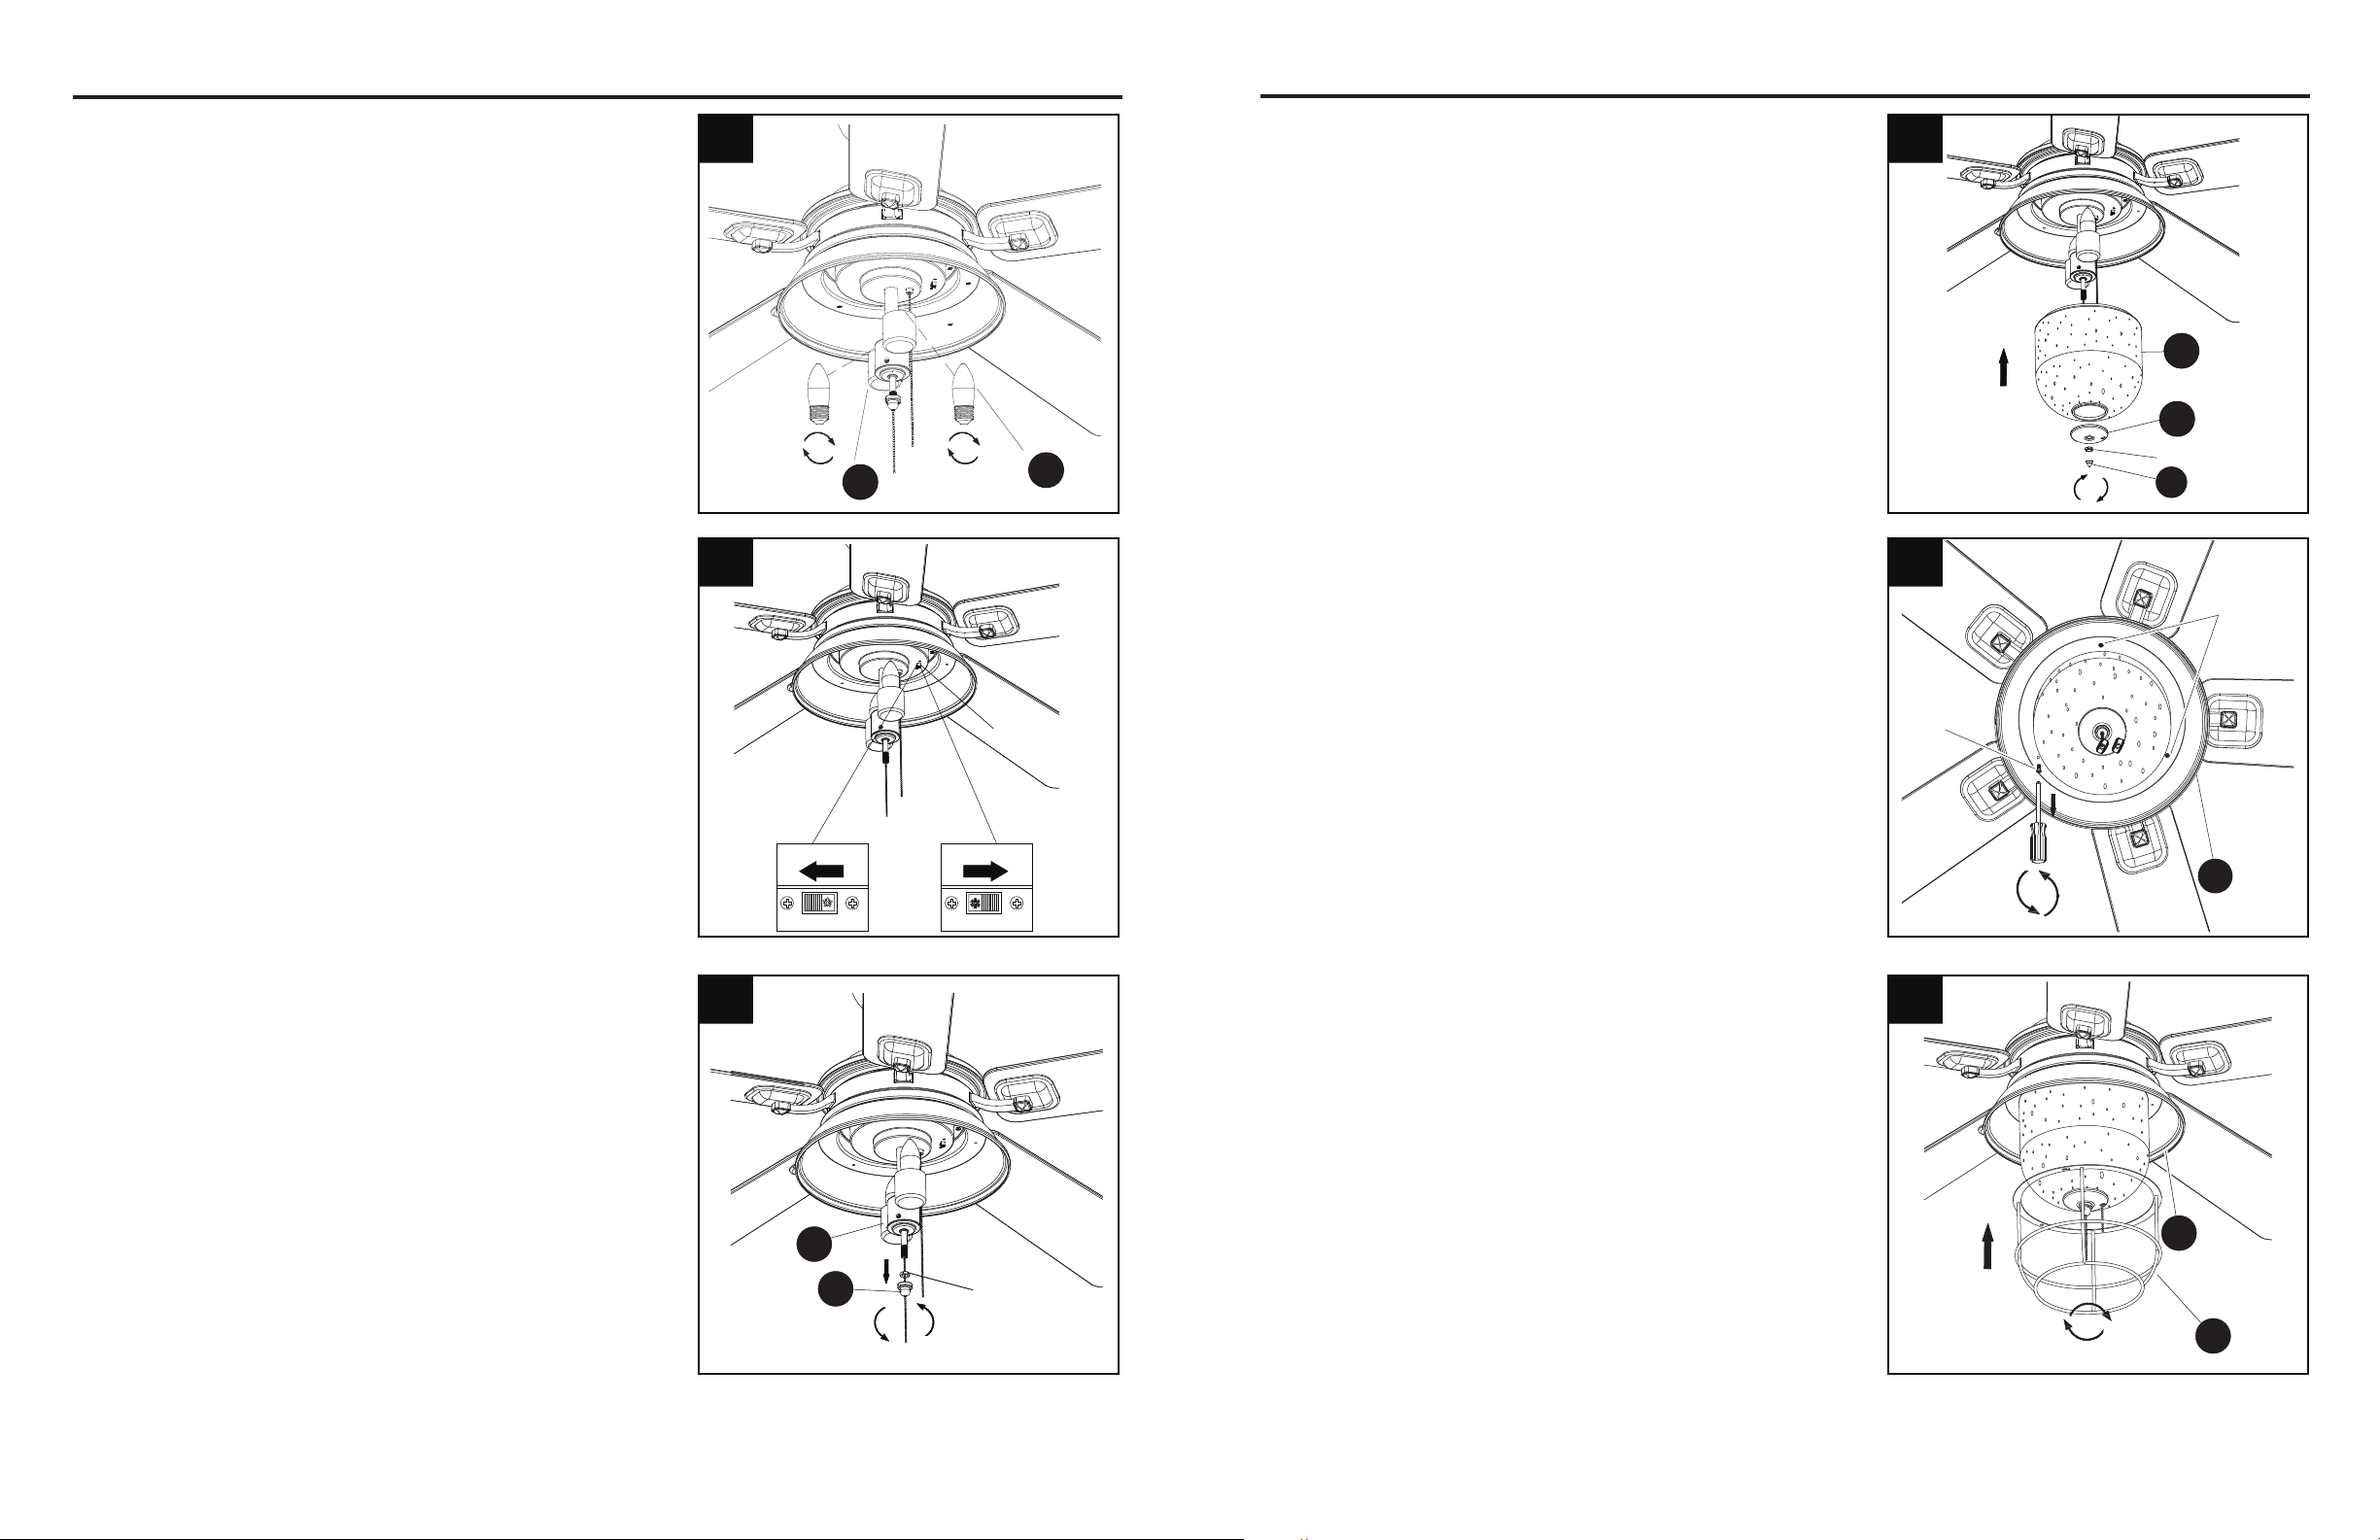
10. Install bulbs (K) into sockets on light kit (J).
Reverse
switch
A
B
12. Remove the preassembled nial (O) and the hex nut
from the light kit (J).
13. Place glass (L) over the preassembled pipe on light
kit (J). Install the glass cap (N) to the preassembled
pipe and pass the fan switch chain through the side
hole in glass cap (N). Secure the glass (L) properly
with previously removed hex nut and nial (O). Tighten
securely.
FINAL INSTALLATION
FINAL INSTALLATION
14. Loosen two preassembled screws from the light kit pan
(I). Remove and save remaining preassembled screw.
K
J
J
O
Hex Nut
I
Screw
(remove)
Screws
(loosen)
Hex nut
L
N
O
13
12
11
10
14
15. Place the light kit frame (M) into the light kit assembly.
Align the two keyslots on the light kit frame (M) with the
two screws on the light kit pan (I). Rotate the light kit
frame (M) clockwise until it locks.
M
I
15
3. Reverse Switch:
When the season changes, you may want to change the
direction your fan spins. To switch between clockwise and
counterclockwise rotations, ip the fan reversal switch.
WARNING: Wait for fan to stop before reversing the switch.
A. In cooler weather, clockwise rotation creates an upward
airow, which moves hot air from the ceiling into the
room. Push the switch RIGHT and see a Snowake
icon for clockwise rotation.
B. In warm weather, counterclockwise rotation creates a
downward airow, which cools the air. Push the switch
LEFT and see a Sun icon for counterclockwise rotation.
Loading ...
Loading ...
Loading ...