Loading ...
Loading ...
Loading ...
Installing the oven
97
The oven must not be operated
until it has been properly installed
within cabinetry.
In order for the oven to function
correctly, it required an adequate
supply of cool air. Ensure that the air
flow is not impaired (e.g. insulation in
the cabinetry). Also be sure that the
cool air supply is not heated by other
sources nearby.
Before installation
Before connecting the oven to the
power supply, first disconnect the
power supply from the oven isolator
switch.
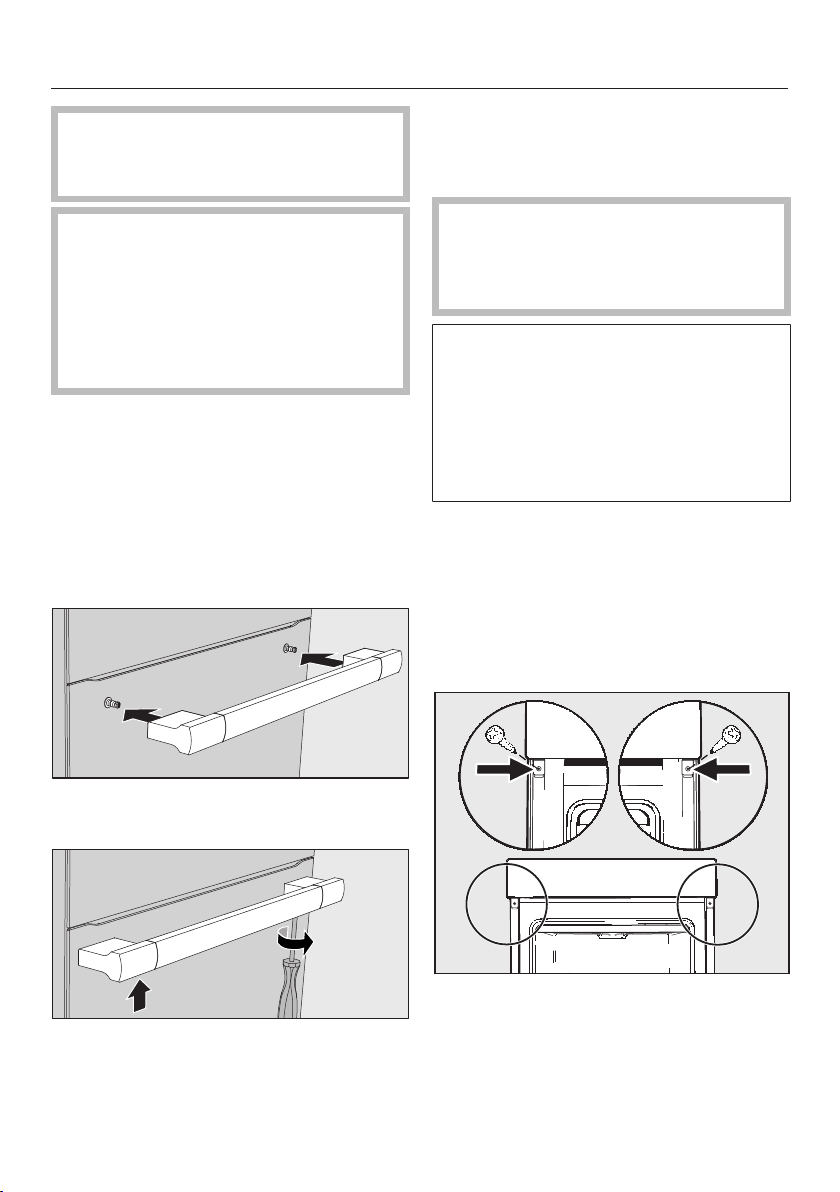
Mounting the door handle (depending
on model)
Mount the handle onto the retaining
bolts.
Use the supplied Allen wrench to
tighten all four bolts.
Installing the oven
Connect the power cord to the
electrical supply.
Do not carry the oven by the door
handle. The door can be damaged.
Use the handles on each side of the
oven to carry it.
It is recommended that you remove the
door before installing the appliance (see
“Cleaning and Care - Removing the
door”) and all oven accessories from
the cavity. This will make for easier
installation into the niche and will not
tempt you to use the handle to carry it.
If there are side handles, please
remove them.
Push the oven into the cabinetry and
align it.
Open the door (if it was not removed
previously).
Use the supplied screws to secure the
oven to the side walls of the cabinetry
through the holes in the trim.
Reinstall the door, if necessary (see
“Cleaning and care - Installing the
door”).
Loading ...
Loading ...
Loading ...