Loading ...
Loading ...
Loading ...
69
Bottom Door Hinge
For your convenience, the refrigerator doors have bottom hinges
with door closers. These closers allow the doors to swing fully
closed with just a gentle push.
IMPORTANT: So that the closers feature will operate properly,
the doors must be removed only when open to a 90° angle to the
front of the cabinet. If one or both doors were not at a 90° angle
when removed, the bottom door hinge must be reset.
WARNING
Excessive Weight Hazard
Use two or more people to move and install
refrigerator.
Failure to do so can result in back or other injury.
90°
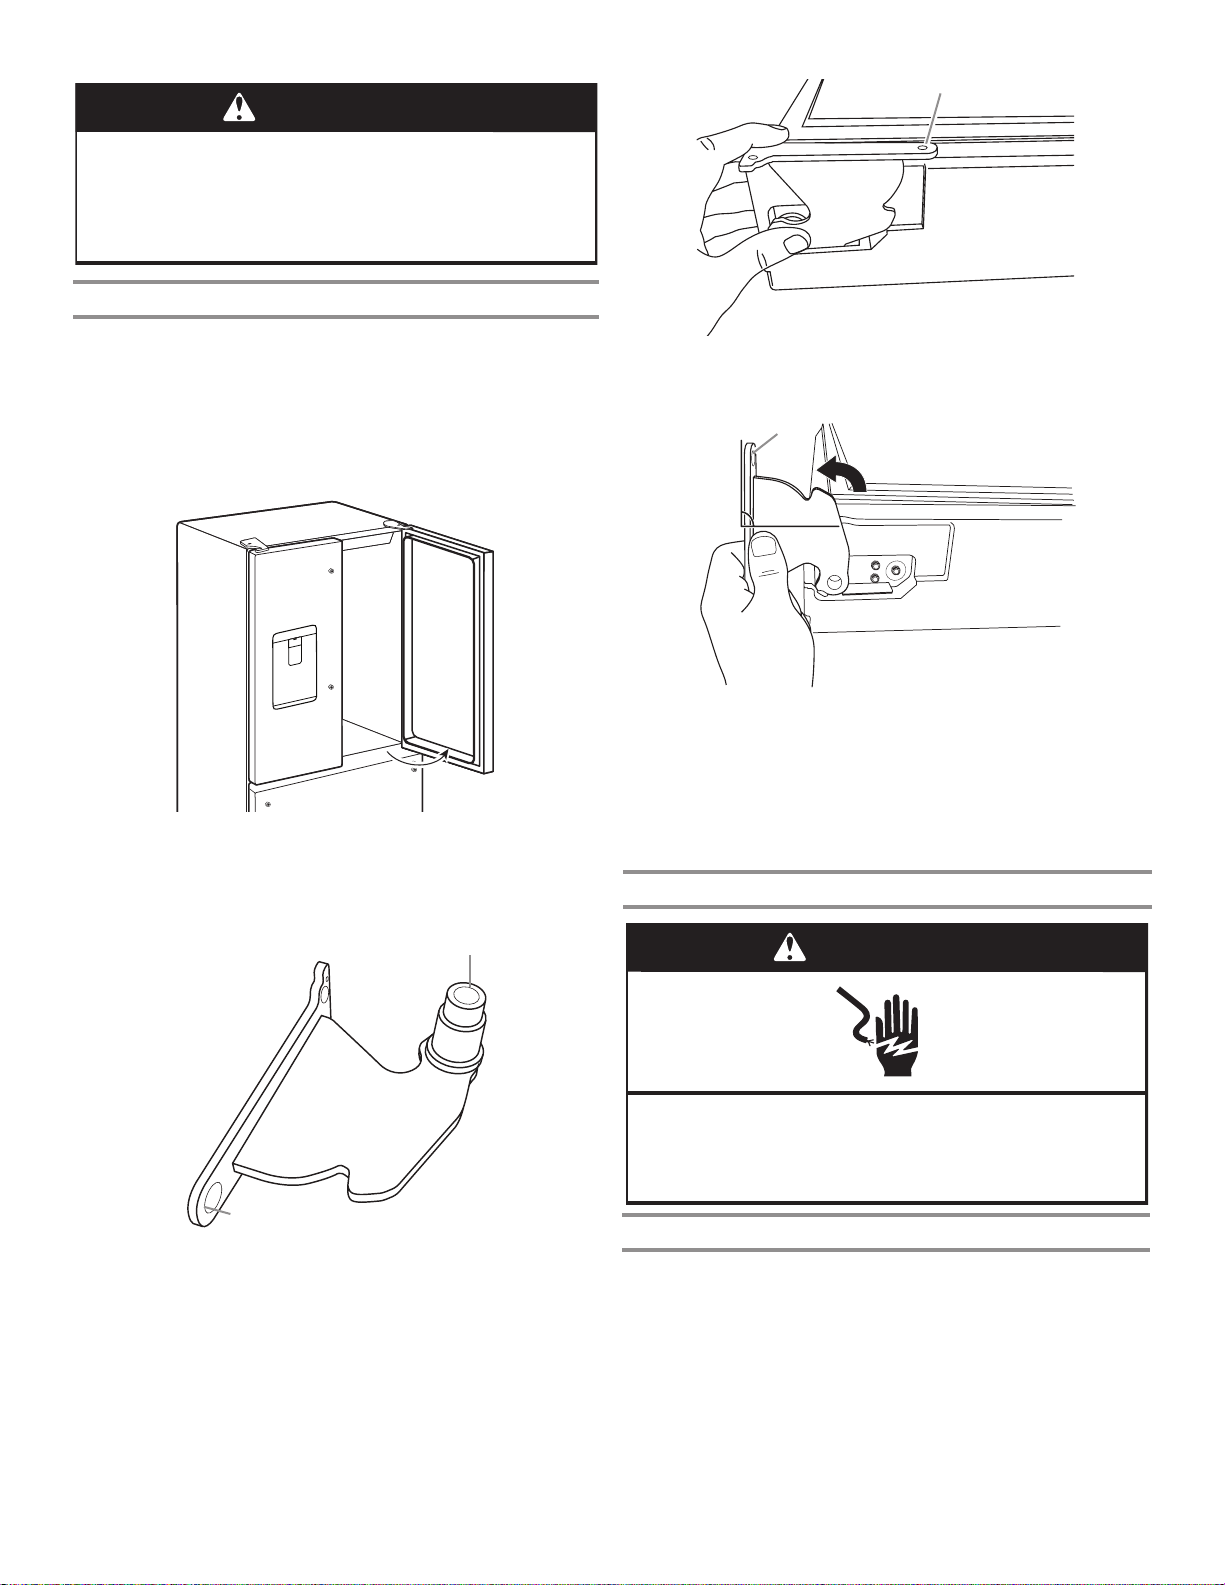
Reset the Door Hinge
1. Lift the door from the bottom hinge pin and place it on a flat
surface.
2. Using a TORX
T25 screwdriver, remove the bottom hinge with
the bushing from the cabinet.
3. Insert the bottom hinge and bushing into the corresponding
slot in the bottom of the door.
NOTE: Make sure that the base of the hinge is parallel to the
bottom of the door.
4. Turn the hinge until the hinge base is at a 90° angle to the
bottom edge of the door.
5. Remove the hinge from the door. Using a driver with a
#2 square bit, reattach the bottom hinge to the refrigerator
cabinet.
6. The hinge is now reset and prepared for the door to be
replaced. See the “Replace Refrigerator Doors” sections later
in this section.
Remove Refrigerator Doors
WARNING
Electrical Shock Hazard
Disconnect power before removing doors.
Failure to do so can result in death or electrical shock.
Remove Right-Hand Door
1. Unplug refrigerator or disconnect power.
2. Keep the refrigerator doors closed until you are ready to lift
them free from the cabinet.
NOTE: Provide additional support for the refrigerator door
while the hinges are being removed. Do not depend on the
door gasket magnets to hold the door in place while you are
working.
3. Using a Phillips screwdriver, remove the cover from the top
hinge.
4. Using the TORX
T25 screwdriver, remove the three screws
from the top hinge and set aside.
A. Bushing
B. Hinge base
A
B
A. Hinge base parallel to the bottom edge of the door
A
A. Hinge base turned to a 90° angle
with the bottom edge of the door
90°
A
Loading ...
Loading ...
Loading ...